99
4-7 SET UP Menu
C
h
ap
te
r 4
M
enu
Se
tt
in
g
s
When operating the VTR through an external device with
the ALT/
[F9]
or ALT/
[F10]
buttons set to “on”, all of the
tape operation and editing buttons are disabled, with the
exception of the STOP and EJECT buttons. You may also
set the VTR so that all buttons are enabled or disabled.
Perform this setting using the VTR SETUP menu item 008
“LOCAL FUNCTION ENABLE”. You cannot, however,
disable the menu and remote operation mode selection
buttons.
4-7-1 VTR SETUP Menu
All menu items required for setting up the VTR operating
conditions are displayed in the scrollable VTR SETUP
menu.
For HOME, TC, VIDEO, AUDIO, PF1, and PF2,
including the screens displayed by pressing the ALT
button, you can register about 120 menu items.
For details on the VTR SETUP menu items, see the
Appendix “Menu List” on page 139.
For details of the PF assign menu, see “4-1-3 Registering
Items to the VTR SETUP Menu” on page 41.
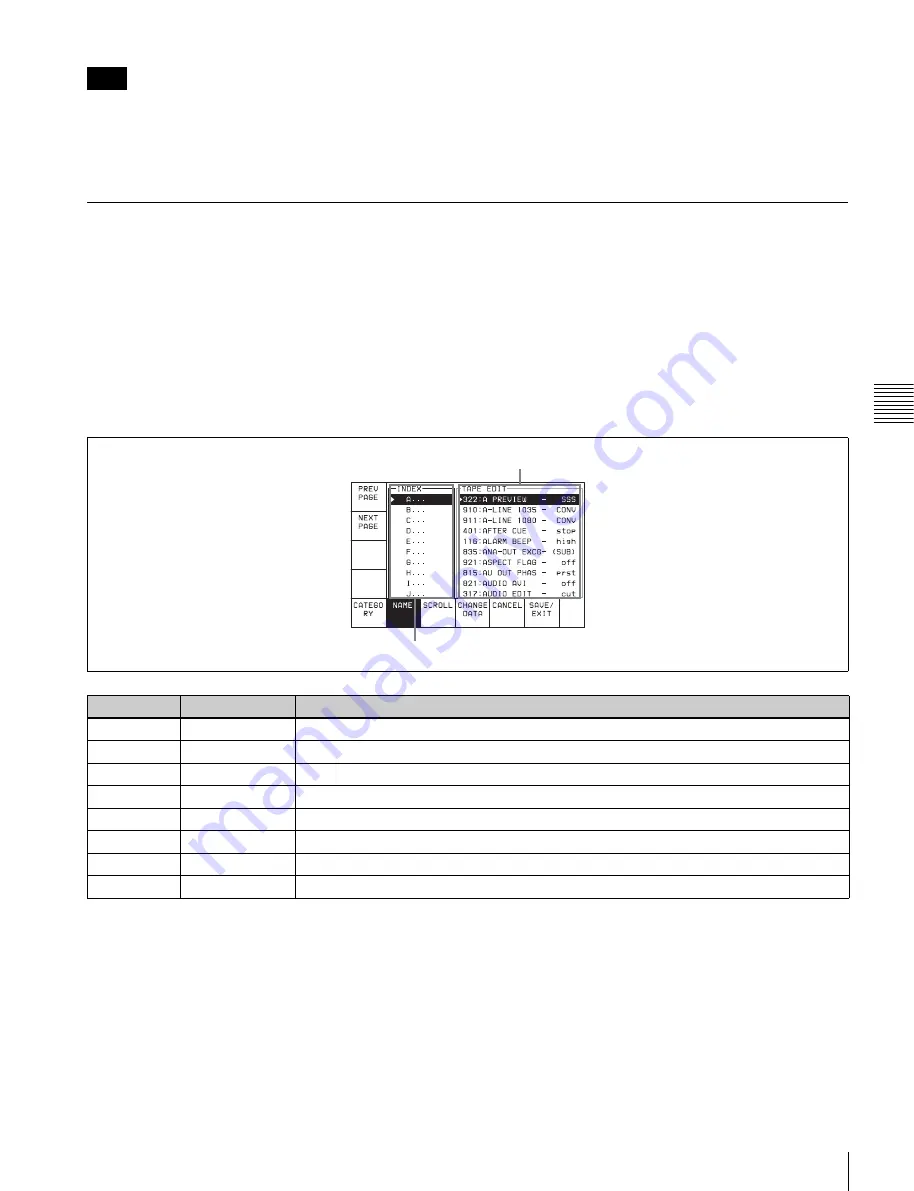
To activate the VTR SETUP menu
Press the SET UP button, then press the
[F6]
(VTR
SETUP) button.
Note
Button
Indication
Function
[F1]
PREV PAGE
Moves to the beginning of the previous category.
[F2]
NEXT PAGE
Moves to the beginning of the next category.
[F5]
CATEGORY
Display by category
[F6]
NAME
Display in alphabetical order
[F7]
SCROLL
Scrolling display of all menus
[F8]
CHANGE DATA
Changes the setting.
[F9]
CANCEL
Cancels the setting operation.
[F10]
SAVE/EXIT
Sets the value and exits the VTR SETUP menu.
Item window
Category/index window