3-280-870-
11
(1)
2008 Sony Corporation
Digital Video Camera Recorder
Operating Guide
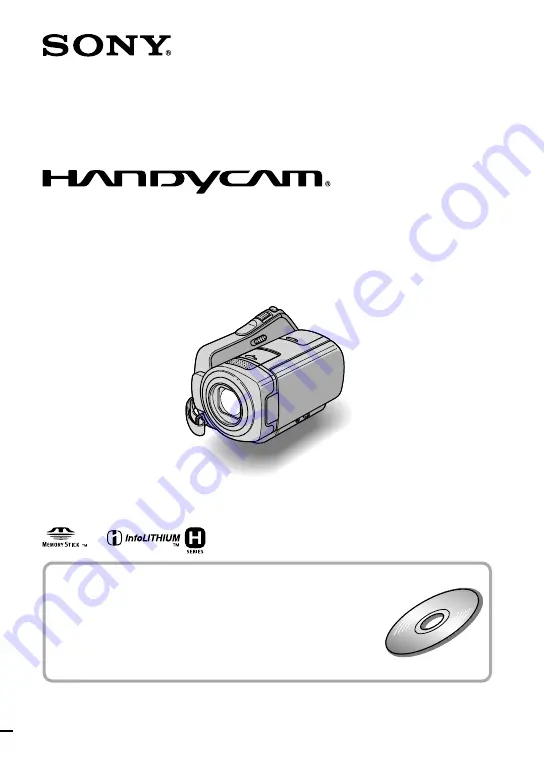
DCR-SR35E/SR36E/SR45E/SR46E/SR55E/
SR65E/SR75E/SR85E
For details on the advanced operations, please refer to
“Handycam Handbook” (PDF).
Page 1: ... 870 11 1 2008 Sony Corporation Digital Video Camera Recorder Operating Guide DCR SR35E SR36E SR45E SR46E SR55E SR65E SR75E SR85E For details on the advanced operations please refer to Handycam Handbook PDF ...
Page 2: ...ce If static electricity or electromagnetism causes data transfer to discontinue midway fail restart the application or disconnect and connect the USB cable again Disposal of Old Electrical Electronic Equipment Applicable in the European Union and other European countries with separate collection systems This symbol on the product or on its packaging indicates that this product shall not be treate...
Page 3: ...uarantee matters please refer to the addresses given in separate service or guarantee documents For customers in the U S A If you have any questions about this product you may call Sony Customer Information Center 1 800 222 SONY 7669 The number below is for the FCC related matters only Regulatory Information Declaration of Conformity Trade Name SONY Model No DCR SR45E DCR SR46E Responsible Party S...
Page 4: ...th Part 15 of the FCC Rules Operation is subject to the following two conditions 1 This device may not cause harmful interference and 2 this device must accept any interference received including interference that may cause undesired operation Notes on use Supplied items The numbers in are the supplied quantity AC Adaptor 1 Power cord Mains lead 1 Handycam Station 1 DCR SR55E SR65E SR75E SR85E A V...
Page 5: ...rded In such a case save your images on some type of external media first and then perform MEDIA FORMAT Fasten the grip belt and hold your camcorder correctly while recording To adjust the LCD panel open the LCD panel 90 degrees to the camcorder then rotate it to the best angle to record or play You can rotate the LCD panel 180 degrees to the lens side to record in mirror mode The LCD screen is ma...
Page 6: ... disk of the camcorder using a computer If you do so your camcorder may not operate correctly Note on disposal transfer If you perform MEDIA FORMAT to format the hard disk of the camcorder data may not be completely deleted from the hard disk When you transfer the camcorder it is recommended that you perform EMPTY to prevent the recovery of your data In addition to the above when you dispose of th...
Page 7: ...the image on a TV 16 Other parts and functions of the camcorder 17 Indicators displayed during recording playback 19 Performing various functions HOME and OPTION 21 Saving images 23 Deleting images 24 Enjoying with a computer Performing with a computer 25 Handbook software to be installed 25 Installing Picture Motion Browser 25 Troubleshooting Troubleshooting 28 Self diagnosis display Warning indi...
Page 8: ...am Station For DCR SR35E SR36E SR45E SR46E Connect the AC Adaptor to the DC IN jack on your camcorder Open the jack cover and connect the DC plug of the AC Adaptor to the DC IN jack 4 For DCR SR55E SR65E SR75E SR85E Connect the power cord mains lead to the AC Adaptor and the wall outlet wall socket Insert the camcorder into the Handycam Station securely all the way to the bottom When setting the c...
Page 9: ...85E Charging time 125 125 Recording time Continuous recording time 100 110 90 105 Typical recording time 50 50 45 50 Playback time 120 140 120 140 Top When the media is set to the hard disk Bottom When the media is set to the Memory Stick PRO Duo Notes All times measured under the following settings Recording mode SP The LCD backlight turns ON Typical recording time shows the time when you repeat ...
Page 10: ... outlet wall socket immediately if any malfunction occurs while using your camcorder Do not use the AC Adaptor placed in a narrow space such as between a wall and furniture Do not short circuit the DC plug of the AC Adaptor or battery terminal with any metallic objects This may cause a malfunction Even if your camcorder is turned off AC power source mains is still supplied to it while connected to...
Page 11: ... the desired geographical area with then touch NEXT 4 Set SUMMERTIME Y year M month D day hour and minute then touch The clock starts Tips The date and time do not appear during recording but they are automatically recorded on the media and can be displayed during playback You can turn off the operation beeps by touching HOME SETTINGS SOUND DISP SET BEEP OFF Changing the language setting You can c...
Page 12: ...rder p 19 1 Touch HOME MANAGE MEDIA tab on the screen 2 Touch MOVIE MEDIA SET to select the media for movies and touch PHOTO MEDIA SET to select the media for still images The media setting screen appears 60min 3 Select the media you want to set 4 Touch YES The media is changed To confirm the recording media setting Turn the POWER switch repeatedly to light up the Movie Still lamp depending on whi...
Page 13: ...n the Memory Stick PRO Duo Notes Do not open the Memory Stick Duo cover while recording Inserting a Memory Stick PRO Duo forcibly in the wrong direction may cause a malfunction to the Memory Stick PRO Duo Memory Stick Duo slot or image data If Failed to create a new Image Database File It may be possible that there is not enough free space appears in step 3 format the Memory Stick PRO Duo All reco...
Page 14: ...T STOP or To stop recording press START STOP again Still Images Press PHOTO lightly to adjust the focus a beep sounds then press it fully a shutter click sounds appears beside or When disappears the image has been recorded Tips You can check the free media space by touching HOME MANAGE MEDIA MEDIA INFO The maximum continuous recordable time of movies is approximately 13 hours When a movie file exc...
Page 15: ...vie to be played back Still Images Touch the tab and the still image to be played back VIEW IMAGES button POWER switch VIEW IMAGES button HOME MENU Previous 6 images Next 6 images Returns to the recording screen Displays movies Displays still images OPTION Searches for images by date Goes to the Face Index screen Goes to the Film Roll Index screen Slide show button Goes to the VISUAL INDEX screen ...
Page 16: ...arked with you can play it back from the point you have stopped previously Playing the image on a TV Connect your camcorder to the input jack of a TV or VCR using the A V connecting cable supplied or an A V connecting cable with S VIDEO optional For details see Handycam Handbook PDF Yellow A V OUT jack White Red Yellow Signal flow VCR or TVs DCR SR55E SR65E SR75E SR85E A V Remote Connector DCR SR3...
Page 17: ...to 5 times the original size Playback zoom When you touch the screen during playback zoom the point you touched will be displayed in the center of the LCD screen DISC BURN button Create a disc by connecting the camcorder to a computer For details see PMB Guide p 25 DISP BATT INFO button You can switch the screen display when you press while the power is set to on When you press while the power is ...
Page 18: ... camcorder turns off in sleep mode ACCESS lamp Hard disk When the ACCESS lamp is lit or flashing your camcorder is writing reading data Connecting to the devices A V Remote Connector A V OUT jack Connect with the A V connecting cable USB jack DCR SR35E SR36E SR55E SR75E output only Connect with the USB cable Active Interface Shoe DCR SR55E SR65E SR75E SR85E The Active Interface Shoe supplies power...
Page 19: ...d Recording remaining times OPTION button VIEW IMAGES button Face Index set Image size Approximate number of recordable still images Recording media Return button Playback mode Currently playing movie number Number of total recorded movies Previous Next button Video operation buttons Data file name Currently playing still image number Number of total recorded still images Playback folder Displays ...
Page 20: ...MAGE SIZE Slide show set NightShot plus Super NightShot plus Color Slow Shutter PictBridge connecting Warning Bottom Indicator Meaning Picture effect Digital effect Manual focus SCENE SELECTION Back light White balance SteadyShot off EXPOSURE SPOT METER TELE MACRO Face Index Tips Indicators and their positions are approximate and differ from what you actually see See Handycam Handbook PDF for deta...
Page 21: ...simultaneously the grayed items in the current recording playback situation To see the explanation of the HOME MENU HELP Press HOME or Touch HELP The bottom of the HELP button turns orange Using the OPTION MENU The OPTION menu appears like the pop up window that appears when you right click the mouse on a computer Touch OPTION then the menu items you can set at that moment appears 1 Touch the desi...
Page 22: ...AIR IMG DB F HDD MEMORY STICK SETTINGS category MOVIE SETTINGS REC MODE NIGHTSHOT LIGHT WIDE SELECT DIGITAL ZOOM STEADYSHOT AUTO SLW SHUTTR GUIDEFRAME REMAINING SET INDEX SET 1 PHOTO SETTINGS IMAGE SIZE 1 FILE NO NIGHTSHOT LIGHT GUIDEFRAME FLASH MODE 1 2 FLASH LEVEL 2 REDEYE REDUC 2 VIEW IMAGES SET DATA CODE DISPLAY SOUND DISP SET 3 VOLUME 1 BEEP 1 LCD BRIGHT LCD BL LEVEL LCD COLOR OUTPUT SETTINGS...
Page 23: ...computer By using Picture Motion Browser on the supplied CD ROM you can save images recorded on your camcorder For details see PMB Guide on the supplied CD ROM Creating a DVD with One Touch One Touch Disc Burn You can save images recorded on the hard disk of the camcorder directly to a DVD with ease by pressing DISC BURN button Saving images on a computer Easy PC Back up You can save images record...
Page 24: ...ng movies 1 Touch HOME OTHERS DELETE 2 Touch DELETE 3 Touch DELETE 4 Touch the movie to be deleted The selected movie is marked with 5 Touch YES To delete all movies at one time In step 3 touch DELETE ALL YES YES To delete the still images In step 2 touch DELETE Touch DELETE then touch the still image to be deleted The selected still image is marked with Touch YES Tips To delete all still images o...
Page 25: ...or installation appears Click Handycam Handbook The installation screen for Handycam Handbook PDF appears Select the desired language and the model name of your Handycam then click Handycam Handbook PDF Installation starts When the installation is completed the short cut icon of Handycam Handbook PDF appears on the desktop of your computer The model name of your Handycam is printed on its bottom s...
Page 26: ...h as E may vary depending on the computer Click Install on the installation screen of the computer Select the language for the application to be installed then click Next As the screen to confirm the connection appears connect your camcorder to the computer following the steps below For DCR SR55E SR65E SR75E SR85E Connect the AC Adaptor to the Handycam Station and a wall outlet wall socket Set the...
Page 27: ... required to complete the installation Remove the CD ROM from the disc drive of your computer To disconnect the USB cable Click the icon Safely remove USB Mass Storage Device OK Windows 2000 only on the task tray on the bottom right of the desktop of your computer Touch END YES on the screen of your camcorder Disconnect the USB cable Operating Picture Motion Browser To start Picture Motion Browser...
Page 28: ... it after about 1 minute If the functions still do not work press the RESET button p 17 using a sharp pointed object If you press the RESET button all settings including the clock setting are reset The temperature of your camcorder is extremely high Turn off your camcorder and leave it for a while in a cool place The temperature of your camcorder is extremely low Turn off the camcorder and take it...
Page 29: ...amcorder again E 20 E 31 E 61 E 62 E 91 E 94 A malfunction that you cannot service has occurred Contact your Sony dealer or local authorized Sony service facility Inform them of the 5 digit code which starts from E Indicators Messages Causes Solutions 101 0001 The file is damaged or unreadable An error may have occurred with the hard disk drive in your camcorder Delete unnecessary images Battery p...
Page 30: ...so camera shake easily occurs Use the flash DCR SR55E SR65E SR75E SR85E The camcorder is unsteady so camera shake easily occurs Hold the camcorder steady with both hands and record the image However note that the camera shake warning indicator does not disappear The media is full Still images cannot be recorded during processing Wait for a while then record Drop sensor activated Recording playback...
Page 31: ...heat to build up inside When disconnecting the power cord mains lead pull it by the plug and not the cord Do not damage the power cord mains lead such as by placing anything heavy on it Keep metal contacts clean Keep the Remote Commander and button type battery out of children s reach If the battery is accidentally swallowed consult a doctor immediately DCR SR55E SR65E SR75E SR85E If the battery e...
Page 32: ...harged in about 3 months if you do not use your camcorder at all Use your camcorder after charging the pre installed rechargeable battery However even if the pre installed rechargeable battery is not charged the camcorder operation will not be affected as long as you are not recording the date Procedures Connect your camcorder to a wall outlet wall socket using the supplied AC Adaptor and leave it...
Page 33: ...gth DCR SR35E SR36E SR45E SR46E F 1 8 4 1 f 1 9 76 0 mm 3 32 3 in When converted to a 35 mm still camera For movies 41 1 640 mm 1 5 8 64 5 8 in 16 9 2 For still images 48 1 920 mm 1 15 16 75 5 8 in 4 3 DCR SR55E SR65E SR75E SR85E F 1 8 3 2 f 2 5 62 5 mm 1 8 2 1 2 in When converted to a 35 mm still camera For movies 41 1 189 mm 1 5 8 46 7 8 in 16 9 2 For still images 36 900 mm 1 7 16 35 1 2 in 4 3 ...
Page 34: ...g the supplied rechargeable battery pack Handycam Station DCRA C200 DCR SR55E SR65E SR75E SR85E Input Output connectors A V OUT jack Video audio output jack USB jack mini B DCR SR55E SR75E output only AC Adaptor AC L200 L200B Power requirements AC 100 V 240 V 50 60 Hz Current consumption 0 35 0 18 A Power consumption 18 W Output voltage DC 8 4 V Operating temperature 0 C to 40 C 32 F to 104 F Stor...
Page 35: ...stered trademarks or trademarks of Microsoft Corporation in the United States and or other countries Macintosh and Mac OS are registered trademarks of Apple Inc in the U S and other countries Intel Intel Core and Pentium are trademarks or registered trademarks of Intel Corporation or its subsidiaries in the United States and other countries Adobe the Adobe logo and Adobe Acrobat are either registe...
Page 36: ...Additional information on this product and answers to frequently asked questions can be found at our Customer Support Website http www sony net Printed in Japan GB ...