


34
GB
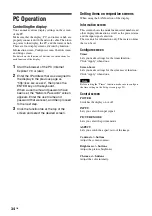
PC Operation
Controlling the display
You can make various display settings on the screen
of the PC.
Make sure that the display, PC, and router or hub are
properly connected with the network cable. Then turn
on power to the display, the PC, and the router or hub.
There are four display screens, divided by function:
Information screen, Configure screen, Control screen,
and Setup screen.
For details on the functions of buttons, see instructions for
each function of the display.
1
Start the browser of the PC (Internet
Explorer 7.0 or later).
2
Enter the IP address that was assigned to
the display in the previous page as
“http://xxx.xxx.xxx.xxx”, then press the
ENTER key on the keyboard.
When a user name and password have
been set, the “Network Password” screen
appears. Enter the user name and
password that were set, and then proceed
to the next step.
3
Click the function tab at the top of the
screen and select the desired screen.
Setting items on respective screens
When using the LAN function of the display
Information screen
This screen shows the model name, serial number and
other display information, as well as the power status
and the input signal selection.
The screen is for information only. There are no items
that can be set.
Configure screen
Timer
Lets you make settings for the timer function.
Click “Apply” when done.
Screen Saver
Lets you make settings for the screensaver function.
Click “Apply” when done.
Before setting the “Timer” function, make sure to configure
the time setting on the Setup screen (page 35).
Control screen
POWER
Switches the display on or off.
INPUT
Lets you select the input signal.
PICTURE MODE
Lets you select the picture mode.
ASPECT
Lets you switch the aspect ratio of the image.
Co/– buttons
Adjust the screen contrast.
Brig/– buttons
Adjust the picture brightness.
/– buttons
Adjust the color intensity.
Note
Summary of Contents for FWD-32B1
Page 13: ...13JP JP 後面 FWD 55B2 46B2 42B2 FWD 32B1 2 ...
Page 47: ......
Page 53: ...7GB GB ...
Page 57: ...11GB GB Rear FWD 55B2 46B2 42B2 FWD 32B1 2 ...
Page 97: ...9FR FR Arrière FWD 55B2 46B2 42B2 FWD 32B1 2 ...
Page 137: ...9DE DE Rückseite FWD 55B2 46B2 42B2 FWD 32B1 2 ...
Page 177: ...9ES ES Parte posterior FWD 55B2 46B2 42B2 FWD 32B1 2 ...
Page 217: ...9 IT IT Parte posteriore FWD 55B2 46B2 42B2 FWD 32B1 2 ...
Page 253: ...5CS CS ...


