


SEL1855 (E 18-55mm F3.5-5.6 OSS)
3
NOTE ON REPLACEMENT OF SERVICE EXCLUSIVE OPTICS BLOCK
1. To replace the Service Exclusive Optics Block, connect the E-mount lens to the NEX-5, and release the specified flag in the following proce-
dure.
• Implement [Service Flag OFF (S)] of E-Mount Lens Adjustment (Adjustment Application for Service).
Note:
The lens cannot be detected when E-mount Lens is connected to
NEX-5
without releasing the specified plug.
Displayed as “F
--
”
2. Since the Service Exclusive Optics Block is a stock part for service, make sure to check the firmware version when replacing.
If you are using an old version firmware, make sure to update it with the method of firmware update as shown below.
METHOD OF FIRMWARE UPDATE
System Requirements
OS: Windows XP/Vista/7
Operating condition: The free area of the hard disk should be more than 200MB.
The system memory (RAM) should be more than 512MB.
USB port: USB 2.0 recommended
Instruments
•
NEX-5
(product)
•
USB cable
•
[101HGPLens]UserFirmUpdater.zip (Download from the
TISS
homepage)
•
FirmwareData_user_Firm_******_***.zip (Download from the
TISS
homepage) (Latest edition)
Firmware updating procedure
1. Decompress the zip file “Decompress FirmwareData_user_Firm_******_***.zip”.
2. Decompress the zip file “[101HGPLens]UserFirmUpdater.zip”, and save the file “FirmwareData_user_Firm_******_***.dat” decompressed in
step 1 into the “resource” folder close below.
3. Connect
the
NEX-5
camera mounted with
NEX-5
camera (hereinafter referred to as camera) to PC with the USB cable, and then turn on the
power of camera.
4. Run
“FirmwareUpdater.exe”.
5. Follow instructions shown in
1
to
6
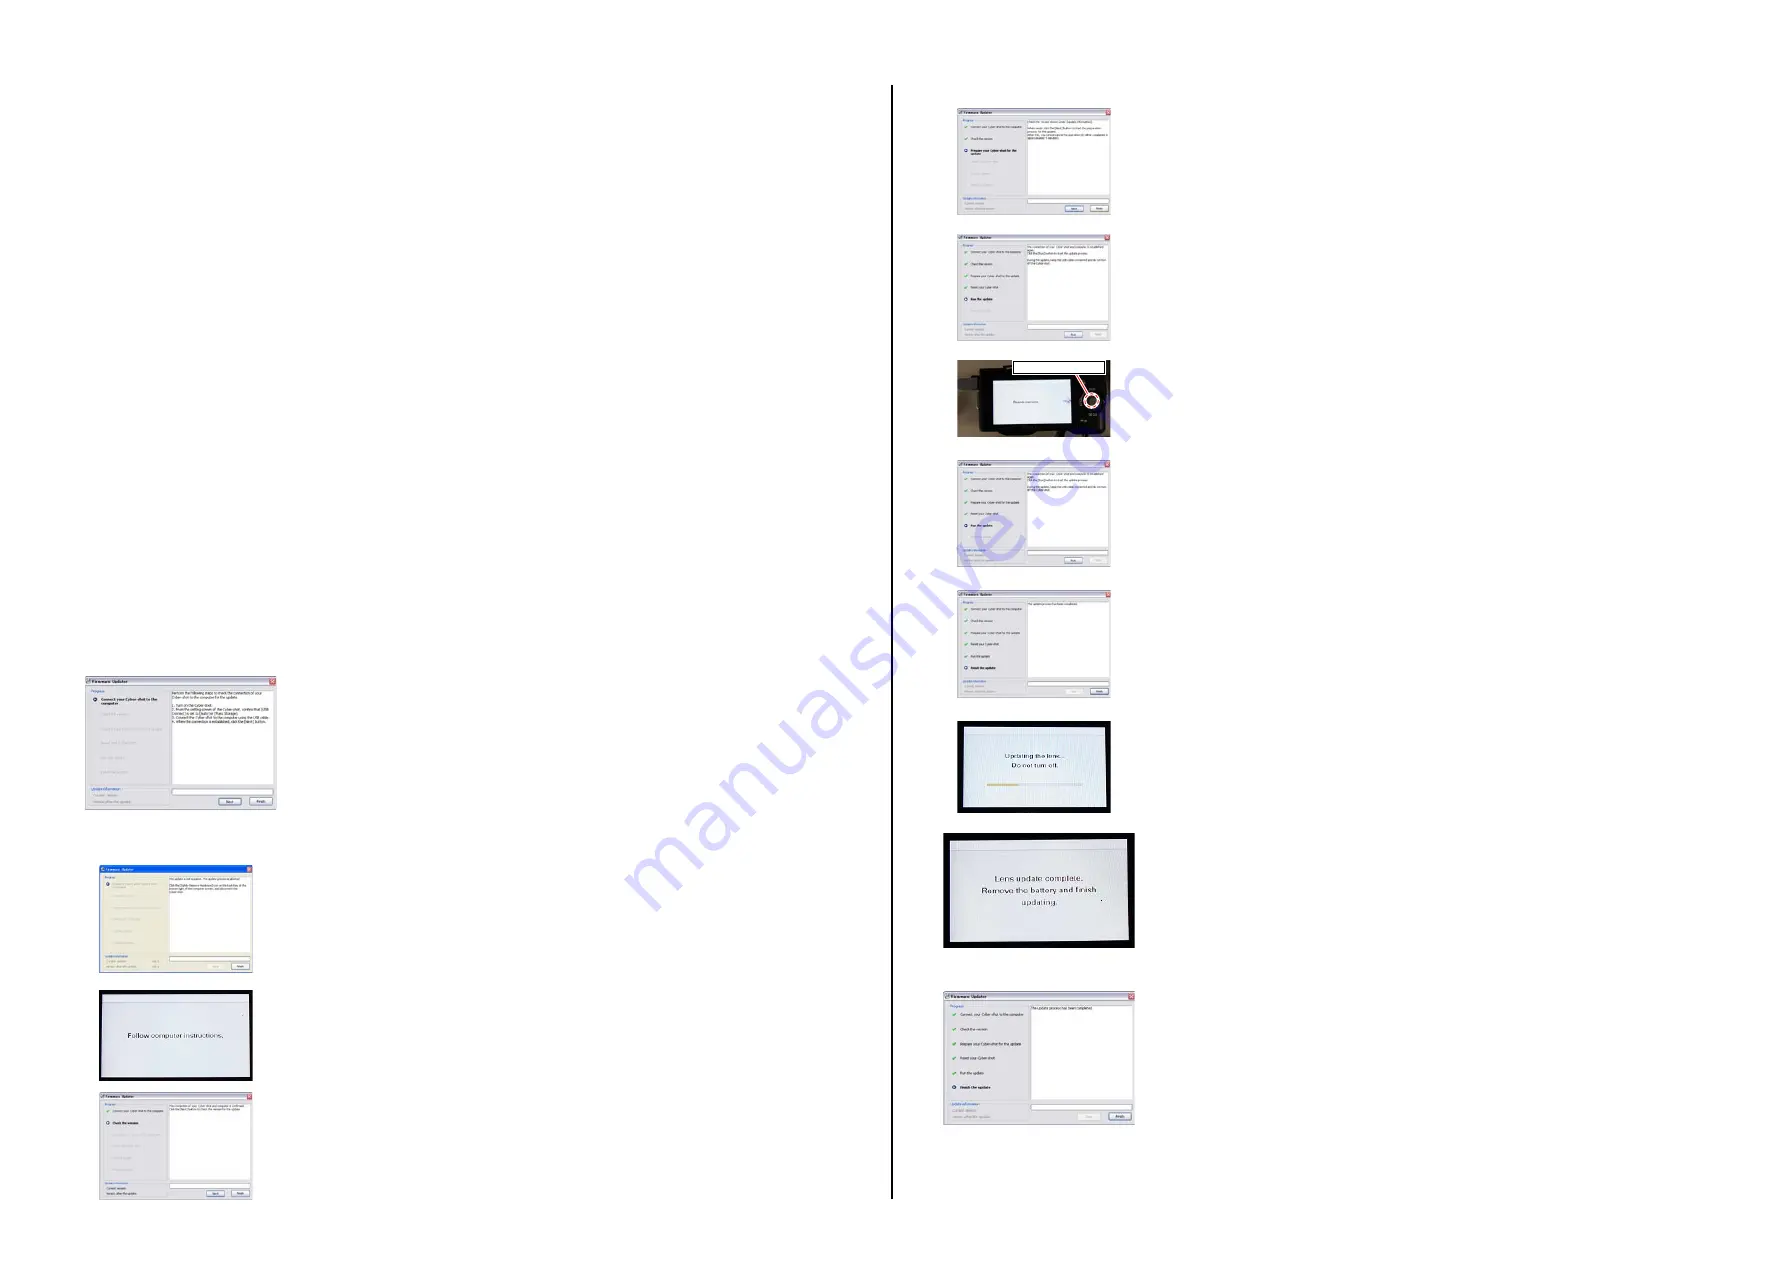
dialog boxes displayed on PC, and click the [Next] button sequentially to execute the update.
6. Turn off the power of camera and remove the battery when the following message appears on camera’s LCD.
– ENGLISH –
7. Click the [Finish] button to exit the update process.
4
Reset camera.
1
Connect camera to PC.
If the update is not required, message will appear in dialog box, click [Finish] to abort the update
process.
If the connection is established normally, the following message appears on camera’s LCD.
2
Check the version.
3
Prepare for the update.
Push this button
5
Run the update.
6
Finish the update.
Do not turn off the power of camera during the following message being displayed on camera’s
LCD.
To perform the reset, operations on camera side are required.
Press the center button of the control wheel when the following message appears on camera’s
LCD.
The changed portions from
Ver. 1.2 are shown in blue.


