background image

Table of C

on

ten

ts

M

enu Lists

Inde
x

GB

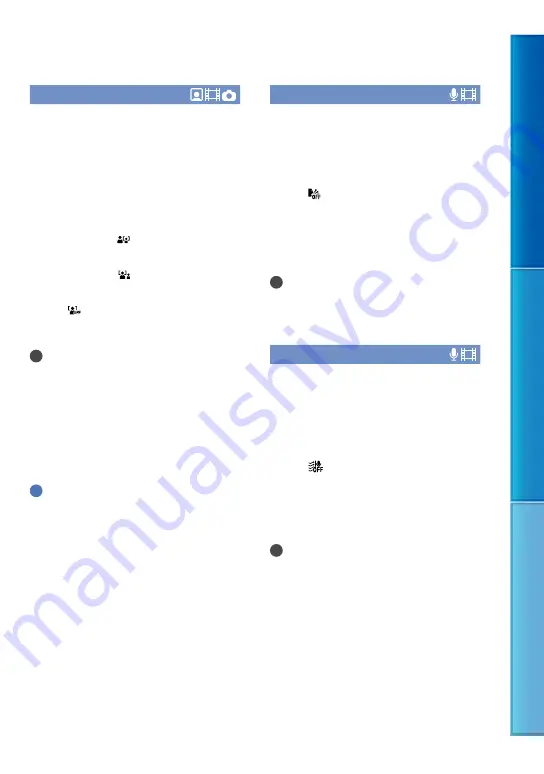
Face Detection


You can set this product to detect a face 

automatically.

It adjusts the focus/color/exposure 

automatically for the face of the subject.

Auto

Detects faces without distinction between 

adults and children.

Child Priority ( )

Gives faces of children priority.

Adult Priority ( )

Gives faces of adults priority.

Off ( )

Does not detect faces.

Notes

The frame does not appear on faces, even when 

this product detects the faces.

Faces may not be detected depending on 

recording conditions, subject conditions, and 

the setting of this product.

[Face Detection] may not function properly 

depending on recording conditions. Set [Face 

Detection] to [Off] in this case.

Tips

For better face detection performance, shoot the 

subject(s) under the following conditions:

Shoot in a sufficiently bright place

The subject(s) does not wear glasses, a hat 

or mask

The subject(s) faces directly towards this 

product


Closer Voice


This product detects a face of a person and 

records the voice clearly.

On

Records human voices clearly.

Off ( )

Records ambient sound faithfully. When you 

want to record the sound clearly without any 

interference, for example when you record a 

music concert, set [Closer Voice] to [Off].

Notes

The [Closer Voice] function does not activate 

while an external microphone is connected to 

this product.

Auto Wind NR


This product records a movie with 

less wind noise input from the built-in 

microphone. This function automatically 

cuts the low-range wind noise according to 

the noise level.

Off (

)

Does not reduce the wind noise.

On

Reduces the wind noise.

Notes

When you set [Auto Wind NR] to [Off], 

[Intelligent Auto] is set to [Off].

[Auto Wind NR] will not function while an 

external microphone is attached to this product.

Summary of Contents for DEV-30

Page 1: ...Table of Contents Menu Lists Index GB Click Digital Recording Binoculars Handbook DEV 30 50 50V 2013 Sony Corporation 4 464 705 12 1 ...

Page 2: ...language are used for illustrating the operating procedures Change the screen language before using this product if necessary p 17 On recording To ensure stable operation of the memory card it is recommended that you format the memory card with this product before using it the first time p 58 Formatting the memory card will erase all the data stored on it and the data will be irrecoverable Save yo...

Page 3: ...is product due to the protection features of this product being activated in such situations In this case an indicator appears on the screen p 70 When this product is connected to a computer or accessories Do not try to format the memory card of this product using a computer If you do so this product may not operate correctly When connecting this product to another device with communication cables...

Page 4: ...is product while walking Doing so may cause accidents or injury Do not do any of the following Otherwise the memory card may be damaged recorded images may be impossible to play back or may be lost or other malfunctions could occur ejecting the memory card when the access lamp p 18 is lit or flashing removing the battery pack or AC Adaptor from this product or applying mechanical shock or vibratio...

Page 5: ...opping of this product may compromise the rain proof performance of this product We recommended that you contact your Sony dealer or local authorized Sony service facility charge applies regarding repairs Make sure to use this product properly observing the following points as damage caused by misuse abuse or failure to properly maintain this product is not covered by warranty Do not use this prod...

Page 6: ...duct are designed to allow any water or sand entering via the clearance of the IPD ADJ dial or the viewfinder to escape from the bottom If sand caught in the parts of this product impairs their movement remove the sand with a blower etc and then operate them repeatedly Drains ...

Page 7: ...mory card 17 Binoculars Recording Playback Using this product as binoculars 19 Recording 21 Recording movies 21 Shooting photos 22 Playback on this product 23 Playing images on a TV 25 List of connection 25 Using BRAVIA Sync 27 Advanced operations Useful functions for recording movies and photos 28 Recording better images automatically Intelligent Auto 28 Selecting the recording mode 28 Recording ...

Page 8: ...ck 39 Saving images on an external media device 40 Saving desired movies and photos 41 Playing back images in the external media device on this product 42 Creating a standard definition image quality disc with a recorder etc 43 Customizing this product Using menus 44 Menu lists 45 Shooting Mode Items for selecting a shooting mode 48 Camera Mic Items for customized shooting 48 Image Quality Size It...

Page 9: ...ng the recorded movies on a TV 77 Maintenance and precautions 78 About the AVCHD format 78 About GPS DEV 50V 78 About the memory card 79 About the InfoLITHIUM battery pack 80 About handling of this product 81 Quick reference Screen indicators 85 Parts and controls 86 Index 88 ...

Page 10: ...ains lead 1 HDMI cable 1 Micro USB cable 1 Rechargeable battery pack NP FV70 1 Lens cap 1 Neck strap 1 Operating Guide 1 CD ROM Manuals for Digital Recording Binoculars 1 Digital Recording Binoculars Handbook PDF Notes The PlayMemories Home software and PlayMemories Home Help Guide can be downloaded from the Sony website p 36 Only for DEV 50 50V Carrying case 1 Finder cap 1 Large eyecup 2 ...

Page 11: ...e clasp Attaching the lens cap When you do not intend to use this product store this product with the lens cap attached Attaching the large eyecup DEV 50 50V If you cannot see the picture in the viewfinder clearly under bright light use the large eyecup Align the large eyecup with the eyecup groove in the viewfinder Attaching the finder cap DEV 50 50V When you do not intend to use this product sto...

Page 12: ... the battery with the grooves in the battery compartment while pressing the battery release lever then slide the battery until it clicks 3 Close the battery memory card cover 4 Connect the AC Adaptor and the power cord mains lead to this product and the wall outlet wall socket The CHG charge lamp lights up and charging starts The CHG charge lamp turns off when the battery pack is fully charged Sli...

Page 13: ...move the battery pack Turn off this product by pressing the POWER button Open the battery memory card cover p 12 Slide the battery release lever and remove the battery Charging the battery pack abroad You can charge the battery pack in any countries regions using the AC Adaptor supplied within the AC 100 V 240 V 50 Hz 60 Hz range Notes Do not use an electronic voltage transformer Notes on the batt...

Page 14: ... with the micro USB cable connected Do not connect the micro USB cable until the following procedure is completed If this product is used by more than one person adjust the diopter and the width whenever a different person uses it 1 Press the POWER button This product is turned on 2 Adjust the diopter until you can see a clear image with each eye by turning the diopter adjustment knob Adjust the d...

Page 15: ...the selection When each setting have been completed select Next To set the date and time again select MENU Setup Clock Settings Date Time Setting Date Time When Date Time is not on the screen press until the item appears 5 Select 60i NTSC or 50i PAL to suit the TV color system used in your country region then select When the 60i 50i selection is made this product restarts to update the system See ...

Page 16: ...subject until the adjustment is completed Notes If this product fails to perform Auto 3D Lens Adjust select Run Again Type of subjects that should be displayed on the screen for Auto 3D Lens Adjust The scale indicated varies depending on the subject displayed on the screen Subjects that indicate a higher scale Distant subjects in bright places such as outdoors Subjects farther away than 20 m 65 ft...

Page 17: ...this manual Memory Stick XC HG Duo media SD memory card SDHC memory card SDXC memory card Described in this manual SD card SD Speed Class 4 or faster is required Operation with all memory cards is not assured Memory Stick PRO Duo media of up to 32 GB Memory Stick XC HG Duo media of up to 64 GB and SD cards of up to 64 GB have been verified to operate with this product Notes Movies recorded on Memo...

Page 18: ...rmat the memory card p 58 Confirm the direction of the memory card If you forcibly insert the memory card in the wrong direction the memory card memory card slot and or image data may be damaged Do not open the battery memory card cover during recording When inserting or ejecting the memory card be careful so that the memory card does not pop out and drop Do not eject the memory card while the acc...

Page 19: ...e default setting About zooming Magnifications available are as follows Binoculars magnification approx DEV 30 DEV 50 50V Movie recording 2D mode 1 0 8 to 15 2 0 8 to 10 3 0 8 to 25 2 0 8 to 12 3 Movie recording 3D mode 1 0 5 to 6 0 5 to 6 Photo recording 0 5 to 15 4 0 5 to 25 4 Zoom ratio approx DEV 30 DEV 50 50V Movie recording 2D mode 20 2 13 3 33 2 16 3 Movie recording 3D mode 12 12 Photo reco...

Page 20: ...een 2D and 3D At the default setting images in the viewfinder are displayed in 3D Notes The recorded image does not change even if you press FINDER 2D 3D Tips In the 3D display mode for the viewfinder this product displays the image from the left lens in the left viewfinder and the image from the right lens in the right viewfinder In the 2D display mode this product displays the image from the lef...

Page 21: ... The recording lamp lights in red during recording To stop recording press START STOP again To display items on the screen again Operate the multi selector You can change the settings using the Display Setting menu p 55 Notes The maximum continuous recordable time of a movie is as follows 2D about 13 hours 3D about 6 hours 30 minutes It will take several seconds until you can start recording after...

Page 22: ...stance at which you can obtain good 3D movies varies depending on the zooming level Recommended recording distance approx Zoom 2 m to 9 m 6 ft to 30 ft 6 m to 16 m 20 ft to 51 ft 24 m to 30 m 78 ft to 100 ft A subject farther away than the recommended recording distance will lose 3D depth Notes You should not record a subject closer than the recommended recording distance in 3D because an uncomfor...

Page 23: ...lity Size Image Size a desired setting You cannot record photos while is displayed Playback on this product You can play back images recorded with this product Tips If you want to play back 3D images set 2D 3D Mode Select to 3D 1 Press the POWER button This product is turned on 2 Press View Images The Event Index screen appears after some seconds 3 Select an image you want to view using the multi ...

Page 24: ...e displayed depending on the playback image Notes You may not be able to play back the images with devices other than this product Tips When playback from the selected image reaches the last image the screen returns to the INDEX screen Select during pause to play back movies slowly As you repeat pressing Enter after selecting during playback movies are played as fast as about 5 times about 10 time...

Page 25: ...ting to a 3D TV Movies recorded in 3D are played back in 3D Make sure that 2D 3D Mode Select is set to 3D Adjusting the depth of 3D movies when this product is connected to a 3D TV with the HDMI cable supplied You can adjust the depth of image while playing back 3D movies Only operating buttons are displayed in the viewfinder Adjust the depth while checking the images displayed on the TV screen Se...

Page 26: ...he aspect ratio according to the connected TV 16 9 4 3 Set TV Type to 16 9 or 4 3 according to your TV p 59 When your TV is monaural When your TV has only one audio input jack Connect the yellow plug of an AV Cable sold separately to the video input jack and connect the white left channel or red right channel plug to the audio input jack of your TV or VCR When connecting to your TV via a VCR Conne...

Page 27: ...Event Index play selected movies or display selected photos by pressing up down left right enter buttons of the remote commander of your TV Notes There may be some operations you cannot do with the remote commander To set this product select MENU Setup Connection CTRL FOR HDMI On the default setting Also set your TV accordingly Refer to the instruction manual of the TV for details The operation of...

Page 28: ...light Macro Camera shake detection Walk Tripod Sound detection Auto Wind NR To cancel the Intelligent Auto function select Off Notes This product may not detect the expected scene or subject depending on the recording conditions Selecting the recording mode You can switch the recording mode to select the movie quality Standard is the default setting The recording time of the memory card is changed...

Page 29: ...r LP 1440 1080 50i You can select the following recording mode 3D MVC HD 28M 3D 60p Quality 50p Quality AVC HD 28M PS Highest Quality AVC HD 24M FX High Quality AVC HD 17M FH Standard AVC HD 9M HQ Long Time AVC HD 5M LP M such as in 24M means Mbps Recording information on your location GPS DEV 50V This product records information on the location when movies or photos are recorded the default setti...

Page 30: ...ng the MANUAL dial that 3D Depth Adjustment is assigned to The 3D Depth Adjustment here allows you to adjust the 3 dimensional appearance of the image on the screen during recording Press MANUAL to make this product adjust the depth of the 3D image Pressing MANUAL repeatedly toggles between enabling and disabling the 3D depth adjustment Rotate the MANUAL dial to adjust the 3D depth while checking ...

Page 31: ... smaller F stop than F3 4 when you set the zoom lever to the W Wide angle side the IRIS is reset to F3 4 as you move the zoom lever to the T Telephoto side If you adjust the IRIS the in focus range in front of and behind the focused subject is changed When you open the IRIS wider a smaller F stop the in focus range becomes narrower and when you close the IRIS narrower a larger F stop the in focus ...

Page 32: ...n the playback screen To delete all images recorded in the memory card and recover all the recordable space of the memory card format the memory card p 58 Reduced size images which enable you to view many images at the same time on an index screen are called thumbnails Select MENU Edit Copy Delete using the multi selector To select and delete movies select Multiple Images MOVIE PHOTO MOVIE PHOTO O...

Page 33: ...ct to return to the previous screen Select To undo the protection of movies and photos Select the movie or photo marked with in step 3 disappears To protect all movies photos in an event at one time In step 2 select Set All In Event Select the desired event with then select Select To undo the protection of an event In step 2 above select Remove All In Event select the desired movies photos then se...

Page 34: ...ware for more advanced editing Capturing a photo from a movie You can capture images from movies recorded with this product Select Photo Capture on the movie playback screen using the multi selector Select to play back movies Select at the point where you want to capture a photo The movie pauses Select to adjust the capturing point with more precision Select The image size of captured photos from ...

Page 35: ...ction is required to install PlayMemories Home An Internet connection is required to use PlayMemories Online and other online services The services may not be available in some countries regions Software for Mac The PlayMemories Home software is not supported on Mac computers To import images from this product to your Mac and play them use the appropriate software on your Mac For details visit the...

Page 36: ... disc creation function etc 3 Starter Edition is not supported 4 Faster processor is recommended Notes Operation with all computer environments is not assured Installing the PlayMemories Home software in your computer Access the following download site using an Internet browser on your computer then click Install Run www sony net pm Install according to the on screen instructions When the on scree...

Page 37: ...ray disc This product automatically divides an image file that exceeds 2 GB and saves the parts as separate files All image files may be shown as separate files on a computer however the files will be handled properly by the import function and the playback function of this product or the PlayMemories Home software To create a Blu ray disc You can create a Blu ray disc with a high definition image...

Page 38: ...help menu of PlayMemories Home If the icon is not displayed on the computer screen click Start All Programs PlayMemories Home the desired item For details on PlayMemories Home select PlayMemories Home Help Guide on the software or visit the PlayMemories Home support page http www sony co jp pmh se Downloading the dedicated software for this product You can install the dedicated software for this p...

Page 39: ...iscs with high definition image quality images recorded should not be used in DVD players recorders Because DVD players recorders are not compatible with the AVCHD format DVD players recorders may fail to eject the disc The types of media on which images are saved See page 29 The devices on which the created disc can be played back Blu ray Disc Blu ray disc playback devices such as a Sony Blu ray ...

Page 40: ...VD drive media devices connected via a USB hub media devices with built in USB hub card reader Notes You may not be able to use external media devices with a code function The FAT file system is available for this product If the storage medium of the external device was formatted for the NTFS file system etc format the external media device using this product before use The format screen appears w...

Page 41: ... the index screen To disconnect the external media device Select while this product is in the playback standby mode index is displayed of the external media device Disconnect the USB Adaptor Cable Notes The number of scenes you can save on an external media device are as follows However even if the external media device has free space you cannot save scenes exceeding the following number Movies Ma...

Page 42: ...out copying Index of the external media device is displayed Select the image you want to view and play back the image p 23 You can also view images on a TV connected to this product p 25 You can play back the high definition image quality movies on your computer using PlayMemories Home Start PlayMemories Home and select the drive where the external media device is connected with Settings To perfor...

Page 43: ... device a disc recorder etc with an AV Cable sold separately Connect this product to the input jacks of the recording device 3 Start playback on this product and record it on the recording device Refer to the instruction manuals supplied with your recording device for details 4 When dubbing is finished stop the recording device and then this product Notes Since copying is performed via analog data...

Page 44: ...g the menu or to return to the previous menu screen To find a menu item quickly The Camera Mic and Setup menus have sub categories Select the sub category icon so that the screen displays the list of menus in the sub category selected When you cannot select a menu item Grayed out menu items or settings are not available When you select the grayed out menu item this product displays the reason why ...

Page 45: ...tically corrects the vertical position of the right and left movies to record 3D movies that can be viewed comfortably without blurring 51 Scene Selection Selects an appropriate recording setting according to the type of scene such as night view or beach 51 Self Timer Sets the self timer when this product is in photo recording mode 52 Tele Macro Shoots a subject in focus with the background out of...

Page 46: ...ts the photo size 57 Playback Function Plays back movies or photos 23 Edit Copy Delete Deletes movies or photos 32 Protect Protects movies or photos to avoid deleting 33 Copy Copies movies or photos to external media devices 41 Direct Copy Copies all movies and photos that have not yet been saved on an external media device 42 Setup Media Settings Media Info Displays memory card information such a...

Page 47: ...st Adjusts the relative vertical position of the right and left viewfinder 61 GPS Information Displays location information 61 GPS Setting Sets the GPS 62 REC Lamp Sets the recording lamp to light up or not 62 Beep Sets whether this product sounds operation beeps or not 62 Language Setting Sets the display language 62 60i 50i Sel Switch 1080 60i NTSC system and 1080 50i PAL system 62 Battery Info ...

Page 48: ...y Outdoor The white balance is appropriately adjusted for the following recording conditions Outdoors Night views neon signs and fireworks Sunrise or sunset Under daylight fluorescent lamps Indoor The white balance is appropriately adjusted for the following recording conditions Indoors At stages where the lighting conditions change quickly Under video lamps sodium lamps or incandescent like color...

Page 49: ...to adjust the brightness Tips You can also adjust manually by using the MANUAL dial p 30 Focus You can adjust the focus manually You can select this function also when you want to focus on a certain subject intentionally Auto Adjusts the focus automatically Manual Adjusts the focus manually When you set Focus to Manual select nearby subject distant subject to adjust the focus Notes When you set Fo...

Page 50: ...shutter speed manually Tips You can also adjust manually by using the MANUAL dial p 30 AE Shift You can adjust the exposure based on the results of the automatic exposure measurement Off Adjusts the exposure automatically On Adjusted number and EV Adjusts the exposure manually Select to record a brighter image or select to record a darker image Tips You can adjust the automatic exposure level to b...

Page 51: ... left images to record 3D movies and display 3D movies in the viewfinder that can be viewed comfortably without blurring Aim this product at a subject that produces a scale higher than the mark on the screen and then select p 16 Notes Use Auto 3D Lens Adjust in the following cases When you feel that the 3D movies do not look the way you want them to When you have not adjusted the 3D lenses for a w...

Page 52: ...and Shutter Speed settings are canceled Self Timer Press PHOTO to start the count down A photo is recorded after about 10 seconds Off Cancels the self timer On Starts the self timer recording Once you shoot a photo the setting is canceled To cancel recording select Notes If you change the 2D 3D Mode Select setting the Self Timer setting returns to default Tele Macro This is useful to shoot small s...

Page 53: ...yShot to Off when using a tripod sold separately then the image becomes natural On The SteadyShot function is used Off The SteadyShot function is not used Digital Zoom You can change the maximum zoom level Note that the image quality decreases when you use the digital zoom On The digital zoom is used Off The digital zoom is not used Tips You can change the setting only in the 2D mode Digital Zoom ...

Page 54: ... following conditions Shoot in a sufficiently bright place The subject s does not wear glasses a hat or mask The subject s faces directly towards this product Closer Voice This product detects a face of a person and records the voice clearly On Records human voices clearly Off Records ambient sound faithfully When you want to record the sound clearly without any interference for example when you r...

Page 55: ...r the menu item to Select one of the My Buttons to which the menu item will be assigned Select Grid Line You can display the grid line and check that the subject is horizontal or vertical The grid line is not recorded Off Does not display the grid line On Displays the grid line Notes The grid line cannot be displayed while recording movies Tips Positioning the subject at the cross point of the gri...

Page 56: ...aved on will depend on the recording mode that has been set during recording For details see page 29 Tips Frame rate means the number of images that are updated in a certain period of time 2D 3D Mode Select You can switch the operating mode of this product between 2D and 3D 2D Records plays the 2D movie 3D Records plays the 3D movie Notes When you record 3D movies the binocular magnification can b...

Page 57: ... quality at the 16 9 wide ratio 4 224 2 376 M 5 0M Allows you to record more photos in relatively clear quality 2 592 1 944 S 2 1M Allows the maximum number of photos to be recorded in the 16 9 wide ratio 1 920 1 080 S VGA Allows the maximum number of photos to be recorded 640 480 Notes See page 75 for the number of recordable photos Edit Copy Items for editing See Using menus p 44 on the operatio...

Page 58: ...d While Executing is displayed do not operate the buttons on this product disconnect the AC Adaptor or eject the memory card from this product The access lamp is lit or flashing while formatting memory card Repair Img DB F See page 68 72 File Number You can select the way to assign file number of photos Series Assigns file numbers of photos in sequence The file number becomes larger each time you ...

Page 59: ...TV Depending on the memory card condition bars appear Volume You can adjust the volume of playback sound by selecting TV Type You need to convert the signal depending on the TV connected when playing back movies and photos The recorded movies and photos are played back as following illustrations 16 9 Select this to view your movies on a 16 9 wide TV The recorded movies and photos are played back a...

Page 60: ...ion Select the output image resolution when connecting this product to a TV with the HDMI cable supplied Auto Normal setting outputs the signal according to the TV automatically 1080p Outputs movies with a 1080p signal 1080i Outputs movies with a 1080i signal 720p Outputs movies with a 720p signal 480p 576p Outputs the 480p 576p signal 480i 576i Outputs the 480i 576i signal Notes When Frame Rate i...

Page 61: ...you use this product under extremely hot or cold conditions When the vertical and horizontal lines will not overlap or the horizontal line is extremely tilted stop using this product and contact your Sony dealer or local authorized Sony service facility GPS Information DEV 50V This product can display location information How to check the triangulating information Color of the satellites triangula...

Page 62: ... when you start stop recording or operate buttons Off Cancels the melody Language Setting You can select the language to be used on the screen 60i 50i Sel Select the settings depending on the TV color systems of the countries regions where you use this product Select 60i when TV color system is NTSC and select 50i when TV color system is PAL Notes You cannot record play back in the setting of 50i ...

Page 63: ...Time You can set the date and time Select to select the item and select to set the value Area Setting You can adjust a time difference without stopping the clock Select your local area when using this product in other time zones Refer to the world time difference information on page 78 DEV 30 50 Home Select this item when you are going to use this product in the area where you are living Destinati...

Page 64: ... adjusted until the next time you turn this product on again The clock may not be adjusted to the correct time automatically using the GPS system depending on the country region selected for this product In this case set Auto Clock ADJ to Off Auto Area ADJ Auto area adjustment DEV 50V This product can compensate for time differences automatically by acquiring location information from the GPS syst...

Page 65: ... plug of the AC Adaptor has been disconnected from the wall outlet wall socket Connect it to the wall outlet wall socket p 12 This product does not operate even when the power is set to on It takes a few seconds for this product to be ready to shoot after the power is turned on This is not a malfunction Disconnect the AC Adaptor from the wall outlet wall socket or remove the battery pack then reco...

Page 66: ...ery pack is being charged If the temperature of the battery pack is too high or too low you may not be able to charge it p 80 Attach the battery pack to this product correctly p 12 If the problem persists disconnect the AC Adaptor from the wall outlet wall socket and contact your Sony dealer The battery pack may be damaged The remaining battery time indicator does not indicate the correct time The...

Page 67: ... record images The playback screen is displayed Press MODE to turn on the Movie or Photo lamp p 21 This product is recording the image you have just shot on the memory card You cannot make new recording during this period The memory card is full Delete unnecessary images p 32 Total number of movie scenes or photos exceeds the recording capacity of this product p 75 Delete unnecessary images p 32 P...

Page 68: ... Horizontal stripes appear on the images This occurs when recording images under a fluorescent lamp sodium lamp or mercury lamp This is not a malfunction Sound is not recorded correctly If you disconnect an external microphone etc during recording movies sound may not be recorded correctly Connect the microphone again in the same way as when you start recording movies Playback Images cannot be pla...

Page 69: ...right and left edges of images are trimmed slightly on a connected TV The screen of this product can display recording images across the entire screen full pixel display However this may cause slight trimming of the top bottom right and left edges of images when played back on a TV which is not compatible with full pixel display The image appears distorted on the 4 3 TV This happens when viewing a...

Page 70: ...ice facility In this case when you contact them give them all the numbers of the error code beginning with C or E C or E Self diagnosis display C 04 The battery pack is not an InfoLITHIUM battery pack V series Use an InfoLITHIUM battery pack V series p 80 Connect the DC plug of the AC Adaptor to the DC IN jack of this product securely p 12 C 06 The battery pack temperature is high Change the batte...

Page 71: ...Incompatible memory card is inserted p 17 Warning indicator pertaining to the write protect of the memory card The memory card is write protected Access to the memory card was restricted on another device Warning indicator pertaining to the external media device The image database file may be damaged Check the database file by selecting MENU Setup Media Settings Repair Img DB F Warning indicator p...

Page 72: ...computer However it is not guaranteed that all movies can be imported to the computer Buffer overflow Writing to the media was not completed in time You have performed recording and erasing operations repeatedly or a memory card that has been formatted by other device is used Copy and take data backup to other device such as a computer and then format the memory card on this product p 58 The size ...

Page 73: ... cannot execute functions Check the database file by selecting MENU Setup Media Settings Repair Img DB F If the message still appears reconnect the external media device then format it Note that if you format the external media device all the data on the device will be deleted If you cannot format the external media device the external media device may be incompatible with this product or damaged ...

Page 74: ...ring time NP FV70 190 NP FV100 385 In this manual monitor means that the user watches or views a subject without recording Playing time Approximate time available when you use a fully charged battery pack unit minute Battery pack 2D 3D NP FV70 315 270 NP FV100 625 535 Each operating time in the 2D mode is measured with REC Mode set to Standard Typical recording time shows the time when you repeate...

Page 75: ...kly moving and complex images are recorded at a higher bit rate and this reduces the overall recording time Expected number of recordable photos Memory card 20 4 M 16 GB 1850 32 GB 3800 64 GB 7500 Each number is measured when the Sony s memory card is used The number of recordable photos of memory card shown is for both the maximum image size of this product and the default image size The actual n...

Page 76: ...ere 1080 60i 1080 50i is supported you can view 3D movies as recorded by connecting this product to a 3D compatible TV or monitor with the HDMI cable supplied Viewing high definition image quality movies In countries regions where 1080 60i 1080 50i is supported you can view the movies with the same high definition image quality as that of the recorded movies You need a NTSC or PAL system based and...

Page 77: ...60i 50i Sel to 50i PAL Argentina Australia Austria Belgium Bulgaria Brazil China Czech Republic Denmark Finland France Germany Guiana Holland Hong Kong Hungary Iran Iraq Italy Kuwait Malaysia Monaco New Zealand Norway Paraguay Poland Portugal Russia Singapore Slovak Republic Spain Sweden Switzerland Thailand Ukraine United Kingdom Uruguay etc Setting to the local time You can easily set the clock ...

Page 78: ...n coding technology The MPEG 4 AVC H 264 format is adopted to compress video data and the Dolby Digital or Linear PCM system is used to compress audio data The MPEG 4 AVC H 264 format is capable of compressing images at higher efficiency than that of the conventional image compressing format The MPEG 4 MVC H 264 format is adopted to compress 3D video data in the AVCHD format Ver 2 0 for the 3D and...

Page 79: ...er time for this product to start triangulating compared to when you stay in the same place Error caused by the position of GPS satellites This product automatically triangulates your current location when this product receives radio signals from 3 or more GPS satellites The triangulating error allowed by the GPS satellites is about 10 m 33 feet Depending on the environment of the location the tri...

Page 80: ... that improper use may cause a malfunction On image data compatibility Image data files recorded on memory card by this product conform to the Design rule for Camera File system universal standard established by the JEITA Japan Electronics and Information Technology Industries Association If you cannot use memory cards that have been used with another device format it with this product p 58 Note t...

Page 81: ...be restored if it is used in high temperatures for a long time or if left in a fully charged state or when the battery pack is frequently used Use the remaining battery time indication as a rough guide only The mark that indicates low battery flashes even if there are still 20 minutes of battery time remaining depending on the operating conditions or ambient temperature About storage of the batter...

Page 82: ...ate for a long time turn it on and let it run by recording and playing back images about once a month Use up the battery pack completely before storing it Moisture condensation If this product is brought directly from a cold place to a warm place moisture may condense inside this product This may cause a malfunction to this product If moisture condensation has occurred Leave this product for about...

Page 83: ...ff for more than 24 hours On trademarks AVCHD 3D Progressive and AVCHD 3D Progressive logo are trademarks of Sony Corporation and Panasonic Corporation Memory Stick Memory Stick Duo Memory Stick PRO Duo Memory Stick PRO HG Duo Memory Stick XC HG Duo MagicGate MagicGate Memory Stick and MagicGate Memory Stick Duo are trademarks or registered trademarks of Sony Corporation InfoLITHIUM is a trademark...

Page 84: ...ith the owners of the respective copyrights Based on requests by the copyright owners of these software applications we are obliged to inform you of their contents For information on the license contents in English please read the file in the LICENSE folder of the CD ROM On GNU GPL LGPL applied software The software that is eligible for the following GNU General Public License hereinafter referred...

Page 85: ...ng mode PS FX FH HQ LP 28 60min Remaining battery expected recording and playing time 20 4 M Photo size 57 Recording playback editing media 17 An external media device is connected 41 0 00 00 Counter hour minute second 00min Estimated recording remaining time 9999 Approximate number of recordable photos and photo size Playback folder 100 112 Current playing movie or photo Number of total recorded ...

Page 86: ...s and their positions are approximate and may differ from what you actually see Some indicators may not appear depending on the model Parts and controls Figures in are reference pages MODE button 21 POWER button 14 Accessory shoe Built in microphone Lens IPD ADJ dial 15 View Images button 23 FINDER 2D 3D display button 20 START STOP button 21 Multi selector 15 HDMI OUT jack 25 microphone jack PLUG...

Page 87: ... DC IN jack 12 Tripod receptacle Attach a tripod sold separately to the tripod receptacle using a tripod screw sold separately the length of the screw must be less than 5 5 mm 7 32 in Depending on the specifications of the tripod this product may not attach in the proper direction Battery memory card cover 12 Battery memory card cover button 12 Speaker Memory card access lamp 18 While the lamp is ...

Page 88: ...3 Direct Copy 42 Disc recorder 43 Display Setting 55 Divide 33 E Edit Copy 57 Event Index 23 Exposure 49 External media 40 F Face Detection 54 FH 28 File Number 58 Fireworks 52 Focus 49 Format 58 Frame Packing 60 Frame Rate 56 Fully charged 12 FX 28 G GPS Information 61 GPS Setting 62 Grid Line 55 H HDMI 3D Setting 60 HDMI Resolution 60 HQ 28 Hyper Gain 51 I Image Quality Size 56 Image Size 57 Ind...

Page 89: ...n 51 Screen indicators 85 Self diagnosis display Warning indicators 70 Self Timer 52 Setting the date and time 15 Setup 58 Shooting Mode 48 Shutter Speed 50 Side by Side 60 Snow 52 Spotlight 52 Starting PlayMemories Home 38 SteadyShot Movie 53 SteadyShot Photo 53 SummerTime 63 Sunrise Sunset 52 Supplied items 10 T Tele Macro 52 Thumbnail 32 33 Triangulating 29 Tripod 87 Troubleshooting 65 Turning ...

Page 90: ...Additional information on this product and answers to frequently asked questions can be found at our Customer Support Website http www sony net ...

Reviews: