


Du
b
b
in
g
/E
d
itin
g
Dubbing/Editing
105
Dubbing sound to a
recorded tape
You can record additional audio to the
original sound on the tape. You can add
sound to a tape already recorded in the 12-bit
mode without erasing the original sound.
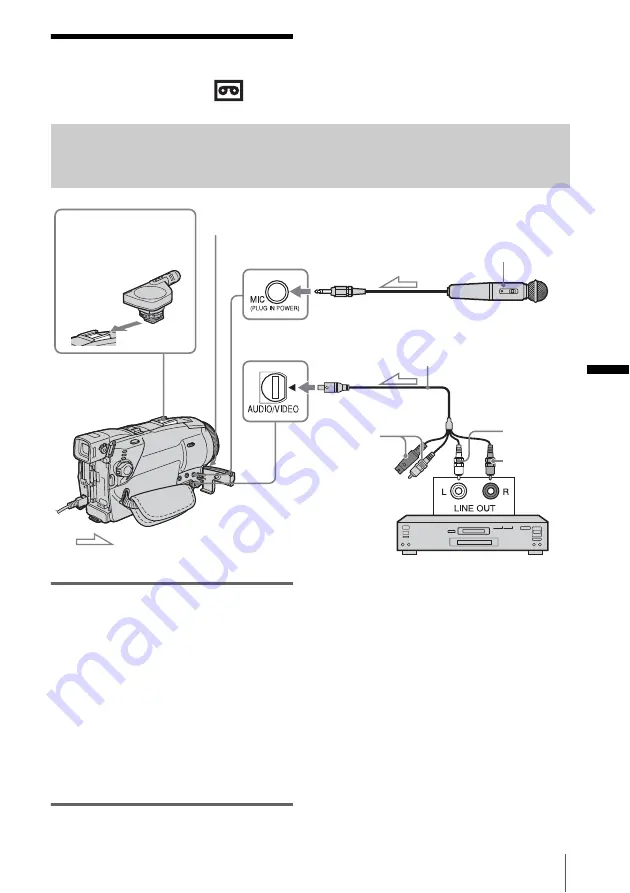
Preparing for audio recording
Record audio in one of the following ways.
• Using the internal microphone (no connection
required).
• Connecting a microphone (optional) to the
MIC jack. (
A
)
• Connecting a microphone (optional) to the
Intelligent accessory shoe. (
B
)
• Connecting audio device to your camcorder
using an A/V connecting cable. (
C
)
The audio input to be recorded takes precedence
over others in the order of MIC jack
t
Intelligent accessory shoe
t
AUDIO/VIDEO
jack
t
internal microphone.
b
Note
• You cannot record additional audio:
– When the tape is recorded in the 16-bit mode.
– When the tape is recorded in the LP mode.
– When your camcorder is connected via the i.LINK
cable.
– On blank sections of the tape.
– When the write-protect tab of the cassette is set to
SAVE.
• When you are using the AUDIO/VIDEO jack or the
internal microphone to record additional sound, the
picture will not be output from the S VIDEO jack or
the AUDIO/VIDEO jack. Check the picture on the
LCD screen or the viewfinder and the sound on the
headphones.
• When you use an external microphone (optional) to
record additional audio, you can check the picture
and the sound by connecting your camcorder to a TV
A
MIC (PLUG IN POWER) jack
Microphone (optional)
A/V connecting cable (supplied)
Intelligent accessory
shoe
See page 139.
B
Internal microphone
Signal flow
C
AUDIO/VIDEO jack
Audio device (such as
CD/MD players)
Do not connect the
S video plug (black)
and the Video plug
(yellow).
Audio output jacks
Audio R
(red)
Audio L
(white)
,
continued


