background image

82

GB

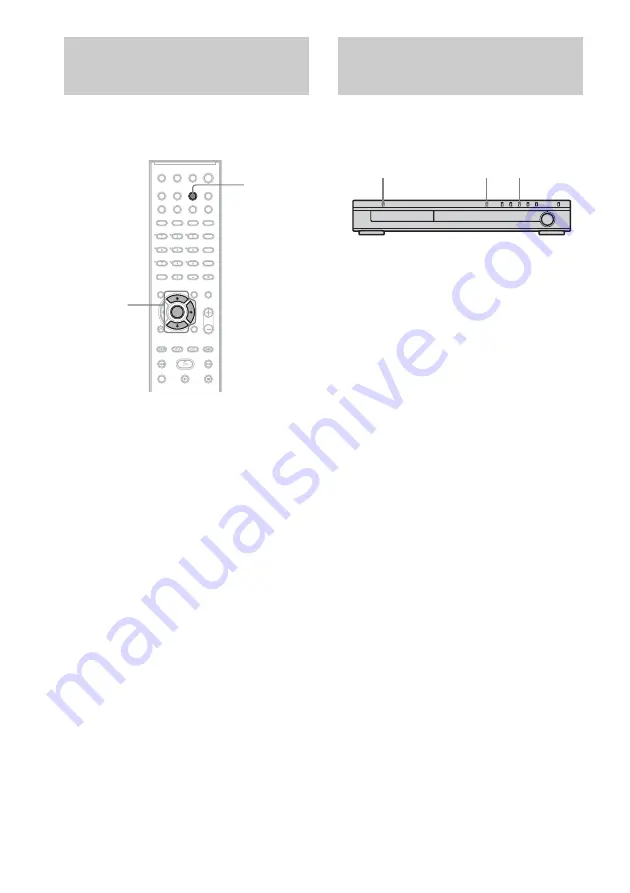
The brightness of the front panel display can be 
set to either of 2 levels.

1

Press AMP MENU.

2

Press 

X

/

x

 repeatedly until “DIMMER” 

appears in the front panel display, then 
press ENTER or 

c

3

Press 

X

/

x

 to select the brightness of 

the front panel display.

4

Press ENTER or AMP MENU.

The AMP menu turns off.


You can return the system parameters, such as 
preset stations, to the default settings.

1

Press 

"

/

1

 to turn on the system.

2

Press 

x

A

, and 

"

/

1

 on the system at 

the same time.

“COLD RESET” appears in the front panel 
display and the default settings are returned.

Changing the Brightness 
of the Front Panel Display

AMP MENU

X/x/c

ENTER

Returning to the Default 
Settings

"

/

1

x

A

Summary of Contents for DAV-DZ700FW

Page 1: ... 2005 Sony Corporation 2 590 890 11 1 DVD Home Theatre System Operating Instructions DAV DZ700FW ...

Page 2: ... sources such as radiators or air ducts or in a place subject to direct sunlight excessive dust mechanical vibration or shock Do not install the unit in an inclined position It is designed to be operated in a horizontal position only Keep the unit and discs away from equipment with strong magnets such as microwave ovens or large loudspeakers Do not place heavy objects on the unit If the unit is br...

Page 3: ...3GB Thank you for purchasing Sony DVD Home Theatre System Before operating this system please read this manual thoroughly and retain it for future reference Welcome ...

Page 4: ... Audio Tracks and Images as a Slide Show with Sound 50 Enjoying DivX Videos 52 Adjusting the Delay Between the Picture and Sound 54 A V SYNC Searching for a Particular Point on a Disc 55 Scan Slow motion Play Freeze Frame Searching for a Title Chapter Track Scene etc 56 Searching by Scene 58 Picture Navigation Viewing Information About the Disc 59 Sound Adjustments Changing the Sound 63 Enjoying S...

Page 5: ...stom Settings 86 CUSTOM SETUP Settings for the Speakers 87 SPEAKER SETUP Additional Information Precautions 90 Notes about the Discs 91 Troubleshooting 91 Self diagnosis Function 94 When letters numbers appear in the display Specifications 95 Glossary 96 Language Code List 99 Index to Parts and Controls 100 DVD Setup Display List 105 AMP Menu List 106 Index 107 ...

Page 6: ... CD ROMs CD Rs CD RWs recorded in the following formats audio CD format video CD format MP3 audio tracks JPEG image files and DivX video files of format conforming to ISO 9660 Level 1 Level 2 or its extended format Joliet About This Manual Symbol Meaning Functions available for DVD VIDEOs DVD Rs DVD RWs in video mode and DVD Rs DVD RWs Functions available for DVD RWs in VR Video Recording mode Fun...

Page 7: ... there are some that do not conform to the CD standard and may not be playable by this product Note on DualDisc This product is designed to playback discs that conform to the Compact Disc CD standard A DualDisc is a two sided disc product which mates DVD recorded material on one side with digital audio material on the other side Please be aware that the audio side of a DualDisc may not play on thi...

Page 8: ...re on one side it is not necessary to turn the disc over 3To select a layer see Selecting a Playback Area for a Super Audio CD page 44 4To select an area see Selecting a Playback Area for a Super Audio CD page 44 Region code Your system has a region code printed on the back of the unit and will only play DVDs labeled with the same region code DVD VIDEOs labeled will also play on this system If you...

Page 9: ...s otherwise authorized by Macrovision Reverse engineering or disassembly is prohibited This system incorporates with Dolby 1 Digital and Dolby Pro Logic II adaptive matrix surround decoder and the DTS 2 Digital Surround System 1Manufactured under license from Dolby Laboratories Dolby Pro Logic and the double D symbol are trademarks of Dolby Laboratories 2Manufactured under license from Digital The...

Page 10: ...l Menu display as follows Control Menu display The Control Menu display 1 and 2 will show different items depending on the disc type For details about each item see the pages in parentheses Guide to the Control Menu Display DISPLAY Control Menu display 1 m Control Menu display 2 appears for certain discs only m Control Menu display off ...

Page 11: ... Relevant Disc Type TITLE page 56 SCENE page 56 TRACK page 56 Selects the title scene or track to be played CHAPTER page 56 INDEX page 56 Selects the chapter or index to be played INDEX page 56 Displays the index and selects the index to be played TRACK page 56 Selects the track to be played ORIGINAL PLAY LIST page 44 Selects the type of titles DVD RW to be played the ORIGINAL one or an edited PLA...

Page 12: ...e disc all titles all tracks all albums repeatedly or one title chapter track album repeatedly PARENTAL CONTROL page 71 Sets to prohibit playback on this system SETUP page 83 QUICK Setup page 35 Use Quick Setup to choose the desired language of the on screen display the aspect ratio of the TV and the size of the speakers you are using CUSTOM Setup In addition to the Quick Setup setting you can adj...

Page 13: ...u can control the system using the supplied remote Insert two Size AA R6 batteries by matching the 3 and ends on the batteries to the markings inside the compartment When using the remote point it at the remote sensor on the system Do not leave the remote in an extremely hot or humid place Do not use a new battery with an old one Do not drop any foreign object into the remote casing particularly w...

Page 14: ...the AC Power Cord Mains Lead page 32 Step 6 Turning off the Demonstration page 32 Step 7 Adjusting the Wireless System page 33 Step 8 Performing the Quick Setup page 35 Video signal is sent to the TV and is output from the TV screen audio signals are processed by this system and output from the speakers of this system You can also enjoy sound of other sources such as TV programs in addition to DVD...

Page 15: ...y the speaker parameters distance level etc on page 87 Required cords Speaker cords The connector and the color tube of the speaker cords are the same color as the label of the jacks to be connected Required equipments for the wireless system IR transmitter Transmits the sound by the infrared ray Connect it to the system IR receiver Receive the sound by the infrared ray Connect it to the surround ...

Page 16: ...e surround speakers and the IR receiver to the surround amplifier Attaching the speaker stand to the speaker Before connecting the speakers attach the speaker stand to the speaker Spread a cloth on the floor to avoid damaging the floor You can use the speaker without the speaker stand by installing it on the wall page 22 1 Insert the post into the base Note Tip IR receiver IR receiver stand Delta ...

Page 17: ...he short post is for tabletop use 2 Secure the base to the post by screws 3 Draw the speaker cord through the hole on the base then stand it up Post long Post short Screw holes Base or Screws 3 Bottom of the base Speaker cord Bottom of the base continued ...

Page 18: ... speaker cord through the hole on the speaker 5 Mount the speaker on the post Do not catch the speaker cord between the speaker and the post Do not drop the speaker when mounting Note Speaker cord Speaker Hole Speaker ...

Page 19: ...tarted 19GB 6 Connect the speaker cord to the speaker then adjust the length of the speaker cord 7 Attach the terminal cover to the speaker by screws Adjust the length of the speaker cord Screws 2 Terminal cover ...

Page 20: ...NTER WOOFER DIGITAL IN OPTICAL DIGITAL IN COAXIAL SURROUND L SURROUND R SPEAKER DIR R2 Front speaker R Center speaker Front speaker L Surround speaker L Subwoofer Surround speaker R Rear side of the front speaker Rear side of the front speaker Rear side of the surround speaker Rear side of the surround speaker Surround amplifier IR transmitter IR receiver ...

Page 21: ... incandescent lamp The cords of the IR transmitter and IR receiver are for this system only You cannot use a commercially available extension cord Notes on placing the surround amplifier and speaker base Do not step and place objects other than supplied speakers on the surround amplifier and speaker base When you install the speaker on the surround amplifier or speaker base make sure the speaker i...

Page 22: ...r cord to the appropriate terminal on the components 3 to 3 and to If the cords are reversed the sound will lack bass and may be distorted Installing the speakers on the wall 1 Prepare screws not supplied that are suitable for the hole on the back of each speaker See the illustrations below 2 Fasten the screws to the wall The screws should protrude 7 to 8 mm 9 32 to 11 32 inch 3 Peel the seals off...

Page 23: ...n them to the wall Install the speakers on a vertical and flat wall where reinforcement is applied Contact a screw shop or installer regarding the wall material or screws to be used Sony is not responsible for accident or damage caused by improper installation insufficient wall strength or improper screw installation natural calamity etc Note Wall mount pads 7 7 mm 3 mm thick 9 32 9 32 inch 1 8 in...

Page 24: ...e range that the infrared rays can reach Do not install the IR receiver in a place exposed to direct sunlight or strong light such as an incandescent lamp Do not use the IR transmitter or IR receiver that is not supplied with the system Note 10 10 10 10 Infrared signal IR transmitter Infrared signal IR transmitter IR receiver IR receiver Approx 10m Approx 10m Top view Side view ...

Page 25: ...fter connecting the FM wire antenna aerial keep it as horizontal as possible When you connect the supplied AM loop antenna aerial cord A or cord B can be connected to either terminal If you have poor FM reception use a 75 ohms coaxial cable not supplied to connect the system to an outdoor FM antenna aerial as shown below Step 2 Antenna Aerial Hookup Note Tip AM loop antenna aerial FM wire antenna ...

Page 26: ...e the input mode of the TV to RGB signals Refer to the operating instructions supplied with the TV to be connected When connecting to a TV with the COMPONENT VIDEO IN jacks Connect a component video cord not supplied To use the COMPONENT VIDEO OUT jacks Y PB CB PR CR your TV monitor must be equipped with via COMPONENT VIDEO IN jacks Y PB CB Step 3 TV Hookup INPUT FROM VIDEO EURO AV Y PB CB PR CR S...

Page 27: ... or P VIDEO appears in the front panel display when the system outputs progressive signals 1 Press FUNCTION repeatedly to select DVD 2 Press PROGRESSIVE Each time you press PROGRESSIVE the display changes as follows x P AUTO PROGRESSIVE AUTO Select this setting when your TV accepts progressive signals and the TV is connected to the COMPONENT VIDEO OUT jacks Normally select this under the above con...

Page 28: ...at 30 frames 60 fields per second Film based software is derived from film and displays images at 24 frames per second Some DVD software contains both video and film In order for these images to appear natural on your screen when output in progressive format the progressive signals need to be converted to match the type of DVD software that you are watching When you play video based software in pr...

Page 29: ... components such as a VCR cannot be connected you can connect other components with the coaxial cable not supplied to the COAXIAL DIGITAL IN jack page 31 To listen to the TV sound select the function by pressing FUNCTION For details see page 68 When you want to output the TV sound or stereo sound of a 2 channel source from the 6 speakers select the Dolby Pro Logic Dolby Pro Logic II MOVIE or Dolby...

Page 30: ... Connect the VCR or other components to the VIDEO VIDEO AUDIO IN jacks using the video audio cord not supplied When connecting a cord be sure to match the color coded sleeves to the appropriate jacks on the components Step 4 Other Component Hookup Note R AUDIO OUT L VIDEO OUT COAXIAL DIGITAL OUT OPTICAL DIGITAL OUT SPEAKER COAXIAL FM 75 Y R AUDIOIN VIDEOIN L PB CB PR CR DVD ONLY SAT VIDEO DIR T1 C...

Page 31: ...s the analogue signal will be processed after 2 seconds If you connect a digital satellite receiver without an DIGITAL OUT jack Connect the digital satellite receiver to the VIDEO AUDIO IN jacks only of the system To listen to the portable audio source sound through the system Connect the audio output jacks of the portable audio source to the AUDIO IN jack on the front panel of the system with the...

Page 32: ...demonstration turns off When you press 1 on the system the demonstration does not turn off When you set the demonstration mode in the AMP menu to on the demonstration does not turn off even though you press 1 on the remote To turn off the demonstration set the demonstration mode to off then press 1 on the remote Setting the demonstration mode on off 1 Press AMP MENU 2 Press X x repeatedly until DE...

Page 33: ... receiver is receiving an infrared ray from another Sony s wireless product Move the IR transmitter and or the IR receiver so that the POWER ON LINE indicator turns green Example for installation Position the IR transmitter and IR receiver as illustrated Install the IR transmitter and IR receiver in direct line with each other and adjust the orientation of the IR transmitter and IR receiver until ...

Page 34: ...that both delta marks on the IR receiver and stand are aligned page 16 To hang the IR transmitter on a wall 1 Rotate the stand of the IR transmitter 2 Install 2 commercially available screws in the wall so that it protrudes 4 mm Install the screws 30 mm apart 3 Hang the IR transmitter via hole on the bottom of the stand on the screw Make sure that the IR transmitter does not move after installatio...

Page 35: ... to the previous adjustment press 1 Turn on the TV 2 Press 1 Disconnect the headphone when you perform the Quick Setup You cannot operate steps after 10 with the headphone connected Make sure that the function is set to DVD 3 Switch the input selector on your TV so that the signal from the system appears on the TV screen Press ENTER to run QUICK SETUP appears at the bottom of the screen If this me...

Page 36: ...ccept RGB signals no picture appears on the TV screen even if you select RGB Refer to the instructions supplied with your TV 10Press ENTER The Setup Display for selecting the speaker distance appears 11Press X x to select the front speaker distance from the listening position then press ENTER You can set from 1 0 to 7 0 meters 4 to 23 ft 12Press X x to select the center speaker distance from the l...

Page 37: ...lace the center speaker up to 1 6 meters 5 ft closer B and the surround speakers up to 5 0 meters 16 ft closer C to the listening position The front speakers can be placed from 1 0 to 7 0 meters 4 to 23 ft A from the listening position Place speakers as illustrated below Do not place the center and surround speakers farther away from the listening position than the front speakers If you encounter ...

Page 38: ...38GB If color irregularity is observed again Place the speaker further away from the TV set If howling occurs Reposition the speakers or turn down the volume on the system ...

Page 39: ...nu may appear on the TV screen You can play the disc interactively by following the instructions on the menu DVD page 43 VIDEO CD page 45 To save the power in standby mode Press 1 while the system turns on To cancel standby mode press 1 once Additional operations Playing Discs Playing Discs 1 FUNCTION Adjust the volume Connect headphone H Disc tray A 1 FUNCTION x H X MUTING VOLUME REPEAT X x c ENT...

Page 40: ...hange the play mode you change the settings on the Setup Display you change the function by pressing FUNCTION you disconnect the AC power cord mains lead For DVD RWs in VR mode CDs Super Audio CDs DATA CDs and DATA DVDs the system remembers the resume playback point for the current disc The resume point is cleared when you eject the disc the system enters standby mode DATA CD DATA DVD only Resume ...

Page 41: ... Program Play Program Play starts When the program ends you can restart the same program again by pressing H To return to normal play Press CLEAR or select OFF in Step 2 To play the same program again select ON in Step 3 and press ENTER To turn off the Control Menu Press DISPLAY repeatedly until the Control Menu is turned off To change or cancel a program 1 Follow steps 1 to 3 of Creating your own...

Page 42: ...X x to select the item to be shuffled x When playing a VIDEO CD Super Audio CD or CD TRACK shuffles tracks on the disc x When Program Play is activated ON shuffles tracks selected in Program Play 4 Press ENTER Shuffle Play starts To return to normal play Press CLEAR or select OFF in Step 2 To turn off the Control Menu Press DISPLAY repeatedly until the Control Menu is turned off You can set Shuffl...

Page 43: ...AT option press H Repeat Play starts You can quickly display the REPEAT status by pressing REPEAT Each time you press REPEAT the REPEAT option changes You cannot use this function with VIDEO CDs and Super VCDs with PBC playback When playing a DATA CD which contains MP3 audio track and JPEG image files and their playing time are not the same the audio sound will not match the image When MODE MP3 JP...

Page 44: ...s ENTER Selecting a playback area on a 2 channel Multi channel Super Audio CD Some Super Audio CDs consist of a 2 channel playback area and a multi channel playback area You can select the playback area you want to listen to 1 Press MULTI 2CH when the system is in stop mode The following display appears 2 Press MULTI 2CH repeatedly to select the item MULTI plays a multi channel playback area 2CH p...

Page 45: ...cannot change a playback area by pressing MULTI 2CH With PBC Playback Control functions you can enjoy simple interactive operations search functions and other such operations PBC playback allows you to play VIDEO CDs interactively by following the menu on the TV screen 1 Start playing a VIDEO CD with PBC functions The menu for your selection appears 2 Select the item number you want by the number ...

Page 46: ...format for the system to recognize the tracks or files You can also play discs recorded in Multi Session See the instructions supplied with the CD R CD RW drives and the recording software not supplied for details on the recording format About the multi session disc If MP3 audio tracks or JPEG image files are recorded in the first session the system will also play MP3 audio tracks or JPEG image fi...

Page 47: ...ars page 48 the album names are arranged in the following order A t B t C t D t F t G Albums that do not contain tracks or files such as album E do not appear in the list If you add numbers 01 02 03 etc to the front of the track file names when you store the tracks or files in a disc the tracks and files will be played in that order Since a disc with many trees takes longer to start playback it is...

Page 48: ... to press after the last track on the first album but that you cannot return to the previous album by pressing To return to the previous album select the album from the album list To play the next or previous JPEG image file Press C c when the Control Menu is not displayed Note that you can select the next album by continuing to press c after the last image on the first album but that you cannot r...

Page 49: ...album and press PICTURE NAVI Images of files in the album appear in 16 subscreens 3 Press C X x c to select the image you want to view and press ENTER To play the next or previous JPEG image file Press C c when the Control Menu is not displayed Note that you can select the next album by continuing to press c after the last image on the first album but that you cannot return to the previous album b...

Page 50: ... X You can also change the slide show duration page 51 and effect page 52 while playing JPEG image file You can play a slide show with sound by first placing both MP3 and JPEG files in the same album on a DATA CD When you play back the DATA CD select AUTO mode as explained below 1 Load a DATA CD 2 Press DISPLAY The Control Menu appears 3 Press X x to select MODE MP3 JPEG then press ENTER The optio...

Page 51: ...nd JPEG image files in the DATA CD the No audio data and No image data messages appear on the screen If you set MODE MP3 JPEG to IMAGE JPEG on a disc that contains MP3 tracks only or AUDIO MP3 on a disc that contains JPEG files only you may not able to change the MODE MP3 JPEG setting PICTURE NAVI does not work when AUDIO MP3 is selected If you play large MP3 track data and JPEG image data at the ...

Page 52: ...Video Files DivX is a video file compression technology developed by DivXNetworks Inc This product is an official DivX Certified product You can play DATA CDs and DATA DVDs that contain DivX video files DATA CDs and DATA DVDs that the system can play Playback of DATA CDs CD ROMs CD Rs CD RWs and DATA DVDs DVD Rs DVD RWs DVD Rs DVD RWs on this system is subject to certain conditions With DATA CDs t...

Page 53: ...video file the picture may be unclear or the sound may skip The system cannot play some DivX video files that are longer than 3 hours Playing DivX Video Files You can play DivX video files on DATA CDs CD ROMs CD Rs CD RWs and DATA DVDs DVD Rs DVD RWs DVD Rs DVD RWs You can view the disc information while playing a DivX video file page 59 If there are no DivX video files recorded on a DATA DVD a me...

Page 54: ...the album list If the number of viewing times is preset you can play the DivX video files as many times as the preset number The following occurrences are counted when the system is turned off when the disc tray is opened when another file is played When the sound does not match the pictures on the screen you can adjust the delay between the picture and sound 1 Press AMP MENU 2 Press X x repeatedl...

Page 55: ...k speed is faster than 1M 1m Watching frame by frame Slow motion Play DVD DVD RW DivX video VIDEO CD only Press m or M when the system is in pause mode To return to the normal playback speed press H Each time you press m or M during Slow motion Play the playback speed changes Two speeds are available With each press the indication changes as follows Playback direction 2 y 1 Opposite direction DVD ...

Page 56: ... numbers on the disc you can select the desired one by entering its number Or you can search for a scene using the time code 1 Press DISPLAY When playing a DATA CD with JPEG image files press DISPLAY twice The Control Menu appears 2 Press X x to select the search method x When playing a DVD VIDEO DVD RW TITLE CHAPTER TIME TEXT Select TIME TEXT to search for a starting point by inputting the time c...

Page 57: ... then select another number 5 Press ENTER The system starts playback from the selected number To search for a scene using the time code DVD VIDEO only 1 In Step 2 select TIME TEXT T playing time of the current title is selected 2 Press ENTER T changes to T 3 Input the time code using the number buttons then press ENTER For example to find the scene at 2 hours 10 minutes and 20 seconds after the be...

Page 58: ... title chapter or track appears as follows 4 Press C X x c to select a title chapter or track and press ENTER Playback starts from the selected scene To return to normal play during setting Press O RETURN or DISPLAY If there are more than 9 titles chapters or tracks V is displayed at the bottom right of the screen To display the additional titles chapters or tracks select the bottom scenes and pre...

Page 59: ...anges as shown in the charts When playing a DVD VIDEO or DVD RW When playing a DATA CD DivX video or DATA DVD DivX video ViewingInformationAbout the Disc DISPLAY DISPLAY t Playing time and number of the current title r Remaining time of the current title r Playing time and number of the current chapter r Remaining time of the current chapter r Disc name r Title and chapter r The display returns to...

Page 60: ...ears on the front panel display Viewing the Station Name or Frequency in the front panel display When the system is set to TUNER AM or TUNER FM you can check the frequency using the front panel display Press DISPLAY Each time you press DISPLAY the display changes as shown in the charts 1 This is displayed if you have entered a name for a preset station page 80 2 Returns to the original display whe...

Page 61: ...be displayed Checking the play information of the Disc To check DVD Super Audio CD CD text Press DISPLAY repeatedly in Step 2 to display text recorded on the DVD Super Audio CD CD The DVD Super Audio CD CD text appears only when text is recorded in the disc You cannot change the text If the disc does not contain text NO TEXT appears To check DATA CD MP3 audio DivX video DATA DVD DivX video text By...

Page 62: ...lectronics and Information Technology Industries Association JEITA Date information is DD MM YYYY DD Day MM Month YYYY Year If there is no date information or data is damaged on the disc the system cannot display the date information Tip Note 1 8 1 2 0 01 01 2003 DATA CD JPEG Date information ...

Page 63: ...guage is displayed two or more times the DVD VIDEO is recorded in multiple audio formats x When playing a DVD RW The audio streams recorded on a disc are displayed The default setting is underlined Example 1 AUDIO 2 AUDIO 2 AUDIO does not appear when one audio stream is recorded on the disc x When playing a VIDEO CD CD or DATA CD MP3 audio The default setting is underlined STEREO the standard ster...

Page 64: ...D DivX video or DATA DVD DivX video Example MP3 audio About audio signals Audio signals recorded in a disc contain the sound elements channels shown below Each channel is output from a separate speaker Front L Front R Center Surround L Surround R Surround Monaural This signal can be either the Dolby Surround Sound processed signals or the Dolby Digital sound s monaural Surround audio signals LFE L...

Page 65: ... x 2 CHANNEL STEREO This mode outputs the sound from the front left and right speakers and subwoofer Standard 2 channel stereo sources completely bypass the sound field processing Multi channel surround formats are downmixed to two channels This allows you to play any source using only the front left and right speakers and subwoofer Outputting 2 channel sources like CDs by 5 1channel x Dolby Pro L...

Page 66: ...atching science fiction or action movies with lots of sound effects x CINEMA STUDIO EX C Cinema Studio EX C Reproduces the sound characteristics of the Sony Pictures Entertainment scoring stage This mode is ideal for watching musicals or classic films where music is featured in the soundtrack About Cinema Studio EX Cinema Studio EX is ideal for enjoying the movie software encoded with multi channe...

Page 67: ...ching movies at night Enjoying the surround sound by headphones x HEADPHONE THEATER This mode outputs the sound as surround from headphone L R x HEADPHONE 2CHANNEL STEREO This mode outputs the sound from headphone L R Standard 2 channel stereo sources completely bypass the sound field processing Multi channel surround formats are downmixed to two channels To turn the surround effect off Press SOUN...

Page 68: ...ck digital connection at the same time the digital connection takes priority Reinforcing bass frequencies You can reinforce bass frequencies Press DSGX Bass frequencies are effectively reinforced To turn off the sound effect Press DSGX again Enjoying the sound at low volume Narrows the dynamic range of the sound track Useful for watching movies at low volume late at night 1 Press AMP MENU 2 Press ...

Page 69: ...Sound Adjustments 69GB 4 Press ENTER or AMP MENU The AMP menu turns off AUDIO DRC only applies to Dolby Digital sources Note ...

Page 70: ...es on or off while playing If multilingual subtitles are recorded on the disc you can change the subtitle language while playing or turn the subtitles on or off whenever you want You can select a language you are learning for example and turn on the subtitles for better understanding Press SUBTITLE during playback Each time you press SUBTITLE the subtitle language changes Depending on the DVD VIDE...

Page 71: ...yback 2 Press DISPLAY while the system is in stop mode The Control Menu appears 3 Press X x to select PARENTAL CONTROL then press ENTER The options for PARENTAL CONTROL appear 4 Press X x to select ON t then press ENTER x If you have not entered a password The display for registering a new password appears Enter a 4 digit password using the number buttons then press ENTER The display for confirmin...

Page 72: ...a predetermined level such as the age of the users The PARENTAL CONTROL function allows you to set a playback limitation level 1 Press DISPLAY while the system is in stop mode The Control Menu appears 2 Press X x to select PARENTAL CONTROL then press ENTER The options for PARENTAL CONTROL appear 3 Press X x to select PLAYER t then press ENTER x If you have not entered a password The display for re...

Page 73: ... playback If you forget your password remove the disc and repeat steps 1 to 3 of Preventing playback of specific discs CUSTOM PARENTAL CONTROL When you are asked to enter your password enter 199703 using the number buttons then press ENTER The display will ask you to enter a new 4 digit password After you enter a new 4 digit password replace the disc in the system and press H When the display for ...

Page 74: ... confirm your password re enter it using the number buttons then press ENTER If you make a mistake entering your password Press C before you press ENTER and input the correct number Standard Code number Argentina 2044 Australia 2047 Austria 2046 Belgium 2057 Brazil 2070 Canada 2079 Chile 2090 China 2092 Denmark 2115 Finland 2165 France 2174 Germany 2109 India 2248 Indonesia 2238 Italy 2254 Japan 2...

Page 75: ...l the TV You can control the TV by using following buttons Only for the Sony TVs You can select the TV channels by using the number buttons is for selecting a channel number greater than 10 For example for channel 25 press then 2 and 5 Depending on the TV you may not be able to control your TV or to use some of the buttons above Other Operations Controlling the TV with the Supplied Remote Note TV ...

Page 76: ...e THEATRE SYNC function Point the remote to the direction of TV and this system then press THEATRE SYNC once If this function does not work change the transmit time The transmit time varies depending on the TV To change the transmit time Press and hold TV CH while entering the code for transmit time see the table using the number buttons The transmit time from the remote is selected Using the THEA...

Page 77: ...or AUDIO IN jack on the front panel Refer to the operation manual supplied with the components for further information on the operation Press FUNCTION repeatedly until VIDEO SAT or AUDIO appears in the front panel display Each time you press FUNCTION the mode of the system changes in the following sequence DVD t TUNER FM t TUNER AM t VIDEO t TV t SAT t AUDIO t DVD t Changing the output level of th...

Page 78: ... broadcast signal To receive the AC 3 signal you need to connect a digital satellite tuner to the system with an optical cable or coaxial cable page 31 and set the digital output mode of the digital satellite tuner to AC 3 1 Press AMP MENU 2 Press x X repeatedly until DUAL MONO appears in the front panel display then press ENTER or c 3 Press x X to select the sound you want MAIN main sound is outp...

Page 79: ...the preset number you want 7 Press ENTER The station is stored 8 Repeat 1 to 7 to store other stations To change the preset number Restart from Step 1 Listening to the radio Preset radio stations in the system s memory first see Presetting radio stations page 79 1 Press FUNCTION repeatedly until FM or AM appears in the front panel display The last received station is tuned in 2 Press PRESET or rep...

Page 80: ...ed for each preset station 1 Press FUNCTION repeatedly until FM or AM appears in the front panel display The last station you received is tuned in 2 Press PRESET or repeatedly to select the preset station you want to create an index name for 3 Press TUNER MENU 4 Press C X x c repeatedly until NAME IN appears in the front panel display 5 Press ENTER 6 Create a name by using the cursor buttons Press...

Page 81: ...ving RDS broadcasts Simply select a station from the FM band When you tune in a station that provides RDS services the station name appears in the TUNER information If an RDS broadcast is not received the station name may not appear in the display You can set the system to turn off at a preset time so you can fall asleep listening to music You can preset the time in 10 minutes decrements Press SLE...

Page 82: ...he front panel display 4 Press ENTER or AMP MENU The AMP menu turns off You can return the system parameters such as preset stations to the default settings 1 Press 1 to turn on the system 2 Press x A and 1 on the system at the same time COLD RESET appears in the front panel display and the default settings are returned Changing the Brightness of the Front Panel Display AMP MENU X x c ENTER Return...

Page 83: ...NTER The Setup Display appears 4 Press X x to select the setup item from the displayed list LANGUAGE SETUP SCREEN SETUP CUSTOM SETUP or SPEAKER SETUP Then press ENTER The Setup item is selected Example SCREEN SETUP 5 Select an item using X x then press ENTER The options for the selected item appear Example TV TYPE 6 Select a setting using X x then press ENTER The setting is selected and setup is c...

Page 84: ...ou can select the desired language for the disc s menu x AUDIO DVD VIDEO only Switches the language of the sound track When you select ORIGINAL the language given priority in the disc is selected x SUBTITLE DVD VIDEO only Switches the language of the subtitle recorded on the DVD VIDEO When you select AUDIO FOLLOW the language for the subtitles changes according to the language you selected for the...

Page 85: ...creen in stop mode or while playing a Super Audio CD CD or DATA CD MP3 audio Settings for the Display SCREEN SETUP 4 3 LETTER BOX Select this when you connect a 4 3 screen TV Displays a wide picture with bands on the upper and lower portions of the screen 4 3 PAN SCAN Select this when you connect a 4 3 screen TV Automatically displays the wide picture on the entire screen and cuts off the portions...

Page 86: ...nly Gives the sound track which contains the highest number of channels priority when you play a DVD VIDEO on which multiple audio formats PCM DTS MPEG audio or Dolby Digital format are recorded When you set the item to AUTO the language may change The TRACK SELECTION setting has higher priority than the AUDIO settings in LANGUAGE SETUP page 84 Depending on the disc this function may not work If P...

Page 87: ...e Using the Setup Display page 83 The default settings are underlined You cannot operate these setup items when you connect headphones to the system To return to the default setting when changing a setting Select the item then press CLEAR Note that only the SIZE setting does not return to the default setting x SIZE If you do not connect center or surround speakers or move the surround speakers set...

Page 88: ...t be effective x LEVEL FRONT You can vary the level of front speakers as follows Be sure to set TEST TONE to ON for easy adjustment FRONT YES CENTER YES Normally select this NONE Select this if no center speaker is used SURROUND BEHIND Select this if surround speakers are located in section B SIDE Select this if surround speakers are located in section A NONE Select this if no surround speaker is ...

Page 89: ...ll hear the test tone from each speaker in sequence 7 From your listening position adjust the value of LEVEL FRONT or LEVEL SURROUND using C X x c The test tone is emitted from only the speaker which you are adjusting 8 Press ENTER when you have finished making adjustments 9 Press X x repeatedly to select TEST TONE then press ENTER 10Press X x repeatedly to select OFF then press ENTER When you adj...

Page 90: ... level inputs or no audio signals If you do the speakers may be damaged when a peak level section is suddenly played On cleaning Clean the cabinet panel and controls with a soft cloth slightly moistened with a mild detergent solution Do not use any type of abrasive pad scouring powder or solvent such as alcohol or benzine If you have any questions or problems concerning your system please consult ...

Page 91: ...em together system IR transmitter and IR receiver Power The power is not turned on Check that the AC power cord mains lead is connected securely If PROTECT and UNPLUG appears alternately in the front panel display Immediately unplug the AC power cord mains lead and check the following items Are the and speaker cords short circuited Are you using only the specified speakers Is anything blocking the...

Page 92: ...nected properly The surround effect is difficult to hear when you are playing a Dolby Digital DTS or MPEG audio sound track Make sure the sound field function is on page 65 Check the speaker connections and settings page 15 87 Depending on the DVD the output signal may not be the entire 5 1 channel It may be monaural or stereo even if the sound track is recorded in Dolby Digital or MPEG audio form...

Page 93: ...ge file cannot be played The DATA CD is not recorded in a JPEG format that conforms to ISO 9660 Level 1 Level 2 or Joliet It has an extension other than JPEG or JPG It is larger than 3 072 width 2 048 height in normal mode or more than 3 300 000 pixels in Progressive JPEG It does not fit the screen those images are reduced The MODE MP3 JPEG setting has been set to AUDIO MP3 page 50 If you cannot c...

Page 94: ... MP3 audio track JPEG image file DivX video file you want to play is broken The data is not MPEG1 Audio Layer 3 data The JPEG image file format does not conform to DCF The JPEG image file has the extension JPG or JPEG but is not in JPEG format The file you want to play has the extension AVI or DIVX but is not in DivX format or is in DivX format but does not conform to a DivX Certified profiles The...

Page 95: ...ep Antenna aerial FM wire antenna aerial Antenna aerial terminals 75 ohms unbalanced Intermediate frequency 10 7 MHz AM tuner section Tuning range 531 1 602 kHz with the interval set at 9 kHz Antenna aerial AM loop antenna aerial Intermediate frequency 450 kHz Video section Outputs Video 1 Vp p 75 ohms R G B 0 7 Vp p 75 ohms COMPONENT Y 1 Vp p 75 ohms PB CB PR CR 0 7 Vp p 75 ohms Input VIDEO 1 Vp ...

Page 96: ...ting Satellite Receiver and other high quality media In order to ensure that the subtle nuances endowed by these high quality media would be transmitted with no accompanying deterioration Sony developed a technology called Digital Infrared Audio Transmission for the infrared transmission of digital audio signals using no compression and it introduced it into the system This technology transfers di...

Page 97: ...veloped by Digital Theater Systems Inc This technology conforms to 5 1 channel surround This format comprises of stereo rear channel and there is discrete subwoofer channel in this format DTS provides the same 5 1 discrete channels of high quality digital audio The good channel separation is realized due to the all channel data being recorded discretely and processed in digitally DVD A disc that c...

Page 98: ...is compatible with the 525 progressive format Region Code This system is used to protect copyrights A region number is allocated on each DVD system or DVD disc according to the sales region Each region code is shown on the system as well as on the disc packaging The system can play discs that match its region code The system can also play discs with the mark Even when the region code is not shown ...

Page 99: ...russian 1059 Bulgarian 1060 Bihari 1061 Bislama 1066 Bengali Bangla 1067 Tibetan 1070 Breton 1079 Catalan 1093 Corsican 1097 Czech 1103 Welsh 1105 Danish 1109 German 1130 Bhutani 1142 Greek 1144 English 1145 Esperanto 1149 Spanish 1150 Estonian 1151 Basque 1157 Persian 1165 Finnish 1166 Fiji 1171 Faroese 1174 French 1181 Frisian 1183 Irish 1186 Scots Gaelic 1194 Galician 1196 Guarani 1203 Gujarati...

Page 100: ...parentheses Front panel A 1 on standby 32 39 82 B Disc tray 39 C A open close 39 82 D H play 39 E X pause 39 F x stop 39 82 G 39 H FUNCTION 39 I PHONES jack 39 J VOLUME 39 K remote sensor 13 L Front panel display 101 M AUDIO IN jack Index to Parts and Controls ...

Page 101: ...a title or chapter appears in the front panel display DVD only C Monaural Stereo effect Radio only 79 D Lights up when 2 channel source is output from the surround speakers 66 E Current sound effect 68 F Current surround format Except for Super Audio CD 64 G Current mode DVD function only H Lights up during MULTI channel playback Super Audio CD only 44 I Playing status DVD function only ...

Page 102: ...acks 26 E EURO AV T OUTPUT TO TV jacks 26 F AM terminal 25 G FM 75Ω COAXIAL jack 25 H DIR T1 jack 15 I VIDEO VIDEO AUDIO IN jacks 28 30 SPEAKER COAXIAL FM 75 Y R AUDIOIN VIDEOIN L PB CB PR CR DVD ONLY SAT VIDEO DIR T1 COMPONENT VIDEO OUT EURO AV OUTPUT TO TV AM FRONT R FRONT L CENTER WOOFER DIGITAL IN OPTICAL DIGITAL IN COAXIAL ...

Page 103: ...5 79 P m SLOW TUNING 55 79 Q H play 39 The H button has a tactile dot R TV 75 S THEATRE SYNC 76 T 1 on standby 32 39 79 U AMP MENU 32 77 82 V DSGX 68 W FUNCTION 27 39 68 77 X SOUND FIELD 65 Y DISPLAY 79 Z PICTURE NAVI 49 wj AUDIO 63 wk SUBTITLE 70 wl ANGLE 70 e ALBUM 39 76 ea MENU 43 es MUTING 39 ed VOLUME TV VOL 39 75 79 The VOLUME TV VOL button has a tactile dot ef DISPLAY 10 35 41 71 83 eg PRES...

Page 104: ...104GB Surround amplifier A POWER ON LINE indicator 33 B POWER 33 C DIR R2 jack 15 D SPEAKER jacks 15 POWER ON LINE POWER SURROUND L SURROUND R SPEAKER DIR R2 Front panel Rear panel ...

Page 105: ...want to use from the displayed language list SCREEN SETUP TV TYPE SCREEN SAVER BACKGROUND 16 9 4 3 LETTER 4 3 PAN SCAN ON OFF PICTURE BLUE BLACK JACKET CUSTOM SETUP TRACK SELECTION AUTO BOX MULTI DISC RESUME ON OFF GRAPHICS PAUSE MODE AUTO FRAME SUBTITLE Select the language you want to use from the displayed language list AUDIO OFF 4 3 OUTPUT FULL NORMAL LINE VIDEO RGB SPEAKER SETUP SIZE DISTANCE ...

Page 106: ...ng items with AMP MENU on the remote AMP Menu List AMP menu AUDIO DRC DRC STD DRC MAX DIMMER DIMMER ON DIMMER OFF DRC OFF DUAL MONO MAIN SUB MAIN SUB MAIN SUB A V SYNC SYNC OFF SYNC ON DEMO DEMO ON DEMO OFF AUDIO ATT ATT ON ATT OFF ...

Page 107: ...e 55 FILE 56 File 97 Film based software 98 Front Panel 100 Front panel display 59 101 H Handling discs 91 Hookup Overview 14 I INDEX 56 Installing the speakers on the wall 22 Instant Advance 39 Instant Replay 39 INTERVAL 51 J JPEG 46 48 L Language Code List 99 LANGUAGE SETUP 84 LEVEL FRONT 88 LEVEL SURROUND 89 LINE 86 Listening to other components 77 Listening to TV sound 68 Locating a specific p...

Page 108: ... play 55 Sound Field 65 SPEAKER SETUP 87 Speaker setup 37 Speaker System Hookup 15 SUBTITLE 70 84 Super Audio CD 8 44 T TEST TONE 89 THEATRE SYNC 76 TIME TEXT 57 TITLE 56 Title 98 TRACK 56 Track 98 TRACK SELECTION 86 Troubleshooting 91 TUNER MENU 79 TV Hookup 26 TV TYPE 85 U Usable discs 6 V VIDEO CD 98 W Wireless system 24 33 Sony Corporation Printed in Korea ...

Reviews: