32
GB
Playing a Disc
Depending on the DVD VIDEO or VIDEO CD,
some operations may be different or restricted.
Refer to the operating instructions supplied with
your disc.
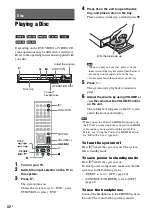
1
Turn on your TV.
2
Switch the input selector on the TV to
this system.
3
Press
"
/
1
.
The system turns on.
Unless the system is set to “DVD,” press
FUNCTION to select “DVD.”
4
Press
Z
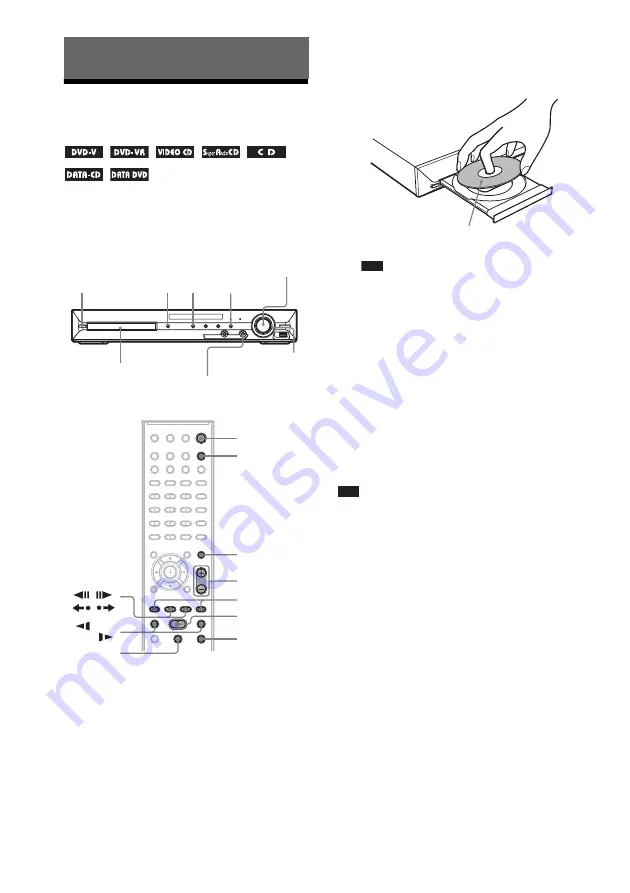
on the unit to open the disc
tray, and place a disc on the tray.
Place one disc on the tray, and then press
Z
.
Note
• When you play an 8 cm disc, place it on the
inner circle of the tray. Be careful that the disc is
not skewed on the inner circle of the tray.
• Do not place more than one disc on the tray.
5
Press
H
.
The system starts playback (continuous
play).
6
Adjust the volume by using /
– on the remote or the VOLUME control
on the unit.
The volume level appears on the TV screen
and in the front panel display.
Note
• When you set the Control for HDMI function to on,
the TV that is connected to the system with an HDMI
cable can be sync-operated with the system. For
details, see “Using the Control for HDMI Function
for “BRAVIA” Sync” (page 61).
To turn the system off
Press
"
/
1
while the system is on. The system
enters standby mode.
To save power in standby mode
Press
"
/
1
while the system is on.
To enter power saving mode, make sure that the
system is in the following status.
– “DEMO” is set to “OFF” (page 24).
– [CONTROL FOR HDMI] is set to [OFF]
To use the headphones
Connect the headphones to the PHONES jack on
the unit. The sound of the system is muted.
Disc
"
/
1
Disc tray
FUNCTION
Adjust the volume
Connect
headphones
N
Z
OPERATION DIAL
"
/
1
FUNCTION
x
H
X
./>
MUTING
/–
/m/
M/
STEP
/
,
/
With the label side up.
Summary of Contents for DAV-DZ290K
Page 117: ...117GB U USB device 63 V VIDEO SETUP 51 VOLUME LIMIT 53 W WMA file 63 ...
Page 118: ......
Page 119: ......


