69
Ad
vance
d s
til
l i
m
ag
e sh
oot
in
g
•
Attaching the supplied lens hood blocks a flash
light.
•
Because the shutter speed is slower under dark
conditions when
(Slow synchro) or
(No
flash) is selected, it is recommended that you
use a tripod.
•
While the flash is being charged, the lamp
flashes. After charging is completed, the lamp
goes out.
•
You can change the brightness of the flash
using [Flash Level] in the menu settings
(page 70). (Except when the mode dial is set to
.)
•
You can mount an external flash on this camera
(page 71).
To pop up the flash manually
(Pop-up Flash mode)
Normally, the flash strobes
automatically according to lighting
conditions. However, you can pop up
the flash only when you want to use it.
Set [Pop-up Flash] to [Manual] in the
SET UP settings (page 140).
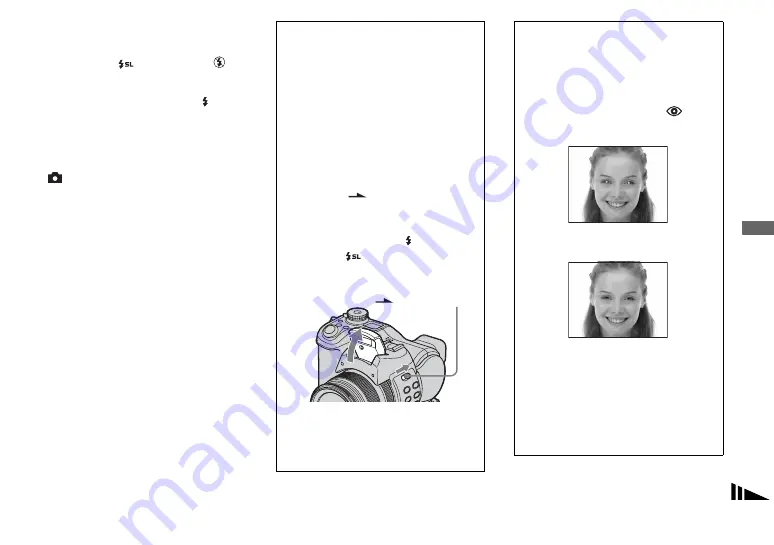
To strobe the flash
1
Slide the
OPEN (FLASH)
switch in the arrow direction.
The flash pops up.
2
Set the flash mode to (Forced
flash) or
(Slow synchro).
3
Shoot the image.
To return to auto mode
Set [Pop-up Flash] to [Auto] in the SET
UP settings.
OPEN (FLASH)
To reduce “red-eye” when
shooting live subjects
The flash pre-strobes before shooting
to reduce the red-eye phenomenon. Set
[Red Eye Reduction] to [On] in the
SET UP settings (page 140).
appears on the screen.
•
The amount of red-eye reduction possible
varies according to the individual. In
addition, the distance to the subject, and
whether or not the subject has seen pre-
strobe light begin to strobe may also
reduce the effectiveness of the red-eye
reduction process.
m


