72
c
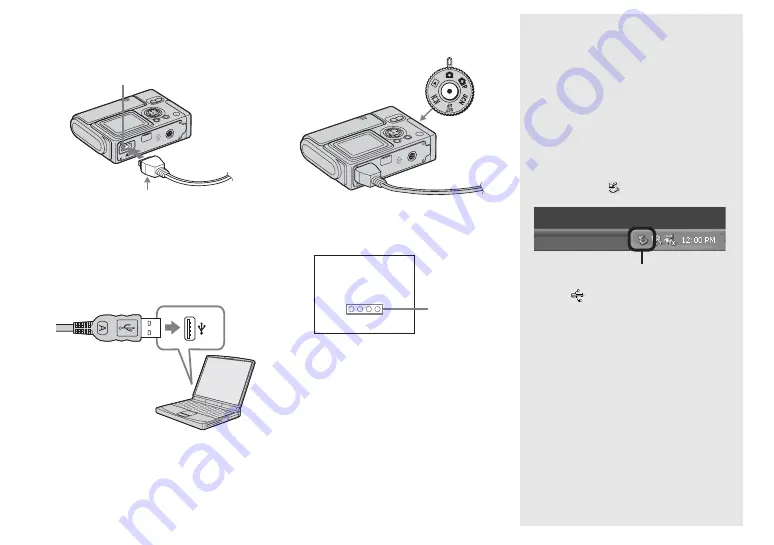
Connect the supplied USB
multi connecting cable to the
multi connector of the camera.
•
When placing the camera, make sure the
LCD screen is facing up.
d
Connect the USB multi
connecting cable to your
computer.
•
When using a desktop computer, connect the
USB multi connecting cable to the USB
connector on the rear panel.
e
Turn on the camera.
•
When using Windows XP, the AutoPlay
wizard automatically appears on the
desktop. Proceed to page 75.
“USB MODE NORMAL” appears on
the LCD screen of the camera. When a
USB connection is established for the
first time, your computer automatically
runs the used program to recognize the
camera. Wait for a while.
•
If “USB MODE NORMAL” does not appear,
confirm that [USB CONNECT] is set to
[NORMAL] in the SET UP settings (page 99).
*
During communication, the access indicators
turn red.
P
Disconnecting the USB multi
connecting cable from your
computer, removing the
“Memory Stick” from the camera,
or turning off the camera
Disconnecting the USB multi connecting
cable from your computer/removing the
“Memory Stick” from the camera/turning
off the camera
For Windows 2000, Me, or XP users
1
Double-click
on the task tray.
2
Click
(Sony DSC), then click [Stop].
3
Confirm the device on the confirmation
window, then click [OK].
4
Click [OK].
This step is unnecessary for Windows
XP users.
5
Disconnect the USB multi connecting
cable from your computer, remove the
“Memory Stick” from the camera, or
turn off the camera.
For Windows 98 or 98SE users
Confirm that the access indicators on the
LCD screen are turned white and carry out
only Step 5 above.
v
mark
Multi connector
USB MODE
NORMAL
Access
indicators*
Double-click
Summary of Contents for Cyber-shot DSC-F77A
Page 109: ...109 Index Z Zoom Playback zoom 54 Using the smart zoom 20 ...
Page 110: ......
Page 111: ......


