background image

107

M

u

si

c Ju

ke
box

Managing Audio Tracks 
on the Music Jukebox 
(HDD only)

You can erase or label artists/albums/tracks 
on the HDD.

1

Press SYSTEM MENU.

The System Menu appears.

2

Select “Music Jukebox,” and press 
ENTER.

3

Select “Listen to Music / Edit,” and 
press ENTER.

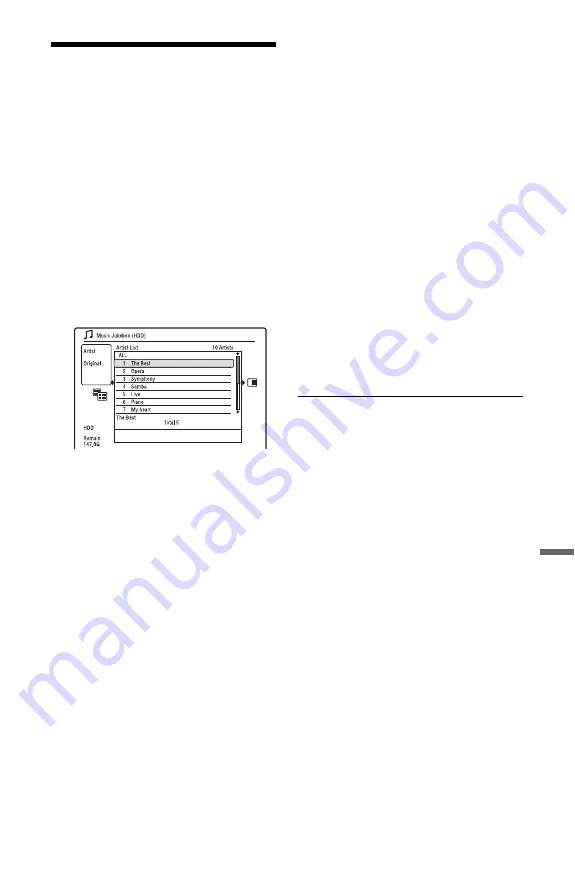
The “Music Jukebox (HDD)” appears.

4

Select an artist, album, or track, and 
press 

,

.

To display an album list, select an artist 
using 

M

/

m

, and press ENTER.

To display a track list, select an album 
using 

M

/

m

, and press ENTER.

5

Select an option, and press ENTER.

“Erase”: Erases the selected artist/
album/track. Select “Yes” when asked 
for confirmation.
“Edit”: Allows you to make the 
following edits. 
• “Artist Name”: Allows you to enter or 

re-enter an artist name (page 44).

• “Album Name”: Allows you to enter 

or re-enter an album name (page 44).

• “Track Name”: Allows you to enter or 

re-enter a track name (page 44).

• “Copy Album”: Allows you to copy an 

album (page 103).

• “Copy Track”: Allows you to copy a 

track (page 103).

“Repeat”: Repeats playback of artist/
album/track (page 105).
“Add to Play List”: Allows you to add 
tracks to a Playlist (page 105).
“Play List Name”: Allows you to enter 
or re-enter a Playlist name (up to 12 
characters) (page 44).

b

Note

You cannot edit audio tracks on the connected 
USB device.

Summary of Contents for 3-295-080-12(1)

Page 1: ...oration RDR HXD790 HXD890 HXD990 HXD1090 RDR HXD795 HXD895 HXD995 HXD1095 DVD Recorder Operating Instructions To find out useful hints tips and information about Sony products and services please visit www sony europe com myproduct ...

Page 2: ... this equipment has a detachable fuse cover be sure to attach the fuse cover after you change the fuse Never use the plug without the fuse cover If you should lose the fuse cover please contact your nearest Sony service station Precautions This unit operates on 220 240 V AC 50 60 Hz Check that the unit s operating voltage is identical with your local power supply To prevent fire or shock hazard do...

Page 3: ...f correctly you will help prevent potentially negative consequences for the environment and human health which could otherwise be caused by inappropriate waste handling of the battery The recycling of the materials will help to conserve natural resources In case of products that for safety performance or data integrity reasons require a permanent connection with an incorporated battery this batter...

Page 4: ... be checked in case of repair or inspection during a malfunction or modification However the contents will not be backed up or saved by Sony If the hard disk needs to be formatted or replaced it will be done at the discretion of Sony All contents of the hard disk drive will be erased including contents that violate copyright laws On power sources The recorder is not disconnected from the AC power ...

Page 5: ...written as HDD and disc is used as a general reference for the HDD DVDs or CDs unless otherwise specifiedbythe text or illustrations Icons such as listed at the top of each explanation indicate what kind of media can be used with the function being explained For details see Recordable and Playable Discs on page 151 Instructions in this manual describe the controls on the remote You can also use th...

Page 6: ... BRAVIA Sync for HDMI connections only 24 Step 3 Connecting the Audio Cords HDMI Cord 25 Step 4 Inserting a Conditional Access Module CAM RDR HXD795 HXD895 HXD995 HXD1095 only 26 Step 5 Connecting the Mains Lead 27 Step 6 Preparing the Remote 27 Controlling TVs with the remote 28 If you have a Sony DVD player or more than one Sony DVD recorder 29 Changing programme positions of the recorder using ...

Page 7: ...e Information 51 Displaying the programme information 51 Viewing Teletext not available in some areas 51 Viewing a Digital Text Service models for the UK only 52 Selecting digital text from dedicated digital teletext channels 52 Selecting digital text from other channels 52 Recording For Freeview 53 Timer Recording EPG Series Manual 53 Recording TV programmes using the EPG 53 Recording programmes ...

Page 8: ...nually Schedule 68 Using the Quick Timer function 69 Recording stereo and bilingual programmes 70 Creating chapters in a title 70 Checking Changing Cancelling Timer Settings Schedule 71 Checking changing timer settings 71 Cancelling timer settings 71 Recording from Connected Equipment 72 Playback 73 Playing 73 Playback options 75 Playing a specific portion repeatedly A B Repeat 77 Playing repeated...

Page 9: ...Playlist title Divide 87 Moving a chapter Move 88 Dubbing HDD y DVD 89 Before Dubbing 89 HDD DVD Dubbing 90 Dubbing Using Dubbing List 90 Making a Backup Disc DVD Backup 93 HDD Camcorder Dubbing 94 Before HDD Camcorder Dubbing 94 Preparing for HDD camcorder dubbing 95 One Touch Dubbing from HDD Camcorder ONE TOUCH DUB 96 Dubbing from HDD Camcorder Using the On Screen Display HDD Cam Dubbing 96 DV ...

Page 10: ... HDD only 107 Photo Album 108 About the Photo Album Function 108 Preparing for Using the Photo Album Function 108 Connecting the USB device 108 Copying JPEG image files to the HDD DISC USB t HDD 108 Copying all JPEG image files from the connected USB device USB t DVD RW DVD R 109 Copying JPEG image files or albums on the HDD HDD y HDD 110 Copying JPEG image albums to a disc HDD t DVD RW DVD R 110 ...

Page 11: ...ttings Language 134 Recording Settings Recording 135 Playback Settings Playback 137 Limitation Settings Parental Lock 138 HDMI Settings HDMI Output 139 Other Settings Options 141 Other Settings Options 2 142 Additional Information 143 Troubleshooting 143 Resetting the Recorder 150 Recordable and Playable Discs 151 Playable Discs 153 About Recording Dubbing Mode 154 Language Code List 158 Country A...

Page 12: ...utton has a tactile dot H CLEAR 44 77 78 I ANGLE 75 114 Changes the angles or rotates an image during slideshow J TV DVD 28 Switches between TV mode and DVD mode K SUBTITLE 75 Selects a subtitle language L text 51 52 This button function is not available in some areas M MENU 73 Displays the disc s menu N Green 50 61 O Yellow 50 61 P Red 50 61 Q Blue 50 61 R SYSTEM MENU 120 TITLE LIST 40 73 83 TOP ...

Page 13: ...e 39 75 105 114 x stop 73 104 114 The H button has a tactile dot Y TV PAUSE 79 Z z REC 38 x REC STOP 38 HDD DVD DUB 90 Starts dubbing the current playing title or cancels the dubbing REC MODE 38 Selects the recording mode wj ZOOM 114 Zooms an image during a slideshow wk TV 1 on standby 28 TV t input select 28 TV 2 volume 28 TV PROG programme 28 The button has a tactile dot wl PLAY MODE 77 80 Use t...

Page 14: ... Removes the CAM from the CAM slot O CAM Conditional Access Module slot RDR HXD795 HXD895 HXD995 HXD1095only 26 P ONE TOUCH DUB 96 100 Starts dubbing from a connected digital video camera Q DV IN jack 98 Connect a DV camcorder to this jack R USB jack type A 102 108 Connect a USB device to this jack S PictBridge USB jack type B 118 Connect a PictBridge compatible printer to this jack Use the tactil...

Page 15: ...tion B NTSC indicator 125 131 Lights up when NTSC colour system is selected C VPS PDC indicator 57 69 Lights up when the VPS PDC function is turned on D Timer indicator 66 Lights up when the timer for recording is set E Disc type Lights up when a recordable DVD R or DVD RW disc is loaded F Command Mode indicator 141 Displays the Command Mode of the remote When the Command Mode for the recorder is ...

Page 16: ...NK jack 20 Connect the set top box controller to this jack E DIGITAL AERIAL IN OUT jacks 18 F HDMI OUT high definition multimedia interface out jack 22 25 G DIGITAL OUT COAXIAL jack 25 H AC IN terminal 27 I LINE 3 TV jack 22 J LINE 2 OUT S VIDEO jack 22 K COMPONENT VIDEO OUT Y PB CB PR CR jacks 22 Rear panel ...

Page 17: ...ou select Depending on the broadcasts you are receiving and your equipment select one of the following aerial hookups Do NOT set LINE 1 In to Decoder in the Video In Out setup page 131 when making connection C b Note Analogue broadcasts are scheduled to end at different times depending on the country area After analogue broadcasts end in your area you will not be able to use hookup D to view TV br...

Page 18: ... With this hookup you can record any programme position by selecting the programme position on the recorder 1 Disconnect the aerial cable from your TV and connect it to DIGITAL AERIAL IN on the rear panel of the recorder 2 Connect DIGITAL AERIAL OUT of the recorder to the aerial input of your TV using the supplied aerial cable z Hint For RDR HXD795 HXD895 HXD995 HXD1095 except models for the UK on...

Page 19: ...aerial cable from your TV and connect it to the DIGITAL AERIAL IN jack on the rear panel of the recorder 2 Connect the DIGITAL AERIAL OUT jack and the ANALOG AERIAL IN jack using the supplied short aerial cable 3 Connect the ANALOG AERIAL OUT jack of the recorder to the aerial input of your TV using the supplied long aerial cable B Receiving Freeview and analogue terrestrial broadcastings DVD reco...

Page 20: ...s This recorder accepts RGB signals If the set top box receiver can output RGB signals connect the TV SCART connector on the set top box receiver to the LINE 1 DECODER jack and set LINE 1 In to RGB in the Video In Out setup page 131 Refer to the instructions supplied with the set top box receiver C Receiving cable or satellite For analogue broadcasting ANT IN TO TV DVD recorder Signal flow Set top...

Page 21: ...re turned on After making hookup C check that the recorder correctly controls the set top box receiver page 32 Use this hookup if you watch cable programme positions without a set top box receiver Also use this hookup if you are only connecting an aerial antenna With this hookup you can record any programme position by selecting the programme position on the recorder 1 Disconnect the aerial cable ...

Page 22: ...ctures D B E C A Audio video cord not supplied Component video cord not supplied yellow TV projector or audio component TV projector or audio component green S video cord not supplied TV projector or audio component red blue Signal flow to COMPONENT VIDEO OUT to LINE 2 OUT S VIDEO to LINE 2 OUT VIDEO SCART cord not supplied to T LINE 3 TV DVD recorder TV HDMI cord not supplied TV projector or audi...

Page 23: ...cted set top box receiver when the set top box receiver is connected to the recorder using a SCART cord only turn the recorder on When connecting to the HDMI jack Follow the steps below Improper handling may damage the HDMI jack and the connector 1 Carefully align the HDMI jack on the rear of the recorder and the HDMI connector by checking their shapes Make sure the connector is not upside down or...

Page 24: ...Out setup page 131 and SMARTLINK to This Recorder Only in the Options setup page 141 b Notes For correct SMARTLINK connection you will need a SCART cord that has the full 21 pins Refer as well to your TV s instruction manual for this connection Not all TVs respond to the functions above 1 MEGALOGIC is a registered trademark of Grundig Corporation 2 EASYLINK and CINEMALINK are trademarks of Philips...

Page 25: ...ection You can enjoy Dolby Digital 5 1ch DTS 5 1ch and MPEG audio 5 1ch surround effects If you connect a Sony audio component that is compatible with the Control for HDMI function refer to the operating instructions supplied with the audio component VIDEO AUDIO INPUT L R A B Audio component with a decoder white TV projector or audio component Audio video cord not supplied Signal flow Coaxial digi...

Page 26: ...nect the recorder to an audio component using an HDMI cord you will need to do one of the following Connect the audio component to the TV with the HDMI cord or Connect the recorder to the TV with a video cord other than HDMI cord component video cord S video cord or audio video cord Step 4 Inserting a Conditional Access Module CAM RDR HXD795 HXD895 HXD995 HXD1095 only Insert a conditional access m...

Page 27: ...the recorder b Notes If the supplied remote interferes with your other Sony DVD recorder or player change the command mode number for this recorder page 29 Use the batteries correctly to avoid possible leakage and corrosion Should leakage occur do not touch the liquid with bare hands Observe the following Do not use a new battery with an old battery or batteries of different manufacturers Do not a...

Page 28: ... the TV 1 button Code numbers of controllable TVs If more than one code number is listed try entering them one at a time until you find the one that works with your TV The remote performs the following Controlling TVs with the remote TV 2 Number buttons TV t TV PROG TV 1 TV DVD DISPLAY Manufacturer Code number Sony 01 default Grundig 11 Hitachi 24 ITT 15 16 JVC 33 LG Goldstar 76 Loewe 45 Nokia 15 ...

Page 29: ...r Sony DVD recorder or player after you have completed Step 7 Easy Setup The default command mode setting for this recorder and the supplied remote is 3 Default setting You can check the current Command Mode in the front panel display For details see page 141 You can change programme positions of the recorder using the number buttons Example for channel 50 Press 5 0 then press ENTER z Hint If the ...

Page 30: ...r to supply the power to the indoor aerial connected to the DIGITAL AERIAL IN jack To supply the power whether the recorder is turned on or in standby select On To supply the power only when the recorder is turned on select Auto Select Off to not supply the power D TV Auto Channel Setting If the aerial cable is connected to the DIGITAL AERIAL IN jack hookup A or B select Auto Scan Then select your...

Page 31: ... appears 1 Select the time zone for your area or GMT Greenwich Mean Time using and press m 2 Select On using if you are now on summer time and press ENTER 3 Set the day month year hour and minutes using M m and press ENTER to start the clock EPG Type Select Select the EPG Electronic Programme Guide type to use If no programme positions for digital broadcasts are found after scanning the EPG Type S...

Page 32: ...ver 1 Press ENTER to select Continue 2 Select the set top box receiver type using M m and press ENTER 3 Select the provider using M m and press ENTER 4 Select the receiver brand using M m and press ENTER If you select Other providers you can select a receiver brand from a list of all available brands If your receiver brand is not on the list select The receiver brand list is automatically updated ...

Page 33: ...might have been added If the external receiver is still not on the list or is not controlled properly by the recorder please call Customer Support to report the brand and model of your external receiver To fix the set top box controller to your set top box receiver Once you have confirmed that the set top box controller controls your set top box receiver fix it in place 1 Remove the backing on the...

Page 34: ...e on your TV screen Be sure to connect your VCR to the DVD recorder and to your TV in the order shown below To watch video tapes watch the tapes through a second line input on your TV The SMARTLINK features are not available for devices connected via the DVD recorder s LINE 1 DECODER jack To watch the connected VCR or similar device s pictures through the recorder while the recorder is in standby ...

Page 35: ...put jack b Notes Do not connect the yellow LINE IN VIDEO jack when using an S video cord Do not connect the output jack of this recorder to another equipment s input jack with the other equipment s output jack connected to the input jack of this recorder This may cause noise feedback Do not connect more than one type of video cord between the recorder and your TV at the same time Connecting to the...

Page 36: ... when you set LINE 1 In to Decoder in step 7 of Setting external decoder PAY TV Canal Plus analogue decoder programme positions page 37 you will not be able to select L1 because Line 1 will become a dedicated line for the decoder Connecting a decoder TV Aerial cable supplied SCART cord not supplied External decoder PAY TV Canal Plus analogue decoder to AERIAL OUT to i LINE 1 DECODER DVD recorder t...

Page 37: ... position using 15Select Sound System using M m and select an available TV system B G D K I or L using To receive broadcasts in France select L 16Select Decoder using M m and select On using 17Press SYSTEM MENU to exit the menu To return to the previous step Press O RETURN b Notes If you disconnect the recorder s mains lead you will not be able to view the signals from the connected decoder To wat...

Page 38: ...der you can manually re format the disc to make a blank disc page 49 2 Recording a Programme This section introduces the basic operation to record a current TV programme to the hard disk HDD or to a disc DVD For an explanation of how to make timer recordings see page 53 Digital broadcasting or page 66 Analogue broadcasting 1 Press HDD or DVD If you want to record to a DVD insert a recordable DVD 2...

Page 39: ... recording what you are watching on the TV to the HDD Set TV Pause to TV s Tuner in the Options 2 setup page 142 b Notes To turn off the TV Direct Rec function set SMARTLINK to Pass Through in the Options setup page 141 Some buttons such as the TITLE LIST button or H button do not work when TV appears in the front panel display If you press the 1 button while recording the recorder stops recording...

Page 40: ...the display Press DISPLAY repeatedly 3 Playing the Recorded Programme Title List To play a recorded title select the title from the Title List 1 Press HDD or DVD If you select DVD insert a DVD see 1 Inserting a Disc on page 38 Playback starts automatically depending on the disc 2 Press TITLE LIST Example 4 Title List for HDD Checking the disc status while recording RW RWVR RWVideo R HDD RVR RVideo...

Page 41: ...urrent recording mode example SP mode 3 Select a title using M m and press ENTER Playback starts from the selected title To stop playback Press x stop To scroll the list display by page Page mode Press while the Title List is displayed Each time you press the Title List changes to the previous next page of titles About the Title List for DVD RWs DVD Rs VR mode You can switch the Title List to show...

Page 42: ...e and press X Playback pauses 6 Select OK using M m and press ENTER The scene is set for the title s thumbnail picture To return to the Title List press O RETURN To change the thumbnail preview mode Set Preview HDD only You can select Quick Preview or Normal for the thumbnail preview mode in the Title List Set Set Preview in the Options setup page 142 To switch to the 8 Title List 1 Press while th...

Page 43: ...rictions for the current programme H TV mode or DVD mode page 29 I Disc information J Title type Original or Playlist for DVD RW DVD R in VR mode K Disc type format page 151 Displays the finalised disc in Video mode as DVD VIDEO L Title number Chapter number page 80 M Playing time N Multi angles indicator page 75 O Copy protected indicator page 157 P Data transfer bar and rate To turn off the disp...

Page 44: ...int where you want to insert the character using m M To erase all of the characters press and hold CLEAR for 2 seconds or more 6 Select Upper case or Lower case using The characters for the selected type are displayed 7 Press M m to select the character you want to enter and press ENTER The selected character appears at the input row To insert a space press X or select Space and press ENTER 8 Repe...

Page 45: ... Name and press ENTER 6 Select Next Screen and press ENTER Enter the disc name page 44 You can enter up to 64 characters for a DVD RW DVD R VR mode disc name and 40 characters for a DVD RW DVD RW Video mode DVD R DVD R Video mode disc name b Note The disc name may not appear when the disc is played on other DVD equipment 1 Insert a disc See 1 Inserting a Disc on page 38 2 Press SYSTEM MENU The Sys...

Page 46: ...en disc types Discs are automatically finalised when removed from the recorder However you may need to finalise the disc for certain DVD equipment or if the recording time is short You can edit or record on the disc even after finalising Finalising is unnecessary when playing a disc on VR format compatible equipment Even if your other DVD equipment is VR format compatible you may need to finalise ...

Page 47: ... to exit z Hint You can check whether the disc has been finalised or not Press DISPLAY after step 1 page 43 b Notes Depending on the condition of the disc recording or the DVD equipment discs may not play even if the discs are finalised The recorder may not be able to finalise the disc if it was recorded on another recorder Inserting an unfinalised disc into other DVD equipment may damage the reco...

Page 48: ...quipment unfinalise the disc b Note The recorder is not able to unfinalise DVD RWs Video mode that have been finalised on another recorder 1 Insert a disc See 1 Inserting a Disc on page 38 2 Press SYSTEM MENU The System Menu appears 3 Select Disc Setup and press ENTER 4 Select Finalise and press ENTER 5 Select Unfinalise and press ENTER 6 Select Start and press ENTER The recorder starts unfinalisi...

Page 49: ...a Disc on page 38 2 Press SYSTEM MENU The System Menu appears 3 Select Disc Setup and press ENTER 4 Select Format and press ENTER 5 Select an item and press ENTER VR Mode Formats DVD RWs DVD Rs in VR mode Video Mode Formats DVD RWs DVD Rs in Video mode Format DVD RW Formats DVD RWs 6 Select Start and press ENTER All contents on the disc are erased z Hint By reformatting you can change the recordin...

Page 50: ... if you display the EPG while recording Press GUIDE This display consists of an information box and an 8 channel programme list covering a 30 minute period Example of EPG Display A Indicates the currently selected channel number and station name with the programme title and genre B Indicates the currently selected programme and allows you to move around the list Press ENTER to watch the selected p...

Page 51: ...an also use any of colour buttons To exit the Teletext service Press text again Buttons Operations M m Selects the desired item PAGE Displays the previous next eight channels INFO Displays the detailed information of the programme page 51 Colour buttons red yellow green blue Activates the same colour function on the screen O RETURN Closes the display Displaying the programme information Buttons Op...

Page 52: ...ions to obtain your required selection On some pages the TV programme may also be displayed on the text screen On screen instructions will inform you how to change the displayed programme If you are instructed to press OK or Select when viewing the text pages press ENTER To exit the text service Follow the on screen instructions or press PROG Digital text services may also be available on other di...

Page 53: ...he disc has enough available space for the recording page 43 For the HDD DVD RWs and DVD RWs you can free up disc space by erasing titles page 82 Adjust the recording picture quality if necessary page 120 b Note If digital teletext is operated or subtitles are displayed while recording they will be recorded on the disc page 135 The EPG function is a feature that simplifies setting the timer Just s...

Page 54: ...the Date row 3 Select a time in the Time row 4 Select the Genre row and press ENTER 5 Select a genre using M m and press ENTER 6 Select OK and press ENTER 7 Select Search and press ENTER To stop recording during timer recording Press x REC STOP Note that it may take a few seconds for the recorder to stop recording On screen instructions may appear after pressing x REC STOP In this case follow the ...

Page 55: ...ings appear 4 Select Set Details and press ENTER 5 Set Series Recording to On and press O RETURN 6 Select OK and press ENTER The selected programme is set for recording and appears in the Timer List The other programmes in the series will be set for recording appear in the Timer List as each previous recording is completed red Indicates that the whole programme is set to be recorded grey Indicates...

Page 56: ... Search Searches for repeat programmes Series Search Searches for programmes in a series Recommendation Search Searches for programmes recommended by broadcaster as a link for current series To set the programme for recording follow the instructions for Recording TV programmes using the EPG page 53 from step 2 About EPG Link The EPG Link function automatically updates the date start and stop times...

Page 57: ...pear after pressing x REC STOP In this case follow the on screen instructions To make the detailed settings 1 Select Set Details in step 3 above and press ENTER 2 Select an item using M m and set using Record to Sets the recording destination If there is not enough available DVD disc space for the recording the recorder automatically records the programme to the HDD even if you select DVD Recovery...

Page 58: ...th Quick Timer The recording mode cannot be set to AUTO when VPS PDC is set to On You can set the recorder to record in 30 minute increments Press z REC repeatedly to set the duration Each press advances the time in 30 minute increments The maximum duration is six hours The time counter decreases minute by minute to 0 00 then the recorder stops recording the power turns off To cancel the Quick Tim...

Page 59: ...iority and the entire programme is recorded After finishing the previous recording the other recording starts with several tens of second s delay when the end time of one recording and the start time of another are the same When the recordings start at the same time only one of them will be recorded Cancel the timer setting for the programme that you are not going to record z Hints For manual time...

Page 60: ... button on the connected equipment to cancel the playback pause status The connected equipment starts playback and the playback image is recorded by this recorder To stop recording press x REC STOP on this recorder If you connect a DV camcorder with a DV IN jack See DV Camcorder Dubbing on page 98 If you connect an HDD camcorder with a USB jack See HDD Camcorder Dubbing on page 94 b Notes When rec...

Page 61: ... or Sport or by using the Keyword Search function page 67 Once you have found the programme you are looking for use the GUIDE Plus system to set the timer for recording page 66 You can set the system to display your favourite programmes according to conditions that you set such as category and keyword page 63 b Note The GUIDE Plus system cannot be used when Input Line System is set to NTSC in the ...

Page 62: ...nd press ENTER to watch the programme G Broadcast station Logo Shows the broadcast station logo H Time Slot Indicates the currently selected time slot Use to select a different time slot Available buttons in the GUIDE Plus system Home Screen To unlock the Video Window The Video Window is locked so that it does not change programme positions when you move the cursor across other titles From Grid se...

Page 63: ...ion select a programme position and press the red button Delete Categories Select the category using M m and press ENTER To add more categories press the yellow button Add You can register up to 4 categories To cancel the registration select a category and press the red button Delete Keywords Enter a keyword See To search for a programme by keyword on page 67 To add more keywords press the yellow ...

Page 64: ...the programme guide data can be received If the programme guide data has not been received after waiting for a day search for the host channel at the following website and set the host channel manually Changing the GUIDE Plus host channel manually Setup page 64 www europe guideplus com If the set top box receiver is connected to the recorder using a SCART cord only and you want to receive the prog...

Page 65: ...ange the programme position press the green button Prog No then enter a programme position number using the number buttons and press ENTER z Hint To receive from the recorder a programme position that can be received by either the set top box receiver or the recorder change the input source in step 6 If any programme positions are unused or contain unwanted channels you can hide them 1 After step ...

Page 66: ...t the recording picture quality if necessary page 120 Turn on the set top box receiver and connect the set top box controller when the recorder is connected to a set top box receiver and you want to record using the GUIDE Plus system b Note Do not operate your set top box receiver just before or during a timer recording This may prevent the accurate recording of a programme You can use the GUIDE P...

Page 67: ...ready entered keywords go to step 8 To enter a new keyword go to step 4 4 Press the yellow button Add The display for entering characters appears 5 Select a character on the keyboard using M m and press ENTER To switch between upper case lower case or characters with accents press the yellow button Keyboard repeatedly To cancel entering a new keyword press the red button Back 6 Repeat step 5 to en...

Page 68: ...ecording destination to DVD or make available space for the recording page 83 The last recording mode you selected manually becomes the default recording mode for timer recordings made from the GUIDE Plus system You cannot adjust the recording quality HDD or DVD once the recording starts The beginning of some recordings may not be made when using the VPS PDC function You cannot extend the recordin...

Page 69: ...g during timer recording Press x REC STOP Note that it may take a few seconds for the recorder to stop recording On screen instructions may appear after pressing x REC STOP In this case follow the on screen instructions z Hint You can use the Rec Mode Adjust function page 68 b Notes If a message indicating that the HDD is full appears on the screen change the recording destination to DVD or make a...

Page 70: ...etup page 132 About HDD Recording format see page 137 ZWEITON German stereo system When a stereo based programme is received Stereo appears When a bilingual ZWEITON based programme is received L R or L R appears NICAM system To record a NICAM programme be sure to set NICAM Select to NICAM default in the Audio In setup If the sound is not clear when listening to NICAM broadcasts set NICAM Select to...

Page 71: ...rder automatically records the programme to the HDD even if you select DVD Recovery Recording When you set a daily or weekly timer HDDr allows you to replace the previous timer recording with the new one automatically HDD only To set the recording pattern press the green button Frequency To change the recording mode press the red button Quality page 154 6 Press to display Timing 7 Press the green ...

Page 72: ...ecordings start at the same time only one of them will be recorded Cancel the timer setting for the programme that you are not going to record b Note When VPS PDC is set for one or more timer recordings the start times may change in the event of a broadcast delay or early start Recording from Connected Equipment You can record from a connected VCR or similar device To connect a VCR or similar devi...

Page 73: ...Video mode you can display the disc s menu by pressing TOP MENU or MENU b Note The H button is not available in the disc s menu To play VIDEO CDs Super VIDEO CDs with PBC functions PBC Playback Control allows you to play VIDEO CDs Super VIDEO CDs interactively using the menu on your TV screen When you start playing a VIDEO CD Super VIDEO CD with PBC functions the menu appears Select an item using ...

Page 74: ...nother title except HDD you start playback using the Title List except HDD you edit the title after stopping playback you change the settings on the recorder you make a recording except HDD you disconnect the mains lead To play restricted DVDs Parental Lock If you play a restricted DVD the display for entering your password appears on your TV screen Enter your four digit password using the number ...

Page 75: ...ant replay instant advance DivX video file only Each time you press replays the scene for the following duration 5 seconds t 15 seconds t 30 seconds t 1 minute t 2 minutes t 3 minutes t 5 minutes t 10 minutes t 20 minutes t advances the time in 10 minute increments t 2 hours Each time you press briefly fast forwards the current scene for the following duration 30 seconds t 1 minute t 1 minute 30 s...

Page 76: ...ereo using the AUDIO button when you play DTS sound tracks on a CD page 75 fast reverse fast forward Fast reverses fast forwards the disc when pressed during playback Search speed changes as follows fast reverse fast forward mFR1 1 T t MFF1 2 mFR2 T T t t MFF2 mFR3 3 T T T t t t MFF3 3 mFR4 3 T T T T t t t t MFF4 3 When you press and hold the button fast forward fast reverse continues at the selec...

Page 77: ...LAY MODE during playback For audio tracks on a DATA DVD DATA CD CD press while the Title List is displayed and select Play Mode The Play Mode menu appears 2 Select Repeat and press ENTER 3 Select an item to be repeated using M m Repeat Title for HDD DVDs DATA DVDs 1 DATA CDs 1 repeats the current title Repeat Chapter for HDD DVDs repeats the current chapter Repeat Track for VIDEO CDs 2 CDs DATA DV...

Page 78: ...R The chapter or track is programmed If you make a mistake select the step number example 01 using M m and press CLEAR 6 To programme other chapters or tracks press M m to select a step number and repeat steps 4 and 5 7 Press H Programme play starts To stop Programme play Press x stop To cancel Programme play Press CLEAR during playback Or set Programme to Cancel Programme Play in the Play Mode me...

Page 79: ... preset differently between the recorder and the connected TV when watching the programme from the external equipment connected to your TV The picture tuned by the recorder pauses when TV Pause is set to Recorder s Tuner in the Options 2 setup page 142 You may not be able to use the TV Pause function depending on some TVs For details refer to the operating instructions supplied with your TV The TV...

Page 80: ...colour system while recording on the HDD in the PAL SECAM colour system Searching for a Time Title Chapter Track etc DivX video file only You can search a disc by title chapter scene or track As titles and tracks are assigned individual numbers select the title or track by entering its number You can also search for a scene using the time code 1 Press PLAY MODE during playback The Play Mode menu a...

Page 81: ...81 Playback 5 Press ENTER Playback starts from the selected number z Hint You can search for a title track chapter by entering the title track chapter number using the number buttons during playback ...

Page 82: ... Editing a Title on page 83 For DVD Rs and DVD Rs the available disc space does not increase even if you erase titles To switch between the Playlist and Original Title List DVD RW DVD R in VR mode only You can display the Playlist titles in the Title List Playlist or the Original titles in the Title List Original 1 Press while the Title List is displayed 2 Select Play List using M m and press ENTE...

Page 83: ...Protects the title appears next to the protected title Move Changes the title s playing order page 87 Combine Combines two titles into one page 87 Genre Name Allows you to enter a genre name up to 12 characters page 44 Multi Mode Allows you to select and edit multiple titles at one time page 83 Create Creates a Playlist page 87 Undo Undoes the last edit you made z Hint You can label or re label DV...

Page 84: ... The Title List appears z Hint A chapter mark is inserted after the scene is erased The chapter mark divides the title into separate chapters on either side of the mark b Notes Images or sound may be momentarily interrupted at the point where you erase a section of a title Sections shorter than five seconds may not be erased If you want to dub a long title to a disc but do not want to reduce the p...

Page 85: ...al or Playlist if necessary 2 Select a title containing the chapter you want to edit and press The sub menu appears 3 Select Edit and press ENTER 4 Select Chapter Edit and press ENTER For the HDD select a type of editing and press ENTER For details see page 82 5 Select an option and press ENTER You can make the following edits to the chapter Divide Divides a chapter into two page 86 Erase Move Era...

Page 86: ... chapter using and press ENTER 3 For a Playlist chapter only Select Erase and press ENTER The display asks for confirmation 4 Select Yes and press ENTER The chapter is erased 1 After step 4 of Erasing and Editing a Chapter select Combine 2 Move the combining bar using and press ENTER The two adjacent chapters of the combining bar are combined b Note Chapters cannot be combined if they are automati...

Page 87: ...add to the Playlist 1 Press TITLE LIST and switch to the Playlist For details on switching to the Playlist see page 82 2 Select a Playlist title and press The sub menu appears 3 Select Edit and press ENTER 4 Select Move and press ENTER 5 Select a new location for the title using M m and press ENTER The title moves to the new location To move more titles repeat from step 2 1 Press TITLE LIST and sw...

Page 88: ...the chapter you want to edit and press The sub menu appears 3 Select Edit and press ENTER 4 Select Chapter Edit and press ENTER 5 Select Erase Move 6 Select a chapter using and press ENTER 7 Select Move and press ENTER 8 Select a new location for the chapter using and press ENTER The chapter moves to the new location Moving a chapter Move ...

Page 89: ...he position of chapter marks may be slightly changed from the original However the chapter marks in the dubbing source are not retained in the dubbed title when dubbing to a DVD RW DVD R Video mode DVD RW or DVD R at normal speed The chapter marks are automatically inserted according to the Auto Chapter Video and Auto Chapter DVD R RW settings in the Recording setup page 136 The Set Thumbnail sett...

Page 90: ...e page 157 To convert the recording mode only when dubbing from a disc to the HDD Before step 1 press REC MODE to select the recording mode b Note You cannot use the HDD DVD DUB button in the following cases Dub the title using Dubbing List page 90 When dubbing the title recorded in MN6 mode or longer duration mode to a DVD RW DVD R When dubbing the title recorded in HQ mode to a DVD Dubbing Using...

Page 91: ...hanges the dubbing mode of all selected titles at a time using M m page 154 Input Disc Name Changes the disc name page 44 Finalise Select Yes to finalise a disc automatically after dubbing DVD RW DVD R Video mode or DVD R 10Select Start Dubbing and press ENTER When you set Finalise to Yes in step 9 select the title menu style and press ENTER The recorder turns off automatically when you do not use...

Page 92: ...uality of the dubbing Bilingual Sets how a bilingual audio programme is dubbed Cancel Exits the sub menu 4 Repeat steps 2 and 3 to edit all of the titles 5 Go to step 8 of Dubbing Using Dubbing List on page 90 to dub edited titles b Notes The Dubbing List you created remains after dubbing To edit the existing Dubbing List select Use Previous Dubbing List in step 4 The Dubbing List is cleared when ...

Page 93: ...e recorder starts High Speed dubbing the contents that were dubbed to the HDD in step 6 9 Select Cancel and press ENTER The disc is automatically finalised To make another backup disc replace discs select Start and press ENTER 10Select Yes or No and press ENTER To erase the backup data on the HDD select Yes To make another backup disc later select No The recorder turns off automatically when you d...

Page 94: ...images and moving images only moving images can be dubbed to the recorder Playlist made with the HDD camcorder cannot be dubbed to the recorder You cannot set the recording mode for HDD camcorder dubbing When dubbing from the HDD camcorder the recorder recognises and uses the shooting date and time information of the HDD camcorder If the HDD camcorder s clock is incorrect the recorder may not dub ...

Page 95: ...Options 2 setup page 142 b Notes Connect the HDD camcorder directly to the recorder Do not disconnect the USB cable while dubbing When signal input to the USB jack type A on the front panel or recorder operation cannot be performed correctly when using an HDD camcorder connect the HDD camcorder to the LINE IN jack and follow the instructions of Recording from Connected Equipment on page 72 The rec...

Page 96: ...the HDD camcorder see Dubbing from HDD Camcorder Using the On Screen Display HDD Cam Dubbing on page 96 Data about the dubbed contents are all cleared when you reset the recorder page 150 If the USB jack and the DV IN jack on the recorder are both connected to a compatible digital video camera One Touch Dubbing is performed via the USB jack Dubbing from HDD Camcorder Using the On Screen Display HD...

Page 97: ...s off automatically if you do not use the recorder for more than 20 minutes after the dubbing has finished To stop dubbing Press x REC STOP Or select Exit in step 6 and press ENTER b Note With Incremental Dubbing the contents that have already been dubbed to the recorder are not dubbed again even after you erase them from the recorder You can dub only newly shot contents ...

Page 98: ...ration is straightforward because the recorder will fast forward and rewind the tape for you you do not need to operate your DV camcorder Refer as well to the instruction manual supplied with the DV camcorder before connecting z Hint If you plan to do additional editing on a disc after the initial dub use the DV IN jack and record on a DVD RW DVD R VR mode or HDD b Notes You cannot make a recordin...

Page 99: ...the same model You cannot record date time or the contents of the cassette memory onto the disc If you record from a DV Digital8 format tape that is recorded in multiple sound tracks such as a tape with multiple sampling frequencies 48 kHz 44 1 kHz or 32 kHz no sound or an unnatural sound will be output when playing back the sampling frequency switch point on the disc In order to use this recorder...

Page 100: ...on is cancelled if a timer recording starts except for DVD RW DVD R VR mode DV One Touch Dubbing ends automatically when there are images containing copy protection signals at the beginning of the tape When connecting digital video cameras to both DV IN jack and USB jack pressing the ONE TOUCH DUB button starts dubbing from the HDD camcorder Disconnect the HDD camcorder from the USB jack to dub fr...

Page 101: ...nect your DV camcorder to the DV IN jack on the front panel 2 Press SYSTEM MENU The System Menu appears 3 Select HDD Cam DV and press ENTER 4 Select DV Playback and press ENTER 5 Start playback on the DV camcorder Images from the DV camcorder appear on your TV screen To cancel playback Press SYSTEM MENU z Hint You can dub the playing tape contents During playback press HDD or DVD to select the dub...

Page 102: ...usic Jukebox list page 104 No other operations are available when copying audio tracks While copying audio tracks timer recordings are unavailable If the timer is set during copying the recorder starts the timer recording after copying is finished Copy protected CDs cannot be copied to the HDD Preparing for Using Jukebox Connect a USB device to the USB jack on the recorder or copy audio tracks fro...

Page 103: ...Title List DVD CD page 74 1 Press SYSTEM MENU The System Menu appears 2 Select Music Jukebox and press ENTER 3 Select Listen to Music Edit and press ENTER The Music Jukebox HDD appears 4 Select an artist using M m and press ENTER 5 Select an album using M m and press ENTER If you want to copy the album press instead of ENTER then go to step 7 6 Select a track to copy using M m and press The sub me...

Page 104: ... ANGLE next while the Music Jukebox list is displayed Each time you press SUBTITLE previous ANGLE next the Music Jukebox list changes to the previous next page of the list To change the play information HDD only Press DISPLAY repeatedly Each time you press the button information below the artist album track list is changed About the Playlist and Original list HDD only You can switch the Music Juke...

Page 105: ...4 Select an item using M m Repeat Artist HDD only repeats tracks of the current artist Repeat Album repeats the current album Repeat Track repeats the current track Repeat Play List HDD only repeats the current Playlist Repeat Programme USB device only repeats the current programme page 106 5 Press ENTER Repeat play starts To cancel Repeat play Set Repeat to Repeat Off in step 4 b Note You can sel...

Page 106: ...e select the step number example 01 using M m and press CLEAR 7 To programme other tracks press M m to select a step number and repeat steps 5 and 6 8 Press H Programme play starts To stop Programme play Press x stop To cancel Programme play Set Programme to Cancel Programme Play in the Play Mode menu during playback To erase the programme Set Programme to Erase Programme List in the Play Mode men...

Page 107: ...ER Erase Erases the selected artist album track Select Yes when asked for confirmation Edit Allows you to make the following edits Artist Name Allows you to enter or re enter an artist name page 44 Album Name Allows you to enter or re enter an album name page 44 Track Name Allows you to enter or re enter a track name page 44 Copy Album Allows you to copy an album page 103 Copy Track Allows you to ...

Page 108: ...py JPEG image files from DATA CDs DATA DVDs or the connected USB device to the HDD You can connect a USB device digital still camera Memory card reader and USB memory to the USB jack on the recorder to view JPEG image files or copy to the HDD Refer to the operating instructions supplied with the USB device before connecting b Note Some USB devices may not work with this recorder 1 Insert a disc th...

Page 109: ... Single Mode from the sub menu 8 Repeat step 7 to select all of the albums or JPEG image files you want to copy 9 Press The sub menu appears 10Select Copy to HDD and press ENTER The display asks for confirmation 11Select Yes and press ENTER To cancel select No 1 Connect the USB device to the USB jack on the recorder 2 Insert a blank DVD RW DVD R Video mode 3 Press SYSTEM MENU The System Menu appea...

Page 110: ...ppears 11Select Copy and press ENTER 12Select the destination album using M m and press ENTER The display asks for confirmation 13Select Yes and press ENTER To cancel select No b Note Albums or JPEG image files are not copied to the HDD in the following cases when the HDD disc space is insufficient for copying when there are already the maximum number of files and or albums on the HDD You can copy...

Page 111: ...hows to a disc When copying an album containing more than 99 JPEG image files to a disc slideshows will be created with every 99 JPEG image files and recorded to a disc For DVDs the available disc space does not increase even if you erase slideshows You can copy the edited JPEG image files to a DVD RW DVD R Video mode A slideshow is also recorded to the disc as a video file You can play the slides...

Page 112: ...how depending on DVD equipment You cannot copy JPEG image files to a recordable DVD which has been recorded using other recorders devices DATA DVDs finalised on this recorder may not be able to play on other equipment You can record up to 99 slideshows to a disc For DVDs the available disc space does not increase even if you erase slideshows Using the Photo Album List You can play JPEG image files...

Page 113: ...age 117 D Scroll bar Appears when all of the JPEG image files do not fit on the list To view the hidden JPEG image files press M m E Album and JPEG image file information Displays the image JPEG image file number recording date and time JPEG image file name and JPEG image file size appears for protected JPEG image files F Remaining space on the HDD To scroll the list display by page Page mode Pres...

Page 114: ...s to load files or folders b Note The thumbnail for a file that cannot be playable on the recorder is displayed as 1 Follow steps 1 to 4 of Using the Photo Album List The Photo Album list appears Switch between the album list and JPEG image file list if necessary 2 Select an album or JPEG image file using M m and press H The slideshow starts z Hint You can start a slideshow by selecting Start Slid...

Page 115: ...wing Zoom rotate skip or pause an image Display information on the screen by pressing DISPLAY If there is no audio track in the selected Music Playlist the slideshow is played back with no sound Creating a Slideshow with Your Favourite Music and Graphic Effects x Pict Story HDD only You can easily create and play your own slideshow with your favourite music in Music Playlist and graphic effects us...

Page 116: ... was created An x Pict Story is created in the HQ mode To edit x Pict Story titles see Erasing and Editing on page 82 b Notes You cannot make a recording while creating an x Pict Story If there is no JPEG image file in the selected folder you cannot create an x Pict Story If there is no audio track in the selected Music Playlist the x Pict Story is created with no sound The selected Music Playlist...

Page 117: ... HDD page 110 Rename Album Changes the selected album name page 44 Protect Album Contents Protects all JPEG image files in the selected album Cancel Protection Cancels protection of all JPEG image files in the selected album Copy to DVD Copies the selected album or JPEG image file to a DVD page 110 Multi Mode Selects multiple albums or JPEG image files to edit Copy all to HDD Copies all the albums...

Page 118: ...DATA DVD DATA CD select View Photos on a DVD CD To print JPEG image files from the connected USB device select View Photos on a USB Device The Photo Album list appears 6 Select an album and press ENTER 7 Select a file using M m and press The sub menu appears 8 Select the item and press ENTER To print two or more files select Multi Mode To print the file selected in step 7 only go to step 12 9 Sele...

Page 119: ...Printer of USB in the Options 2 setup page 142 To restart the connected USB device Select Restart USB Device of USB in the Options 2 setup page 142 z Hint Printing options such as paper size or layout differ depending on the printer For details refer to the instructions supplied with the printer ...

Page 120: ... MENU to exit To create your own setting 1 Select Memory1 Memory2 or Memory3 in step 3 2 Select Detailed Settings and press ENTER The display for adjusting detailed settings appears 3 Select an item using M m and adjust settings using For explanation of each setting see the tables below 4 Press SYSTEM MENU to exit The setting is automatically stored as the setting you selected in step 1 Tuner TV b...

Page 121: ...Reduces noise contained in the luminance element of the video signal CNR chroma noise reduction Reduces noise contained in the chroma element of the video signal Detail Adjusts the sharpness of images outlines White AGC Turn on for automatic white level adjustment White Enhancer Adjusts the intensity of white Black Enhancer Adjusts the intensity of black Black Level Selects the black level setup l...

Page 122: ...icture MNR mosquito noise reduction Reduces the faint noise appearing around the outlines of the images The noise reduction effects are automatically adjusted within each setting range according to the video bit rate and other factors Sharpness Sharpens the outlines of the images Detail Adjusts the sharpness of images outlines White Enhancer Adjusts the intensity of white Black Enhancer Adjusts th...

Page 123: ...just DVD related settings Input Disc Name You can label a disc For details see page 45 Protect Disc You can protect a disc against erasure For details see page 45 Format DVD RW DVD RW only The recorder automatically starts formatting in VR mode or Video mode whichever is selected below when a new unformatted DVD RW is inserted You can manually re format a DVD RW DVD RW or DVD R disc to make a blan...

Page 124: ...other recorder related settings The recorder will automatically set the clock when any digital channels have been scanned and stored Auto Auto Clock Set Turns on the Auto Clock Set function when a programme position in your local area broadcasts a time signal 1 Press repeatedly until the programme position of the station that carries a time signal appears 2 Press m to select Start and press ENTER ...

Page 125: ...NK features are not available when Power Save is set to Mode 1 or Mode 2 Selects the EPG Electronic Programme Guide type to use The default setting varies depending on the country region Select this to run the Easy Setup programme Follow the instructions for Easy Setup page 30 from step 2 Input Line System NTSC Records in NTSC or PAL 60 colour system PAL SECAM Records in PAL or SECAM colour system...

Page 126: ...ition you want to move and press ENTER To display other pages press M m repeatedly 2 Press M m to select the programme position number to swap for the one selected in step 1 and press ENTER The programme position numbers are swapped To move other programme positions repeat from step 1 You can skip or lock certain channels 1 Enter your four digit password using the number buttons and press ENTER To...

Page 127: ...nd press ENTER The programme position order will be set according to the country region you set If any programme positions are unused or contain unwanted channels you can disable them page 128 Download from TV If you connect a TV to this recorder with SMARTLINK you can preset programme positions by downloading from your TV For details refer to the operating instructions supplied with your TV Selec...

Page 128: ... until the programme position you want is displayed Receivable channels To receive broadcasts in France select L Manual CH Setting On Select this when the programme position is unused or contains unwanted programme positions The selected position will be skipped when you press PROG Off Does not skip the selected programme position Programme position FR Select this when in France Western Euro Selec...

Page 129: ...75 F CC7 164 75 172 75 G CC8 172 75 180 75 H CC9 180 75 188 75 H CC10 188 75 196 75 I CC11 196 75 204 75 J CC12 204 75 212 75 J CC13 212 75 220 75 K CC14 220 75 228 75 L CC15 228 75 236 75 L CC16 236 75 244 75 M CC17 244 75 252 75 N CC18 252 75 260 75 N CC19 260 75 268 75 O CC20 268 75 276 75 P CC21 276 75 284 75 P CC22 284 75 292 75 Q CC23 292 75 300 75 S21 CC24 299 25 307 25 S22 CC25 307 25 315 ...

Page 130: ... as size and colour according to the type of TV tuner or decoder connected to the recorder Selects the colour system when picture noise appears after you change the Input Line System setting page 125 z Hint When Input Line System is set to NTSC you can select Auto 3 58NTSC or PAL 60 b Note Input Colour System cannot be set when viewing digital broadcasts Selects the signal format in which the reco...

Page 131: ...lied with your TV SMARTLINK is available only when Video is selected RGB signals are not output when using the HDMI connection Selects a method of inputting video signals for the LINE 1 DECODER jack The picture will not be clear if this setting does not match the type of video input signal Sets the recorder to convert signals of the NTSC colour system to the PAL colour system to play NTSC discs on...

Page 132: ...streams cannot be recorded simultaneously from digital broadcasts Select the setting for the audio input when DV camcorder dubbing Select Mix Stereo 1 75 Mix Stereo 1 50 Mix Stereo 1 25 or Stereo 2 only if you have added a second audio when recording with your digital video camera NICAM Select NICAM Normally select this position Standard Select this if the sound from NICAM broadcasts is not clear ...

Page 133: ... HDMI OUT jack is connected to equipment not compatible with 96 kHz signals 48 kHz PCM will be automatically output even when you select 96 kHz Selects the type of MPEG audio signal Dolby Digital Output HDD DVDs only Dolby Digital Select this when the recorder is connected to an audio component with a built in Dolby Digital decoder Dolby Digital PCM Select this when the recorder is connected to an...

Page 134: ...e of the sound track Switches the language of the subtitles recorded on the disc The Auto Language function is available when Audio Language and Subtitle Language are set to the same language and Subtitle Display is set to On Audio DRC Dynamic Range Control DVDs only On Makes low sounds clear even if you turn the volume down Off Normally select this position OSD Language Audio Language DVD VIDEO o...

Page 135: ...ode The default setting is Off standard recording mode You can check the approximate recording times for the HDD and the different DVD types in each recording mode on page 155 1 Select On go to setup using M m and press ENTER 2 Select a recording mode using and press ENTER To easily select a manual recording mode press REC MODE repeatedly to display MN and select a manual recording mode using DVD ...

Page 136: ...tes The frame at 3 minutes from the first frame is set for the thumbnail picture Auto Chapter HDD VR HDD DVD RW DVD R in VR mode only On The recorder detects changes in the picture and sound and automatically inserts chapter marks up to 99 chapters for one title recorded on the HDD Off No chapter mark is inserted Auto Chapter Video DVD RW DVD R in Video mode only No Separation No chapter mark is i...

Page 137: ... Records to the HDD in VR mode When recording stereo and bilingual programmes both main and sub sounds can be recorded Video Mode On Records to the HDD in Video mode When recording stereo and bilingual programmes only one sound track main or sub can be recorded Set Bilingual Recording to A L default or B R in the Audio In setup page 132 TV Type 4 3 Letter Box Select this when connecting to a 4 3 s...

Page 138: ... VIDEOs can be limited according to a predetermined level such as the age of the users Scenes may be blocked or replaced with different scenes 1 Select Standard and press ENTER 2 Enter your four digit password using the number buttons and press ENTER Pause Mode Field Outputs a stable generally shake free image Frame Outputs a sharp image but may be prone to shake Auto Outputs a generally less shar...

Page 139: ...stomers in France Denmark Finland or Sweden only 1 Enter your four digit password using the number buttons and press ENTER 2 Select an age as limitation level and press ENTER The setting is completed To cancel the setting select Off HDMI Settings HDMI Output You can adjust items related to the HDMI connection b Note You can select HDMI Output only when connecting equipment to the HDMI OUT jack Sel...

Page 140: ...Notes The PCM signals may not be output even when you select Auto depending on the Audio Out settings number of audio channels and the HDMI connected device The Audio Output function is not available when a DVI device is connected 4 3 Video Output Full Select this when you can change the aspect ratio on your TV Normal Select this when you cannot change the aspect ratio on your TV Shows a 4 3 size ...

Page 141: ...not appear b Note Set Power Save to Off in the Basic setup page 125 to set SMARTLINK to Pass Through Registration Code Displays the registration code of DivX video files for this recorder For more information go to http www divx com vod on the Internet On Screen Display On Automatically displays information on the screen when the recorder is turned on etc Off Displays information only when DISPLAY...

Page 142: ...he connected USB device still does not work properly try following Turn the connected USB device off and on again Disconnect and then connect the USB cable Confirm Printer Displays the manufacturer and model name of the printer connected to the recorder Note that this function may not work depending on the printer Selects the tuner for the TV Pause page 79 Set Preview HDD only Quick Preview Plays ...

Page 143: ...crambled channel is selected For RDR HXD795 HXD895 HXD995 HXD1095 A scrambled channel is selected Insert the proper CAM page 26 A HD High Definition programme is selected A radio channel is selected When playing a double layer DVD the video and audio may be momentarily interrupted at the point where the layers switch Picture noise appears If the picture output signal from your recorder passes thro...

Page 144: ...ignal strength is low Check aerial installation TV programme pictures are distorted Reorient the TV aerial Adjust the picture refer to the TV s instruction manual Place the recorder and TV farther apart Place the TV and any bunched aerial cables farther apart The aerial cable is connected to the AERIAL OUT jack on the recorder Connect the cable to the AERIAL IN jack The recorder s colour system is...

Page 145: ...om Initial Setup in the System Menu and follow the on screen instructions to make the settings again page 30 The Time Lock function on your cable box is activated Set this function to off If the host channel has changed or moved the programme guide data cannot be received In this case follow the steps in Searching for the GUIDE Plus host channel Setup page 64 to update the host channel setting If ...

Page 146: ...ing from connected equipment set External Audio to Bilingual in the Audio In setup page 132 Multilingual tracks main and sub cannot be recorded on the HDD when Video Mode On DVD RWs DVD RWs Video mode DVD Rs or DVD Rs Video mode To record the language set Bilingual Recording in the Audio In setup to A L or B R before recording page 132 To record both the main and sub sounds on a disc record on DVD...

Page 147: ...tinue for more than 1 hour reset the clock page 124 Another timer setting overlapped the timer setting page 59 72 Disc space was not sufficient The VPS PDC function is working Contents previously recorded were erased Data that is not playable on this recorder but was recorded on a DVD with a PC will be erased from the disc when the disc is inserted The VPS PDC function does not operate Check that ...

Page 148: ...he Playback setup page 138 The DVD VIDEO prohibits changing angles Try changing the angle using the DVD VIDEO s menu The angles cannot be changed for the titles recorded on this recorder The angles cannot be changed during slow motion playback or when playback is paused The DivX video files do not play The file is not created in DivX format The file has an extension other than avi or divx The DATA...

Page 149: ...and mode page 141 The default command mode setting for this recorder and the supplied remote is 3 Default setting You can check the current command mode in the front panel display page 141 The batteries are weak The remote is too far from the recorder The remote s manufacturer code returned to the default setting when you replaced the batteries Reset the code page 28 The remote is not pointed at t...

Page 150: ...ated E01 appears in the front panel display There is a problem in the HDD Contact your nearest Sony dealer Note that contents on the HDD may be erased when servicing this unit E02 appears in the front panel display The HDD information is incorrect You cannot make a new recording to the HDD Format the HDD following the instructions of Format HDD page 124 Note that all of the recorded contents on th...

Page 151: ... DVD RW compatible players automatically finalised DVD RW VR mode Format in VR mode page 38 Playable only on VR mode compatible players finalisation unnecessary Video mode Format in Video mode page 38 Playable on most DVD players finalisation necessary page 46 DVD R Automatically formatted in VR mode DVD R VIDEO Playable on most DVD players finalisation necessary page 46 DVD R DL DVD R VR mode For...

Page 152: ...c s format reformat the disc page 49 Note that the disc s contents will be erased after reformatting You cannot shorten the time required for recording even with high speed discs It is recommended that you use discs with For Video printed on their packaging You cannot add new recordings to DVD Rs DVD Rs or DVD RWs Video mode that contain recordings made on other DVD equipment In some cases you may...

Page 153: ...n a different recorder and not correctly finalised Note on playback operations of DVD VIDEOs VIDEO CDs Some playback operations of DVD VIDEOs VIDEO CDs may be intentionally set by software producers Since this recorder plays DVD VIDEOs VIDEO CDs according to the disc contents the software producers designed some playback features may not be available Refer to the instructions supplied with the DVD...

Page 154: ...ecorder due to the recording quality or physical condition of the disc or the characteristics of the recording device and authoring software The disc will not play if it has not been correctly finalised For more information refer to the operating instructions for the recording device If the disc contains PC data unrecognisable by this recorder the data may be erased Do not insert any discs that ca...

Page 155: ...9 53 84 165 1 hr 35 min 2 hr 50 min MN24 42 56 88 175 1 hr 40 min 2 hr 59 min MN23 44 59 92 185 1 hr 45 min 3 hr 8 min MN22 46 62 97 195 1 hr 50 min 3 hr 17 min SP MN21 51 68 105 210 2 3 hr 35 min MN20 54 73 115 230 2 hr 10 min 3 hr 53 min MN19 59 79 120 245 2 hr 20 min 4 hr 11 min LSP MN18 63 84 130 265 2 hr 30 min 4 hr 29 min MN17 67 90 140 280 2 hr 40 min 4 hr 47 min MN16 72 96 150 300 2 hr 50 ...

Page 156: ...VD RW VR mode DVD R VR mode HQ PCM MN32 to MN16 720 480 720 576 MN15 to MN12 544 480 544 576 MN11 to MN9 480 480 544 576 MN8 and MN7 352 480 352 576 MN6 to MN1 352 240 352 288 For the HDD HDD Recording Format is set to Video Mode On DVD RW DVD RW Video mode DVD R DVD R Video mode PCM MN32 to MN9 720 480 720 576 MN8 and MN7 352 480 352 576 MN6 to MN1 352 240 352 288 z Hint Audio signals are recorde...

Page 157: ...Dubbing List Titles containing Copy Once copy protection signals are indicated with Discs that can be used for protected signals CPRM compatible DVD RWs DVD Rs VR mode only The recorded disc can be played only on CPRM compatible equipment page 152 CPRM Content Protection for Recordable Media is a coding technology that protects copyrights for images b Notes Protected titles in the HDD cannot be mo...

Page 158: ...Canada ca 0312 Chile cl 0314 China cn 0411 Denmark dk 0609 Finland fi 0618 France fr 0405 Germany de 0811 Hong Kong hk 0914 India in 0904 Indonesia id 0920 Italy it 1016 Japan jp 1118 Korea kr 1325 Malaysia my 1324 Mexico mx 1412 Netherlands nl 1426 New Zealand nz 1415 Norway no 1611 Pakistan pk 1608 Philippines ph 1620 Portugal pt 1821 Russia ru 1907 Singapore sg 0519 Spain es 1905 Sweden se 0308...

Page 159: ...e the recorder to malfunction Notes about the discs To keep the disc clean handle the disc by its edge Do not touch the surface Dust fingerprints or scratches on the disc may cause it to malfunction Do not expose the disc to direct sunlight or heat sources such as hot air ducts or leave it in a car parked in direct sunlight as the temperature may rise considerably inside the car After playing stor...

Page 160: ...c CD format or Video CD format are recorded in the first session border only the first session border will be played back The recorder can play the following tracks and files MP3 audio tracks with the extension mp3 JPEG image files with the extension jpeg or jpg Baseline JPEG image files that conform to the Exif 2 2 image files format and Y CB CR is 4 4 4 4 2 2 or 4 2 0 DivX video files with the e...

Page 161: ...ecorders or devices If a warning message indicating that the HDD is full appears erase several albums or files to make space For details on erasing tracks or files see page 107 or 117 The DV IN jack on this recorder is i LINK compliant for digital video cameras i LINK is a more familiar term for IEEE 1394 data transport bus proposed by SONY and is a trademark approved by many corporations IEEE 139...

Page 162: ... Timer indication 24 hour cycle digital Video recording format MPEG 2 MPEG 1 Audio recording format applicable bit rate Dolby Digital 2 ch 256 kbps 128 kbps in EP SLP and SEP mode PCM Inputs and outputs LINE 2 OUT AUDIO Phono jack 2 Vrms 10 kilohms VIDEO Phono jack 1 0 Vp p S VIDEO 4 pin mini DIN Y 1 0 Vp p C 0 3 Vp p PAL LINE 2 IN AUDIO Phono jack 2 Vrms more than 22 kilohms VIDEO Phono jack 1 0 ...

Page 163: ...ts Hard disk drive capacity RDR HXD790 HXD795 120 GB RDR HXD890 HXD895 160 GB RDR HXD990 HXD995 250 GB RDR HXD1090 HXD1095 500 GB Mass approx 4 7 kg Operating temperature 5ºC to 35ºC Operating humidity 25 to 80 Supplied accessories Mains lead 1 Aerial cable 1 Remote commander remote 1 Set top box controller 1 R6 size AA batteries 2 Two aerial cables are supplied for some models Specifications and ...

Page 164: ...138 Channel 128 Channel Options 126 Channel Sort 126 Channel Swapping 130 Chapter 43 58 70 Chapter Edit 85 Chapter number 43 Chapter Search 80 Chase Play 79 Checking changing cancelling timer settings 59 71 Child Lock 14 CI Information 142 Clock Setting 31 124 Combine 86 87 Command Mode 29 141 COMPONENT VIDEO OUT 23 Component Video Out 130 Conditional Access Module 26 Confirm Printer 142 Connectin...

Page 165: ... 83 107 Editing 82 chapters 85 Playlist 87 titles 83 Editor 62 Enter characters 44 EPG Viewing a list of available channels 50 EPG Type Select 31 125 Erase 59 83 86 107 117 Erase Album 117 External Audio 132 F Finalise 46 Finalising 46 Format 49 Format DVD RW 123 Format HDD 124 Formatting 49 Frame Accurate Editing 82 Freeze Frame 76 Front panel 14 Front Panel Display 141 Front panel display 15 Ful...

Page 166: ...120 Play List Name 107 PLAY MODE 77 78 Play mode A B Repeat 77 Programme 78 106 Repeat 77 Playable discs 151 153 Playback 137 Playback 73 104 112 151 153 A B Repeat 77 DivX video files 73 DV camcorder 101 fast forward 76 105 fast reverse 76 105 freeze frame 76 instant advance 75 instant replay 75 JPEG image files 112 Jukebox 104 MP3 audio tracks 73 Programme 78 106 Repeat 77 105 resume play 74 rot...

Page 167: ...e 59 Slideshow 114 x Pict Story 115 Slow motion play 76 SMARTLINK 24 141 Software Update 142 Sort Titles 41 Sound System 130 Split Programmes 55 Sub sound 70 132 SUBTITLE 75 Subtitle Display 135 Subtitle Language 134 Subtitle Recording 135 Super VIDEO CD 153 T Thumbnail picture 42 preview mode 42 142 Time Search 80 TIMER 56 Timer List 59 Timer recording check change cancel 59 71 EPG timer setting ...

Page 168: ...Sony Corporation Printed in Hungary ...

Reviews: