background image

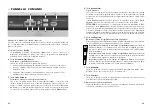
7.  IL SOTTOVUOTO E SIGILLO MANUALE DI UN SACCHETTO:  

FUNZIONE PULSE VACUUM (C) E MANUAL SEAL (D)

L’apparecchio produce una pressione sottovuoto piuttosto alta nel sacchetto. Se Lei 

dovesse mettere sottovuoto alimenti delicati come ad esempio dolci, noi consigliamo 

di mettere sottovuoto il sacchetto con la funzione 

Pulse Vacuum

 ed infine utilizzare 

la funzione 

Manual Seal

 per sigillare manualmente. In questo modo Lei viene facili-

tata nel controllo del grado del sottovuoto per evitare un eventuale danneggiamento 

degli alimenti. Proseguire come descritto nel punto 6 fino alla foto 

K

.

1.  Premere il tasto 

Pulse Vacuum (C)

 e tenere il tasto 

premuto. Osservare la pressione del sottovuoto nel 

sacchetto durante il processo.

2.  Appena è stato prodotto abbastanza sottovuoto, 

rilasciare il tasto 

Pulse Vacuum

 e premere il tasto 

Manual Seal (D)

, l’apparecchio ferma la pompa 

motore ed il sacchetto comincia a sigillare. Il tratto / 

i tratti di saldatura vengono effettuate analogo all’im-

postazione effettuata (bassa, media od alta). Attendere 

fino a che la spia di controllo nel tasto 

Manual Seal 

(D)

 si spegne, mostrando così il termine del processo 

di sigillatura.

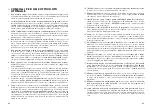
Bene sapere:


– In modo che l’apparecchio lavora ottimamente, Lei dovrebbe lasciare raffreddare 

l’apparecchio 1 minuto, dopo ogni processo di sottovuoto, prima che Lei inserisce 

di nuovo il prossimo sacchetto. Asciugare sempre dopo ogni uso il liquido che 

eventualmente è fuoriuscito ed entrato nella camera a sottovuoto.


– Quando Lei non rispetta questo minuto di raffreddamento dell’apparecchio e 

cerca subito di nuovo di mettere sottovuoto, l’apparecchio si spegne automa-

ticamente, fino a che si è raffreddato, per evitare un surriscaldamento della 

resistenza.


– Il nostro apparecchio funziona solo con pellicole e sacchetti sottovuoto Solis, non 

usare gentilmente altri sacchetti per raggiungere così risultati ottimi e per non 

danneggiare l’apparecchio.

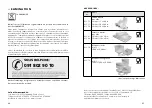
  I numeri di articolo e le descrizioni possono essere consultate nella cartolina 

d’ordine allegata. Lei riceve gli accessori per il Suo apparecchio per sottovuoto in 
un rivenditore specializzato o presso Solis of Switzerland SA. 


Telefono: 0848 804 884, telefax: 0848 804 890 


Email: [email protected] oppure www.solis-onlineshop.ch 


(spedizione soltanto all’interno della Svizzera).


– Con una forbice Lei può aprire un sacchetto sottovuoto e sigillato, per estrarre 

l’alimento.

77

76

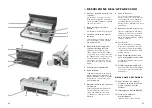
6.  METTERE SOTTOVUOTO UN SACCHETTO E SIGILLARLO  

AUTOMATICAMENTE: FUNZIONE VACUUM & SEAL (B)


– Aprire il coperchio.


– Appoggiare l’alimento nel sacchetto. Usare per cortesia esclusivamente solo i 

sacchetti sottovuoto originali Solis o pellicole, per non danneggiare l’apparecchio 

ed per ottenere il migliori risultati.


– Pulire l’estremità del sacchetto aperta dentro e fuori 

e schiacciarla piatta. L’estremità deve essere pulita, 

asciutta e senza pieghe.


– Appoggiare l’estremità aperta del sacchetto nel vano 

per sottovuoto (

8

) (vedi foto 

I

). Fare attenzione che il 

foro per l’aria (

10

) non sia coperto dal sacchetto.


– Chiudere il coperchio dell’apparecchio e premere il 

dispositivo di bloccaggio fino allo scatto verso il basso; 

la spia di controllo rossa 

Ready

 si illumina. Ora il coper-

chio è bloccato e l’apparecchio è pronto per l’uso (vedi 

foto 

J

).


– Controllare ora l’impostazione 

Sealing time

 attraverso 

le spie di controllo. Scegliere per l’alimento la durata 

adatta di sigillatura, in modo che la cucitura venga 

elaborata in modo corrispondente all’alimento: bassa 

per alimenti secchi, media per alimenti leggermente 

umidi ed alta per alimenti umidi. La spia di controllo 

corrispondente si illumina (vedi foto 

K

).


– Premere ora il tasto 

Vacuum & Seal (B)

. Ora il Suo 

apparecchio mette sottovuoto e sigilla il sacchetto 

automaticamente, la spia di controllo blu si illumina. 

Appena il processo a sottovuoto è concluso, il tasto 

Manual Seal (D)

 si illumina di rosso, per segnalare che 

il sacchetto viene sigillato. Attendere fino a che le spie 

di controllo dei tasti 

Vacuum & Seal 

e

 Manual Seal

 si 

siano spente, dopodiché il processo è completamente 

effettuato (vedi Foto 

L

).

 ATTENZIONE:

 durante il processo del sottovuoto il 

Suo apparecchio produce una forte alta sotto pres-

sione. Osservare che l’alimento, che si trova nel sac-

chetto, possa sopportare questa pressione. Quando Lei 

nota che questa diventa molto forte, premere il tasto 

Manual Seal (D)

, questo ferma la pompa motore ed il 

processo sottovuoto si ferma e inizia subito il processo 

di sigillo.


– Ora Lei può alzare il dispositivo di bloccaggio, aprire il coperchio ed estrarre il 

sacchetto.


– Esaminare di nuovo il tratto di saldatura resp. i due tratti di saldatura, se sono 

piatte e senza pieghe (vedi foto 

H

). Se questo non dovesse essere il caso, ripetere 

il processo.

I

K

L

J

Summary of Contents for VAC PROFESSIONAL 572

Page 1: ...Bedienungsanleitung Mode d emploi Istruzioni per l uso User Manual Gebruiksaanwijzing SOLIS VAC PROFESSIONAL Typ Type Tipo 572 S I N C E 1 9 0 8 ...

Page 2: ... und unterer Dichtungsring Dank der Dichtungsringe wird das Beutelende beim Vakuumieren luft dicht abgeschlossen und die Luft kann abgesaugt werden 8 Vakuum Kammer Hier liegt das offene Ende des Vakuumierbeutels damit die Luft abgesaugt werden kann eventuelle Flüssigkeit aus dem Beutel oder Lebensmittel wird hier aufgefangen 9 Anpressgummi Das Gegenstück zum Schweiss Bal ken damit das Beutelende g...

Page 3: ...se Einstellung in welcher das Gerät ebenfalls eine Schweissnaht produziert ist auch die Grundeinstellung F Taste Marinate Taste mit rotem Kontrolllicht um Fleisch Geflügel oder Fisch in dem quadrati schen 1 0 l oder 2 8 l Solis Behälter im Schnellverfahren zu marinieren G Taste Canister Taste mit rotem Kontrolllicht um einen Solis Behälter mit Hilfe des beigelegten Luftabsaug Schlauchs zu vakuumie...

Page 4: ...lter vakuumieren s WICHTIGE SICHERHEITSHINWEISE Bitte lesen Sie vor Gebrauch Ihres Vakuumiergeräts diese Bedienungsanlei tung aufmerksam durch damit Sie Ihr Gerät kennenlernen und sicher bedie nen können Wir empfehlen diese Anleitung sorgfältig aufzubewahren und gegebenenfalls bei Weitergabe des Gerätes auch dem neuen Besitzer auszuhändigen Bei der Verwendung von elektrischen Geräten sind zu Ihrer...

Page 5: ...N OFF Kippschalter an der Rückseite des Geräts ein Der Kippschalter sollte auf I stehen Das Kontrolllicht bei Sealing time leuchtet in der niedrigs ten Postition auf 3 VERSCHWEISS DAUER EINSTELLEN Bei Ihrem Solis Vac Professional Vakuumiergerät können Sie die Dauer des Ver schweiss Vorgangs dem Lebensmittel anpassen Durch jeden Druck ändert sich die Einstellung das entsprechende Kontrolllicht leuc...

Page 6: ...chneideleiste 2 nach oben Der Klingenhebel sollte sich entweder ganz rechts oder ganz links auf der Schneideleiste befinden er darf sich nicht in der Mitte befinden sonst klappt es nicht mit dem Abschneiden der Folie siehe Abb A Legen Sie die Vakuumierfolien Rolle in die Folienkammer 1 siehe Abb A und ziehen Sie am Ende der Folie bis die richtige Länge für den benötigten Beutel abgerollt ist Drück...

Page 7: ...z Mit einer Schere können Sie einen vakuumierten und verschweissten Beutel aufschneiden um die Lebensmittel zu entnehmen 6 AUTOMATISCHES VAKUUMIEREN UND VERSCHWEISSEN EINES BEUTELS FUNKTION VACUUM SEAL B Gerätedeckel öffnen Legen Sie die Lebensmittel in den Beutel Bitte verwenden Sie ausschliesslich die original Solis Vakuumierbeutel oder Vakuumierfolien um das Gerät nicht zu beschädigen und beste...

Page 8: ... Solis Behälter eingefroren werden die Behälter könnten brechen da sich die Flüs sigkeit während dem Gefrieren ausdehnt 8 VAKUUMIEREN VON SOLIS BEHÄLTERN MIT DECKEL ACHTUNG Bitte verwenden Sie ausschliesslich die Behälter von Solis für dieses Gerät Nur diese Behälter sind für den Unterdruck konzipiert den der Solis Vac Professional erzeugt Sie erhalten das Zubehör für Ihr Vakuumiergerät im guten F...

Page 9: ...ate F der Mari nier Prozess beginnt und dauert wenige Minuten das Kontrolllicht leuchtet in dieser Zeit Das Gerät schaltet sich automatisch ab wenn der letzte Marinier Zyklus abgeschlossen ist dann erlischt auch das Kontrolllicht Entfernen Sie den Luftabsaug Schlauch erst aus dem Behälter und dann vom Gerät Wenn Sie den Marinier Vorgang vorher beenden wollen müssen Sie nur die Taste Cancel B drück...

Page 10: ...mer genug leeren Platz am offenen Beutelende damit das Beutelende problemlos in die Vakuum Kammer gelegt werden kann ohne dass Falten oder Wellen entstehen 2 Das offene Beutelende sollte nicht nass sein da sich nasse Beutel nicht dicht verschweissen lassen Wenn die Lebensmittel Feuchtigkeit enthalten oder der Beutel innen nass ist wählen Sie die höchste Sealing time Einstellung damit verlängert si...

Page 11: ...cht zerdrückt werden Lebensmittel können bis zu 24 Stunden eingefroren werden ohne dass Gefrier brand auftritt diesen Umstand machen wir uns zu nutze Am besten portio nieren Sie die Lebensmittel schon zum Vorgefrieren Sobald sie vorgefroren sind nach ca 24 Stunden vakuumieren Sie die Lebensmittel in einem Solis Vakuu mierbeutel und legen sie wieder zurück in die Tiefkühltruhe 3 Wollen Sie Suppen E...

Page 12: ...nn das Bakterium Botulinum nichts anhaben Folgende Lebensmittel können jedoch leicht mit Botulinum infiziert sein Lebensmittel ohne Säure wie z B Fleisch Meeresfrüchte Geflügel Fisch Eier Pilze und in Lauge eingelegte Oliven Lebensmittel mit wenig Säure wie die meisten Gemüsesorten Lebensmittel mit mittlerer Säure wie z B Tomaten Zwiebel Chili Pfeffer Feigen und Gurken 8 Um die o g gefährdeten Leb...

Page 13: ... den bei Zimmertemperatur gelagert wurden Das ist besonders gesundheitsge fährdend wenn sie in dicker Sauce zubereitet wurden wenn sie vakuumverpackt sind oder in sauerstoffarmer Umgebung aufbewahrt wurden 5 Verteilen Sie vakuumierte Beutel oder Behälter gleichmässig im Kühlschrank oder im Gefrierschrank damit sie möglichst schnell gekühlt werden 24 25 s REINIGUNG UND PFLEGE Zur Reinigung Ihres Va...

Page 14: ...ten keine Löcher verursachen DER BEUTEL SCHMILZT BZW IST NICHT RICHTIG VERSCHWEISST Sollten der Schweiss Balken oder der Anpressgummi überhitzt sein kann der Beutel schmelzen In diesem Fall Deckel öffnen Gerät ausstecken und die beiden genann ten Teile einige Minuten abkühlen lassen s PROBLEME UND MÖGLICHE URSACHEN DAS GERÄT FUNKTIONIERT NICHT 1 Prüfen Sie ob der Netzstecker richtig in der Steckdo...

Page 15: ... der Behälterdeckel ringsum dicht ist 4 Sollte während des Vakuumiervorgangs Flüssigkeit aus dem Behälter austreten sollte der Behälter mit Inhalt erst im Kühlschrank abgekühlt werden 5 Überprüfen Sie ob der Gerätedeckel geschlossen und verriegelt ist 6 Überprüfen Sie die Funktionsfähigkeit des Geräts 7 Prüfen Sie ob der Behälterrand und der Deckelrand absolut sauber sind und 3 cm Abstand zwischen...

Page 16: ...rungsart Lebensmittel Temperatur normale Aufbewah rungszeit Aufbewahrungs zeit mit Vakuum verpackung in Solis Behältern oder Beuteln Kühlschrank rohes rotes Fleisch 5 2 C 2 3 Tage 8 9 Tage rohes weisses Fleisch 5 2 C 2 3 Tage 6 9 Tage Wild 5 2 C 2 3 Tage 5 7 Tage Salami aufge schnitten 5 2 C 4 6 Tage 20 25 Tage Weichkäse 5 2 C 5 7 Tage 14 20 Tage Hartkäse 5 2 C 15 20 Tage 25 60 Tage Frischfisch Me...

Page 17: ...lt und Gesundheit und ermöglicht die erneute Nutzung und Rezyklierung der Komponenten mit bedeutenden Energie und Roh stoffeinsparungen Um die Verpflichtung zur ordnungsgemässen Entsorgung des Geräts deutlich hervorzuheben ist es mit dem Symbol eines durchgestrichenen Abfallcontainers gekennzeichnet Solis of Switzerland AG behält sich das Recht vor jederzeit technische und optische Veränderungen s...

Page 18: ...ditionnement sous vide et donc d aspirer l air contenu dans le sachet 8 Chambre de mise sous vide C est là qu est placée l extrémité ouverte du sachet pendant le conditionnement sous vide afin que l air puisse être aspiré Si du liquide s échappe du sachet ou des aliments il y sera recueilli là 9 Barre d appui en caoutchouc Contrepartie de la barre de sou dage permettant de bien presser à plat l ex...

Page 19: ... simple F Touche Marinate Touche avec témoin lumineux rouge pour faire mariner rapidement la viande la volaille ou le poisson dans un récipient Solis carré de 1 0 ou 2 8 litres G Touche Canister Touche avec témoin lumineux rouge pour le conditionnement sous vide d un récipient Solis à l aide du tuyau d aspiration fourni H Raccord pour le tuyau d aspiration Le tuyau d aspiration est placé dans ce r...

Page 20: ...s électriques nous vous recommandons un disjonc teur différentiel DDR Nous conseillons d utiliser un interrupteur de sécurité avec une sensibilité différentielle de maximum 30 mA Demandez conseil à votre électricien 38 10 N apportez aucune modification à l appareil au cordon à la fiche de secteur à la fiche de connexion ou aux accessoires 11 Risque d accident en cas d utilisation inappropriée 12 N...

Page 21: ...OFF situé à l arrière de l appareil L interrupteur culbuteur doit alors être sur la position I et le témoin lumineux Sealing time allumé sur la position la plus basse 3 REGLAGE DE LA DUREE DE SOUDAGE Grâce à votre Solis Vac Professional vous pouvez adapter la durée de soudage aux aliments En appuyant sur la touche une ou plusieurs fois vous pouvez chan ger le réglage le témoin lumineux corresponda...

Page 22: ... La manette doit se trou ver sur le côté soit tout à droite soit tout à gauche mais pas au milieu de la barre sinon vous ne pourrez pas couper le film voir fig A Placez le rouleau de film plastique dans le compartiment prévu à cet effet 1 voir fig A et tirez sur l extrémité du film jusqu à obtention de la taille de sachet désirée Rabaissez ensuite la barre cutter 2 Le film est ainsi placé en desso...

Page 23: ... onlineshop ch expédition seulement en Suisse Utilisez des ciseaux pour ouvrir un sachet emballé sous vide pour retirer les aliments 6 EMBALLAGE SOUS VIDE ET FERMETURE HERMETIQUE DU SACHET AUTOMATIQUE FONCTION VACUUM SEAL B Ouvrez le couvercle Placez les aliments dans un sachet Utilisez exclusivement les sachets ou films sous vide Solis afin de ne pas endommager votre appareil et d obtenir les mei...

Page 24: ...interdit de congeler des liquides dans un récipient Solis le récipient risque de casser car les liquides prennent du volume en congelant 8 CONDITIONNEMENT SOUS VIDE D UN RECIPIENT SOLIS AVEC COUVERCLE ATTENTION Utilisez uniquement des récipients Solis avec cet appareil Seuls ces récipients sont conçus pour résister à la dépression exercée par le Solis Vac Profes sional Ceux ci sont disponibles dan...

Page 25: ...t absorbé la marinade Le processus complet de marinade dure quelques minutes Perforer la viande la volaille ou le poisson plusieurs fois à l aide d une fourchette Disposez la viande ou le poisson dans un récipient Solis carré de 1 0 ou 2 8 litres Recouvrez la viande ou le poisson avec la mari nade en laissant au moins 3 cm entre les aliments et le haut du récipient Fermez le récipient avec le couv...

Page 26: ...rs emballée sous vide est toujours prête à l emploi s ASTUCES POUR LA MEILLEUR FAÇON DE METTRE SOUS VIDE 1 Ne remplissez pas trop le sachet Laissez toujours assez d espace dans le sachet pour pouvoir glisser l extrémité ouverte dans la chambre de mise sous vide sans que des plis se forment 2 L extrémité à souder ne doit pas être mouillée car un sachet mouillé ne peut pas être fermé hermétiquement ...

Page 27: ...n fruit légume et autre produit délicat Déconge lez ces aliments lentement dans leur sachet ou récipient en les plaçant au réfrigé rateur Décongélation de pain soupe potée ou ragout Possibilité de les décongeler à température ambiante Dans ce cas éventrez le sachet afin que la vapeur puisse s en dégagée Ne jamais recongeler Un aliment décongelé doit être consommé rapidement 21 L appareil d emballa...

Page 28: ...e propagent grâce à l air qui d une part fait que les aliments se dessèchent et d autre part permet à l humidité ambiante de pénétrer dans les aliments qui ne sont pas emballés hermétiquement L air présent dans le congélateur entraîne un risque de brûlure de congélation sur les aliments congelés 3 Le conditionnement sous vide élimine jusqu à 90 de l air dans l emballage Comme l air contient enviro...

Page 29: ...ou congélateur aussitôt après les avoir embal lés sous vide Ne les laissez pas à température ambiante Faites attention que la température de votre réfrigérateur ou congélateur n augmente pas 3 Le conditionnement sous vide prolonge la durée de conservation des aliments secs Les aliments contenant beaucoup de matière grasse rancissent plus vite au contact de l air et lorsque la température est élevé...

Page 30: ...ts dans du papier absorbant LE SACHET FOND OU N EST PAS FERME HERMETIQUEMENT Le sachet peut fondre lorsque la barre de soudage ou la barre d appui en caout chouc est trop chaude Dans ce cas ouvrez le couvercle débranchez l appareil et laissez la barre de soudage et la barre d appui refroidir pendant quelques minutes s DEPANNAGE L APPAREIL NE FONCTIONNE PAS 1 Vérifiez que l appareil est bien branch...

Page 31: ... du liquide s échappe du récipient pendant la mise sous vide il est nécessaire de tout d abord laisser refroidir le récipient plein au réfrigérateur 5 Vérifiez que le couvercle de l appareil est bien fermé et verrouillé 6 Vérifiez que l appareil fonctionne normalement 7 Vérifiez que les bords du récipient et du couvercle sont très propres et que vous avez respecté la marge de 3 cm entre les alimen...

Page 32: ...ours 4 5 jours viande cuite 562 C 3 5 jours 10 14 jours légumes 562 C 1 3 jours 7 10 jours fruits 562 C 5 7 jours 14 20 jours oeufs 562 C 10 15 jours 30 50 jours Congélateur viande 1862 C 3 5 mois 1 an poisson 1862 C 3 4 mois 1 an fruits de mer 1862 C 3 5 mois 1 an Type de conservation Aliments Température Durée de conservation normale Durée de con servation sous vide dans des récipients ou sachet...

Page 33: ...omposants ainsi que des économies d énergie et de matières premières significatives Afin d attirer clairement l attention sur l obligation d élimination réglementaire de l appareil celui ci porte un symbole représentant un conteneur à ordures barré Solis of Switzerland SA se réserve le droit d apporter à tout moment des modifica tions techniques et de présentation ainsi que de procéder à des modif...

Page 34: ...e Grazie alla guarnizione ad anello l estremità del sacchetto viene chiuso ermeticamente durante il sottovuoto e l aria può essere aspirata 8 Vano sottovuoto Qui si trova l estremità aperta del sacchetto sottovuoto in modo che l aria possa essere aspirata eventuale liquido che fuoriesce dal sacchetto o dall alimento viene raccolto qui 9 Gommino elastico di pressione Il pezzo sopraopposto alle barr...

Page 35: ...in quella il dispositivo sigilla anche con un tratto di saldatura F Tasto Marinate Tasto con la spia di controllo rossa per marinare a procedimento rapido carne pollame o pesce nei contenitori Solis 1 0 l oppure 2 8 l G Tasto Canister Tasto con la spia di controllo rossa per mettere sottovuoto un contenitore Solis con l aiuto del tubo di aspirazione dell aria H Apertura del tubo di aspirazione In ...

Page 36: ...ente prima dell uso del Suo apparecchio per il sottovuoto questi istruzioni per l uso in modo che Lei conosca bene il Suo apparecchio e possa utilizzarlo in modo corretto Noi Le consigliamo di con servare accuratamente queste istruzioni ed in caso di un passaggio dell ap parecchio ad un nuovo proprietario Utilizzando apparecchi elettrici sono da osservare per la Sua sicurezza le seguenti misure di...

Page 37: ...questa regolazio ne l apparecchio sigilla con un tratto di saldatura Impostazione bassa per un tempo di sigillatura bassa per alimenti sec chi tipo biscotti riso o caffè impostazione di base In questa regolazione l apparecchio sigilla con un tratto di saldatura 4 CONSIGLI PER L UTILIZZO DI SACCHETTI SOTTOVUOTO Esistono sacchetti per sottovuoto Solis di diverse grandezze oppure pellicole con le qua...

Page 38: ...arsi del tutto a destra o del tutto a sinistra della barra da taglio questa non deve trovarsi al centro altrimenti non funzionerà il taglio della pellicola vedi foto A Appoggiare il rotolo della pellicola per sotto vuoto nell alloggiamento 1 vedi foto A e tirare infine la pellicola fino a che è stata srotolata la lunghezza esatta per il sacchetto di cui si necessita Premere la barra da taglio 2 di...

Page 39: ...pedizione soltanto all interno della Svizzera Con una forbice Lei può aprire un sacchetto sottovuoto e sigillato per estrarre l alimento 77 76 6 METTERE SOTTOVUOTO UN SACCHETTO E SIGILLARLO AUTOMATICAMENTE FUNZIONE VACUUM SEAL B Aprire il coperchio Appoggiare l alimento nel sacchetto Usare per cortesia esclusivamente solo i sacchetti sottovuoto originali Solis o pellicole per non danneggiare l app...

Page 40: ...tenitori potrebbero spaccarsi perché il liquido durante la congelazione si gonfia 79 78 8 METTERE SOTTOVUOTO I CONTENITORI SOLIS CON COPERCHIO ATTENZIONE Utilizzare gentilmente soltanto i contenitori Solis adatti per questo apparecchio Solo questi contenitori sono concepiti per la sottopressione che pro duce il Solis Vac Professional Lei ottiene accessori per il Suo apparecchio per sottovuoto pres...

Page 41: ...ti Punzecchiare con una forchetta alcune volte la carne pollame o pesce Mettere la carne pesce nel conte nitore quadrato Solis 1 0 oppure 2 8 litri coprire la carne pesce con la marinata e lasciare almeno 3 cm di spazio tra alimento e bordo del contenitore superiore Chiudere il contenitore con il coperchio apposito vedi foto U Chiudere il coperchio dell apparecchio e il dispositivo di bloccaggio v...

Page 42: ... riempire troppo il sacchetto Lasciare sempre abbastanza spazio vuoto nell estremità aperta del sacchetto in modo che l estremità del sacchetto possa essere inserita senza problemi nella camera per sottovuoto 2 L estremità aperta del sacchetto non dovrebbe essere bagnata perché un sacchetto bagnato non può essere sigillato Quando gli alimenti contengono umidità oppure il sacchetto è bagnato all in...

Page 43: ... lentamente nel sacchetto o conteni tore nel frigorifero Scongelamento di pane minestre stufati questi alimenti possono essere scongela ti a temperatura ambiente In questo caso tagliare il sacchetto in modo che possa fuoriuscire il vapore In ogni caso dopo lo scongelamento consumare subito e non congelare di nuovo 21 L impiego principale dell apparecchio per sottovuoto è quello di mante nere con c...

Page 44: ... l ossigeno contenuto nell aria La formazione dei microrganismi si crea normalmente attraverso l aria perché questa toglie agli alimenti l umidità dall altra parte si trasporta umidità dell ambiente di nuovo sugli alimenti quando questi non sono confezionati ermetici Alimenti congelati ricevono nell aria del congelatore spesso danni da congelamento 3 Il sistema ermetico toglie alla confezione fino...

Page 45: ...re prima le mani prima di preparare e mettere sottovuoto anche tutti i materiali ed apparecchi che Lei usa dovrebbero essere assolutamente puliti 2 Appena Lei ha messo sottovuoto gli alimenti metterli nel frigorifero o nel con gelatore non lasciare a temperatura ambiente gli alimenti Fare attenzione che la temperatura del congelatore e frigorifero non aumenta 3 La confezione a sottovuoto allunga l...

Page 46: ...ne dovessero essere surriscaldati il sac chetto può sciogliersi In questo caso aprire l apparecchio staccare l apparecchio dalla corrente e lasciare raffreddare i pezzi soprannominati per alcuni minuti 91 90 s PROBLEMI ED EVENTUALI CAUSE L APPARECCHIO NON FUNZIONA 1 Esaminare se la spina di rete è inserita bene nella presa di corrente e lo spinotto di allacciamento alla presa dell apparecchio 2 Es...

Page 47: ...o Esaminare se il coperchio del contenitore è ermetico 4 Se dovesse fuoriuscire liquido dal contenitore durante il processo di sottovuoto il contenitore con il contenuto dovrebbe essere per primo raffreddato nel frigo rifero 5 Esaminare se il coperchio dell apparecchio è chiuso ermetico 6 Esaminare la funzionalità dell apparecchio 7 Esaminare se il bordo del contenitore ed il bordo del coperchio s...

Page 48: ...Giorni Carne cotta 562 C 3 5 Giorni 10 14 Giorni Verdura 562 C 1 3 Giorni 7 10 Giorni Frutta 562 C 5 7 Giorni 14 20 Giorni Uova 562 C 10 15 Giorni 30 50 Giorni Congelatore Carne 1862 C 3 5 Mesi 1 Anno Pesce 1862 C 3 4 Mesi 1 Anno Frutti di mare 1862 C 3 5 Mesi 1 Anno Tipo di conservazione Alimento Temperatura Tempo di conservazione normale Tempo di con servazione con confezione in sottovuoto in un...

Page 49: ... lunga durata ed affidabilità Se dovessero presentarsi dei problemi di funzionamento non esiti à telefonarci Spesso un guasto si risolve senza complicazioni e in modo semplice con il consiglio giusto senza dovere spedire l apparecchio per ripararlo Siamo a Sua disposizione per consigli ed aiuto 091 802 90 10 Conservare la confezione originale di questo articolo in modo che Lei può utilizzarla per ...

Page 50: ... 7 Upper and lower sealing ring The sealing rings will seal the edge of the bag airtightly and allow for evacuation of the air 8 Vacuum chamber The open end of the bag is placed here to allow for evacuation of the air Possible liquids or foods from the bag are collected here 9 Rubber contact seal The counterpart to the sealing bar Ensures even contact of the bag to the sealing bar for optimal seal...

Page 51: ...al the end of a bag In any case the Manual Seal button has to be used following the Pulse Vacuum button to seal the evacuated bag CAUTION Even if you have selected the Vacuum Seal function you can use the Manual Seal button at any time to stop the vacuuming process meaning the motor pump and seal the bag immediately This is helpful when noticing that sensitive foods might take damage from the nega...

Page 52: ... read through this user manual thoroughly before using your vacuum sealer so that you become familiar with your appliance and can use it safely We thoroughly recommend that you keep these instructions and if you pass the appliance on that you also hand these instructions to the new owner For your own safety please observe the following safety measures when using elec trical appliances 1 To avoid e...

Page 53: ...ch on the back side of the appliance to turn it on The toggle switch should be set to I The Sealing time control light will illuminate in the lowest position 3 SETTING SEALING TIME On your Solis Vac Professional you can match sealing time to the foods you want to seal Each touch of the button will change the setting the corresponding control light will illuminate For consistently producing perfect...

Page 54: ...ing foil chamber and lift the cutting bar 2 The blade lever should either be to the far right or to the far left of the cutting bar Should the blade lever be positioned in the middle of the bar cutting the foil will not work properly see ill A Place the foil reel in the foil chamber 1 see ill A and unroll enough foil for whatever size you wish the bag to have Push the cutting bar 2 back down the f...

Page 55: ...or www solis onlineshop ch Delivery only available within Switzerland Use scissors to open a vacuum sealed bag and take out the food 109 108 6 AUTOMATIC VACUUMING AND SEALING OF A BAG THE VACUUM SEAL B FUNCTION Open the cover Place the food into the bag Please only use the original Solis bags or vacuum film so as not to damage the appliance and to give best results Clean the end of the bag inside ...

Page 56: ...uids will expand during freezing 8 VACUUMING SOLIS CONTAINERS WITH LIDS CAUTION Please exclusively use containers from Solis with this appliance Only these containers are designed for the vacuum that the Solis Vac Professional cre ates For item numbers and descriptions please refer to the enclosed order form You can find accessories for your vacuum appliance in good stores or you get them from Sol...

Page 57: ...ick the meat poultry fish a few times with a fork Place the meat fish in the square Solis container 1 0 or 2 8 L Cover the meat fish with the marinade and leave at least 3 cm distance between the food and the upper edge of the container Close the container with the correct lid see fig U Close the appliance cover and cover handle see ill J page 108 Take the air extraction hose 11 Insert one end of ...

Page 58: ...it can be placed in the vacuum chamber without problem and with out wrinkles or creases 2 The open bag end should not be wet since wet bags can not be sealed If the foods contain moisture or the bag is wet on the inside you should choose the highest Sealing time setting to prolong sealing time and to seal with two welds This improves the final result 3 Clean the open bag end and pull it straight b...

Page 59: ...n after about 24 hours vacuum them in Solis vacuum bags amd return them to the freezer 3 If you wish to vacuum pack soups stews or other liquid dishes then they must be pre frozen until they have a solid consistency Ideally this should be done in a Solis vacuum bag Liquids should not be frozen in a Solis container as they might break as the liquids will expand during freezing After evacuation the ...

Page 60: ...ns in the packaging However in an oxygen content of less than 5 most micro or ganisms cannot multiply 4 In general microorganisms can be divided into three categories mould yeasts and bacteria they are present everywhere but can only cause damage in certain conditions 5 In an environment with little air or moisture mould cannot develop In mois ture sugar and warmth yeast can spread with or without...

Page 61: ... FURTHER TIPS FOR SUCCESSFUL VACUUMING 1 Always wash your hands before preparing and vacuuming equally the materials and appliance which you use should be absolutely clean 2 As soon as the foods have been vacuumed put them in the fridge or freezer do not leave them to sit at room temperature Make sure that the temperature in the refrigerator does not increase 3 Vacuum packing extends the shelf lif...

Page 62: ...OR DOES NOT SEAL PROPERLY Should the sealing bar or the rubber contact seal overheat the bag can melt In this case open the cover unplug the appliance and let both of the mentioned parts cool down for a couple of minutes 123 122 s PROBLEMS AND POSSIBLE CAUSES THE APPLIANCE DOESN T WORK 1 Check if the power plug and the connection plug are properly plugged into the power socket resp the appliance j...

Page 63: ...ure that the container lid is tight all around 4 If fluid leaks from the container during vacuuming the container and it s contents should first be cooled in the fridge 5 Check if the appliance cover is closed and locked 6 Check the function buttons on the appliance 7 Check that the edge of the container and the lid are completely dry and that there is 3 cm distance between the food and the top ed...

Page 64: ...62 C 3 5 days 10 14 days Vegetables 562 C 1 3 days 7 10 days Fruit 562 C 5 7 days 14 20 days Eggs 562 C 10 15 days 30 50 days Freezer Meat 1862 C 3 5 months 1 year Fish 1862 C 3 4 months 1 year Seafood 1862 C 3 5 months 1 year Storage type Food Tempera ture Normal storage time Storage time with vacuum packing in Solis containers or bags Room temperature Bread 2562 C 1 2 days 6 8 days Sponge 2562 C...

Page 65: ...ts long life cycle and reliability Despite this though if a malfunction ever occurs simply give us a call Often a breakdown can be easily and quickly remedied with the right tip or technique without having to straight away send off the device for repair We will give you all the advice and practical support you require 091 802 90 10 Keep the original packaging in a safe place so that you may use it...

Page 66: ...erste afdichtring Door de afdichtringen wordt het uiteinde van de zak bij het vacume ren luchtdicht afgesloten en kan de lucht worden afgezogen 8 Vacuümkamer Hier ligt het open einde van de vacuümzak zodat de lucht kan worden afgezogen eventuele vloeistof uit de zak of levensmid delen worden hier opgevangen 9 Aandrukrubber Het tegenstuk voor de sealstrip dat ervoor zorgt dat het uiteinde van de za...

Page 67: ...nd maakt het apparaat ook een sealnaad Dit is tevens de standaardinstelling F Knop Marinate Knop met rood indicatielampje om vlees gevleugelte of vis in de vierkante 1 0 l of 2 8 l Solis voorraaddozen snel te marineren G Knop Canister Knop met rood indicatielampje om een Solis voorraaddoos met behulp van de bijgevoegde luchtafzuigslang te vacumeren H Luchtafzuigopening In deze opening wordt de luc...

Page 68: ...bakje vacumeert 26 Het apparaat resp de sealstrip heeft een beveiliging voor oververhitting Om te s BELANGRIJKE VEILIGHEIDSVOORSCHRIFTEN Leest u alstublieft voor gebruik van uw vacumeerapparaat deze gebruiks aanwijzing aandachtig door zodat u uw apparaat goed leert kennen en goed kunt bedienen We raden aan om deze gebruiksaanwijzing goed te bewaren en bij eventuele overdracht van het apparaat deze...

Page 69: ...ct Schakel het apparaat in met de ON OFF wipschakelaar op de achterzijde van het apparaat De wipschakelaar moet op I staan Het indicatielampje bij Sealing time brandt in de laagste positie 3 SEALDUUR INSTELLEN Bij uw Solis Vac Professional vacumeerapparaat kunt u de duur van het sealen aan het levensmiddel aanpassen Door elke druk op de knop wordt de instelling ver anderd en licht het bijbehorende...

Page 70: ...esneden zie afb C Nu kunt u één uiteinde van de zak sealen Sluit het deksel van het vacuümfolie compartiment en open het deksel van het apparaat Leg een open uiteinde van een zak op het aandrukrub ber 9 Hierbij mag het uiteinde van de zak niet tot in de vacuüm kamer steken zie afb D 138 139 Sluit het deksel van het apparaat en druk het ver grendelstuk helemaal naar beneden Nu is het deksel vergren...

Page 71: ...is onlineshop ch Verzending alleen binnen Zwitserland U kunt een vacuümzak die geseald is met een schaar open maken en de levens middelen er uithalen 141 140 6 AUTOMATISCH VACUMEREN EN SEALEN VAN EEN ZAK FUNCTIE VACUUM SEAL B Deksel openen Leg de levensmiddelen in de zak Gebruik a u b uitsluitend de originele Solis vacuüm zakken om het apparaat niet te beschadigen en om de beste resultaten te bere...

Page 72: ...vloeistoffen worden ingevroren ze kunnen scheuren omdat de vloeistof tijdens het invriezen uitzet 143 142 8 VACUMEREN VAN SOLIS VOORRAADBUSSEN MET DEKSEL LET OP Gebruik alstubkieft uitsluitend de voorraadbussen van Solis voor dit appa raat Alleen deze bussen zijn ontworpen voor de onderdruk die de Solis Vac Professional creëert U vindt de accessoires voor uw vacuümmachine bij uw speciaalzaak of bi...

Page 73: ...erproces duurt slechts een paar minuten Prik met een vork een paar keer in het vlees het gevo gelte of de vis Leg het vlees de vis in de rechthoekige Solis bewaardoos 1 0 of 2 8 liter bedek het vlees de vis met de marinade en laat ten minste 3 cm afstand tussen de levensmiddelen en de bovenrand van de bewaardoos Sluit de bewaardoos met de bijpassende deksel zie afbeelding U Sluit het deksel en de ...

Page 74: ...r voor gebruik s TIPS VOOR HET OPTIMAAL VACUMEREN 1 Doe de zak niet te vol Laat altijd genoeg plaats vrij zodat de uiteinden van de zak zonder problemen in de vacuümkamer gelegd kan worden zonder dat er plooien of golven ontstaan 2 De opening van de zak mag niet nat zijn omdat een natte zak niet geseald kan worden Als de levensmiddelen vocht bevatten of als de zak van binnen nat is selecteer dan d...

Page 75: ...OREN SOLIS VACUÜMZAKKEN Het ontdooien van vlees vis fruit groenten en andere gevoelige producten Deze levensmiddelen moeten langzaam in de zak resp bewaardoos en in de koelkast ontdooid worden Het ontdooien van brood soepen stamppotten Deze levensmiddelen kunnen bij kamertemperatuur ontdooid worden In dit geval de zak opensnijden zodat de damp kan ontsnappen In ieder geval na het ontdooien direct ...

Page 76: ...nsmidde len met Botulinum geïnfecteerd zijn Levensmiddelen zonder zuur zoals bijvoorbeeld vlees zeevruchten gevo gelte vis eieren paddenstoelen en in loog geconserveerde olijven Levensmiddelen met weinig zuur zoals de meeste groentesoorten Levensmiddelen met gemiddeld zuur zoals bijvoorbeeld tomaten uien chilipepers vijgen en komkommers 8 Om deze zogenoemde gevaarlijke levensmiddelen kort te bewar...

Page 77: ...le uren bij kamer temperatuur bewaard zijn Dat is erg gevaarlijk voor de gezondheid als deze in sauzen gebruikt worden of als ze vacuümverpakt of in een zuurstofarme ruimte bewaard worden 5 Verdeel de gevacumeerde zak of bak gelijkmatig in de koelkast of vriezer zodat deze zo snel mogelijk gekoeld worden s REINIGING EN VERZORGING Voor het reinigen van uw apparaat raden wij het volgende aan 1 Trek ...

Page 78: ...T DEZE GEVACUMEERD HEEFT 1 In het apparaat zit een vacuümdruk sensor Als de druk niet hoog genoeg is wordt het sealproces niet automatisch in werking gezet Controleer of de seal strip en de afdichtingen schoon zijn en reinig ze eventueel Controleer ook of ze op de juiste plek zitten en start het apparaat opnieuw 2 Controleer of de afdichtingen kapot gebroken of verdraaid zijn Plaats ze opnieuw of ...

Page 79: ...s of bewaardoos rondom goed dicht zit 4 Mocht er tijdens het vacuümproces vloeistof uit de bus of doos komen dan moet de bus of doos met inhoud eerst in de koelkast afgekoeld worden 5 Controleer of het deksel gesloten en vergrendeld is 6 Controleer de werking van het apparaat 7 Controleer of de rand van de bus of doos en de rand van de deksel echt goed schoon is en er een afstand van 3 cm is tusse...

Page 80: ...dagen 10 15 dagen Groenten 562 C 1 3 dagen 7 10 dagen Fruit 562 C 5 7 dagen 14 20 dagen Eieren 562 C 10 15 dagen 30 50 dagen Vriezer Vlees 1862 C 3 5 maanden 1 jaar Vis 1862 C 3 4 maanden 1 jaar Schelpdieren 1862 C 3 5 maanden 1 jaar Bewaarplaats Levensmiddel Tempera tuur Normale houdbaar heid Houdbaarheid met vacuümver pakking in Solis voorraadbussen of zakken Kamer temperatuur Brood 2562 C 1 2 d...

Page 81: ...t zich te allen tijde het recht voor van technische en optische wijzigingen en modificaties ter verbetering van haar producten 091 802 90 10 Bewaar de originele verpakking van dit product goed zodat u deze voor een eventueel transport of verzending van het product gebruiken kan Solis of Switzerland AG Solis Haus CH 8152 Glattbrugg Zürich Zwitserland Telefoon 41 44 874 64 54 Fax 41 44 874 64 99 inf...

Reviews: