32
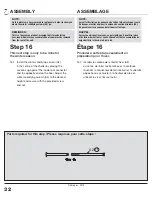
Parts required for this step / Pièces requises pour cette étape :
ASSEMBLY ASSEMBLAGE
© Sojag inc. 2015
A2
X
1
Step 16
This next step is only to be done for
the winter season.
16.1 Install the winter solidifying column (A2)
in the centre of the shelter by placing the
suction cup against the inside roof connector
and the opposite end on the floor. Adjust the
winter solidifying column (A2) to the desired
height
and
secure with the provided screw
and
nut.
NOTE:
On this picture we have removed to roof panels in order to show you
where the winter solidifying column (A2) go.
NOTE :
Sur cette illustration, les panneaux de toit ont été enlevés pour seule
fin de vous montrer où placer la colonne de soutien hivernale (A2).
Ne pas enlever les panneaux de toit pour cette étape.
RAPPEL :
Ceci est un abri quatre saisons, ce qui signifie qu’il peut être laissé
à l’extérieur durant toute l’année. Cependant, toute accumulation de
neige doit être retirée du toit de l’abri.
REMINDER :
This is a four-season product, meaning that it may be left up
year-round. However, any accumulation of snow must be removed
from the roof of the unit.
Étape 16
Procéder à cette étape seulement en
préparation pour l’hiver.
16.1 Installer la colonne de renfort d’hiver (A2)
au centre de l’abri, l’extrémité avec la ventouse
touchant le connecteur de toit intérieur et l’extrémité
opposée au sol. Ajuster à la hauteur désirée en
utilisant la vis et l’écrou fourni.
Summary of Contents for 375506
Page 15: ...15 Sojag inc 2015 X4 J1 D D U1 J1 D1 D1 D D1 D1 D D1 D ...
Page 17: ...17 Sojag inc 2015 X4 D D1 D D D1 D1 U 1 1 1 1 1 ...
Page 21: ...21 Sojag inc 2015 J J V1 V1 V1 J1 ...
Page 25: ...25 Sojag inc 2015 Mb Mb M1b M1b P Mb P1 M1b ...
Page 31: ...31 Sojag inc 2015 S S S S S S S S T X6 X6 X68 ...
Page 33: ...33 Sojag inc 2015 A2 A2 Made in CHINA Fabriqué en CHINE Hecho en CHINA ...
Page 34: ...34 Notes ...
Page 35: ...35 Notes ...
Page 36: ...Printed in China Imprimé en Chine www sojag ca ...

