


47
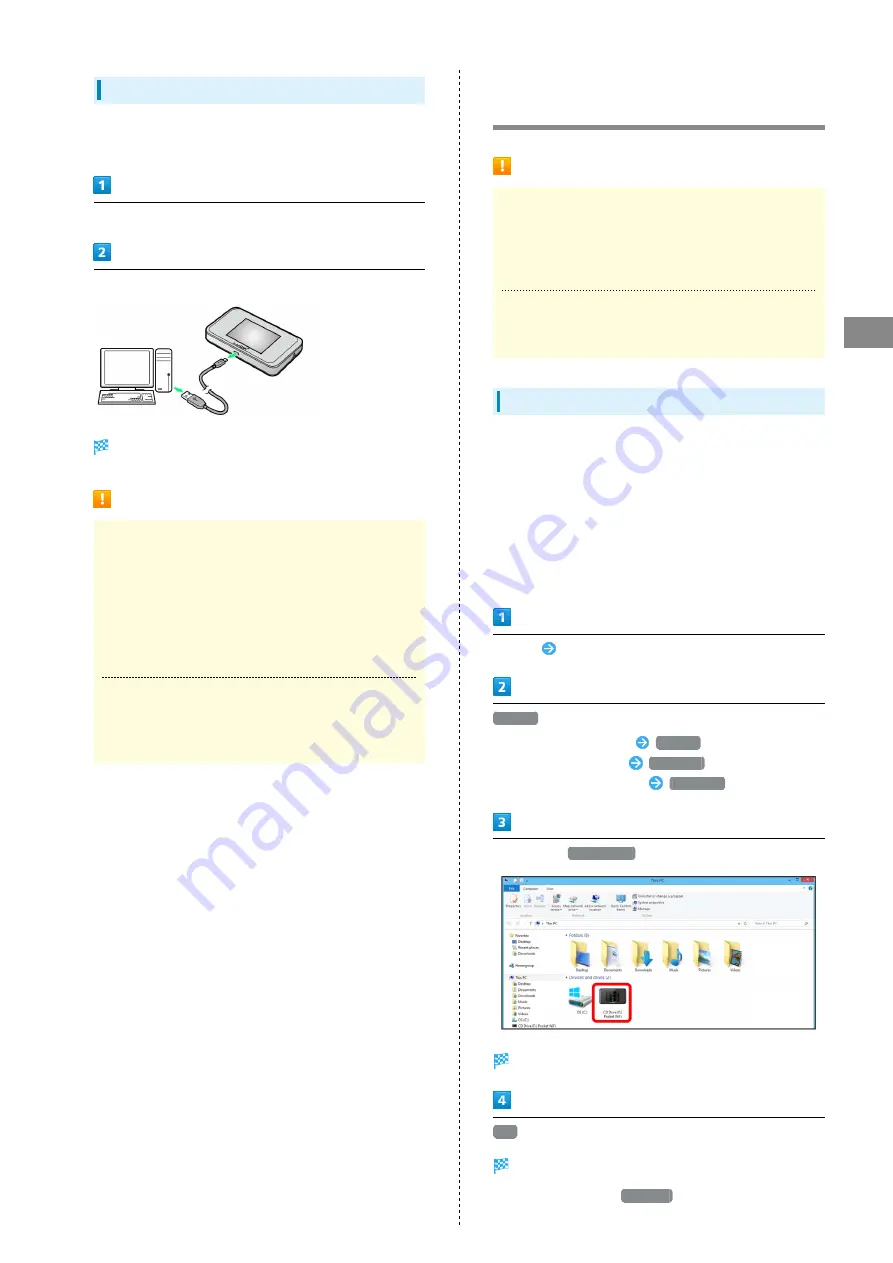
Connecting with Micro USB Cable (Windows)
501HW
Device Removal (Windows)
・When using a PC, check that data uploading/downloading is
completed before removing Wi-Fi router.
Check that data uploading/downloading is completed.
Remove Wi-Fi router from PC
Removal is complete.
Cautions for Removing Wi-Fi Router
Standby/Hibernation
Wi-Fi router may malfunction if PC enters standby
(suspend/resume) or hibernation with it connected. Be sure
to remove Wi-Fi router before leaving a PC unattended,
etc. Wi-Fi router may malfunction if connected before PC
starts/restarts. Remove Wi-Fi router before starting/
restarting PC.
WEB UI
Exit WEB UI before removing Wi-Fi router. Do not remove
Wi-Fi router during transmissions.
Installing/Uninstalling Driver
(Windows PC)
Notes on Installation/Uninstallation
Removing
Do not remove Wi-Fi router during installation/
uninstallation. May cause failure of installation/
uninstallation, system shutdown or other abnormality.
Administrative Privileges
Log in as Administrator.
Manual Installation
When connecting Wi-Fi router the first time, the device driver
installs automatically.
If installation does not begin automatically or a screen is not
displayed for selecting installation options, install with the
following steps.
Screenshots/operations are based on Windows 8.1.
・Power on the PC first, and then connect Wi-Fi router to the
PC.
Desktop
Activate File Explorer
This PC
・Windows 10: Start menu
This PC
.
・Windows 7: Start menu
Computer
.
・Windows Vista: Start menu
Computer
.
Double-click
Pocket WiFi
User Account Control dialog box may appear.
Yes
Installation is complete.
・Windows Vista: Click
Continue
.
Summary of Contents for 501HW
Page 1: ...501HW User Guide...
Page 2: ......
Page 19: ...17 Getting Started 501HW Power Off Press Hold Power is off...
Page 20: ...18...
Page 46: ...44...
Page 62: ...60 Resetting Data Traffic Reset all data traffic volumes for 1 2 and 3 Data volume is reset...
Page 92: ...90...
Page 100: ...98 Next Confirm description for SSID and SSID Stealth in LAN Wi Fi setup Next...
Page 103: ...101 Settings Using WEB UI 501HW Select the network OK Network search is set...
Page 106: ...104 Set each item Save Created profile appears for profile name...
Page 108: ...106 Enter each item Save Edited information appears...
Page 122: ...120 Set each item Apply LAN Wi Fi basic settings for SSID A are made...
Page 126: ...124 Set each item Apply LAN Wi Fi advanced settings are made...
Page 128: ...126 OK MAC Address Filtering is set...
Page 130: ...128 OK MAC Address Filtering is canceled...
Page 132: ...130 OK Wi Fi router is rebooted and DHCP is set...
Page 137: ...135 Settings Using WEB UI 501HW Apply OK IP address filtering settings are canceled...
Page 140: ...138 Canceling Portmapping In Menu List Router Setting Portmapping Delete OK...
Page 141: ...139 Settings Using WEB UI 501HW Apply OK Portmapping settings are canceled...
Page 144: ...142 Canceling Special Applications In Menu List Router Setting Special Applications Delete OK...
Page 145: ...143 Settings Using WEB UI 501HW Apply OK Special application settings are canceled...
Page 154: ...152 OK Wi Fi router reboots to its default settings...
Page 164: ...162 Delete OK Information is deleted after pop up screen is shown...
Page 166: ...164 Delete OK Information is deleted after pop up screen is shown...
Page 178: ...176 Enter Login password Login Settings open LAN Wi Fi...
Page 181: ...179 Settings Using WEB UI 501HW Enter Login password Login Settings open LAN Wi Fi...
Page 189: ...187 Settings Using WEB UI 501HW Data Usage...
Page 192: ...190 Data Usage...
Page 195: ...193 Settings Using WEB UI 501HW Data Usage Reset...
Page 196: ...194 Yes Data volume is reset...
Page 198: ...196 Information Information is shown...
Page 199: ...197 Settings Using WEB UI 501HW Select information to confirm Information is shown...
Page 202: ...200 Delete YES Information is deleted after pop up screen is shown...
Page 204: ...202 Enter Login password Login Settings open Device Information Information is shown...
Page 221: ...Appendix Troubleshooting 220 Specifications 223 Warranty Service 225 Customer Service 225...
Page 228: ...226...
Page 243: ......


