8
Snom D7C User Manual
Setting up the expansion module
5.
Holding the D7C and the connector backside up, push the connector against the footstand of
the DC7 (Fig. 4). If it does not snap securely into place, push the three levers on the connector
towards the footstand of the D7C until you hear each one click into place (Fig. 5).
Fig. 4
Fig. 5
6.
Push the other side of the connector against the footstand of the phone. If it does not snap
securely into place, push the three levers on the connector towards the footstand of the phone
until you hear each one click into place.
7.
D785 only
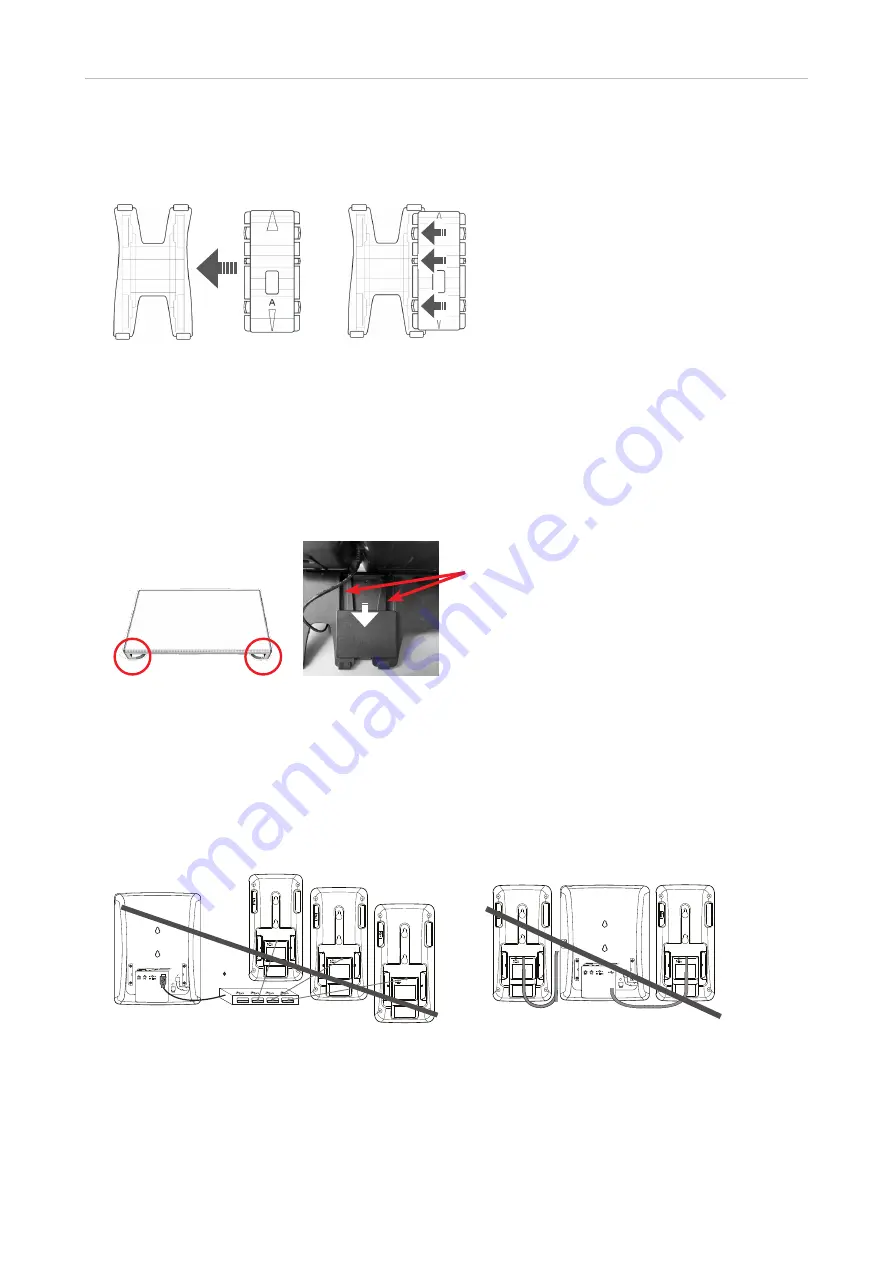
. Place a soft cloth on the desktop and turn phone and D7C backside up. On either side
of the small plate marked B there is a ridge (Fig. 6) that fits into the slideguides on the footstands.
Insert the ridges into the slideguides of the footstands of phone and D7C and slide the connector
down toward the tips of the "legs" (Fig. 7).
Fig. 6
Fig. 7
C
onnecting two or three D7Cs to a Snom phone
Do not
use a USB hub (Fig. 8). If the phone has more than one USB port,
do not
connect expansion
modules to more than one port (Fig. 9).
The D7Cs must be daisy-chained
. If they are not, the phone
will not be able to identify the function keys on the modules, rendering them inoperable.
Fig. 8
Fig. 9
1.
Connect the modules to each other first. If a module is connected to the phone already, connect
the second and third module to each other.
2.
Important note:
Attach a power adapter (available separately) to the second module and to a wall
outlet
before
connecting the daisy-chain to the phone or the second / second and third module to
the D7C already connected to the phone (Fig. 10).
Slide guide


