If you have any problems, contact Elenco
®
Copyright © 2014 Elenco
®
Electronics, Inc. All Rights Reserved.
●
150 Carpenter Ave.
●
Wheeling, IL 60090
(800) 533-2441 Fax: (847) 520-0085
●
e-mail: [email protected]
●
Website: www.elenco.com or www.snapcircuits.net
WARNING: SHOCK HAZARD
-
Never connect Snap Circuits
®
to the electrical outlets in your
home in any way!
WARNING:
Always check your wiring before
turning on a circuit. Never leave a circuit
unattended while the batteries are installed.
Never connect additional batteries or any other
power sources to your circuits.
Strobe Light & Sound
Model SCP-14
753163
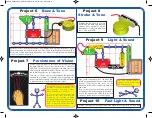
Project 3
Strobe Light &
Sound
Snap Circuits
®
uses electronic blocks that snap onto a base grid to build different
circuits. These blocks have different colors and numbers on them so that you can
easily identify them. Build the circuit shown by placing all the parts with a black
1
next
to them on the clear base grid first. Then, assemble parts marked with a
2
. Connect
the white LED (D6) using the red & black jumper wires as shown, with red wire to “+”
side. Install three (3) “AA” batteries (not included) into the battery holder (B3).
Turn on the slide switch (S1). The white LED should be flashing. Move the lever on
the adjustable resistor (RV) to adjust the flash rate a little.
Note:
In rare cases the circuit may not work at all settings of RV. If this happens,
move the RV lever to the side near the strobe IC (U23), and only move the RV lever
over a small range.
Combine projects 1 & 2 by stacking
the white LED (D6) and speaker
(SP2) together as shown. Remember
to connect the red wire to the “+” side
of the LED. This circuit is shown on
the box cover.
Project 1
Strobe Light
Placement
Level Numbers
Project 2
Strobe Sound
Replace the white LED (D6) with the speaker (SP2); the speaker doesn’t have a “+”
side, so the red wire can go to either side. Turn on the slide switch (S1). You hear a
clicking sound from the speaker. Move the lever on the adjustable resistor (RV) to
adjust the clicking rate a little.
CAUTION:
Persons who are extremely
sensitive to flashing lights should exercise
caution when playing with this toy.
CAUTION:
High intensity light. Do not
look directly at the white LED (D6).
Project 4
Suspended
Raindrops
Use the circuit from project 1. Go to a
water faucet and adjust the faucet so
water is dripping at a steady rate.
Dim the room lights and hold the
white LED so it shines on the
dripping water. Try to set the lever on
the adjustable resistor (RV) so that
the dipping water drops appear
suspended in mid-air. You may need
to adjust the drip rate on the faucet to
make this work.
Faucet
Turn on the switch (S1)
and move the lever on the
adjustable resistor (RV)
to change the brightness
of the white LED (D6).
Project 5
Adjustable Light
+
+
SCP-14_022014.qxp_SCP-14 Instructions 3/7/14 2:37 PM Page 1


