Take into consideration that the interactive pen display generates heat when it is turned on. To
maintain a consistent operating temperature, do not block or cover any of the ventilation holes on the
back of the unit. Other external factors can affect the interactive pen display, such as the heat
generated by control systems or other electronic equipment. Make sure that there is adequate airflow
around the unit.
Use your computer's mouse and keyboard to install SMART Product Drivers before you install your
interactive pen display. Your interactive pen display cannot provide keyboard or tethered pen
functionality until you install SMART Product Drivers. You should also keep your computer within 5m
(16') of the unit or use an active USB extender. This protects against signal degradation that occurs
with a longer USB cable. The video cable also has length limitations, so you should not use an RGB
video cable longer than 15m (50').
Setting up your work area
Organise your work area so you can work comfortably. Position your interactive pen display and your
keyboard for easy access without unnecessary reaching. You should be able to comfortably view the
interactive pen display and any other displays with a minimum of eye strain.
Because the interactive pen display surface is a little higher than your desk, you can adjust the height
of your chair to ensure comfortable use of the device.
You can also mount the interactive pen display onto articulated arms or other third-party stands
meeting the VESA 100 specification for display stands.
Changing the angle of your interactive pen display
You can recline the Smooth Tilt Stand to change the angle and height of your interactive pen display.
To alleviate glare, you can use the attached Smooth Tilt Stand to angle the interactive pen display.
N
N O T E
For information on how to remove the stand, see
Removing and installing the Smooth Tilt Stand
g
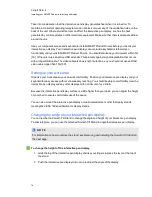
To change the height of the interactive pen display
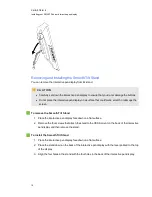
1. Grab the top of the interactive pen display and use your fingers to press the lever at the top of
the stand.
2. Push the interactive pen display down or up to adjust the angle of the display.
C H A P T E R 2
Installing your SMART Podium interactive pen display
14
Summary of Contents for Podium 500 Series
Page 1: ...SMART Podium 500 Series Interactive pen display User s guide...
Page 18: ......
Page 28: ......
Page 32: ......
Page 46: ......
Page 50: ......
Page 62: ......
Page 66: ......
Page 69: ......
Page 70: ...SMART Technologies smarttech com support smarttech com contactsupport...


