Skyrack Canada •
(514) 919-
6134• [email protected] • www.skyrack.ca
1
Upper buckle (#2)
Lateral buckle (#3)
Lower buckle (#2)
INSTRUCTON & ASSEMBLY SHEET
SKYRACK TRUNK BIKE CARRIER - 3 BIKES
MODEL # SR-BR-101
PARTS INCLUDED
•
DESCRIPTION
•
QTY.
1
Skyrack Trunk Bike Carrier
1
2
Small Strap with Small Hook (2’ x 1”)
2
3
Long Strap with Big Hook (5’ x 1”)
4
4
Safety
Strap (6.5’ x 1”)
1
WARNINGS / LIMITATIONS
•
Number of bicycles carried should not exceed 3.
•
Do not exceed the maximum carrying capacity of 100 lbs (45kg).
•
Verify periodically that all bolts and knobs are tight.
•
Verify the wear of the straps and change it if needed.
•
Do not use this bike carrier off-road.
•
Do not use this bike carrier for tandems or recumbents.
•
Do not install the bike carrier on trailer or towed vehicle.
•
If you don’t use the safety strap, it may result in loss of bicycles.
•
Failure to follow above guidelines voids warranty.
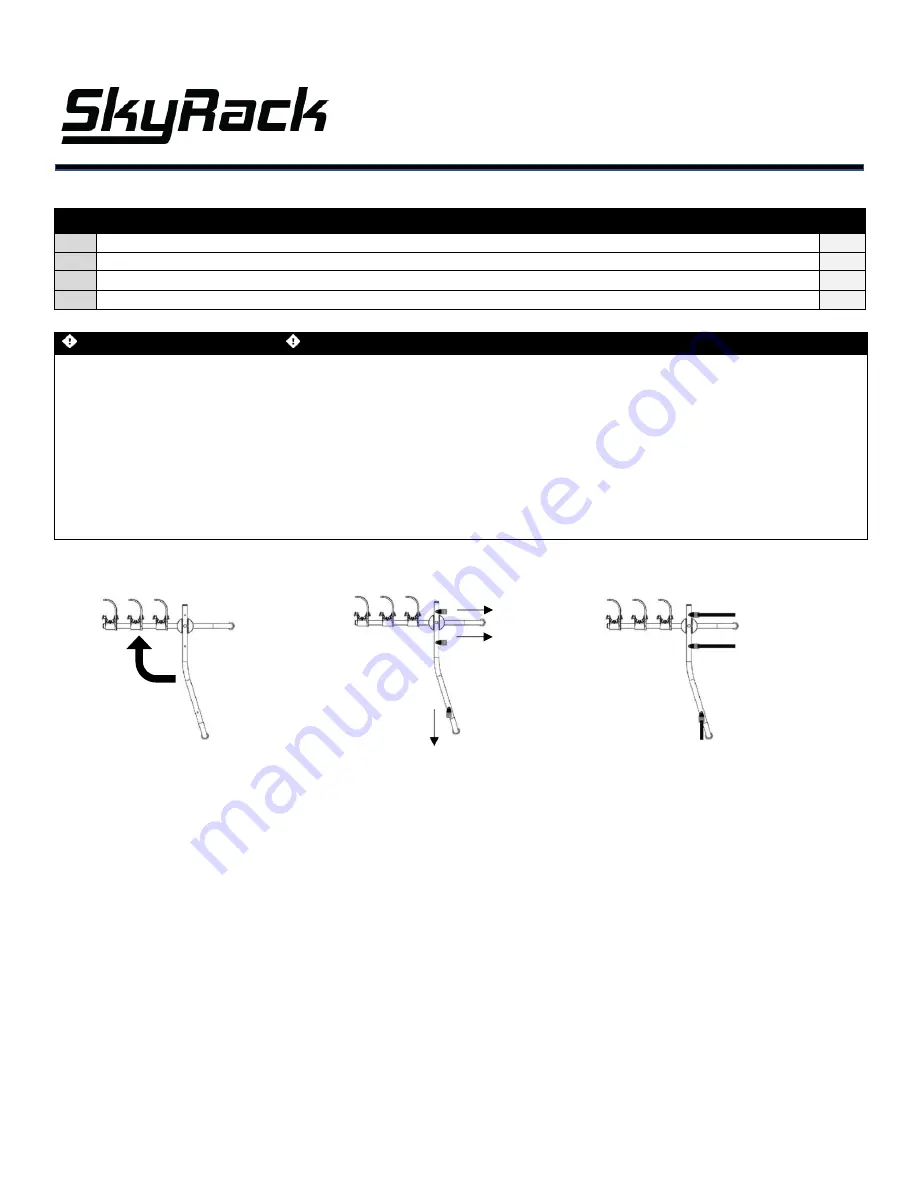
MOUNTING INSTRUCTIONS
1-
Loosen the two-adjustable knob to open the bike carrier and retighten as shown.
2-
Simply tighten the nut of the of the 6-metal buckle in the direction as shown.
3-
Attach the Small Strap with Small Hook (#2) on the upper buckle and the lower buckle and attach the Long Strap with Big Hook
(#3) on the lateral buckle.
INSTALATION INSTRUCTIONS
1-
Clean the trunk and the rear of your car.
2-
Loosen the two-adjustable knob to open the bike carrier.
3-
Move the upper supports leg until he is slighty upwards about 15 to 20 degrees and retighten.
4-
When you have assembled the bike carrier to is proper setting, place it on the vehicle. Now attach the two upper hooks (#2) into
the slot at the leading edge of the trunk. Adjust the straps lengths so the bike carrier stays in place on the car.
5-
Now attach the two lateral hooks (#3) to the outside edge of the trunk lip. The straps should always be at a 90-degree angle from
the attached edge.
6-
Now attach the two lower hooks (#2) on the bottom edge of the trunk.
7-
Tighten all the straps. We also recommend making a simple knot at the end of the cam buckle with the extra length of the straps.
__________________________________________________________________________________________
➋
➌
➊


