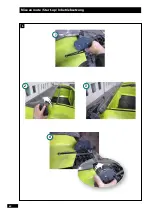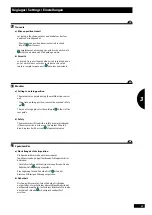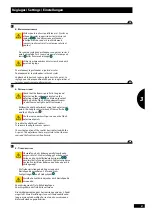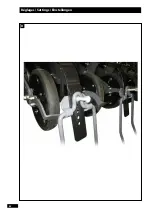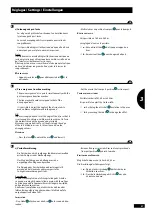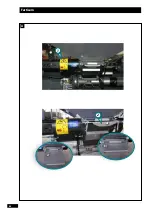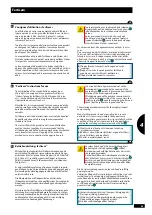
Einstellung der Bodenabstützung
1- e
inStellUng
deS
a
ndrUck
-d
rUckwerteS
(Standardeinstellung Position 2)
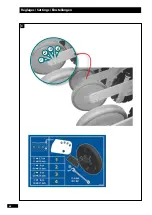
- Vor der Einstellung der Sätiefe müssen Sie den Andruck-
Druckwert der Rollen festlegen
Diese Einstellung hängt von den Ihnen vorliegenden
Bodenbedingungen und der Tiefe der von Ihnen
ausgeführten Aussaat ab.
Bitte beziehen Sie sich für die für Ihre Arbeiten am besten
geeignete Positionierung des Rades in der Einkerbung
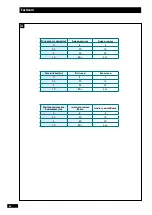
auf die Tabelle auf der nebenstehende Seite.
Übermäßiger Druck kann die Qualität der Aussaat
beeinträchtigen und zu Beschädigungen der Maschine
führen.
- Diese Einstellung hängt von den Ihnen vorliegenden
Bodenbedingungen ab.
- Sehr trockener Boden
➪
Position
1
für einen
maximalen Druckwert
- Ausgetrockneter Boden
➪
Position
2
- Tiefe Aussaat
➪
Position
3
- Sehr feuchter Boden
➪
Position
4
zur Kontrolle
der Tiefe, ohne Glättung der
Oberseite der Reihe
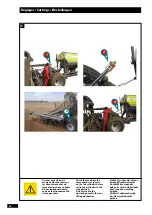
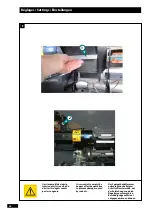
- Zum Ändern der Rollenposition muss die
Schraubenmutter um einige Umdrehungen gelöst
werden, danach ist eine Änderung der Einstellposition
möglich.
- Nach erfolgter Einstellung muss die Schraubenmutter
wieder fest angezogen werden.
Hinweis:
- Bei sehr klebenden Bedingungen müssen die Rollen
entfernt werden, damit kein Saatgut aus der Furche
austritt.
In diesem Fall werden die Tiefe von dem Parallelogramm
und die geschlossene Furche von der hinteren Egge ge-
steuert.
Adjusting the grip
1- a
dJUSting
the
PreSS
wheel
PreSSUre
(normal setting is position 2)
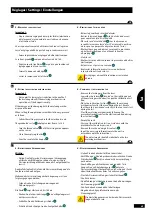
- Before adjusting the drilling depth, you should establish
the press wheel pressure.
This setting is dictated by the ground conditions and by
the drilling depth.
Refer to the table opposite to position the wheel in the
notching that best suits the task you are performing.
An excessive pressure may be detrimental to the drilling
quality and damage the machine.
- This setting is dictated by your ground conditions.
- Very dry ground
➪
position
1
, for maximum
pressure.
- Moist ground
➪
position
2
.
- Deep drilling
➪
position
3
- Very moist ground
➪
position
4
to control the depth
without smearing the top of the
row
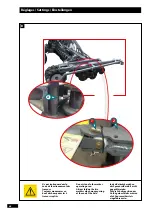
- To modify the position of the rollers, unscrew the bolt by
a couple of turns then change the detent.
- Tighten the screw firmly after making the adjustment.
Note:
- If the conditions are very sticky, remove the press wheels
so as not to drag seed grains from the furrow.
In this case, the parallelogram linkage controls the depth
and the furrow is closed by the rear harrow.
Réglage de l’appui au sol
1- r
églage
de
la
PreSSion
de
réaPPUi
(réglage standard position 2)
- Avant de régler la profondeur de semis, vous devez
déterminer la pression de réappui des roulettes.
Ce réglage est dicté par vos conditions de sol et par la
profondeur du semis que vous effectuez.
Se référer au tableau page ci-contre pour positionner la
roue dans l’encochage le plus adapté à votre travail.
Une pression excessive peut nuire à la qualité du semis et
endommager la machine.
- Ce réglage est dicté par vos conditions de sol.
- Sol très sec
➪
position
1
pour un maximum de
pression.
- Sol ressuyé
➪
position
2
- Semis profonds
➪
position
3
- Sol très humide
➪
position
4
pour contrôler la
profondeur sans lisser le dessus du
rang
- Pour modifier la position des roulettes, desserrer de
quelques tours l’écrou puis changer de cran.
- Rebloquer fermement l’écrou après réglage.
Remarque :
- En cas de conditions très collantes, retirer les roulettes
pour ne pas ressortir de graines du sillon.
Dans ce cas, la profondeur est contrôlée par le
parallélogramme et le sillon refermé par la herse arrière.
Info-Traçabilité
Directives pour TRADUCTION EN-DE
à
ajouter
ou
à
traduire
à
suppriMer
deMande
de
traduction
ideM
n
°
page
xx
à
Vérifier
49
FR
EN
DE
3
Réglages / Settings / Einstellungen
C
C
C
Summary of Contents for Maxi Drill 6000
Page 2: ......
Page 28: ...26 Mise en route Start up Inbetriebsetzung D 1 2 3 3 ...
Page 30: ...28 Mise en route Start up Inbetriebsetzung D 1 2 ...
Page 32: ...30 Mise en route Start up Inbetriebsetzung E ...
Page 42: ...40 Mise en route Start up Inbetriebsetzung L 2 3 4 1 ...
Page 50: ...48 Réglages Settings Einstellungen C 3 4 2 1 ...
Page 54: ...52 Réglages Settings Einstellungen D ...
Page 64: ...62 A Fertisem 1 2 a a b c ...
Page 68: ...66 Fertisem B 2 1 3 ...
Page 70: ...68 Fertisem D 1 2 ...
Page 74: ...72 Entretien Maintenance Wartung B ...
Page 94: ...92 Entretien Maintenance Wartung J Maxi Drill ...
Page 98: ...96 Conseils Techniques Technical advice Technische Hinweise B ...

