Simrad SH80
18
851--164300 / C
The transducer face must be protected by a rigid, padded cover
(e.g. a wooden box lined with foam rubber) all the time it is
exposed to the risk of physical damage.
Note
Once the units are unpacked, great care must be taken to ensure
that transducers and cabling are not exposed to any mechanical
stress.
Re-packing
If the unit is not to be installed immediately, re-pack it in its original
packing material to prevent damage in the intervening period.
→
Refer to the information on page 20.
1.9 Storage
Pre-installation storage
The equipment should be stored in its original transportation crate
until ready for installation. The crate must not be used for any
purpose for which it was not intended (eg. work platform etc.).
Once unpacked, the equipment must be kept in a dry, non
condensing atmosphere, free from corrosive agents and isolated
from sources of vibration.
Note
Do not break the seal to open a circuit board package before the
board is to be used. If the board package is returned to the
manufacturers with the seal broken, the contents will be assumed
to have been used and the customer will be billed accordingly.
The unit must be installed in its intended operating position as soon
as possible after unpacking.
If the unit contains normal batteries, these may have been
disconnected/isolated before the unit was packed. These must then
be reconnected during the installation procedure. Units containing
batteries are marked.
Caution
Units containing lithium or alkaline batteries must be handled
separately and with care. Such units are marked accordingly. Do
not attempt to recharge such batteries, open them or dispose of
them by incineration. Refer to the applicable product data sheets.
After use storage
Introduction
If a unit is removed from its operating location and placed into
storage, it must be properly cleaned and prepared before packing.
Summary of Contents for SH80 - REV C
Page 2: ......
Page 14: ...Simrad SH80 X 851 164300 C Blank page...
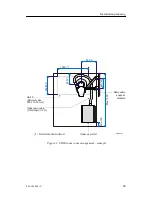
Page 61: ...Transceiver unit 45 851 164300 C Figure 13 Mounting the Transceiver Unit CD3110A...
Page 196: ...Notes...
Page 197: ...Notes...
Page 200: ......


