28
9.9
Cutter drum removal and refitting
The drum replacement stage can be performed either with the machine mounted on the
prime mover or lifted slightly off the ground and secured using suitable lifting equipment.
Place props under the machine to prevent it lowering if the valve or any other components
on the prime mover arm give way.
Use suitable lifting means and PPE for handling, making sure you work in compliance with
the regulations in force concerning safety in the workplace.
To remove the drum, proceed as follows:
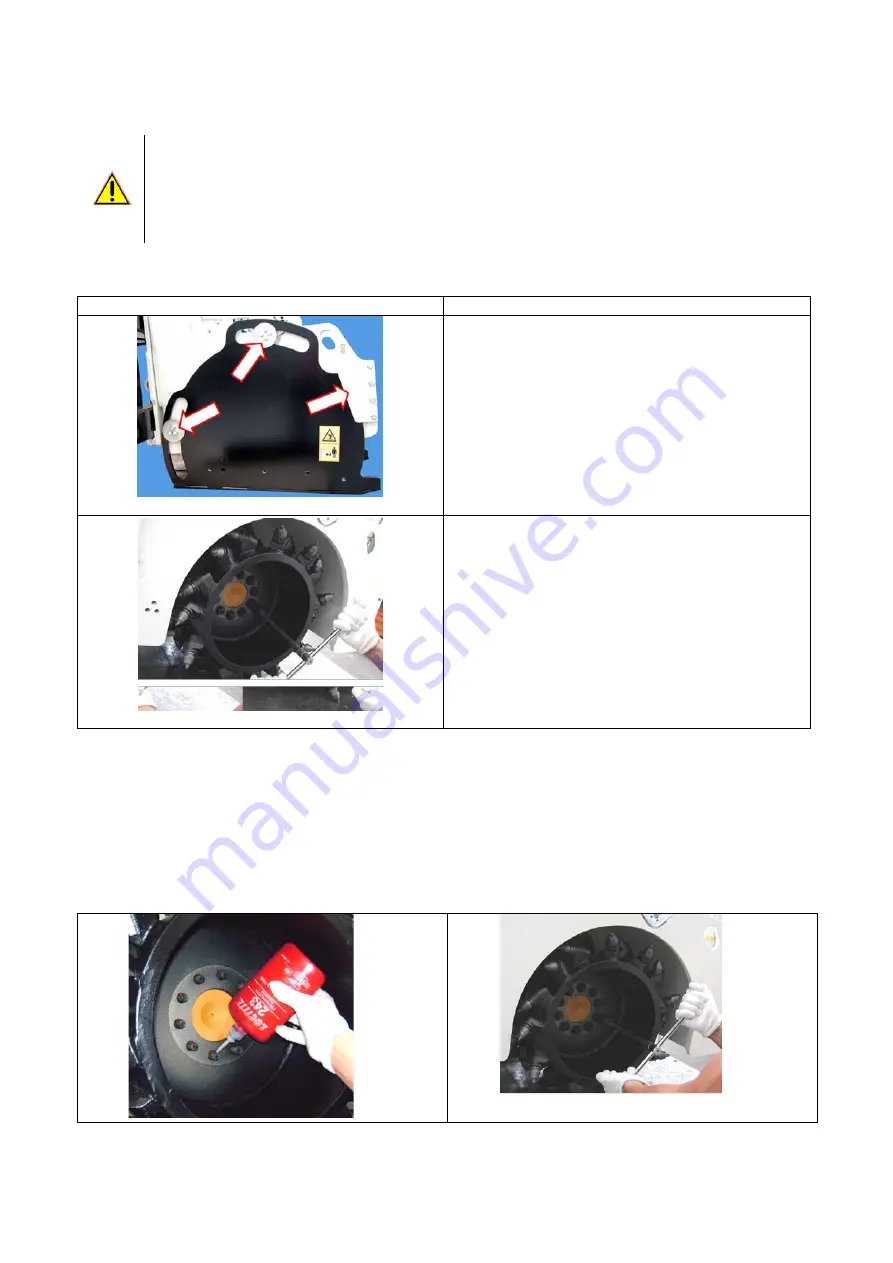
Set the planing depth at zero (see para 9.8);
fig.
A
Undo the screws fastening the guide pins and the
front guide, using appropriate tools (fig. A), and
remove the skid;
fig. B
Heat the nuts up to circa 100° C to annul the
bonding properties of the Loctite, unscrew them (fig.
B), and then take out the drum;
To refit the drum, proceed as follows:
1. Clean the stud bolts and nuts well;
2. Apply Loctite 243 to the stud bolts (see fig. C), and then fit the drum; next, tighten the nuts to a torque
of 210 Nm for the PL 450 – PL 5520 and 460 Nm for the PL 6020 (fig. D);
3. Fit the side plate and then the fastening screws on the skid guide pins (see fig. A).
fig.
C
fig. D
Summary of Contents for PL 4520
Page 14: ...14...
Page 60: ...60 IMPORTER...


