01
02
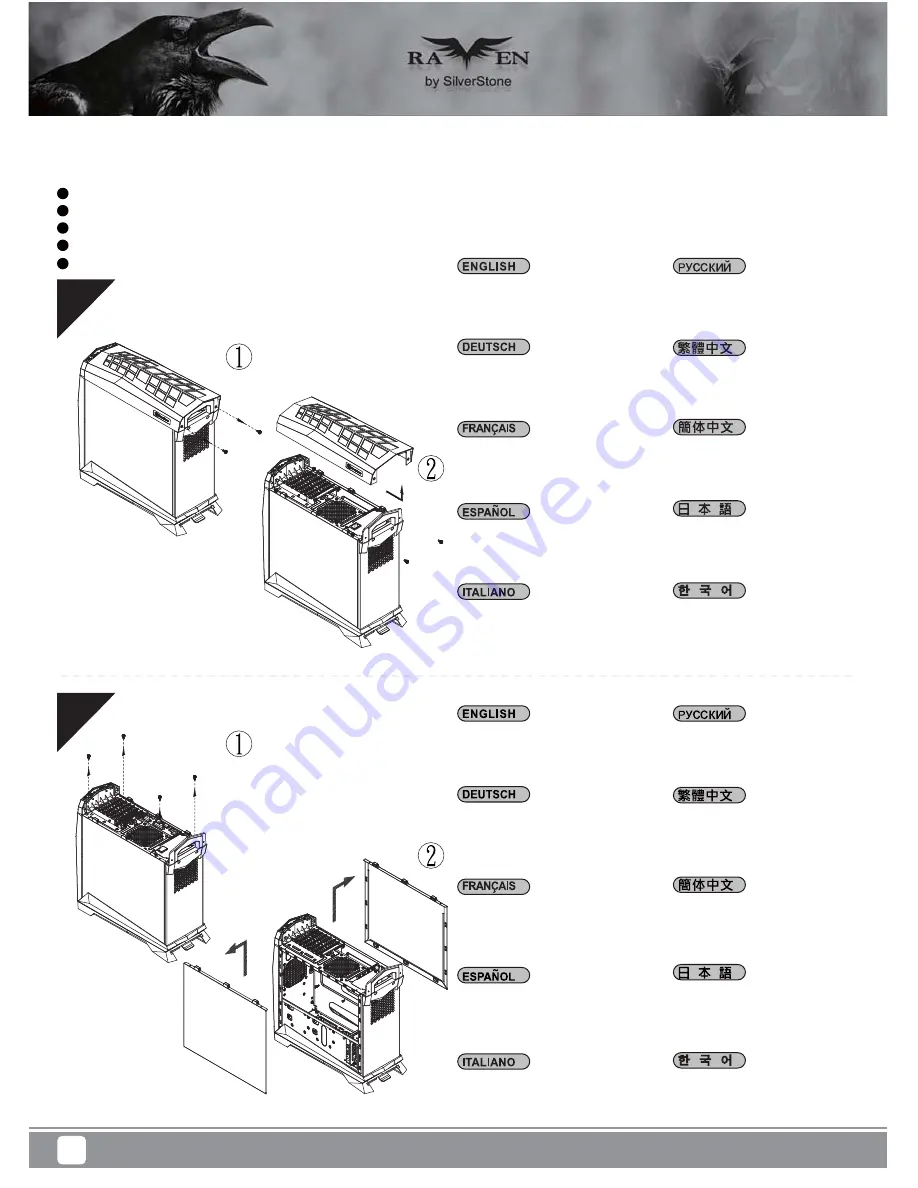
Lösen Sie die Rändelschrauben
von der Rückseite der oberen
Abdeckung; dann Abdeckung in
der abgebildeten Richtung abziehen.
Dévissez les vis à oreilles depuis la
face arrière du capot supérieur puis
retirez le capot supérieur dans la
direction indiquée dans l'illustration.
Desatornille los tornillos manuales
de la parte posterior de la cubierta
superior y luego tire de la cubierta
superior en la dirección que se muestra
en la ilustración.
Svitare le viti a testa zigrinata dal lato
posteriore del coperchio superiore,
quindi sollevare il coperchio superiore
nella direzione mostrata in figura.
Unscrew thumb screws from the
rear side of the top cover then pull
top cover off in the direction as
shown in the illustration.
Отверните
винты
с
накатанной
головкой
на
задней
части
верхней
крышки
,
затем
вытяните
верхнюю
крышку
в
направлении
,
указанном
на
рисунке
.
상단 커버 뒷면에서 엄지 나사를
풀고, 아래 그림에 표시된 방향으로
커버를 당겨서 벗깁니다.
將上蓋後方的手扭螺絲移除,
將上蓋依指示方向退出
将上盖后方的手扭螺丝移除,
将上盖依指示方向退出
上部カバーの背面からサムスクリ
ューを外してから、
図に示される方
向にカバーを外します。
Lösen Sie die beiden Schrauben an den
linken und rechten Seitenwänden, nehmen
Sie die Seitenwände ab.
Desserrez les vis des deux panneaux
latéraux pour les retirer
Desatornille dos tornillos de los paneles
izquierdo y derecho para quitarlos.
Per rimuovere i pannelli laterali allentare, per
entrambi, le due viti di serraggio.
Loosen two screws from both left and right
side panels to remove them.
Отвинтите
по
два
винта
,
крепящих
левую
и
правую
боковых
панели
,
и
снимите
панели
.
왼쪽과 오른쪽 사이드 패널에서 두 개씩
나사를 풀어 사이드 패널을 제거합니다.
取下左右側板各兩顆螺絲,卸下側板。
取下左右侧板各两颗螺丝,卸下侧板。
両方の左右パネルからネジ2本を緩めて、
取り外します。
have all components collected
check that all components do not have compatibility problems with each other or with the case
if possible, assemble the components outside the case first to make sure they are working
keep the motherboard manual ready for reference during installation
prepare a Philips screwdriver.
1
2
3
4
5
Before you begin, please make sure that you
4
Installation Guide


