DV-5200HD
TARGA GmbH
Lange Wende 41
D-59494 Soest
www.silvercrest.cc
Digital HD Pocket Camcorder
in a contemporary slim design
User manual and service information
GB
IE
1565988
6
Page 1: ...DV 5200HD TARGA GmbH Lange Wende 41 D 59494 Soest www silvercrest cc Digital HD Pocket Camcorder in a contemporary slim design User manual and service information GB IE 1 5 6 5 9 8 8 6 ...
Page 2: ......
Page 3: ...chargeable Battery 7 Cables 8 Repair and Maintenance 8 Intended Use 8 Conformity 9 Disposal of Old Devices 9 Introduction 10 Package Contents 10 Controls and buttons 11 Front Panel 12 Rear Panel 12 Left Panel display closed 13 Left Panel display open 13 Top View 13 Bottom 14 Opening the Display 15 Charging the Batteries 16 ...
Page 4: ...e Camcorder On and Off 20 Switching the Operating Mode 21 Setting the Menu Language 21 Setting Date and Time 22 Recording 23 Recording Videos 23 Video Light 25 Macro Mode 25 Exposure Compensation 26 Capturing Pictures 27 Video Light 29 Macro Mode 29 Exposure Compensation 29 Playback 30 Playing Back Video Clips 30 Playing Back Photos 33 ...
Page 5: ...41 Photo Playback Menu 44 Setup Menu 47 Date Time 48 Beep 48 Auto PowerOff 48 TV Standard 48 Format 48 Default 49 Language 49 Frequency 49 Connectors and Ports 50 Viewing Recordings on a Television Screen 50 Connecting via the HDMI Cable 50 Connecting via the USB AV Cable 51 Transferring Recordings to the Computer 53 Using the USB port 54 Using a Card Reader 55 ...
Page 6: ...Table of Contents DV 5200HD 4 English Appendix 56 Installing the Software 56 System Requirements 56 Software 56 Technical Specifications 58 Warranty Information 60 ...
Page 7: ...qualified technicians Do not look at the sun or other sources of intense light Doing so may damage your eyesight Keep the device away from water and other liquids Do not operate the device with wet hands and do not use it in rain or snow Dampness can cause danger through fire or electric shock Keep the device out of the reach of children and animals to avoid accidents or damage Switch the device o...
Page 8: ...e the charger is connected must be easy to access so that the power cord can be pulled out quickly in case of emergency Unplug the power cord from the mains when it is not used for a while e g when going on holiday in order to avoid the danger of fire Do not hold the power cord with wet hands The charger consumes electricity in idle mode To avoid any kind of power consumption you should separate i...
Page 9: ...out of reach of children If a rechargeable battery is swallowed seek medical help immediately Keep all packaging away from children as this can cause suffocation Charger and Rechargeable Battery Insert the rechargeable battery with the correct polarity Never throw a rechargeable battery into fire Remove the rechargeable battery when the device is not to be used for a long time Danger of Explosion ...
Page 10: ... shock Inspect the power cord from time to time Do not use an adapter plug or extension cable that does not meet the required safety standards Repair and Maintenance Repairs are required when this device has been damaged in any way for example when the charger or the housing of the DV 5200HD is damaged when liquid or objects have entered the device when the product has been exposed to rain or mois...
Page 11: ...ation of Conformity can also be found at the end of this User s Manual Any changes to the equipment other than those recommended by the manufacturer may lead to these directives no longer being met Only use the accessories recommended by the manufacturer If you are not using the device within the Republic of Germany you must observe the regulations and laws in the country of use Disposal of Old De...
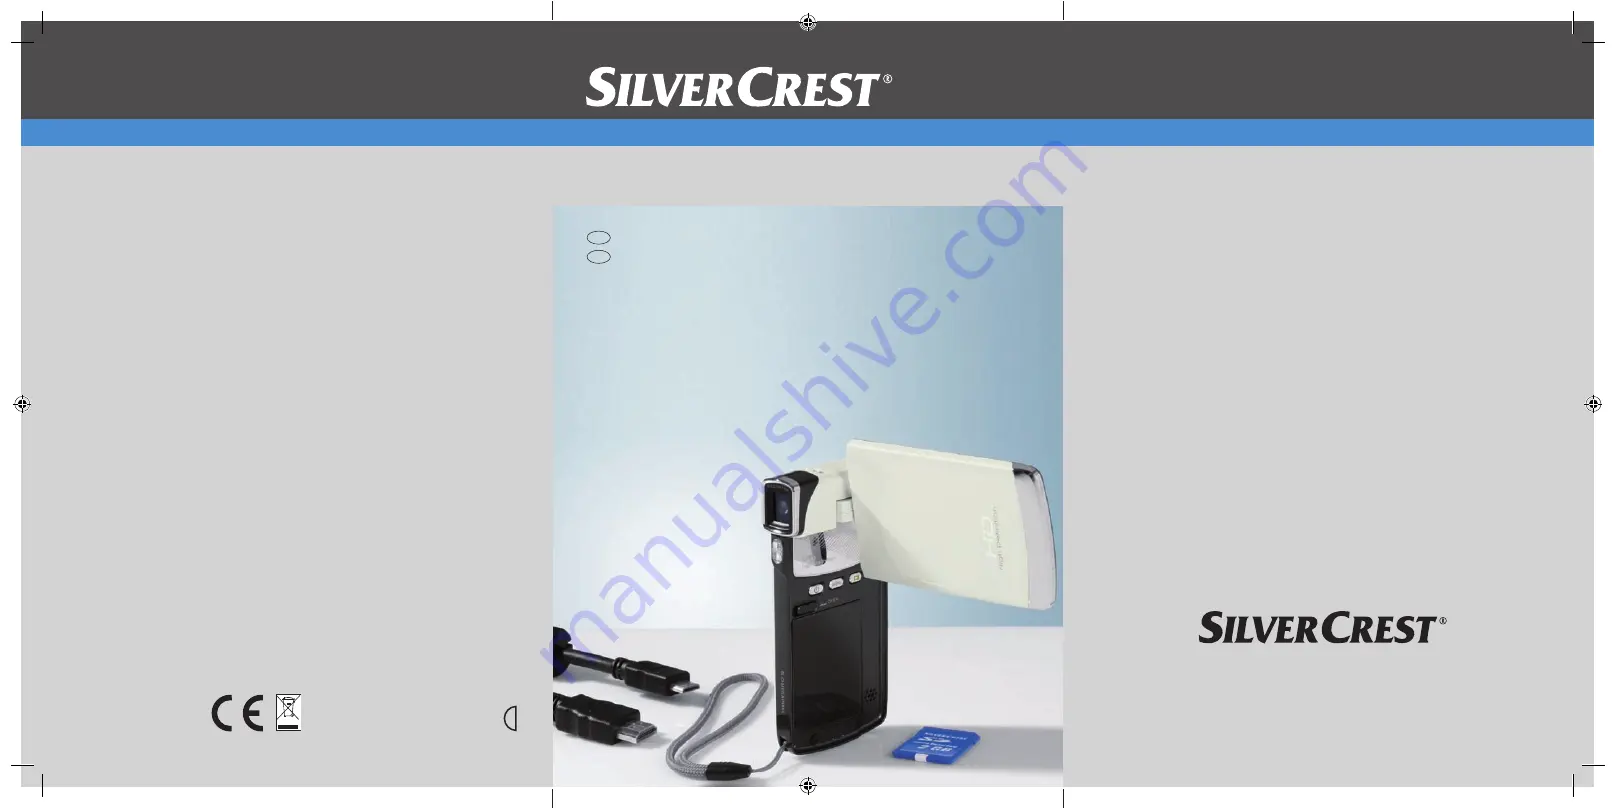
Page 12: ...plied devices and accessories out of the packaging and inspect them for any damaged or missing items Camcorder DV 5200HD Rechargeable Li Ion battery PAC ELECTRONICS CO LTD NP40 2 pieces Charger Technics GP TC03G 2U025 0421D and power cord USB AV cable HDMI cable Carrying strap ...
Page 13: ...future Controls and buttons An additional illustration of the items and controls and their corresponding numbers can be found on the inner page of the fold out cover of this User s Manual You can keep this page folded out whilst reading the different chapters of this User s Manual This will permit you to refer to the corresponding items or connection port of your camcorder at any time ...
Page 14: ...glish Front Panel 1 Lens 2 Video lamp 3 Eyelet for carrying strap Rear Panel 4 Power indicator 5 RECORD button 6 Mode selection switch 7 Confirmation button LED lamp on off 8 USB AV cable receptacle 9 HDMI jack 10 Menu navigation ...
Page 15: ...l display closed 11 Microphone 12 Fold out touchscreen Left Panel display open 13 Menu button 14 PLAY button 15 Battery compartment cover 16 Speaker 17 Battery compartment lock 18 On Off button Top View 19 Macro switch 20 Memory card compartment ...
Page 16: ...Introduction DV 5200HD 14 English Bottom 21 Tripod mount ...
Page 17: ...lay Open the display and then rotate it according to your needs 1 2 3 You can also rotate the display so it faces the front In this case the picture orientation will be adjusted automatically However this applies to recordings in landscape format only ...
Page 18: ...o that the contacts and correspond to the rechargeable battery and charging tray markings Make sure that the battery clicks into place on the charger Next connect the power cord to the charger and plug the power cord to a wall outlet To power the camcorder use only the rechargeable Lithium Ion battery PAC ELECTRONICS CO LTD NP40 Remove the rechargeable battery from the camcorder when the device is...
Page 19: ...e camcorder to the computer by using the USB AV cable To do this proceed as described in steps 1 3 on page 54 Using the USB Port If you keep the camcorder powered off after the USB cable has been connected to the computer the battery will charge The power indicator 4 will light red to indicate that the camcorder battery is being charged via the computer As soon as the battery is fully charged the ...
Page 20: ... the battery compartment by first inserting the bottom part of the cover and then push it downwards until it clicks into place see figure 3 Inserting an SD Card By using the supplied SD memory card you can increase the camcorder storage capacity for saving your videos and photos When a memory card is inserted all the recorded contents will be saved onto it If there is no memory card inserted your ...
Page 21: ... compartment and gently press on the inserted card This will protrude a little so that you can get a hold of it and remove it If the memory card or the internal memory is full the message Memory full will appear on the display The video being currently recorded will be saved and the recording will be cancelled Write Protecting the Memory Card The memory card features a write protection tab When th...
Page 22: ...button 18 to power the camcorder on Press the On Off button 18 to power the camcorder off When opening the display the camcorder will power on automatically As soon as you close it the device will power off The following table shows an overview of the different states of the power indicator 4 Colour Description Green Powered on Alternate blinking red green Recording in progress Red Data processing...
Page 23: ...ower the device on by pressing the On Off button 18 or by opening the camcorder display 2 Press the mode selector button 6 twice The setup menu will appear and the first option Date Time is highlighted with a yellow frame 3 Use the navigation buttons 10 to move the highlight to the Language option and press the confirmation button 7 Alternatively you can use your finger to tap the icon 4 Use the n...
Page 24: ...the date and time 4 Press the navigation buttons 10 to set the year 5 Press the recording button 5 to toggle between the year month day hours and minutes fields 6 Press the navigation buttons 10 to set the highlighted red background option 7 Repeat steps 5 and 6 until you have finished setting the date and time Please note that the time has to be in 24 hour format and the date in year month day no...
Page 25: ...press the navigation buttons 10 to select a larger to smaller scene area Press the S button to zoom in or press the T button to zoom out The zoom function is not available for the 1080p and QVGA resolutions See also page 36 Resolution 6 Press the record button 5 to stop recording The power indicator 4 will light solid green The video will be saved automatically under a unique name The maximum allo...
Page 26: ...he display informing you about the current settings 3 2 6 7 8 5 1 4 9 1 Video recording mode indicator 2 Zoom bar 3 Macro recording White Balance Night mode Effect 4 Recording time counter 5 Memory type an SD memory card has been inserted and all recordings are being stored on it ...
Page 27: ...g To do this press the confirmation button 7 Pressing this button again will turn the video lamp off Macro Mode This device features a macro function allowing you to focus on very close subjects This allows you to position the lens as close as 20 21 cm 8 inches from the subject The macro switch 19 is located on the top panel of the device Slide the switch to the left to enable the macro mode Slide...
Page 28: ...ompensation value 1 While in video recording or photo capture mode icons and tap on the S or T display icons to set an exposure compensation value If the picture is too bright you can set a negative value for exposure compensation If the picture is too dark you can set a positive value for exposure compensation ...
Page 29: ...on buttons 10 to select a larger to smaller scene area Press the S button to zoom in or press the T button to zoom out The zoom for enlarging or reducing the scene area does not work in Macro mode 5 Press the record button 5 to take the picture The photo taken will be shown on the display for a few seconds After this the device will return to photo capture mode The picture will be saved automatica...
Page 30: ...cording White Balance Night mode Effect 5 Memory type an SD memory card has been inserted and all pictures are being stored on it there is no SD memory card inserted and all pictures are being stored on the internal camcorder memory 6 Picture resolution 7 Battery level 8 Self timer indicator 9 Exposure Compensation ...
Page 31: ...y as for video recording See page 25 The Video Light Macro Mode The macro function for photography works in exactly the same way as for video recording See page 25 Macro Mode Exposure Compensation During photo capture you can set an exposure compensation value It works in exactly the same way as for video recording See page 26 Exposure Compensation ...
Page 32: ...n use the Play button 14 to switch to playback mode icon The last recorded video will appear Press this button once again to return to video mode The icon in the upper left corner of the display shows the current mode The following options are available Press the navigation buttons S T 10 to choose a recording To start or stop playback press the confirmation button 7 or tap the icon on the display...
Page 33: ... number of recorded videos 4 Playback icon Tap on this icon to start video playback 5 Tap these icons to skip to the previous video 6 Thumbnail view Tap on this icon to get a thumbnail view of all videos While in thumbnail view tap the or icons multiple times to skip to the previous or next thumbnail page If the desired video has been selected tap the OK button to view it in fullscreen mode and to...
Page 34: ...g buttons The icon pauses the current playback The button will change into a playback icon Tap this playback icon to resume playback Tap the icon for fast forward playback or the icon to rewind Press the confirmation button 7 briefly to resume normal playback The playback control buttons will be hidden after a few seconds so you can obtain a better view of your recording To show them again give a ...
Page 35: ...the current mode The following options are available Press the navigation buttons S T 10 to choose a picture Tap the button to toggle to obtain an overview of all pictures Press the navigation buttons 10 or tap on a picture to select it The current picture will be highlighted with a white border Press the confirmation button 7 or tap on the OK button to display the picture in fullscreen mode Durin...
Page 36: ...the previous picture 6 Thumbnail view Tap on this icon to get a thumbnail view of all pictures While in thumbnail view tap the or icons multiple times to skip to the previous or next thumbnail page If the desired picture has been selected tap the OK button to view it in fullscreen mode 7 Tap on the icon to open the playback menu 8 Protected file indicator ...
Page 37: ...ot set to video recording select it by using the mode selector 6 3 Press the menu button 13 or tap on the bottom of the screen to display the menu 4 Press the S or T navigation button 10 to select the desired function and then press the confirmation button 7 or tap on it on the display to open it 5 Make the desired adjustments see below and tap OK 6 Press the menu button 13 again or tap on the ico...
Page 38: ...n Resolution in pixels Description 1080P 1920 x 1080 High quality 720P 1280 x 720 Average quality WVGA 720 x 480 Normal quality QVGA 352 x 240 Low quality recommended for Internet applications Your camcorder supports recording in modern wide screen format However not all of the resolutions available offer a 16 9 aspect ratio for the QVGA setting the aspect ratio is downscaled to 4 3 automatically ...
Page 39: ...re suitable for very fast moving scenes like car racing sports events etc Playback is always performed in slow motion so you can check the exact details of the scene Videos in QVGA resolution are recorded without sound This is due to the fact that this recording mode has been designed for slow motion playback and that sound output in slow motion makes no sense The zoom function is disabled when re...
Page 40: ...er videos can be stored You can record using the quality presets Normal green and High red To do this select the corresponding icon Photo Capture Menu The photo capture menu allows you to set the different picture recording parameters How to open the photo capture menu 1 Open the display and then rotate it according to your needs The device powers on automatically 2 If the current mode is not set ...
Page 41: ...urrent lighting conditions Select one of the preset options or use the Automatic setting The icons have the following meanings Automatic Daylight Cloudy Fluorescent Tungsten Resolution The resolution determines the size of the recording in pixels As a general rule The higher the resolution the more storage space is required The following settings are available Designat ion Resolution in pixels Des...
Page 42: ...ll improve the quality of any night recordings Select the corresponding icon Off On The icon will appear Self timer The self timer delays the capture for a preset time after pressing the recording button 5 This allows you to participate in the scene e g for a group photo Proceed as follows 1 Select the self timer with a 5 second or 10 second delay The corresponding icon will show on the display 2 ...
Page 43: ...yback volume Video Playback Menu 1 Open the display and then rotate it according to your needs The device powers on automatically 2 If the current mode is not set to video recording select it by using the mode selector 6 3 Press the playback button 14 to switch to video playback mode 4 Press the menu button 13 or tap on the bottom of the screen to display the menu 5 Press the S or T navigation but...
Page 44: ...ss the confirmation button 7 or tap on the delete icon to confirm the deletion Warning After a recording has been erased it cannot be restored After performing step 4 no further safety prompt will appear the selected video will be erased immediately and the next video will be displayed 5 Press the menu button 13 twice to return to video playback Delete all Use this option to delete all saved video...
Page 45: ...ack Menu see page 41 2 Select Protect and press the confirmation button 7 to confirm 3 Use the navigation buttons 10 or the W X buttons on the display to select the video that you want to protect 4 Press the confirmation button 7 to protect the currently displayed video The icon will appear Press the confirmation button once again to unprotect 5 If required use the navigation buttons to select ano...
Page 46: ...ttons on the display to select the desired sound volume You can choose from volume levels between 1 low and 10 high If you keep pressing the T button after the value 1 has been reached a Mute icon will appear and the sound output is disabled 4 Press the confirmation button 7 or tap on the OK button to apply the selected sound volume 5 Press the Menu button 13 to return to the video playback menu P...
Page 47: ...ture Protected pictures cannot be deleted See also on page 46 Protect 1 Perform steps 1 to 4 from Photo Playback Menu see page 44 2 Select Delete One and press the confirmation button 7 to confirm 3 Use the navigation buttons 10 or the W X buttons on the display to select the picture that you want to delete 4 Press the confirmation button 7 or tap on the delete icon to confirm the deletion Warning...
Page 48: ...ct the Cancel icon and press the confirmation button 7 Or tap on the Cancel icon on the display and then tap on the OK button Protect Here you can protect one or more pictures to avoid accidental deletion Proceed as follows 1 Perform steps 1 to 4 from Photo Playback Menu see page 44 2 Select Protect and press the confirmation button 7 to confirm 3 Use the navigation buttons 10 or the W X buttons o...
Page 49: ... direct display on a TV set a formatting function for the internal memory or the inserted SD memory card a function for restoring the factory defaults menu language setting and setting the mains frequency for avoiding picture interference 1 Open the display and then rotate it according to your needs The device powers on automatically 2 Press the mode selector button 6 twice to display the setup me...
Page 50: ...Off button 18 You can choose between the power off times of 1 minute 5 minutes or disable the automatic power off function The icons have the following meanings Auto PowerOff disabled Power off after 1 minute Power off after 5 minutes TV Standard Choose between the TV systems PAL or NTSC NTSC is the colour system used in America and Japan PAL is used in most European countries This setting only ap...
Page 51: ...erent medium Default All device parameters will be reset to their factory default values This will not erase any data from your memory card Language Select the desired display menu language see also page 21 Setting the Menu Language Frequency Select the mains frequency to avoid any interference caused by fluorescent lighting A mains frequency of 50 Hz is used across Europe in America the mains use...
Page 52: ...ll provide digital picture and sound and therefore offers the best quality The HDMI 9 and USB AV 8 ports are located behind a protective cover Simply operate the device as usual For instance enable the Autoplay slideshow function to view all pictures in sequence see also page 47 Autoplay Connecting via the HDMI Cable 1 Please make sure that your camcorder is powered off 2 Open the port cover and i...
Page 53: ...ble video recording and photo capture are not available It is only possible to play already recorded content Connecting via the USB AV Cable 1 Please make sure that your camcorder is powered off 2 Open the port cover and insert the connector of the USB AV cable into the USB AV port 8 of your camcorder see also page 12 Rear Panel 3 Insert the AV connector into the corresponding inputs of your TV se...
Page 54: ...onding to the above input connectors on your TV set If necessary read the User Manual of your TV set for more information on how to do this 5 Press the On Off button 18 to power the camcorder on The device display remains off while the picture will be shown on the TV screen ...
Page 55: ...ter via the USB AV cable by inserting the SD memory card into a card reader Be careful when renaming any folders and files Do NOT try to change the folder or file names stored on the device from the computer otherwise you may not be able to play back any files contained here with your camcorder After you have copied your files or folders to the computer you can rename or edit them on the computer ...
Page 56: ...r into a free USB port on your powered on computer 4 Press the On Off button 18 to power the camcorder on The computer will detect the built in memory and the memory card if any as a removable disk and will create a new drive with the next available driver letter The camcorder display remains off and the power indicator 4 lights red 5 Open My Computer on your PC and double click on the new removab...
Page 57: ... Insert the memory card into the card reader of your computer normally labelled SD MMC 2 The PC will add the memory card contents under the drive letter in My Computer representing the card reader 3 Open My Computer on your PC and double click on the disk drive representing the card reader 4 All recorded files can be found in the folder DCIM on this disk drive 5 Now you can copy the recorded files...
Page 58: ...s and even upload them easily to YouTube Facebook etc store them on AVCHD media or create photo books and albums You must connect your camcorder to the computer before inserting the CD into your CD or DVD drive otherwise the software will not detect the camcorder and not install 1 Use the USB cable to connect the device to your computer see page 54 Using the USB port 2 Power the camcorder on 3 Ins...
Page 59: ...5200HD Appendix English 57 The files stored on your camcorder should be imported automatically into TotalMediaHDCam After this you can edit them For more information see the online help of TotalMediaHDCam ...
Page 60: ...media Built in Flash memory 128 MB approx 75MB available for videos and pictures SD card SDHC compatible up to max SDHC Class 6 16 GB Zoom Video 4x digital zoom except for 1080p and QVGA Photo 4x digital zoom Photo Picture file formats JPEG EXIF 2 2 DCF Resolution 3M 5M 12M firmware interpolation Video Format H 264 AVI Resolution QVGA 120 fps WVGA 60 fps HD 720p 30 fps HD 1080p 30 fps Colour effec...
Page 61: ...AL HDMI Shutter speed Photo 2 to 1 4000 sec Video 1 15 to 1 2000 sec Auto power off Off 1 min 5 min Power Supply Li Ion battery PAC ELECTRONICS CO LTD NP40 3 7V 720mAh or via computer USB port Charger Technics GP TC03G 2U025 0421D Input 100 240VAC 50 60Hz max 0 11 A Output 4 2 V 0 6 A Dimensions 58 W x 108 H x 18 D mm Weight 96 g without battery ...
Page 62: ...Appendix DV 5200HD 60 English Warranty Information ...
Page 63: ...DV 5200HD Appendix English 61 ...
Page 64: ...Appendix DV 5200HD 62 English ...