16x16 HDMI Matrix over Single Cat.X with
HDBaseT-Lite
P/N: AV-GM07M3-S1
Page 1: ...16x16 HDMI Matrix over Single Cat X with HDBaseT Lite P N AV GM07M3 S1...
Page 2: ...is unit yourself except where explained in this manual Provide proper ventilation and air circulation and do not use near water Keep objects that might damage the device and assure that the placement...
Page 3: ...sion up to 60m 198ft from the HDMI source at Full HD 1080p 48 bit and 40m 130ft at 4K2K 30 HDCP compliant Bi directional IR pass though Allows controlling local HDMI sources or display through control...
Page 4: ...ntrol RS 232 control Ethernet control IR remote control HDMI source control Controllable via IR pass through from IR receiver at RX to IR blaster at TX IR remote control Electro optical characteristic...
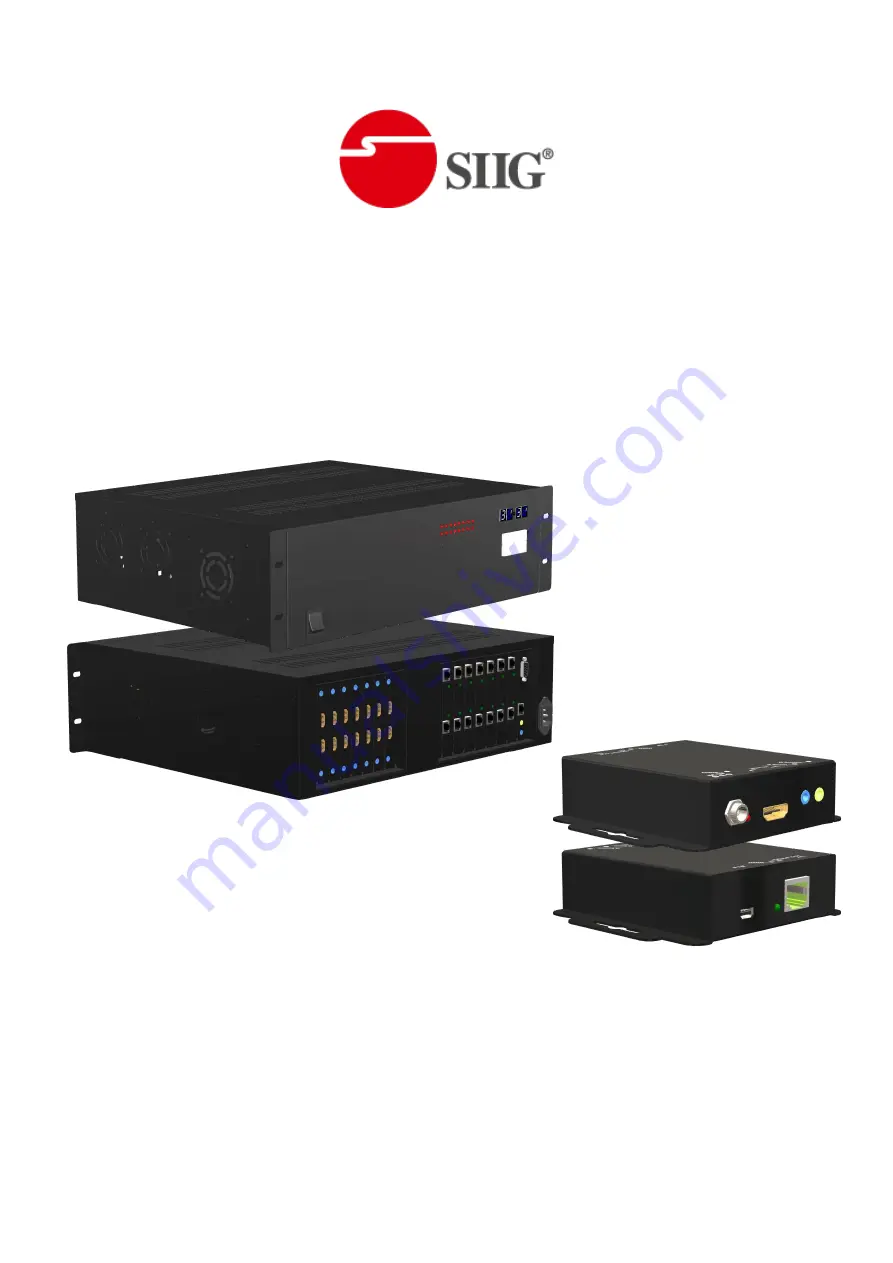
Page 5: ...ED LED display for output ports 4 IR SENSOR IR sensor for receiving the IR commands from IR remote 5 Input 7 segment LED LED display for input channels 6 Output Push Button Front panel push buttons us...
Page 6: ...ceiving unit AV GM07M3 S1 RX Front Panel Rear Panel 1 Latch locking power jack Connect to 5V DC power supply 2 LED Power indicator 3 HDMI OUT Connect to a HDMI display with a HDMI male male cable 4 IR...
Page 7: ...IR Receives IR commands from remote control IR RECEIVER 1 4 Receives IR commands from individual remote control MA 5288RX IR BLASTER IR control on individual display device IR RECEIVER IR receiver con...
Page 8: ...X as receiver 1 Connect each HDMI output to HDMI displays 2 Connect the CAT X input on the MA 5288RX to the CAT X output port on the AV GM07M3 S1 3 Connect IR receiver and place the IR receiver at the...
Page 9: ...7 CONNECTION DIAGRAM...
Page 10: ...input push button to select the mapping configuration 0 7 which you want to save current input output mapping 3 After you select the desired mapping configuration number the LED will blink twice and t...
Page 11: ...you push the input learn button before the setting is effective 6 The LED will show 0 0 if the setting is success The LED will show F F if the setting is failure 5 EDID Learning Mode 1 Push input lea...
Page 12: ...er 10 Reserved To Transfer key TAKE Trigger the previous setting Mute Turn off Mute the selected Output SWITCH Begin input and output selection DEFAULT EDID Begin default EDID selection LEARN Begin ED...
Page 13: ...o button 3 4 Press ALL to select All Output A 3 5 Press TAKE button 4 3 Output Status Status number output Take Ex Output 4 Input 2 1 Press STATUS button 2 Press number key 4 to select Output 4 3 Pres...
Page 14: ...3 5 Press TAKE button 0 F 0 success F fail Learn number output To All input Take Ex Learn Output 2 Input All 1 Press LEARN button E L 2 Press number key 2 to select Output 2 L 3 Press To button 2 L 4...
Page 15: ...utput All 3 Press To button All 4 Press MUTE button All 00 5 Press TAKE button Method C Software Control through RS 232 port Ethernet port 1 System Requirement 1 OS Information MS WinXP 7 2 Baud rates...
Page 16: ...nnection button Step4 Make sure the connection status is on connected status 7 FW SW Version Button Click button to show version information 8 RS 232 Button 1 Click button to switch to RS 232 function...
Page 17: ...on Click this button to change connection status 13 Power On Off Button Click this button to power on off Power on status Blue Click this button to power off device Standby Mode Power off status Red C...
Page 18: ...File to Input a Select Input b Click Load button to select the EDID file 3 Create EDID File a Click Create button to create EDID file b Select the EDID content c Click Save EDID on Computer to save t...
Page 19: ...r 15 Firmware Update Button 1 Make sure RS 232 is connecting and the connecting status is 2 Click FIRMWARE UPDATE Button and then will be a pop up windows 3 F W Update for Control Board Step1 Click Lo...
Page 20: ...he AV GM07J3 S1 Step4 Click Start button and the firmware will start writing 4 F W Update for Input and Output Card Step1 Click Load File to select the firmware file which you want to update Step2 Cli...
Page 21: ...d the device IP address Step5 Select Ethernet button and then will be a pop up windows Step6 Key in the device IP address to the pop up windows and click OK Step7 Click the Connect Button to connect t...
Page 22: ...ng a Select Mapping 1 8 b Click Recall button to recall previous mapping which are saved 3 Rename Mapping a Rename the mapping Mapping1 Mapping8 b Click Confirm button to confirm the change 18 Default...
Page 23: ...1 19 In Out Switch Button Click the button on the checkerboard to select Input Output port User can click the input number button to let all outputs select the same input Ex All outputs select input 1...
Page 24: ...22 16 Mute Output Button Click the circle button to turn off output s video and audio Ex Mute Output 2...
Page 25: ...23 Method D Web Interface Control 1 Set up PT MA HD1616 C IP address Please refer to Network setting section 2 Key in the IP address on the web page...
Page 26: ...EDID of the lowest capable HDMI display among others to make sure all displays are capable to play the HDMI signals normally There are THREE methods to do EDID Learning as below 1 Front Panel Push in...
Page 27: ...damage in transit Under no circumstances will a unit be accepted without a return authorization number The warranty is in lieu of all other warranties expressed or implied including without limitatio...
Page 28: ...26...