ENGLISH
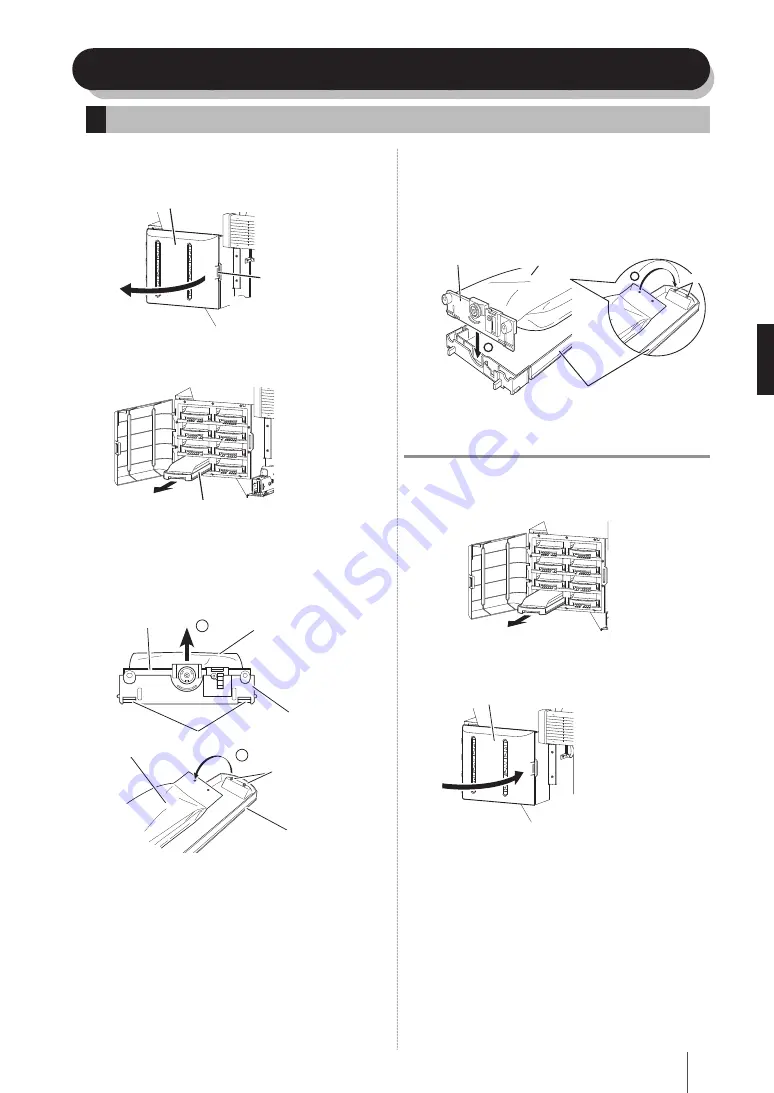
Ink pack installation and replacement
1
Push the knob of the ink box cover to open the
ink box.
Knob
Ink box cover
2
Confirm the color of the ink pack to be replaced,
and pull the ink tray out of the printer.
Ink tray
3
Take the empty ink pack out of the ink tray.
If ink is not installed, go to step
4
.
Push the two claws at the lower part of the plate of the
ink pack, and pull up the plate
1
. Then remove the ink
pack from the hook of the ink tray
2
.
1
2
Plate
Hook
Push two claws
Ink pack
Ink tray
Ink pack installation/replacement procedure
4
Take a new ink pack out of the box and set it in
the ink tray.
Hook the two holes at the end of the ink pack
1
on
the ink tray's two protrusion. Then insert the plate into
the ink tray until a click is heard
2
.
2
1
New ink pack
Plate
Protrusion
Ink tray
5
Insert the ink tray into the slot of the printer.
Note
Insert the ink tray as far as it will go.
The location of ink tray is determined by color. Be sure to insert
each ink tray into the specified slot.
Ink tray
-
-
6
Close the ink box cover.
Ink box cover
7
Confirm that the ink pack replacement was
completed.
When the replacement is successfully completed, the
printer returns to the online or offline state.
If the replacement is not completed, an error message
appears. Retry the replacement procedure beginning
with step
1
.
While ink is remaining in the subcartridge even during
replacement of ink, print operation is performed.
-
-
-
Ink tray
Ink pack
Summary of Contents for IP-7700-02
Page 1: ......
Page 35: ...34 ...
Page 69: ...68 ...
Page 103: ...102 ...
Page 137: ...136 ...
Page 171: ...170 ...
Page 205: ...204 ...
Page 239: ...238 ...


