
ADDITIONAL INSTRUCTION MANUAL FOR DP1S
ENGLISH
The camera (DP1S) is an improved version of the DP1. This instruction manual explains the
additional functions and changing points of the enclosed instruction manual. Please refer to this
additional instruction manual with the DP1 User’s Manual.
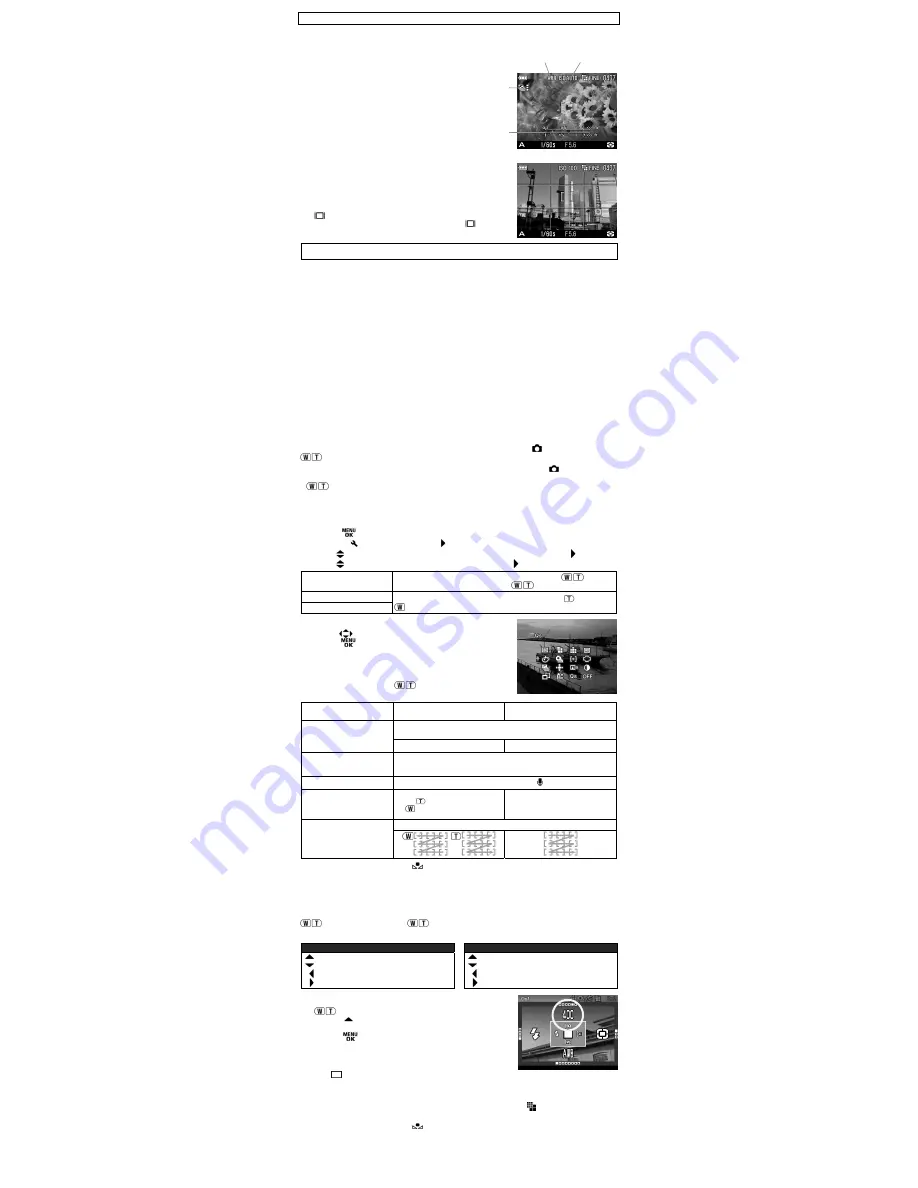
CHANGE THE COLOR LCD MONITOR INDICATION.
1.
If [
Auto
] is selected from [
ISO Setting
], ”
ISO AUTO
” will
be displayed.
2.
If [
Auto
] is selected from [
White Balance
], ”
AWB
” will be
displayed.
3.
The location of the Auto Bracket icon has been changed
to the upper left of the monitor.
4.
The ft (feet) indicator has been added to the scale bar in
MF mode.
ADDITIONAL FUNCTION .1
The Grid Display mode for still picture taking is added to
the LCD monitor.
Please refer to page
32
of the instruction manual. By pressing
the
button, it is possible to display the grid.
During picture shooting mode, each time the
button is
pressed, the color LCD monitor display will change as follows.
Display Icons
→
Grid Display
→
Hide Icons
→
LCD Monitor OFF
→
• • •
Notice
:
The grid display cannot be used in MF mode and movie mode.
ADDITIONAL FUNCTION .2
Addition of ISO 50 sensitivity
ISO 50 can provide exceptional results with the fine detail and lower noise. Please see DP1
USER’S MANUAL
P.53
for information regarding “SETTING THE SENSITIVITY”.
Notice
:
ISO 50 has a narrow dynamic range and therefore may blow out highlight detail such as
brightness or high saturation areas. Please ensure pictures are taken with the correct exposure
setting. If it will not be possible to capture sufficient results, please adjust the EV setting to the
minus side for a little more protection of the highlights.
If [Auto] is selected, it will not change to ISO 50 automatically. Regardless of the firmware
version, the ISO value will change to ISO 100 or 200 in normal shooting, or to ISO 100, 200 or
400 automatically when using flash.
ADDITIONAL FUNCTION .3
Customizing the Digital Zoom Button function
It is possible to allocate different functions such as [
ISO Setting
] from [
Shooting Menu
] to the
buttons (the Digital Zoom Button).
16 functions which all function with the exception of [
Color space
] in the [
Shooting Menu
]
(
P.28-29
of the instruction manual),
Qs
(Quick Set Menu) and
OFF
can be allocated to the
buttons.
If you wish to use the digital zoom, please select [
Digital Zoom
]
from the [
Zoom Button
Settings
] menu.
How to set:
1.
Press the
button.
2.
To open the [
Set Up
] menu, press the button.
3.
Use the
buttons to select the [
Zoom Button Settings
] menu and press the button.
4.
Use the
buttons to select the desired setting and press the button.
Set Both Buttons
It is possible to allocate the same function to both
buttons.
The setting will change by pressing
buttons.
Wide Button Setting
It is possible to allocate different functions to the
button and
button. The setting will change by pressing the allocated button.
Tele Button Setting
5.
Use the
buttons to select the desired icon and then
press the
button to apply the setting.
The available settings are limited depending on the selected
shooting mode. (Unavailable icons will be turned grey.)
According to the selected function, the setting will be changed
as follows by pressing the
buttons.
Set Both Buttons
Wide Button Setting
Tele Button Setting
ISO Setting, Image Size,
Image Quality, White Balance
Color Settings, Drive Mode
Metering Mode
The selected icon can be changed.
(Example)
Image Quality
FINE
↔
NORM
↔
BASIC
↔
RAW
FINE
→
NORM
→
BASIC
→
RAW
Auto Bracket, Contrast,
Sharpness, Saturation
The value will be displayed next to the selected icon, and can be changed.
The value will disappear 2 seconds after being set. Only the icon will be
displayed. (If the setting values is 0, the icon will be hide as well)
Image With Sound
OFF
(Hide icon)
↔
ON
( )
Digital Zoom
Press
to increase magnification
or
to decrease magnification.
Press the button to increase magnification.
When the button is pressed passed
the maximum ratio, the magnification
will return to the original ratio.
AF Area
AF area will change as follows.
■
When Custom White Balance
is selected, the previous stored setting will be used. To
capture a new custom white balance, please refer to
P.52
for information regarding “
Setting a
Custom White Balance
”.
How to use the Qs (Quick Set Menu)
When the camera is in the Still Image Mode, the Quick Set Menu will be displayed by pressing the
button. (By pressing the
button again, it is possible to switch to
Qs1
or
Qs2
.)
Select the desired Menu by pressing the 4-way controller and change the setting.
Qs1
(Quick Set Menu 1)
Qs2
(Quick Set Menu 2)
ISO Setting
White Balance
Flash Mode
Metering Mode
Image Size
Color Settings
Image Quality
Drive Mode
For example, if you wish to change the ISO Setting to 400, press
the
button to display Qs1, then set the value to 400 by
pressing the
button several times.
By pressing
or the shutter button “half-way”, the settings
will be applied and the camera will return to shooting mode.
Warning !!
Select
, if you wish to set to the Drive Mode to [
Single
].
Select
NORM,
if you wish to set the Color Settings to [
Normal
].
When the recoding mode is set to the movie mode, only White balance can be changed.
When Image Quality is slected to
RAW
, Image Size will be set to
(
Hi
) automatically. It is
not possible to select any other Image Size.
When Custom White Balance
is selected, the previous stored setting will be used. To
capture a new custom white balance, please refer to
P.52
for information regarding “
Setting a
Custom White Balance
”.
1
2
3
4


