background image

SDS5000XSeries Digital Oscilloscope Service Manual


WWW.SIGLENT.COM                                                                                                                                 

21/  90 


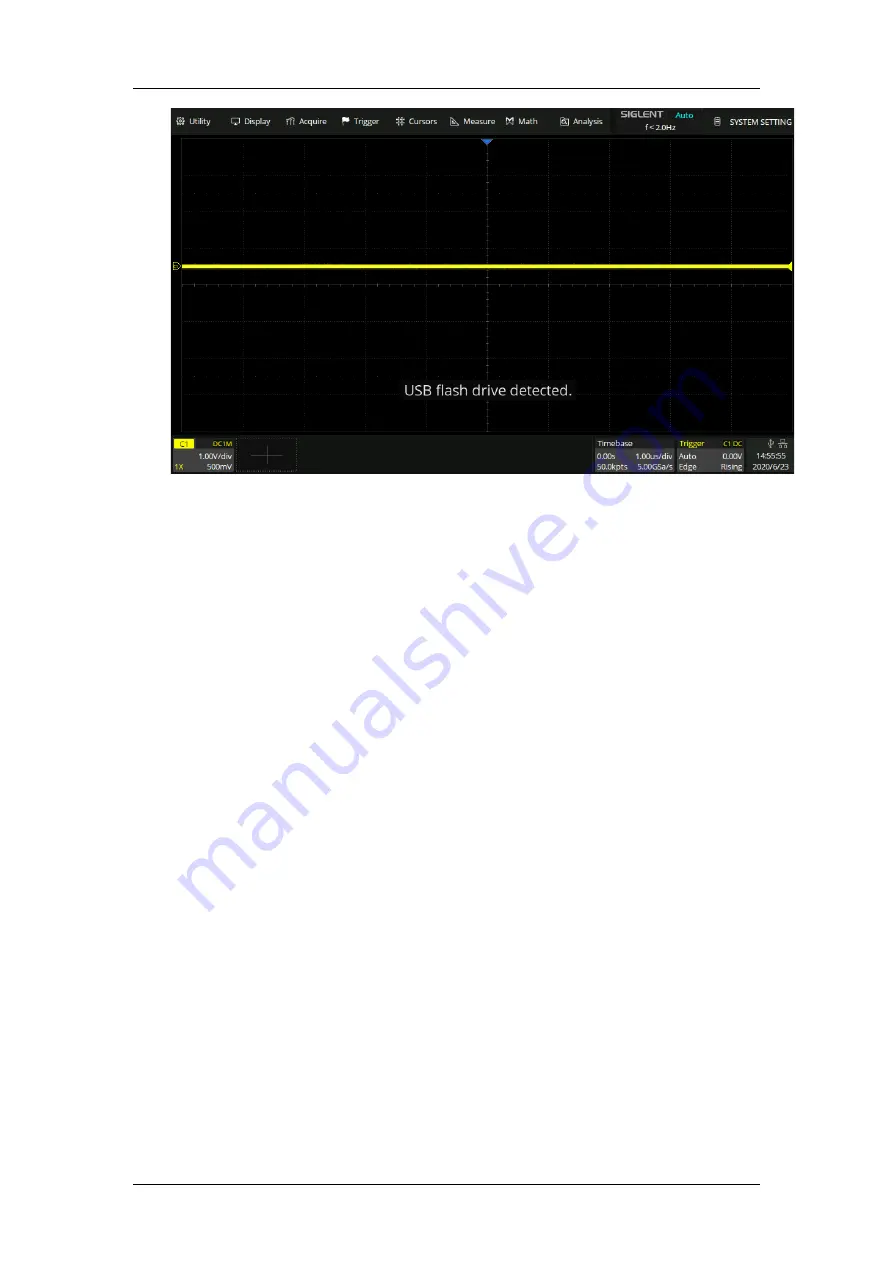
Figure 3 USB drive detected 


4.2.2


USB Device Test 

To test if the USB Device interface is operating correctly. 


Tools: 


A computer with a USB interface 


A standard USB cable(TypeAB) 


National Instruments NI-Max software 


Steps: 

1.


Set up the NI-Max software on a computer and install the driver step 

by step following the instructions. 

Summary of Contents for SDS5000X Series

Page 1: ...SDS5000X Series Digital Oscilloscope Service Manual E01A ...

Page 2: ...IONS 14 4 PREPARE INFORMATION 15 4 1 FUNCTIONAL CHECKING 15 4 1 1 Power on Inspection 15 4 1 2 Probe Compensation 17 4 1 3 Auto Setup 18 4 1 4 Self Calibration 19 4 2 INTERFACE TEST 20 4 2 1 USB Host Test 20 4 2 2 USB Device Test 21 4 2 3 LAN Port Test 23 4 2 4 Pass Fail out Test 26 5 PERFORMANCE TEST 29 5 1 TO VERIFY DC GAIN ACCURACY 34 5 2 TO VERIFY OFFSET ACCURACY 36 5 3 TO VERIFY TIME BASE ACC...

Page 3: ...eypad 62 6 3 5 To Remove the Keyboard and Probe Interface Board 63 6 3 6 To Remove the Acquisition board 64 6 3 7 To Remove the LCD Module and LCD Interface Board 65 7 SOLVING GENERAL PROBLEMS 66 8 TROUBLESHOOTING 69 8 1 SAFETY CONSIDERATION AND CAUTIONS 69 8 2 REQUIRED EQUIPMENT 70 8 3 TROUBLESHOOTING FLOWCHART 70 8 4 TO CHECK THE POWER SUPPLY MODULE 72 8 5 TO CHECK THE ACQUISITION BOARD 73 8 5 1...

Page 4: ...afety This symbol is used where caution is required Refer to the accompanying information or documentation to protect against personal injury or damage to the instrument This symbol warns of a potential risk of shock hazard This symbol is used to denote the measurement ground connection This symbol is used to denote a safety ground connection This symbol shows that the switch is an On Standby swit...

Page 5: ...tial hazard It calls attention to a procedure practice or condition which if not followed could cause bodily injury or death If a WARNING is indicated do not proceed until the safety conditions are fully understood and met 1 2 Working Environment This instrument is intended for indoor use and should be operated in a clean dry environment with an ambient temperature range of 0 C 40 C Temperature Op...

Page 6: ... to conform to EN 61010 1 safety standard per the following limits Installation overvoltage Category II Mains Supply Connector Degree of Pollution II Degree of Protection IP20 Note Installation Overvoltage Category II refers to the local distribution level whichapplies to equipment connected to the mains supply AC power source Degree of Pollution II refers to aworking environment which is dry and ...

Page 7: ...tage source 1 3 Cooling Requirements This instrument relies on forced air cooling with internal fans and ventilation openings Care must be taken to avoid restricting the airflow around the apertures fan holes at each side of the scope To ensure adequate ventilation it is required to leave a 15 cm 6 inch minimum gap around the sides of the instrument CAUTION Do not block the ventilation holes locat...

Page 8: ...me up to 100 W of power Note The instrument automatically adapts to the AC line input within the following ranges Voltage Range 90 264 Vrms 90 132 Vrms Frequency Range 47 63 Hz 380 420 Hz 1 5 Power and ground connections The instrument includes a grounded cord set containing a molded three terminal polarized plug and a standard IEC320 Type C13 connector for making line voltage and safety ground co...

Page 9: ...nterruption is prohibited The position of the oscilloscope should allow easy access to the socket To make the oscilloscope completely power off unplug the instrument power cord from the AC socket The power cord should be unplugged from the AC outlet if the scope is not to be used for an extended period CAUTION The outer shells of the front panel terminals CH1 CH2 CH3 CH4 EXT areconnected to the in...

Page 10: ...k Hazard No operator serviceable parts inside Do not remove covers Refer servicing to qualified personnel 1 8 Abnormal Conditions Only operate the instrument for the purposes specified by the manufacturer Do not operate the scope if there are any visible signs of damage or if it has been subjected to severe transport stresses If you suspect the scope s protection has been impaired disconnect the p...

Page 11: ...anual WWW SIGLENT COM 11 90 Warning Any use of the scope in a manner not specified by the manufacturer may impair the instrument s safety protection This instrument should not be directly connected to human subjects or used for patient monitoring ...

Page 12: ...ssurance The oscilloscope has a 3 year warranty 1 year warranty for probes from the date of shipment during normal use and operation SIGLENT can repair or replace any product that is returned to the authorized service center during the warranty period We must first examine the product to make sure that the defect is caused by the process or material not by abuse negligence accident abnormal condit...

Page 13: ...e functional Nevertheless it is supplied without warranty of any kind covering detailed performance Products not made by SIGLENT are covered solely by the warranty of the original equipment manufacturer 2 3 Maintenance Agreement We provide various services based on a maintenance agreement We offer extended warranties as well as installation training enhancement and on site maintenance and other se...

Page 14: ...ouchable or clickable menu button region on the touch screen For example DISPLAYrepresents the DISPLAY menu on the screen For the operations that contain multiple steps the descriptionis in the form of Step 1 Step 2 As an example follow each step in the sequence to enter the upgrade interface Utility System Setting Upgrade Press the Utility button on the front panel asstep 1 click the System Setti...

Page 15: ...operate four standard interface tests How to use the self calibration routine How to recall factory default settings For more detailed information about oscilloscope operation please refer to the User Manual 4 1 Functional Checking The functional checking details four types of checks used to determine if the oscilloscope is operating properly 4 1 1 Power on Inspection The standard power supply for...

Page 16: ...s correctly grounded to the earth before connecting AC power Press thePowerbutton located at the lower left corner of the front panel and note that several buttons will be lighted for about 6 seconds simultaneously until the boot screen appears The oscilloscope will then begin to perform its power on tests automatically after which the Default button can be pressed to recall the factory default se...

Page 17: ... of a passive probe to any channelof the oscilloscope 2 Connect the probe to the Compensation Signal Output Terminal Cal on the front of the oscilloscope Connect the ground alligator clip of the probe to the Ground Terminal under the compensation signal output terminal 3 Press the Auto Setup button 4 Check the waveform displayed and compare it with the following Under Compensated Perfectly Compens...

Page 18: ...al time base vertical scale and trigger mode according to the input signal to obtain an optimum waveform display Auto Setup will not work on all signal types especially time varying bursts or slow signals 100 Hz If Auto Setup cannot achieve desired settings you can manually adjust the vertical horizontal and trigger systems Select the channel with the lowest frequency when several channels are con...

Page 19: ... more than 5 Make sure the oscilloscope has been warmed up or operated for more than 30 minutes before the self calibration Please perform the self calibration as follows 1 Disconnect everything from all inputs 2 Operate Utility Do Self Cal and it will pop up the following dialog Select Continue to start the self cal program Figure 2 CalibrationInterface 3 The oscilloscope will not respond to any ...

Page 20: ...pabilities To ensure the oscilloscope is operating properly it is recommended that the user first test the interfaces 4 2 1 USB Host Test To test whether the USB Host interface is operating correctly Tools A U disk Steps 1 Insert a U disk flash drive into the USB Host interface on the front panel of the oscilloscope 2 A message prompt USB flash drive detected appears on the screen and an icon will...

Page 21: ...ted 4 2 2 USB Device Test To test if the USB Device interface is operating correctly Tools A computer with a USB interface A standard USB cable TypeAB National Instruments NI Max software Steps 1 Set up the NI Max software on a computer and install the driver step by step following the instructions ...

Page 22: ... software Click Device and Interface at the upper left corner of the NI software interface and immediately the USBTMC device symbol is displayed 4 Click Open VISA Test Panel option button and then the following Interface will appear Next click the Input Output option button and click the Query option button to view the Read operation information ...

Page 23: ...ted with NI Visasoftware Tools A computer with a LAN interface A standard LAN cable National Instruments NI MAX software Steps 1 Set up theNI MAX software on a computer and install the driver using the following instructions 2 Perform Utility System Setting I O Setting LAN Config to open the LAN Config dialog box And input usable IP Address and Subnet Mask ...

Page 24: ...ng a LAN cable via the LAN interface ports 2 Run NI MAX software Click Device and Interface at the upper left corner of the NI software interface and select the LAN device symbol 3 Click Open VISA Test Panel option button which then displays the following interface below Then click the Input Output option button and click the Query option button The ...

Page 25: ...SDS5000XSeries Digital Oscilloscope Service Manual WWW SIGLENT COM 25 90 Read operation information will be displayed ...

Page 26: ...ope Tools A second oscilloscope Two BNC cables Steps 1 Turn on the SDS5000X oscilloscope 2 Enable Channel 1 3 Perform Analysis MaskTest to open the Mask Test dialog box and touch Mask Setup Create Mask to set the mask Set the items as below Table 1 Mask Test Settings Parameter Setting Enable to Test On Source CH1 Type All in Display Info On Mask Setting Mask X Mask Y 0 32 0 32 ...

Page 27: ...igure 5 Figure 5 Mask Test Interface All data points of waveform must be inside the mask to pass the test Even a single point outside the mask will cause a failure 1 Connect the Pass Fail output signal on the rear panel to the input terminal of another oscilloscope 2 Move the waveform on the screen up down or sideways so that any portion of it falls outside of the Pass Fail mask If the interface i...

Page 28: ...ce Manual 28 90 WWW SIGLENT COM oscilloscope Adjust the second oscilloscope s time base and voltage scale as needed If there is no viewable pulse on the second oscilloscope then there may be a problem with this function Figure 6Pulse Waveform ...

Page 29: ...pment for the test Table 2Test equipment Equipment Description Test item Fluke 9500B Active Heads High Performance Oscilloscope Calibrator DCG Offset Clock accuracy Trigger delay BW BWL trigger sensitivity Input impedance Ext Trigger delay Ext Trigger level GPIB Card and Cable For communication between the computer and the 9500B USB Cable or Ethernet Cable For communication between the computer an...

Page 30: ...d PC to the oscilloscope under test PC LAN 9500B CH1 BNC CABLE SDS2000X E CH1 CH2 SDS5000X GPIB CH3 CH4 Figure 7Connecting test instruments for DCG Offset PC CH 1 CH 2 SDS5000X GPIB LAN 9500B CH1 BNC CABLE CH 3 CH 4 Figure 8Connecting test instruments for Clock Trigger Delay Trig Level PC CH 1 CH 2 SDS5000X GPIB LAN 9500B CH1 BNC CABLE CH 3 CH 4 ...

Page 31: ... T SDS5000X PC 9500B CH1 GPIB LAN BNC CABLE CH 3 CH 4 Figure 10Connecting test instruments for Input impedance The figures below show the interconnections between the test equipment and PC to Ext Trigger test EXT PC CH 1 CH 2 SDS5000X GPIB LAN 9500B CH1 CH2 BNC CABLE CH 3 CH 4 Figure 11Connecting test instruments for Ext Trigger Delay Ext Trigger Level ...

Page 32: ...H2 CH3 CH4 BNC Cable Figure 13Connecting test instruments for Channel Skew Verify Test Results To verify whether or not a test passes i e whether the readings are within the appropriate limits it is necessary to record the readings in the Performance Test located in the Test Record Self Calibration The Self Calibration procedure is described in sectionSelf Calibration If the environmental temperat...

Page 33: ...SDS5000XSeries Digital Oscilloscope Service Manual WWW SIGLENT COM 33 90 Calibration operation must be performed to achieve the specified performance ...

Page 34: ...nect all channels of the oscilloscope to the 9500B as shown inFigure 7 3 Set Volts Div of the oscilloscope to 1 mV div Press the Measure button on the front panel of the oscilloscope to display Mean measurement 4 Set DC voltage output level of the 9500B according toTable 3 and record the mean value of the oscilloscope as Vmean 5 Calculate Verror Verror VSetting Vmean and set the next output level ...

Page 35: ...15 V 30 V 1 5 5 V div 15 V 7 5 V 0 7 5 V 15 V 1 5 2 V div 6 V 3 V 0 3 V 6 V 1 5 1 V div 3 V 1 5 V 0 1 5 V 3 V 1 5 500 mV div 1 5 V 0 75 V 0 0 75 V 1 5 V 1 5 200 mV div 600 mV 300 mV 0 300 mV 600 mV 1 5 100 mV div 300 mV 150 mV 0 150 mV 300 mV 1 5 50 mV div 150 mV 75 mV 0 75 mV 150 mV 1 5 20 mV div 60 mV 30 mV 0 30 mV 60 mV 1 5 10 mV div 30 mV 150 mV 0 150 mV 30 mV 1 5 5 mV div 15 mV 7 5 mV 0 7 5 m...

Page 36: ...s 1 Set the 9500B output to on 2 Connect all channels of the oscilloscope to 9500B as shown inFigure 7 3 Set the Volts Div of the channel to 1 mV div Press theMeasurebutton on the front panel of the oscilloscope to display Mean measurement 4 According toTable 4 set offset of the channel to Offset and set the 9500B output level to equal the offset then record the mean value of the oscilloscope as V...

Page 37: ...r settings in Table 4 and repeat the steps 4 to 6 9 Turn the 9500B output off 10 Disconnect the connections to all the channels Table 4Offset Accuracy Volt Div Offset Slope error Zero input V 10 V div 35 V 30 V 0 3 0V 35 V 1 5 1 202 5 V div 30 V 25 V 0 25 V 30 V 1 5 0 602 2 V div 20 V 10 V 0 10 V 20 V 1 5 0 242 1 V div 10 V 5 V 0 5 V 10 V 1 5 0 122 500 mV div 5 V 2 5 V 0 2 5 V 5 V 1 5 0 062 200 mV...

Page 38: ...cilloscope In the test the impedance of both the 9500B and the oscilloscope should be set to 1 MΩ Time Base Accuracy Frequency Error 10 Hz Steps 1 Connect the selected channel of the oscilloscope to the 9500B 2 Set the oscilloscope Volts Divto 100 mV div 3 Set the oscilloscope Sec Div to 50ms div 4 Set the Memory Depth to 12 5Mpts 5 Set waveform of the 9500B to sine amplitude to 600 mV and frequen...

Page 39: ...analog channels In this test the impedance of both the 9500B and the oscilloscope should be set to 50 Ω Channel Trigger Delay Limit abs T L 150 ps Steps 1 Connect the selected channel of the oscilloscope to the 9500B shown as inFigure 8 2 Press the Aux key at the right of the OSCILLOSCOPE CALIBRATOR panel of the 9500B and select Skew function 3 Set the impedance of the 9500B to 50 Ω frequency to 1...

Page 40: ...e external channel and analog channels In the test the impedance of the 9500B should be set to 50 Ω and external channel and selected analog channel both set to 50Ω CH Ext Trigger Delay Limit abs Delay 1 ns Steps 1 Connect selected analog channel and external channel of the oscilloscope to the 9500B with active heads CH1 CH2 shown as in Figure 11 2 Press the Aux key at the right of the OSCILLOSCOP...

Page 41: ... range above 1 ns 9 Disconnect the test connection 10 Check the other analog channel in the same way as steps 1 to 9 5 6 To Verify Trigger Level This test checks the trigger level accuracy of the ext trigger In this test the impedance of both the 9500B and the oscilloscope should be set to 50 Ω CH Trigger Level Error Limit abs Error 20mV Steps 1 Connect selected channel of the oscilloscope to the ...

Page 42: ...Check if the trigger level error is in the limited range above 9 Set the trigger level to 0 mV and 300mV repeat step 5 to step8 10 Set trigger slope to negative repeat steps step5 to step9 11 Disconnect the test connection 12 Check the other analog channels in the same way as steps 1 to 11 5 7 To Verify Ext Trigger Level This test checks the trigger level accuracy of the external trigger channel I...

Page 43: ...e trigger level to 450mV 6 Press the Measurebutton on the front panel of the oscilloscope to display Level xmeasurement 7 Record the value of Level x calculate the level error error 300mV Level x 8 Check if the trigger level error is in the limited range above 9 Set the trigger level to 0 mV and 450mV repeat step 5 to step 8 10 Set trigger slope to negative repeat step 5 to step 9 11 Set the oscil...

Page 44: ... Floor This test checks the noise floor of the analog channels and varies from models In this test do not connect any testing devices to the oscilloscope Table 6Noise Floor Limited Range Volt Div pkpk stdev Limited Range SNR Limited Range Volt Div pkpk stdev Limited Range SNR Limited Range 500 uV 1 15 24 55 100 mV 1 15 38 55 1 mV 1 15 25 55 200 mV 1 15 38 55 2 mV 1 15 27 55 500 mV 1 15 38 55 5 mV ...

Page 45: ...eck the other analog channels in the same way as steps 1 to 5 7 Set the oscilloscope Volts Div to the others in the table above and repeat the steps 3 to 5 5 9 To Verify Bandwidth This test checks the bandwidth of all analog channels In the test the impedance of 9500B should be set to be the same as analog channels 50Ω and 1MΩ The bandwidth should be verified at each coarse Volts DIV except for 1m...

Page 46: ...mpedance Frequency Point Hz SDS5104X 50 Ω 0 05M 21M 52M 74M 98M 121M 168M 201M 251M 301M 351M 401M 451M 501M 601M 701M 801M 901M 1001M 1002M 1201M 1401M 1601M 1801M 2001M SDS5054X 50 Ω 0 05M 21M 52M 74M 121M 168M 201M 234 M 268M 301M 334M 367M 401M 434M 468 M 500M 601M 801M SDS5034X 50Ω 0 05M 21M 52M 74M 121M 168M 201M 234 M 268M 301M 316M 331M 351M 371M 451M SDS5104X 1 MΩ 0 05M 21M 52M 74M 98M 12...

Page 47: ...e of the 9500B to 600 mV when testing at 100 mV div and set to 1 2 V when testing at 200 mV div 4 Check other channels in the same way as step1 to step 8 5 Disconnect the test connection 6 After the test calculate the dB value at every frequent point Check if the value is in the limited range inTable 8 Table 8Limited Range Scope Model Impedance Frequency Point Hz Range SDS5104X 50 Ω 98M 0 5 0 5 dB...

Page 48: ...M 0 8 0 8 dB 234M 1 2 1 dB 351M 2 5 1 dB 501M 44 3 dB SDS5104X 1 MΩ 98M 0 8 0 5 dB 121M 0 8 0 8 dB 168M 0 8 1 3 dB 251M 0 5 1 9 dB 301M 0 8 1 3 dB 351M 3 0 8 dB 401M 6 0 dB 601M 6 0 98 dB SDS5054X 1 MΩ 52M 1 0 5 dB 168M 2 0 8 dB 301M 2 5 1 dB 384M 3 1 dB 501M 5 1 dB 1001M 44 3 dB SDS5034X 1MΩ 35M 1 0 5 dB 118M 2 0 8 dB ...

Page 49: ...he bandwidth at 100mV div 200 mV div Steps 1 Connect channel 1 of the oscilloscope to the 9500B via the active head as shown inFigure 9 2 Set the oscilloscope Volts Div to 100mV div the Sec Div to 50ms div and set the BW Limit button to 20MHz 3 Press the Measure button on the front panel of the oscilloscope to display Peak Peak measurement 4 Set the amplitude of the 9500B to 600mV and impedance to...

Page 50: ...hat displays a complete waveform 2 Record the Peak Peak measurement value of the waveform Table 10Limited Range Scope Model Impedance Frequency Point Hz Range SDS5104X SDS5054 50 Ω 12M 2 1 15 dB 14M 2 4 2 dB 20M 3 4 2 dB 25M 6 2 dB 30M 8 2 dB 1 Calculate the dB value at the frequency point If the value Check if the value is in the limited range 2 Check the other channels in the same way as in step...

Page 51: ...th 1 Steps 1 Connect the selected channel of the oscilloscope to the 9500B as shown in Figure 9 2 Set the oscilloscope Volts Div to 100mV div Sec Divto 50ns div coupling mode to AC 3 Set impedance of the 9500B to 50 Ω frequency to 10 MHz and amplitude to 80 mV and set the impedance of the oscilloscope channels to 50 Ω 4 Set trigger slope of the oscilloscope to Positive 5 Press Trigger Level knob t...

Page 52: ...testing the trigger level when using the internal trigger using the analog input channels The following steps are used to test the external trigger sensitivity Steps 1 Connect the external trigger channel of the oscilloscope to the 9500B as shown inFigure 12 2 Set the impedance of the 9500B to 50Ω amplitude to 200 mV frequency to 10MHz 3 Set the trigger source of the oscilloscope to EXT trigger sl...

Page 53: ... knob to set the level to the center of the waveform 12 Adjust the trigger level within the range of 500mV 500mV to achieve a stable waveform and then record the hardware measuredvalue which is on the top right of the screen 13 Check if the frequency is within the specified range listed in Table 13 14 Set the trigger slope to Negative repeat steps 11 to 13 15 Set the frequency of the 9500Bto the o...

Page 54: ...tude to 0 6 V 4 Set the oscilloscope Volts Divto 100mV div 5 Set the oscilloscope Sec Divto 2ns div trigger source is the selected channel 6 Press theMeasurebutton on the front panel of the oscilloscope to display Skew measurement 7 Check if the result is in the limited range above 8 Disconnect the test connection 9 Check other channels in the same way as steps 1 to 7 5 13 To Verify Input Impedanc...

Page 55: ...f the oscilloscope to the 9500B as shown inFigure 10 2 Set the oscilloscope Volts Div to 100 mV div coupling mode of the channel to AC 3 Press the Aux key at the right of the OSCILLOSCOPE CALIBRATOR panel of the 9500B and select the Load Resistance Measurement Function Record the reading displays on the screen of the 9500B 4 Set coupling mode of the channel to DC Record the reading displays on the...

Page 56: ...he other analog channels in the same way as steps 1 to 6 8 Disconnect the test connection When checking the EXT trigger channel it is the same as checking analog channel Record the reading displays on the screen of the 9500B and check to verify it is within the specified range in Table 12 ...

Page 57: ...lace the parts Otherwise potential personal injuries or damages to the components may occur WARNING HAZARDOUS VOLTAGES Maintenance is performed with power supply on and without protective covers Only qualified personnel with proper tools and protection should perform the maintenance Perform the maintenance with the power cord disconnected wheneverpossible WARNING AVOIDELECTRICALSHOCK Hazardous vol...

Page 58: ...eration or lose of functionality As a minimum place the oscilloscope on a properly grounded ESD mat and wear a properly grounded ESD strap CAUTION REMOVE POWER TO AVOID DAMAGE Remove power before you start to disassemble or replace parts DO NOT disassemble or replace parts with power on is not allowed or damage to the components may occur 6 2 Tools Lists Use these tools to remove or replace the mo...

Page 59: ...the removed parts or replace a new part follow the instructions in reverse order 6 3 1 To Remove the Rear Cover and Knobs Figure 14To remove the rear cover and knobs Steps 1 Remove each front panel knobs by firmly grasping the knob with pliers protected by a soft cloth to prevent scratches if necessary and pull it away from the front panel 2 Remove the sevenPMW3 8 screws on the rear cover ...

Page 60: ...M 3 Lift the rear cover up and off carefully 6 3 2 To Remove the Rear Metal Module Figure 15To remove therear metal module Steps 1 Remove the eight PM3 6 screws outside of the rear metal module 2 Unplug the connecting cable from the mainboard 3 Remove the rear metal module ...

Page 61: ...ply module and Fan Steps 1 Remove the tenPM3 6 screws outside the metal rear cover 2 Remove the metal rear cover 3 Unplug the connecting cable from the power module 4 Remove the ten screws on the power supply module Six PM3 6 screws four PMW3 6 screws 5 Remove the power supply module 6 Remove the four KM3 32 screws and nuts on the fan and remove the fan ...

Page 62: ...bber Keypad Figure 17To remove the front panel and rubber keypad Steps 1 Place the oscilloscope back side down on a soft surface such as an anti static mat 2 Remove the three PM3 6 screws on the front of the panel 3 Remove the seven PB3 6 screws on the back of the panel 4 Remove the front paneland rubber keypad ...

Page 63: ... keyboard and probe interface board Steps 1 Remove the seven PM3 6 screws on the keyboard 2 Disconnect the cable between the probe interface board and the keyboard 3 Remove the keyboard 4 Disconnect the cable between the mainboard and probe interface board 5 Remove the two PM3 6 screws on the probe interface board 6 Remove the probe interface board ...

Page 64: ...ition board Figure 19To remove the acquisition board Steps 1 Disconnect the cable between the Acquisition board and the LCD interface board 2 Remove the four BNC nuts and gaskets on the front side of the metal frame 3 Remove the tenPM3 6 screws on the acquisition board 4 Remove the acquisition board ...

Page 65: ...LCD Interface Board Figure 20To remove the LCD module and LCD interface board Steps 1 Remove the five PM3 6 screws on the LCD module 2 Disconnect the cable between the LCD and LCD interface board 3 Remove the LCD module 4 Remove the two PM3 6 screws on the LCD interface board 5 Remove the LCD Interface board ...

Page 66: ...ower supply modules and acquisition board If no Check that the power cord is secured in the power receptacle Check that the fuse in the power receptacle is not blown out Check that the power source is alive If there is still no light glowing go to the Troubleshootingchapter and check the power supply modules and acquisition board If the display is stuck at the logo screen Remove all the USB FLASH ...

Page 67: ...he problem If the display still stuck at the logo screen contact SIGLENT for further instructions If there is no trace display Check the acquisition is running and trigger status is Trig d or Auto Check the horizontal time division setting is reasonable and the acquisition time is short enough for fast display Disconnect associated channel input and recall the default setup following the procedure...

Page 68: ...at the vertical position setting is working Perform self calibration following the procedures in the User Manual If self calibration does not work contact SIGLENT for further instructions If there is an unexpected trace when no input connected to channel input Power cycle the oscilloscope Upgrade to the latest firmware Contact SIGLENT for further instructions ...

Page 69: ...ance is performed with power supply on and without protective covers Only qualified personnel with proper tools and protection should perform the maintenance The equipment must be well grounded during operation WARNING AVOIDELECTRICALSHOCK Hazardous voltages exist on the power supply module and LCD module To avoid electrical shock disconnect the power cord and wait at least three minutes for the c...

Page 70: ...cilloscope metal cover always use an external fan to provide airflow over the heat sinks and the acquisition board 8 2 Required Equipment Table 13Required Equipment Equipment CriticalSpecifications Recommended Model Digital Multi meter Accuracy 0 05 1 mV resolution SIGLENT SDM3065X Agilent 34401A Oscilloscope 200MHz BW 1MΩimpedance SIGLENT SDS1204X E 8 3 Troubleshooting Flowchart The following flo...

Page 71: ...gital Oscilloscope Service Manual WWW SIGLENT COM 71 90 problem Begin Test Power Supply Module Good Replace Power Supply Module Test Main Board Good Replace Main Board Test LCD Good Replace LCD NO YES NO YES NO End YES ...

Page 72: ... to check it Disconnect power supply cable from the acquisition board and keep the control signal cable connected Reconnect the power cord to the receptacle of the power supply module Be cautious when working near the power supply module without the protective cover high voltage may exist on the heat sink and other exposed conductor Push the ON OFF button to power on the power supply module Test t...

Page 73: ...D 8 Input Vo Standby 5V Figure 21Pin definition of the power supply connector J24 Figure 22Pin definition of the power control bus connector J22 8 5 To Check the AcquisitionBoard There are two different kinds of acquisition boards for the SDS5000X series SDY8 007 163 Up to 1GHz bandwidth for SDS5104X and SDS5054X SDY8 007 140 Up to 500MHz bandwidth for SDS5034X only ...

Page 74: ...chapter Disassembly Procedures Reconnect the power cable to the acquisition board after you have confirmed that the power supply module is in good condition Power up the acquisition board by pushing the front panel power button In most cases you can hear the relays click if the acquisition board power up successfully If you cannot hear the click or there is no sign that the acquisition board is po...

Page 75: ...pplies Find and measure those test points using a multi meter 12 6V 1V0_A 1V0_B 6V5 1V8 5V 1V5A 1V5B 1V2 2V5 3V3 FAN VTT Vref_ddr_A VTT Vref_ddr_B VTT Vref_ddr_C VTT Vref_ddr_D MGTAVCC AVCC 5V AVCC15V AVCC19V 8V4 AVCC7V8 19V6 AVCC 10V AVCC3V3 AVCC5V 7V2 VCC3V3_FE1 VCC3V3_FE2 VCC12V VCC12V 13V5 3v6 AVCC3V 6V6 VCC2V5_FE VCC1V8_FE Figure 23Acquisition Board Power Supply Distribution ...

Page 76: ...S5000XSeries Digital Oscilloscope Service Manual 76 90 WWW SIGLENT COM Figure 24Test points for the Acquisition board power supplies Figure 25Test points for the Acquisition board power supplies continued ...

Page 77: ...s Number Net Name Test Point Tolerance 1 VCC12V6 J24 12 6V𝐷𝐶 400mV𝐷𝐶 2 VCC1V0A C1046 1 0 V𝐷𝐶 50mV𝐷𝐶 3 VCC1V0B C1058 1 0 V𝐷𝐶 50mV𝐷𝐶 4 VCC1V8 TP73 1 8 V𝐷𝐶 50mV𝐷𝐶 5 VCC1V5A TP75 1 5 V𝐷𝐶 50mV𝐷𝐶 6 VCC1V5B TP77 1 5 V𝐷𝐶 50mV𝐷𝐶 7 VCC2V5 TP83 2 5 V𝐷𝐶 100mV𝐷𝐶 8 VCC3V3 TP85 3 3 V𝐷𝐶 100mV𝐷𝐶 9 VCC5V TP81 5 0 V𝐷𝐶 150mV𝐷𝐶 10 VCC1V2 TP79 1 3 V𝐷𝐶 50mV𝐷𝐶 11 VREF_DDR_A TP63 0 75 V𝐷𝐶 22 5mV𝐷𝐶 12 VREF_DDR_B TP65 0 75 ...

Page 78: ...PIN6 1 0V𝐷𝐶 30mV𝐷𝐶 20 VCC7V2 TP144 7 3 V𝐷𝐶 200mV𝐷𝐶 21 VCC6V6_FE TP145 6 6 V𝐷𝐶 200mV𝐷𝐶 22 VCC3V3_FE1 TP131 3 3 V𝐷𝐶 100mV𝐷𝐶 23 VCC3V3_FE2 TP132 3 3 V𝐷𝐶 100mV𝐷𝐶 24 AVCC5V TP129 5 0 V𝐷𝐶 150mV𝐷𝐶 25 VCC8V4 TP140 8 4 V𝐷𝐶 250mV𝐷𝐶 26 VCC10V5_FE TP138 7 8 V𝐷𝐶 250mV𝐷𝐶 27 VCC19V6 TP136 19 8 V𝐷𝐶 600mV𝐷𝐶 28 VCC19V_FE TP137 19V𝐷𝐶 600mV𝐷𝐶 29 VCC15V TP142 15 V𝐷𝐶 450mV𝐷𝐶 30 VCC3V6 TP86 3 6 V𝐷𝐶 100mV𝐷𝐶 31 AVCC3V3 TP...

Page 79: ...2V_PROBUS TP49 12V𝐷𝐶 3600mV𝐷𝐶 39 VCC1V8_FE TP134 1 8 V𝐷𝐶 50mV𝐷𝐶 40 VCC2V5_FE TP133 2 5 V𝐷𝐶 100mV𝐷𝐶 8 5 1 3 Check the clock Check the oscillator X2 Use an oscilloscope to measure the clock signal using the method below Figure 27Test points for clock Table 16Clock parameters of the Acquisition System Test Point Clock Domain Level Description TP44 PLL Reference Clock LVCMOS33 Typical 10 MHz ...

Page 80: ...al frame and re assemble the power supply module to the metal frame for easy access to the test points and safety considerations Follow the instructions in chapter Disassembly Procedures Reconnect the power cable to the acquisition board after you have confirmed that the power supply module is in good condition Power up the acquisition board by pushing the front panel power button In most cases yo...

Page 81: ...der test is abnormal replace the acquisition board 8 5 2 2 Check the Acquisition System power supply Check the Acquisition System power supplies Find and measure those test points using a multi meter 12 6V 1V0_A 1V0_B 6V5E 12V 8V 1V8 5V 1V5A 1V5B 1V2 2V5 3V3 5V5 FAN VTT Vref_ddr_A VTT Vref_ddr_B VTT Vref_ddr_C VTT Vref_ddr_D MGTAVCC VCC16V AVCC 5V AVCC5V AVCC5V_CH AVCC3V3 VCC3V3_CH AVCC15V Figure ...

Page 82: ...5000XSeries Digital Oscilloscope Service Manual 82 90 WWW SIGLENT COM Figure 29Test points for the Acquisition board power supplies Figure 30 Test points for the Acquisition board power supplies continued ...

Page 83: ...pplies Number Net Name Test Point Tolerance 1 VCC12V6 J24 12 6V𝐷𝐶 400mV𝐷𝐶 2 VCC1V0A C1046 1 0V𝐷𝐶 50mV𝐷𝐶 3 VCC1V0B C1058 1 0V𝐷𝐶 50mV𝐷𝐶 4 VCC1V8 TP73 1 8V𝐷𝐶 50mV𝐷𝐶 5 VCC1V5A TP75 1 5V𝐷𝐶 50mV𝐷𝐶 6 VCC1V5B TP77 1 5V𝐷𝐶 50mV𝐷𝐶 7 VCC2V5 TP83 2 5V𝐷𝐶 100mV𝐷𝐶 8 VCC3V3 TP85 3 3V𝐷𝐶 100mV𝐷𝐶 9 VCC5V TP81 5 0 V𝐷𝐶 150mV𝐷𝐶 10 VCC1V2 TP79 1 3V𝐷𝐶 50mV𝐷𝐶 11 VREF_DDR_A TP63 0 75V𝐷𝐶 22 5mV𝐷𝐶 12 VREF_DDR_B TP65 0 75V𝐷𝐶 2...

Page 84: ...0V𝐷𝐶 30mV𝐷𝐶 20 AVCC3V3 TP52 3 3V𝐷𝐶 100mV𝐷𝐶 21 VCC5V5 TP60 5 5V𝐷𝐶 150mV𝐷𝐶 22 AVCC5V TP51 5 0V𝐷𝐶 150mV𝐷𝐶 23 AVCC5VCH TP49 5 0V𝐷𝐶 150mV𝐷𝐶 24 VCC8V TP50 10 0V𝐷𝐶 300mV𝐷𝐶 25 VCC12V TP48 12V𝐷𝐶 360mV𝐷𝐶 26 VCC3V3CH TP53 3 3V𝐷𝐶 100mV𝐷𝐶 27 6V5 TP47 6 5V𝐷𝐶 100mV𝐷𝐶 28 AVCC 5V TP46 5V𝐷𝐶 150mV𝐷𝐶 29 VCC16V C1182 16V𝐷𝐶 500mV𝐷𝐶 30 VCC15V TP71 15V𝐷𝐶 450mV𝐷𝐶 31 VSRART U71_pin3 5 0V𝐷𝐶 150mV𝐷𝐶 32 VSTART_3V3 U71_pin2 3 ...

Page 85: ...main Level Description TP44 PLL Reference Clock LVCMOS33 Typical 10 MHz TP43 Reference Clock Locked LVCMOS33 High level indicates PLL locked Low level means PLL lock failed 8 6 To Check the Processor Board The processer board is mounted on the acquisition board as a daughter card 8 6 1 Check the processor power supplies Check the power rails Find and measure those test points using a multi meter ...

Page 86: ...f the processor power supplies Net Name Test Point Tolerance DVCC1V0_ZYNQ TP1 1 0 V𝐷𝐶 50mV𝐷𝐶 DVCC1V8_ZYNQ TP2 1 8 V𝐷𝐶 50mV𝐷𝐶 DVCC1V5_ZYNQ TP3 1 5 V𝐷𝐶 50mV𝐷𝐶 DVCC3V3_ZYNQ TP4 3 3 V𝐷𝐶 100mV𝐷𝐶 DVCC2V5_ZYNQ C129 2 5 V𝐷𝐶 100mV𝐷𝐶 8 6 2 Check the clock Check the three oscillators X1 X2 and X3 Use an oscilloscope to measure the clock signal using the method below ...

Page 87: ...ocessor Reference LVCMOS33 33 333333 MHz 50PPM R66 USB Host Reference LVCMOS33 24 000000 MHz 50PPM R67 USB Device Reference LVCMOS33 24 000000 MHz 50PPM R68 Ethernet Reference LVCMOS33 25 000000 MHz 50PPM R69 ProgrammableLogic Reference LVCMOS33 25 000000 MHz 25PPM 8 7 To Check the LCD Reconnect the power cable to the acquisition board after you have confirmed that the power supply module is in go...

Page 88: ...nd measure those test points using a multi meter Figure 35Test points for the LCD power supplies Table 21Voltage parameters of the LCD power supplies Net Name Test Point Tolerance 12V6_LCD L71 12 6V𝐷𝐶 10 6V5_LCD L72 6 5V𝐷𝐶 10 VCC3V3 J32 PIN 2 4 6 3 3V𝐷𝐶 10 If the power supply is abnormal replace the acquisition board 8 7 2 To Check the LCD Signal Locate connector J32 use an oscilloscope to measure...

Page 89: ... signal to control the brightness of the LCD Normally 50 duty cycle J32 PIN8 10 LCD_DATA0_N P LVDS LCD DATA signal Always active J32 PIN11 13 LCD_DATA1_N P LVDS LCD DATA signal Always active J32 PIN16 18 LCD_DATA2_N P LVDS LCD DATA signal Always active J32 PIN19 21 LCD_CLK_N P LVDS LCDreference clock typical 50MHz If the signal is good replace the LCD panel If the signal is dead replace the acquis...

Page 90: ...SDS5000XSeries Digital Oscilloscope Service Manual 90 90 WWW SIGLENT COM ...

Reviews: