background image

en

    Rails

14

p

Rails

Rails

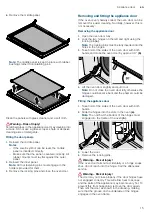
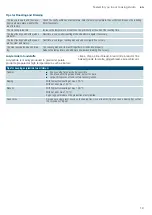
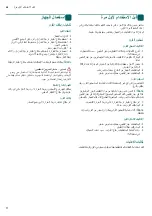
Detaching the shelf supports

The shelf supports are each fixed to the side panels of 

the cooking compartment at three points.

1.

Grip the front of the shelf support and pull it round to 

the middle of the cooking compartment. 

The front hook of the shelf support will come out of 

the hole.

2.

Swing the shelf support round further and pull it out 

of the rear holes in the side panel.

3.

Remove the shelf supports from the cooking 

compartment.

Refitting the shelf supports

1.

Insert the hooks of the shelf support into the rear 

holes in the side panel.

2.

Push the front hook of the shelf support into the 

hole.

q

Appliance door

Appliance door

With good care and cleaning, your appliance will retain 

its appearance and remain fully functional for a long 

time to come. This will tell you how to clean the 

appliance door.

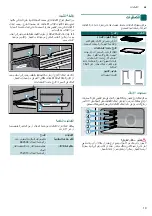
Removing and installing the door panels

To facilitate cleaning, you can remove the glass panels 

from the oven door.

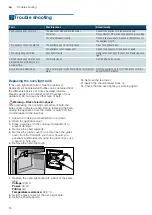
Removing the door panels

1.

Open the oven door fully.

2.

Lock both hinges on the left and right using the 

locking pin.

Note: 

The locking pins must be fully inserted into the 

holes in the hinges.

3.

Lift the bottom of the inner panel slightly until the 

fastening pins come out of the holder (

1

).

4.

Carefully lift the top of the inner panel until the 

fastening pins come out of the holder (

2

).

Caution!

When lifting the inner panel, the middle panel may 

stick to the inner panel. Make sure that the middle 

panel does not fall.

5.

Remove the inner panel.

D

E

Summary of Contents for VG011DBR0M

Page 1: ...3FHJTUFS ZPVS QSPEVDU POMJOF TJFNFOT IPNF CTI HSPVQ DPN XFMDPNF en Instruction manual Built inoven ar اﻻﺳﺘﻌﻤﺎل دﻟﻴﻞ اﻟﻤﺪﻣﺞ اﻟﻔﺮن Built in oven اﻟﻤﺪﻣﺞ اﻟﻔﺮن VG011DBR0M ...

Page 2: ......

Page 3: ...perating the appliance 11 Switching the oven on and off 11 O Time setting options 12 Setting the timer 12 D Cleaning 12 Suitable cleaning agents 12 Surfaces in the cooking compartment 13 Keeping the appliance clean 13 p Rails 14 Detaching the shelf supports 14 Refitting the shelf supports 14 q Appliance door 14 Removing and installing the door panels 14 Removing and fitting the appliance door 15 3...

Page 4: ...associated hazards Children must not play with on or around the appliance Children must not clean the appliance or carry out general maintenance unless they are at least 15 years old and are being supervised Keep children below the age of 8 years old at a safe distance from the appliance and power cable Always slide accessories into the cooking compartment the right way round Accessories on page 1...

Page 5: ...urns Alcoholic vapours may catch fire in the hot cooking compartment Never prepare food containing large quantities of drinks with a high alcohol content Only use small quantities of drinks with a high alcohol content Open the appliance door with care Risk of burns The telescopic shelves become hot when the appliance is in use Take special care not to get burnt when they are pulled out Warning Ris...

Page 6: ...ompartment floor with any sort of foil or greaseproof paper Do not place ovenware on the cooking compartment floor if a temperature of over 50 ºC has been set This will cause heat to accumulate The baking and roasting times will no longer be correct and the enamel will be damaged Aluminium foil Aluminium foil in the cooking compartment must not come into contact with the door glass This could caus...

Page 7: ...tment Open the appliance door as infrequently as possible when the appliance is in use It is best to bake several cakes one after the other The cooking compartment stays warm This reduces the baking time for the second cake You can place two cake tins next to each other in the cooking compartment For longer cooking times you can switch the appliance off 10 minutes before the end of the cooking tim...

Page 8: ...to set the short term timer Time selector You can use the time selector to set the short term timer or to switch on the cooking interior lighting 0 Temperature selector Use the temperature selector to set the temperature for the heating function You can also turn the temperature selector clockwise and anti clockwise Gas burner The gas burner heats from below 8 Gas grill The gas grill heats from ab...

Page 9: ...the appliance is started Once the program is complete the lighting will switch off Cooling fan The cooling fan switches on and off as required The warm air escapes above the door Caution Do not cover the ventilation slots otherwise the oven will overheat To cool the cooking compartment more quickly after operation the cooling fan continues to run for a certain period afterwards Operating mode Use ...

Page 10: ... The accessories must be inserted into the cooking compartment correctly for the tilt protection to work properly When inserting the wire rack ensure that the lug is at the rear and is facing downwards The open side must be facing the appliance door and the curvature must be at the bottom i e When inserting baking trays ensure that the lug is at the rear and is facing downwards The sloping edge of...

Page 11: ... 2 Switch the oven off after 1 hour Note When the appliance is heating up for the first time you may hear crackling noises coming from the oven Recleaning the oven 1 Clean the cooking compartment with hot soapy water 2 Refit the hook in racks 3 If necessary clean the door panels Appliance door on page 14 Cleaning the accessories Before using the accessories clean them thoroughly using a cloth and ...

Page 12: ...e different surfaces are not damaged by using the wrong type of cleaning agent Do not use any of the following on the oven Any harsh or abrasive cleaning agents Cleaning agents with a high concentration of alcohol Hard scouring pads or sponges High pressure cleaners or steam cleaners Wash new sponge cloths thoroughly before use Area Cleaning Appliance exterior Stainless steel front Hot soapy water...

Page 13: ...nto these surfaces dab it off immediately using water and a sponge cloth Do not rub the surfaces or use abrasive cleaning aids Keeping the appliance clean Always keep the appliance clean and remove dirt immediately so that stubborn deposits of dirt do not build up Warning Risk of fire Loose food remnants fat and meat juices may catch fire Before using the appliance remove the worst of the food rem...

Page 14: ... AppliancedoorWith good care and cleaning your appliance will retain its appearance and remain fully functional for a long time to come This will tell you how to clean the appliance door Removing and installing the door panels To facilitate cleaning you can remove the glass panels from the oven door Removing the door panels 1 Open the oven door fully 2 Lock both hinges on the left and right using ...

Page 15: ...two hinges on the left and right using the locking pin a Note The locking pins must be fully inserted into the holes in the hinges 3 Take hold of the sides of the oven door with both hands and close the oven door by approx 30 b 4 Lift the oven door slightly and pull it out Note Do not close the oven door fully otherwise the hinges could become bent and the enamel could be damaged Fitting the appli...

Page 16: ...th a bulb of the same type Voltage 230 V Power 40 W Fitting G9 Temperature resistance 300 C 8 Refit the glass cover for the oven light bulb 9 Refit the shelf supports 10 Remove the tea towel 11 Switch the circuit breaker back on 12 Check that the oven lighting is working again Fault Possible cause Notes remedy The appliance does not work The plug is not plugged into the mains Connect the appliance...

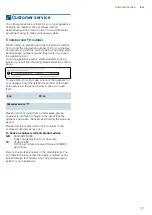
Page 17: ...rol panel To save time you can make a note of the numbers for your appliance and the telephone number of the after sales service in the space below in case you need them Please note that a visit from an after sales service engineer is not free of charge in the event that the appliance has been misused even during the warranty period Please find the contact data of all countries in the enclosed cus...

Page 18: ...n on all sides The cake is too dry Set the temperature 10 C higher and shorten the baking time The cake is generally too light in col our If the shelf position and the cookware are correct then you should increase the temperature if necessary or extend the baking time The cake is too light on top and too dark underneath Bake the cake one level higher in the oven the next time The cake is too dark ...

Page 19: ...a smaller roasting dish and add more liquid if necessary The roast looks good but the juices are too clear and watery Next time use a larger roasting dish and add less liquid if necessary The meat gets burned during brais ing The roasting dish and lid must fit together well and close properly Reduce the temperature and add more liquid when braising if necessary Tips for keeping acrylamide to a min...

Page 20: ... اﻟﻠﺰوم ﻋﻨﺪ وأﺿﻒ ﻧﺴﺒﻴﺎ أﺻﻐﺮ ﺗﺤﻤﻴﺮ إﻧﺎء اﻟﻘﺎدﻣﺔ اﻟﻤﺮة ﻓﻲ اﺧﺘﺮ وﻟﻜﻦ ﺟﻴﺪة ﺑﺤﺎﻟﺔ ﺗﺒﺪو اﻟﻠﺤﻢ ﻗﻄﻌﺔ وﻣﺨﻔﻒ ﻟﻠﻐﺎﻳﺔ اﻟﻠﻮن ﻓﺎﺗﺢ اﻟﺼﻮص ﻟﻠﻐﺎﻳﺔ اﻟﺴﺎﺋﻞ ﻣﻦ أﻗﻞ آﻤﻴﺔ اﻟﻠﺰوم ﻋﻨﺪ وأﺿﻒ ﻧﺴﺒﻴﺎ أآﺒﺮ ﺗﺤﻤﻴﺮ إﻧﺎء اﻟﻘﺎدﻣﺔ اﻟﻤﺮة ﻓﻲ اﺧﺘﺮ ﻳﺤﺘﺮق هﺎدﺋﺔ ﻧﺎر ﻋﻠﻰ اﻟﻄﻬﻲ ﻋﻨﺪ اﻟﻠﺤﻢ ﺟﻴﺪا وﻳﻐﻠﻘﺎن ﻣﺘﻮاﺋﻤﻴﻦ واﻟﻐﻄﺎء اﻟﺘﺤﻤﻴﺮ إﻧﺎء ﻳﻜﻮن أن ﻳﺠﺐ هﺎدﺋﺔ ﻧﺎر ﻋﻠﻰ اﻟﻄﻬﻲ أﺛﻨﺎء اﻟﺴﺎﺋﻞ ﻣﻦ أﺧﺮى آﻤﻴﺔ اﻟﺤﺎﺟﺔ ﻋﻨﺪ وأﺿﻒ اﻟﺤﺮارة درﺟﺔ ﺑﺘﻘﻠﻴﻞ ﻗﻢ اﻟﻄﻌﺎم ﺗﺤﻀﻴﺮ ﻋﻨ...

Page 21: ...ﺟ ﺟﺎف اﻟﻜﻴﻚ ﺑﻤﻘﺪار أﻋﻠﻰ ﺣﺮارة درﺟﺔ اﺿﺒﻂ 10 اﻟﺨﺒﻴﺰ زﻣﻦ ﺑﺘﻘﺼﻴﺮ وﻗﻢ م اﻟﻠﻮن ﻓﺎﺗﺢ إﺟﻤﺎﻟﻴﺔ ﺑﺼﻔﺔ اﻟﻜﻴﻚ زﻣﻦ إﻃﺎﻟﺔ أو اﻟﺤﺮارة درﺟﺔ ﺑﺰﻳﺎدة اﻟﻠﺰوم ﻋﻨﺪ ﻗﻢ اﻟﺼﺤﻴﺤﺔ واﻟﻜﻤﺎﻟﻴﺎت اﻟﺼﺤﻴﺢ اﻹدﺧﺎل ﻣﺴﺘﻮى اﺳﺘﺨﺪام ﺣﺎﻟﺔ ﻓﻲ اﻟﺨﺒﻴﺰ ﻣﻦ ﻟﻜﻨﻪ ﻟﻠﻐﺎﻳﺔ ﻓﺎﺗﺢ أﻋﻠﻰ ﻣﻦ اﻟﻜﻴﻚ ﻟﻠﻐﺎﻳﺔ داآﻦ أﺳﻔﻞ أﻋﻠﻰ ﻣﺴﺘﻮى ﻋﻠﻰ اﻟﻘﺎدﻣﺔ اﻟﻤﺮة ﻓﻲ اﻟﻜﻴﻚ أدﺧﻞ ﻣﻦ ﻟﻜﻨﻪ ﻟﻠﻐﺎﻳﺔ داآﻦ أﻋﻠﻰ ﻣﻦ اﻟﻜﻴﻚ ﻟﻠﻐﺎﻳﺔ ﻓﺎﺗﺢ أﺳﻔﻞ اﻟﺨﺒﻴﺰ زﻣﻦ ﺑﺈﻃﺎﻟﺔ وﻗﻢ ﻧﺴﺒﻴﺎ أﻗﻞ ﺣﺮارة درﺟﺔ اﺧﺘﺮ أ...

Page 22: ...ﻋﻨﺪ اﻷرﻗﺎم وﺑﻬﺎ اﻟﺼﻨﻊ ﻣﻮﺟﻮدة اﻟﺼﻨﻊ ﻟﻮﺣﺔ ﺗﺠﺪ ﺑﺎﻟﺒﺨﺎر اﻟﻄﻬﻲ ﺑﻮﻇﻴﻔﺔ اﻟﻤﺰودة اﻷﺟﻬﺰة ﺑﻌﺾ ﻓﻲ ﻏﻄﺎء ﺧﻠﻒ ﺗﻀﻄﺮ ﻻ آﻲ اﻟﻌﻤﻼء ﺧﺪﻣﺔ هﺎﺗﻒ ورﻗﻢ ﺟﻬﺎزك ﺑﻴﺎﻧﺎت ﺗﺪوﻳﻦ هﻨﺎ ﻳﻤﻜﻨﻚ اﻟﺒﻴﺎﻧﺎت هﺬﻩ إﻟﻰ اﻻﺣﺘﻴﺎج ﻋﻨﺪ ﻃﻮﻳﻞ ﻟﻮﻗﺖ ﻟﻠﺒﺤﺚ اﻟﺨﺎﻃﺊ اﻻﺳﺘﻌﻤﺎل ﺣﺎﻟﺔ ﻓﻲ ﺑﺎﻟﻤﺠﺎن ﻟﻴﺴﺖ اﻟﻌﻤﻼء ﺧﺪﻣﺔ ﻓﻨﻲ زﻳﺎرة أن ﻳﺮاﻋﻰ اﻟﻀﻤﺎن ﻓﺘﺮة أﺛﻨﺎء ﺣﺘﻰ ﺑﺄﻗﺮب اﻻﺗﺼﺎل ﺑﻴﺎﻧﺎت اﻟﻌﻤﻼء ﺧﺪﻣﺔ ﻟﻤﺮاآﺰ اﻟﻤﺮﻓﻖ اﻟﺪﻟﻴﻞ ﻓﻲ أو هﻨﺎ ﺗﺠﺪ اﻟﺒﻠﺪان ﺟﻤﻴﻊ ﻓﻲ اﻟﻌﻤﻼء ﻟﺨﺪﻣﺔ ﻣﺮآﺰ ﺑﻤﻌﺮﻓﺔ ...

Page 23: ...ﺄﺧﺮى اﻟﻔﺮن ﻟﻤﺒﺔ اﺳﺘﺒﺪل اﻟﻜﻬﺮﺑﺎﺋﻲ اﻟﺠﻬﺪ 230 ﻓﻠﻂ اﻟﻘﺪرة 40 واط اﻟﺪواة G9 اﻟﺤﺮارة ﻣﻘﺎوﻣﺔ 300 م 8 اﻟﻔﺮن ﻟﻠﻤﺒﺔ اﻟﺰﺟﺎﺟﻲ اﻟﻐﻄﺎء ﺗﺮآﻴﺐ أﻋﺪ 9 اﻟﺘﻌﻠﻴﻖ ﻗﻀﺒﺎن ﺷﺒﻜﺎت ﺑﺘﺮآﻴﺐ ﻗﻢ 10 أﺧﺮى ﻣﺮة اﻷواﻧﻲ ﻓﻮﻃﺔ أﺧﺮج 11 اﻟﻤﺼﻬﺮ ﺗﻮﺻﻴﻞ أﻋﺪ 12 ﺟﺪﻳﺪ ﻣﻦ ﺗﻌﻤﻞ اﻟﻔﺮن إﺿﺎءة أن ﺗﺄآﺪ اﻟﺨﻠﻞ اﻟﻤﺤﺘﻤﻞ اﻟﺴﺒﺐ ﺣﻠﻮل إرﺷﺎدات ﻳﻌﻤﻞ ﻻ اﻟﺠﻬﺎز اﻟﻜﻬﺮﺑﺎﺋﻲ اﻟﻤﻘﺒﺲ ﻓﻲ ﻣﻮﺿﻮع ﻏﻴﺮ اﻟﻘﺎﺑﺲ اﻟﻜﻬﺮﺑﺎﺋﻴﺔ ﺑﺎﻟﺸﺒﻜﺔ اﻟﺠﻬﺎز ﺑﺘﻮﺻﻴﻞ ﻗﻢ اﻟﻜﻬﺮﺑﺎﺋﻲ اﻟﺘﻴﺎر اﻧﻘﻄﺎع ﻣﺸﻐﻠﺔ أﺧ...

Page 24: ...ﻨﺼﺢ وﻻ اﻟﺠﻬﺎز ﺑﺎب ﻓﻚ 1 ﺗﻤﺎﻣﺎ اﻟﻔﺮن ﺑﺎب اﻓﺘﺢ 2 اﻟﺘﺄﻣﻴﻦ ﺑﺨﺎﺑﻮر واﻟﻴﻤﻨﻰ اﻟﻴﺴﺮى اﻟﻤﻔﺼﻠﺘﻴﻦ ﺑﺘﺜﺒﻴﺖ ﻗﻢ a ﻣﻼﺣﻈﺔ ﺗﻤﺎﻣﺎ اﻟﻤﻔﺼﻼت ﺗﺠﺎوﻳﻒ ﻓﻲ اﻟﺘﺄﻣﻴﻦ ﺧﻮاﺑﻴﺮ إدﺧﺎل ﻳﺠﺐ 3 ﺣﻮاﻟﻲ ﺑﺰاوﻳﺔ أﻏﻠﻘﻪ ﺛﻢ ﻳﺪﻳﻚ ﺑﻜﻠﺘﺎ اﻟﺠﺎﻧﺒﻴﻦ ﻣﻦ اﻟﻔﺮن ﺑﺎب أﻣﺴﻚ 30 b 4 ﻟﻠﺨﺎرج واﺳﺤﺒﻪ ﻗﻠﻴﻼ اﻟﻔﺮن ﺑﺎب ارﻓﻊ ﻣﻼﺣﻈﺔ اﻟﻤﻔﺼﻼت ﺗﻨﺜﻨﻲ أن ﻳﻤﻜﻦ ﺣﻴﺚ ﺗﻤﺎﻣﺎ اﻟﻔﺮن ﺑﺎب ﺗﻐﻠﻖ ﻻ اﻹﻳﻨﺎﻣﻴﻞ اﻟﻤﻴﻨﺎ ﺑﻄﺒﻘﺔ أﺿﺮارا وﺗﺴﺒﺐ اﻟﺠﻬﺎز ﺑﺎب ﺗﺮآﻴﺐ 1 اﻟﺠﺎﻧﺒﻴﻦ ﻣﻦ ﻳﺪﻳﻚ ﺑﻜﻠﺘﺎ اﻟﻔﺮن ﺑﺎب أﻣ...

Page 25: ... اﺿﻐﻂ q اﻟﺠﻬﺎز ﺑﺎب ز ﺎ ﻬ ﺠ ﻟ ا ب ﺎ ﺑ اﻟﻮﻇﻴﻔﻴﻪ وآﻔﺎءﺗﻪ ﺟﻤﺎﻟﻪ ﻋﻠﻰ ﻳﺤﺎﻓﻆ ﺑﺎهﺘﻤﺎم وﺗﻨﻈﻴﻔﻪ ﺑﺠﻬﺎزك اﻟﺠﻴﺪة اﻟﻌﻨﺎﻳﺔ اﻟﺠﻬﺎز ﺑﺎب ﺗﻨﻈﻴﻒ آﻴﻔﻴﺔ ﻋﻠﻰ هﻨﺎ ﺗﺘﻌﺮف ﻃﻮﻳﻠﺔ ﻟﻔﺘﺮة اﻟﺒﺎب زﺟﺎج وﺗﺮآﻴﺐ ﻓﻚ أﻓﻀﻞ ﺑﺸﻜﻞ اﻟﺘﻨﻈﻴﻒ ﻋﻤﻠﻴﺔ ﻹﺟﺮاء اﻟﻔﺮن ﺑﺎب ﻣﻦ اﻟﺰﺟﺎﺟﻴﺔ اﻷﻟﻮاح ﻓﻚ ﻳﻤﻜﻨﻚ اﻟﺒﺎب زﺟﺎج ﻓﻚ 1 ﺗﻤﺎﻣﺎ اﻟﻔﺮن ﺑﺎب اﻓﺘﺢ 2 اﻟﺘﺄﻣﻴﻦ ﺑﺨﺎﺑﻮر واﻟﻴﻤﻨﻰ اﻟﻴﺴﺮى اﻟﻤﻔﺼﻠﺘﻴﻦ ﺑﺘﺜﺒﻴﺖ ﻗﻢ ﻣﻼﺣﻈﺔ ﺗﻤﺎﻣﺎ اﻟﻤﻔﺼﻼت ﺗﺠﺎوﻳﻒ ﻓﻲ اﻟﺘﺄﻣﻴﻦ ﺧﻮاﺑﻴﺮ إدﺧﺎل ﻳﺠﺐ 3 ﺧﻮاﺑﻴﺮ ﺗ...

Page 26: ...ﻏﻢ وﺻﻠﺖ إذا ﻟﻠﻀﺮر اﻷﺳﻄﺢ ﺗﺘﻌﺮض ﺑﺎﻟﻜﺸﻂ ﺗﻘﻢ أﻻ ﻳﺮﺟﻰ إﺳﻔﻨﺠﻴﺔ وﻓﻮﻃﺔ ﺑﺎﻟﻤﺎء اﻟﻔﻮر ﻋﻠﻰ ﺑﻤﺴﺤﻬﺎ ﻓﻘﻢ اﻷﺳﻄﺢ ﺧﺎدﺷﺔ ﺗﻨﻈﻴﻒ ﻣﻮاد أﻳﺔ ﺗﺴﺘﺨﺪم وأﻻ اﻟﺠﻬﺎز ﻧﻈﺎﻓﺔ ﻋﻠﻰ اﻟﻤﺤﺎﻓﻈﺔ اﻻﺗﺴﺨﺎت ﺑﺈزاﻟﺔ وﻗﻢ اﻟﺠﻬﺎز ﻧﻈﺎﻓﺔ ﻋﻠﻰ داﺋﻤﺎ ﺣﺎﻓﻆ ﻋﻨﻴﺪة اﺗﺴﺎﺧﺎت ﺗﺘﻜﻮن ﻻ آﻲ اﻟﺴﺮﻋﺔ وﺟﻪ ﻋﻠﻰ ﺗﺤﺬﻳﺮ اﻟﺤﺮﻳﻖ ﺧﻄﺮ اﺣﺮص ﺗﺸﺘﻌﻞ أن ﻳﻤﻜﻦ اﻟﻠﺤﻮم وﻋﺼﺎرات واﻟﺪهﻮن اﻟﺴﺎﺋﺒﺔ اﻷﻃﻌﻤﺔ ﺑﻘﺎﻳﺎ اﻟﺘﺴﺨﻴﻦ ﻋﻨﺎﺻﺮ وﻣﻦ اﻟﻄﻬﻲ ﺣﻴﺰ ﻣﻦ اﻟﺠﺎﻓﺔ اﻻﺗﺴﺎﺧﺎت إزاﻟﺔ ﻋﻠﻰ اﻟﺘﺸﻐﻴﻞ ﻗﺒﻞ اﻟﻜﻤﺎﻟﻴﺎت...

Page 27: ...ﻠﻔﺔ اﻷﺳﻄﺢ ﺗﺘﻀﺮر ﻻ ﺣﺘﻰ اﻟﺘﺎﻟﻴﺔ اﻟﺘﻌﻠﻴﻤﺎت ﺗﺴﺘﺨﺪم ﻻ اﻟﻔﺮن ﻣﻊ ﺧﺎدﺷﺔ أو ﺧﺸﻨﺔ ﻣﻨﻈﻔﺎت أﻳﺔ اﻟﻜﺤﻮل ﻋﻠﻰ ﺗﺤﺘﻮي ﻗﻮﻳﺔ ﻣﻨﻈﻔﺎت أﻳﺔ ﺧﺸﻨﺔ إﺳﻔﻨﺠﺎت أو ﻟﻴﻔﺎت أﻳﺔ ﺑﺎﻟﺒﺨﺎر أو اﻟﻌﺎﻟﻲ ﺑﺎﻟﻀﻐﻂ ﺗﻨﻈﻴﻒ أﺟﻬﺰة أﻳﺔ اﺳﺘﺨﺪاﻣﻬﺎ ﻗﺒﻞ ﺟﻴﺪا اﻟﺠﺪﻳﺪة اﻹﺳﻔﻨﺠﻴﺔ اﻟﻔﻮط اﻏﺴﻞ اﻟﻨﻄﺎق اﻟﺘﻨﻈﻴﻒ اﻟﺨﺎرج ﻣﻦ اﻟﺠﻬﺎز اﻻﺳﺘﺎﻧﻠﺲ اﻟﻮاﺟﻬﺔ ﺳﺘﻴﻞ ﺳﺎﺧﻦ ﺻﺎﺑﻮﻧﻲ ﻣﺤﻠﻮل ذﻟﻚ ﺑﻌﺪ ﺑﺎﻟﺘﺠﻔﻴﻒ ﻗﻢ ﺛﻢ ﺗﻨﻈﻴﻒ ﺑﻔﻮﻃﺔ ﺑﺎﻟﺘﻨﻈﻴﻒ ﻗﻢ ﻧﺎﻋﻢ ﻣﻨﺪﻳﻞ ﺑﺎﺳﺘﺨﺪام وﺑﻴﺎض اﻟﻨﺸﺎ وﺑﻘﻊ واﻟﺪهﻨﻴﺔ اﻟﺠﻴﺮ...

Page 28: ...ﺎر ﻣﻔﺘﺎح أدر 2 ﺳﺎﻋﺔ ﺑﻌﺪ اﻟﻔﺮن ﺑﺈﻳﻘﺎف ﻗﻢ ﻣﻼﺣﻈﺔ أﺻﻮات اﻟﻔﺮن ﻣﻦ ﺗﺼﺪر أن ﻳﻤﻜﻦ اﻷوﻟﻰ اﻟﺘﺴﺨﻴﻦ ﻋﻤﻠﻴﺔ أﺛﻨﺎء ﻃﻘﻄﻘﺔ ﻟﻠﻔﺮن اﻟﻼﺣﻖ اﻟﺘﻨﻈﻴﻒ 1 ﺳﺎﺧﻦ ﺻﺎﺑﻮﻧﻲ ﺑﻤﺤﻠﻮل اﻟﻄﻬﻲ ﺣﻴﺰ ﺑﺘﻨﻈﻴﻒ ﻗﻢ 2 اﻟﺘﻌﻠﻴﻖ ﺷﺒﻜﺎت ﺑﺘﺮآﻴﺐ ﻗﻢ 3 اﻷﺑﻮاب زﺟﺎج ﺑﺘﻨﻈﻴﻒ ﻗﻢ اﻟﺤﺎﺟﺔ وﻋﻨﺪ اﻟﺠﻬﺎز ﺑﺎب ﻓﻲ ﺻﻔﺤﺔ 14 اﻟﻜﻤﺎﻟﻴﺎت ﺗﻨﻈﻴﻒ ﺗﻨﻈﻴﻒ وﻓﻮﻃﺔ داﻓﺊ ﺻﺎﺑﻮﻧﻲ ﺑﻤﺤﻠﻮل ًا ﺪ ﺟﻴ ﺑﺘﻨﻈﻴﻔﻬﺎ ﻗﻢ اﻟﻜﻤﺎﻟﻴﺎت اﺳﺘﺨﺪام ﻗﺒﻞ 1 اﻟﺠﻬﺎز اﺳﺘﻌﻤﺎل ز ﺎ ﻬ ﺠ ﻟ ا ل ﺎ ﻤ ﻌ ﺘ ﺳ ا اﻟﻔﺮن وإﻳﻘﺎف ﺗﺸﻐﻴ...

Page 29: ...ﺎﻟﻴﺎت ﺳﻠﻴﻢ ﺑﺸﻜﻞ اﻻﻧﻘﻼب ﻣﻦ اﻟﺘﺜﺒﻴﺖ ﻃﺮف أن اﻟﺴﻠﻜﻴﺔ اﻟﺸﺒﻜﺔ إدﺧﺎل ﻋﻨﺪ ﺗﺄآﺪ أﺳﻔﻞ إﻟﻰ وﻳﺸﻴﺮ ﺑﺎﻟﺨﻠﻒ ًﺎ ﻬ ﻣﻮﺟ واﻟﺘﻘﻮس اﻟﺠﻬﺎز ﻟﺒﺎب ًﺎ ﻬ ﻣﻮﺟ اﻟﻤﻔﺘﻮح اﻟﺠﺎﻧﺐ ﻳﻜﻮن أن ﻳﺠﺐ ﻷﺳﻔﻞ اﻟﺘﺜﺒﻴﺖ ﻃﺮف أن اﻷﻟﻮاح إدﺧﺎل ﻋﻨﺪ ﺗﺄآﺪ ﻳﺠﺐ أﺳﻔﻞ إﻟﻰ وﻳﺸﻴﺮ ﺑﺎﻟﺨﻠﻒ ﻟﻠﻜﻤﺎﻟﻴﺎت اﻟﻤﺎﺋﻠﺔ اﻟﺤﺎﻓﺔ ﺗﻜﻮن أن ƒ اﻟﺠﻬﺎز ﺑﺎب ﻣﻮاﺟﻬﺔ ﻓﻲ اﻷﻣﺎم ﻓﻲ اﻻﺳﺘﺨﺪاﻣﺎت ﻣﺘﻌﺪد اﻟﻠﻮح اﻟﺼﻮرة ﻓﻲ اﻟﻤﺜﺎل اﻟﺨﺎﺻﺔ اﻟﻜﻤﺎﻟﻴﺎت اﻟﻤﺘﺨﺼﺼﺔ اﻟﻤﺘﺎﺟﺮ ﻣﻦ أو اﻟﻌﻤﻼء ﺧﺪﻣﺔ ﻣﻦ اﻟﻜﻤﺎﻟﻴﺎت ﺷﺮاء...

Page 30: ...ءة ﺗﺸﻐﻴﻞ ﻳﺘﻢ اﻟﺘﺸﻐﻴﻞ ﻃﺮق أﻏﻠﺐ ﻓﻲ اﻹﺿﺎءة ﺗﻨﻄﻔﺊ اﻟﺘﺸﻐﻴﻞ ﻳﻨﺘﻬﻲ وﻋﻨﺪﻣﺎ اﻟﺘﺒﺮﻳﺪ ﻣﺮوﺣﺔ ﻣﻦ اﻟﺴﺎﺧﻦ اﻟﻬﻮاء وﻳﺨﺮج اﻟﺤﺎﺟﺔ ﻋﻨﺪ اﻟﺘﺒﺮﻳﺪ ﻣﺮوﺣﺔ وإﻳﻘﺎف ﺗﺸﻐﻴﻞ ﻳﺘﻢ اﻟﺒﺎب ﻓﻮق ﺗﻨﺒﻴﻪ اﻟﺴﺨﻮﻧﺔ ﻟﻔﺮط اﻟﻔﺮن ﻳﺘﻌﺮض ﻓﺴﻮف وإﻻ اﻟﺘﻬﻮﻳﺔ ﻓﺘﺤﺎت ﺑﺘﻐﻄﻴﺔ ﺗﻘﻢ ﻻ ﻣﺮوﺣﺔ ﺗﺸﻐﻴﻞ ﻳﺴﺘﻤﺮ اﻟﺘﺸﻐﻴﻞ ﺑﻌﺪ أﺳﺮع ﺑﺸﻜﻞ اﻟﻄﻬﻲ ﺣﻴﺰ ﺗﺒﺮﻳﺪ ﻳﺘﻢ ﺣﺘﻰ ﻣﻌﻴﻨﺔ ﻟﻔﺘﺮة اﻟﺘﺒﺮﻳﺪ اﻟﺘﺸﻐﻴﻞ ﻃﺮﻳﻘﺔ اﻻﺳﺘﺨﺪام Þ اﻟﺼﻔﺮ وﺿﻊ ﻣﺘﻮﻗﻒ اﻟﻔﺮن اﻷدﻧﻰ اﻟﺤﺪ اﻟﺤﺪ اﻷﻗﺼﻰ اﻟﺤﺮارة درﺟﺔ اﻟﻤﺌﻮﻳﺔ ﺑﺎﻟ...

Page 31: ...ﻚ اﻟﻮﻗﺖ ﺿﺒﻂ ﻣﻔﺘﺎح أو اﻟﻘﺼﻴﺮ اﻟﻮﻗﺖ ﻣﻴﻘﺎﺗﻲ ﺿﺒﻂ ﻳﻤﻜﻦ اﻟﻮﻗﺖ ﺿﺒﻂ ﻣﻔﺘﺎح ﺑﺎﺳﺘﺨﺪام اﻟﻄﻬﻲ ﺣﻴﺰ إﺿﺎءة ﺗﺸﻐﻴﻞ 0 اﻟﺤﺮارة درﺟﺔ اﺧﺘﻴﺎر ﻣﻔﺘﺎح ﻣﻔﺘﺎح ﺑﺎﺳﺘﺨﺪام اﻟﺘﺴﺨﻴﻦ ﻟﻨﻮع اﻟﻤﻨﺎﺳﺒﺔ اﻟﺤﺮارة درﺟﺔ ﺿﺒﻂ ﻳﻤﻜﻨﻚ اﻟﺤﺮارة درﺟﺔ اﺧﺘﻴﺎر اﻟﻴﺴﺎر وﺟﻬﺔ اﻟﻴﻤﻴﻦ ﺟﻬﺔ اﻟﺤﺮارة درﺟﺔ اﺧﺘﻴﺎر ﻣﻔﺘﺎح إدارة ﻳﻤﻜﻨﻚ ًﺎ ﻀ أﻳ اﻟﻐﺎز ﺷﻌﻠﺔ أﺳﻔﻞ ﻣﻦ ﺗﺴﺨﻦ اﻟﻐﺎز ﺷﻌﻠﺔ 8 اﻟﻐﺎز ﺷﻮاﻳﺔ أﻋﻠﻰ ﻣﻦ اﻟﻐﺎز ﺷﻮاﻳﺔ ﺗﺴﺨﻦ اﻟﺘﺴﺨﻴﻦ ﻧﻮع اﻟﺤﺮارة درﺟﺔ اﻻﺳﺘﺨﺪام Þ اﻟﺼﻔﺮ وﺿﻊ ﻣﺘﻮﻗﻒ ...

Page 32: ...ﻟﻜﻤﺎﻟﻴﺎت أﺧﺮج اﻟﺘﺸﻐﻴﻞ أﺛﻨﺎء اﻹﻣﻜﺎن ﻗﺪر اﻟﺠﻬﺎز ﺑﺎب ﺗﻔﺘﺢ ﻻ ﺣﻴﺰ ﻳﻈﻞ ﺣﻴﺚ اﻷﺧﺮى ﺑﻌﺪ اﻟﻮاﺣﺪة اﻟﻔﻄﺎﺋﺮ ﻣﻦ اﻟﻌﺪﻳﺪ ﺧﺒﺰ اﻷﻓﻀﻞ ﻣﻦ اﻟﻤﺨﺒﻮزات ﻹﻋﺪاد اﻟﻼزم اﻟﻮﻗﺖ ﻳﻘﻞ وﺑﺬﻟﻚ ﺑﺴﺨﻮﻧﺘﻪ ًﺎ ﻈ ﻣﺤﺘﻔ اﻟﻄﻬﻲ ﺣﻴﺰ ﻓﻲ ﻣﺘﺠﺎورﺗﻴﻦ ﺻﻴﻨﻴﺘﻴﻦ وﺿﻊ أﻳﻀﺎ ﻳﻤﻜﻨﻚ آﻤﺎ اﻟﺜﺎﻧﻴﺔ ﻟﻠﻔﻄﻴﺮة ﺑﺎﻟﻨﺴﺒﺔ اﻟﻄﻬﻲ ﻧﻬﺎﻳﺔ ﻗﺒﻞ اﻟﺠﻬﺎز إﻃﻔﺎء ﻳﻤﻜﻨﻚ ﻧﺴﺒﻴﺎ اﻟﻄﻮﻳﻠﺔ اﻟﻄﻬﻲ ﻷوﻗﺎت ﺑﺎﻟﻨﺴﺒﺔ اﻟﻄﻬﻲ ﻹﻧﻬﺎء اﻟﻤﺘﺒﻘﻴﺔ اﻟﺤﺮارة واﺳﺘﺨﺪام دﻗﺎﺋﻖ ﺑﻌﺸﺮ اﻟﻄﻬﻲ زﻣﻦ ﺑﺎﻟﺒﻴﺌﺔ ﺗﻀﺮ ﻻ ﺑﻄﺮﻳﻘﺔ اﻟﻤ...

Page 33: ...ﻣﻨﻴﻮم رﻗﺎﺋﻖ ﻣﻦ ﻧﻮع ﺑﺄي اﻟﻄﻬﻲ ﺣﻴﺰ أرﺿﻴﺔ ﺣﺮارة درﺟﺔ ﺿﺒﻂ ﺣﺎﻟﺔ ﻓﻲ اﻟﻄﻬﻲ ﺣﻴﺰ أرﺿﻴﺔ ﻋﻠﻰ أواﻧﻲ أﻳﺔ ﺗﻀﻊ ﻻ ﻣﻦ أﻋﻠﻰ 50 أزﻣﻨﺔ أن آﻤﺎ اﻟﺴﺨﻮﻧﺔ ﺗﺮاآﻢ إﻟﻰ ﻳﺆدي ذﻟﻚ إن ﺣﻴﺚ م ﻓﻲ ذﻟﻚ ﻳﺘﺴﺒﺐ وﺳﻮف ﺻﺤﻴﺤﺔ ﺗﻜﻮن ﻟﻦ واﻟﺘﺤﻤﻴﺮ اﻟﻤﺨﺒﻮزات إﻋﺪاد اﻹﻳﻨﺎﻣﻴﻞ اﻟﻤﻴﻨﺎ ﺑﻄﺒﻘﺔ اﻟﻀﺮر إﻟﺤﺎق وهﻲ اﻷﻟﻮﻣﻨﻴﻮم رﻗﺎﺋﻖ ﺑﻴﻦ ﺗﻼﻣﺲ ﺑﺤﺪوث ﻳﺴﻤﺢ ﻻ اﻷﻟﻮﻣﻨﻴﻮم رﻗﺎﺋﻖ زﺟﺎج ﻋﻠﻰ داﺋﻤﺔ ﻟﻮﻧﻴﺔ ًﺎ ﻌ ﺑﻘ ﺗﺘﺮك ﻓﻘﺪ اﻟﺒﺎب زﺟﺎج ﻣﻊ اﻟﻄﻬﻲ ﺣﻴﺰ ﻓﻲ اﻟﺒﺎب اﻟﻄﻬﻲ ﺣﻴﺰ ﻓﻲ اﻟﻤﺎء ﺑﺼﺐ...

Page 34: ...ت ﻹﺧﺮاج ﻟﻠﻔﺮن ﻓﻮﻃﺔ ﺳﺎﺧﻦ وهﻮ اﻟﻄﻬﻲ ﺣﻴﺰ ﻓﻲ ﺗﺸﺘﻌﻞ أن ﻳﻤﻜﻦ اﻟﻜﺤﻮل أﺑﺨﺮة ﻣﻦ آﺒﻴﺮة آﻤﻴﺎت ﻋﻠﻰ ﺗﺤﺘﻮي أﻃﻌﻤﺔ ﺑﺘﺤﻀﻴﺮ ًا ﺪ أﺑ ﺗﻘﻢ ﻻ ﻋﻠﻰ اﻗﺘﺼﺮ اﻟﻜﺤﻮل ﻣﻦ ﻋﺎﻟﻴﺔ ﻧﺴﺒﺔ ﻋﻠﻰ اﻟﻤﺸﺘﻤﻠﺔ اﻟﺴﻮاﺋﻞ ﺑﺎب اﻓﺘﺢ اﻟﻤﺮآﺰة اﻟﻤﺸﺮوﺑﺎت ﻣﻦ ﻗﻠﻴﻠﺔ آﻤﻴﺎت اﺳﺘﺨﺪام ﺑﺤﺮص اﻟﺠﻬﺎز ﺗﻮﺧﻲ ُﺮﺟﻰ ﻳ اﻟﺠﻬﺎز ﺗﺸﻐﻴﻞ أﺛﻨﺎء اﻟﺘﻠﻴﺴﻜﻮﺑﻴﺔ اﻟﺤﻮاﻣﻞ ﺗﺴﺨﻦ ﺑﺤﺮوق اﻹﺻﺎﺑﺔ ﻟﻌﺪم ُﺨﺮﺟﺔ ﻣ واﻟﺤﻮاﻣﻞ اﻟﺸﺪﻳﺪ اﻟﺤﺮص ﺗﺤﺬﻳﺮ ﺑﺤﺮوق اﻹﺻﺎﺑﺔ ﺧﻄﺮ اﻟﺘﺸﻐﻴﻞ أﺛﻨﺎء ﺗﺴﺨﻦ إﻟﻴﻬﺎ اﻟﻮﺻﻮل ﻳﻤﻜﻦ اﻟ...

Page 35: ...آﻬﻢ ﻣﻦ اﻟﺘﺄآﺪ ﻣﻊ ﻟﻠﺠﻬﺎز اﻵﻣﻦ اﻻﺳﺘﺨﺪام آﻴﻔﻴﺔ إﻟﻰ ﺗﻮﺟﻴﻬﻬﻢ ﺑﺬﻟﻚ اﻟﻤﺮﺗﺒﻄﺔ ﻟﻸﺧﻄﺎر اﻟﺠﻬﺎز ﺗﻨﻈﻴﻒ ﻟﻸﻃﻔﺎل ﻳﺠﻮز ﻻ ﺑﺎﻟﺠﻬﺎز اﻟﻌﺒﺚ ﻟﻸﻃﻔﺎل ﻳﺠﻮز ﻻ ﺳﻦ ﻓﻲ ﻳﻜﻮﻧﻮا ﻟﻢ ﻣﺎ ﺑﺎﻟﻤﺴﺘﺨﺪم اﻟﻤﻨﻮﻃﺔ اﻟﺼﻴﺎﻧﺔ أﻋﻤﺎل إﺟﺮاء أو 15 ذﻟﻚ أﺛﻨﺎء ﻣﺮاﻗﺒﺘﻬﻢ ﻳﺘﻢ أن ﻋﻠﻰ أآﺜﺮ أو ﺳﻨﺔ ﺳﻦ دون اﻷﻃﻔﺎل 8 وآﺎﺑﻞ اﻟﺠﻬﺎز ﻋﻦ إﺑﻌﺎدهﻢ ﻳﺠﺐ ﺳﻨﻮات اﻟﺘﻮﺻﻴﻞ ﺻﺤﻴﺢ ﺑﺸﻜﻞ اﻟﻄﻬﻲ ﺣﻴﺰ ﻓﻲ اﻟﻜﻤﺎﻟﻴﺎت إدﺧﺎل ﻋﻠﻰ داﺋﻤﺎ اﺣﺮص ﻓﻲ اﻟﻜﻤﺎﻟﻴﺎت ﺻﻔﺤﺔ 10 اﻟﻤﻬﻤﺔ اﻷﻣﺎن إرﺷﺎدات ﺔ ﻤ ﻬ ﻤ ﻟ...

Page 36: ...ﻈﻔﺎت 12 اﻟﻄﻬﻲ ﺣﻴﺰ أﺳﻄﺢ 13 اﻟﺠﻬﺎز ﻧﻈﺎﻓﺔ ﻋﻠﻰ اﻟﻤﺤﺎﻓﻈﺔ 13 p اﻟﻘﻀﺒﺎن 14 اﻟﻘﻀﺒﺎن ﻓﻚ 14 اﻟﻘﻀﺒﺎن ﺗﺮآﻴﺐ 14 q اﻟﺠﻬﺎز ﺑﺎب 14 اﻟﺒﺎب زﺟﺎج وﺗﺮآﻴﺐ ﻓﻚ 14 اﻟﺠﻬﺎز ﺑﺎب وﺗﺮآﻴﺐ ﻓﻚ 15 3 اﻟﻌﻤﻞ ﻣﺎ اﻻﺧﺘﻼﻻت 16 اﻟﻔﺮن ﻟﻤﺒﺔ ﺗﻐﻴﻴﺮ 16 4 اﻟﻌﻤﻼء ﺧﺪﻣﺔ 17 اﻟﻤﻨﺘﺞ رﻗﻢ E اﻟﺼﻨﻊ ورﻗﻢ FD 17 J ﺑﻨﺎ اﻟﺨﺎص اﻟﻄﻬﻲ ﺳﺘﻮدﻳﻮ ﻓﻲ اﺧﺘﺒﺎرهﺎ ﺗﻢ اﻟﺘﻲ اﻷﻃﺒﺎق 18 اﻻﺳﺘﺨﺪام ﻧﺼﺎﺋﺢ 18 اﻟﻤﻨﺘﺠﺎت ﻣﻌﻠﻮﻣﺎت واﻟﺨﺪﻣﺎت اﻟﻐﻴﺎر وﻗﻄﻊ واﻟﻜﻤﺎﻟﻴﺎت اﻟﻤﻨﺘﺠﺎت ﺣﻮل اﻟﻤﻌﻠﻮﻣﺎت ﻣﻦ ...

Page 37: ...6 ...

Page 38: ...6 ...

Page 39: ...6 ...

Page 40: ...r Trademark License of Siemens AG إﺗﺶ إس ﺑﻲ ﻟﻤﺠﻤﻮﻋﺔ اﻟﻘﺎﻧﻮﻧﻲ اﻻﺳﻢ ﺑﻮاﺳﻄﺔ اﻟﺘﺼﻨﻴﻊ ﺗﻢ BSH Hausgeräte GmbH ﺳﻴﻤﻨﺰ اﻟﺘﺠﺎرﻳﺔ اﻟﻌﻼﻣﺔ ﺗﺮﺧﻴﺺ وﻳﺤﻤﻞ Siemens AG 4 BVTHFSÉUF NC BSM 8FSZ 4US ßODIFO TJFNFOT IPNF CTI HSPVQ DPN 3 9001449525 9001449525 990701 ...

Reviews: