background image


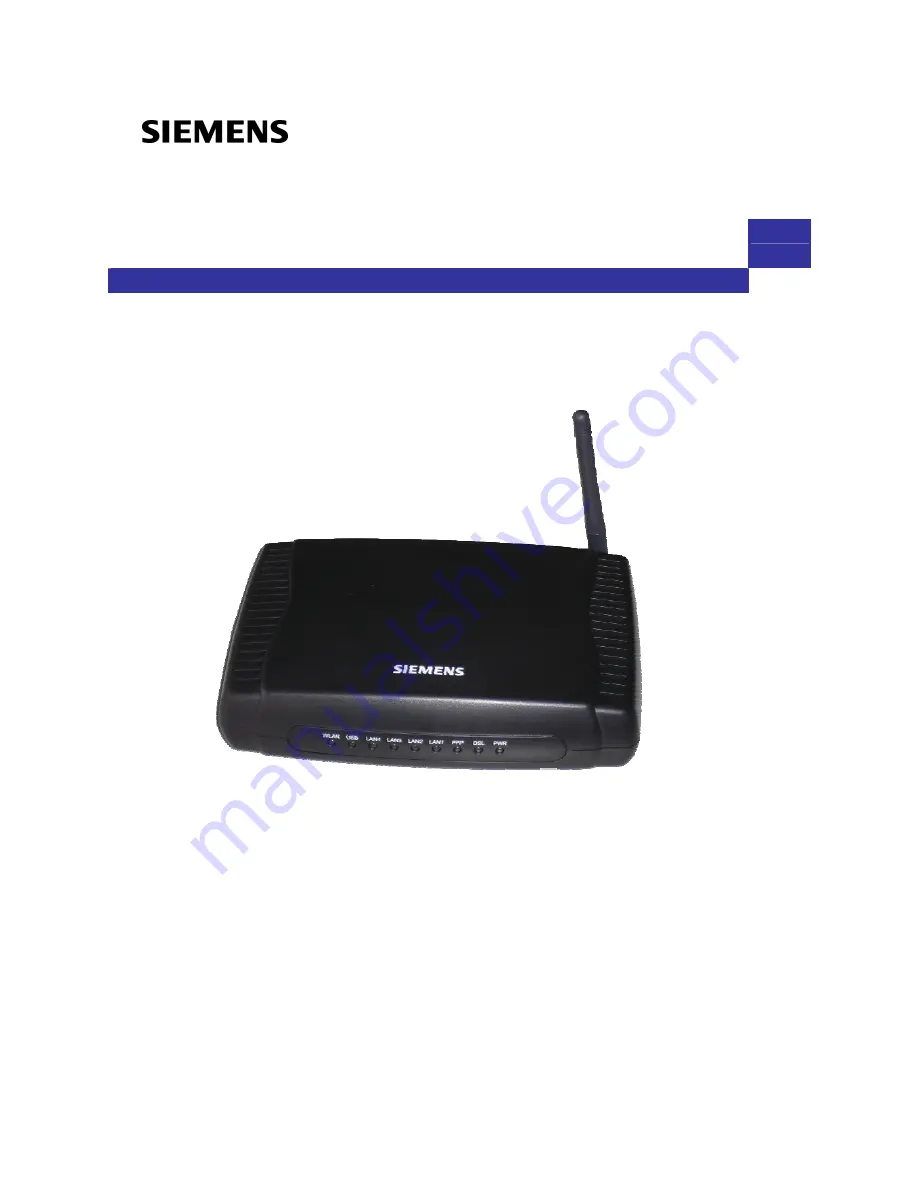
SL2-141/SL2-141-I ADSL Router


User’s Manual


Rev: 1.5 

2007/03/30 

No part of this publication may be reproduced in any form by any means without the prior written permission. Other 

trademarks or brand names mentioned herein are trademarks or registered trademarks of their respective companies. 


This manual currently suits for SL2-141/SL2-141-I. 


Summary of Contents for SL2-141

Page 1: ...t of this publication may be reproduced in any form by any means without the prior written permission Other trademarks or brand names mentioned herein are trademarks or registered trademarks of their respective companies This manual currently suits for SL2 141 SL2 141 I ...

Page 2: ...the product is expected to be not in use for a period of time unplug the power cord of the product to prevent it from the damage of storm or sudden increases in rating For Service Do not attempt to disassemble or open covers of this unit by yourself Nor should you attempt to service the product yourself which may void the user s authority to operate it Contact qualified service personnel under the...

Page 3: ...e with the instructions may cause harmful interference to radio communications However there is no guarantee that interference will not occur in a particular installation If this equipment does cause harmful interference to radio or television reception which can be determined by turning the equipment off and on the user is encouraged to try to correct the interference by one or more of the follow...

Page 4: ...Contents iv ...

Page 5: ...the feature rich routing functions are seamlessly integrated to ADSL service for existing corporate or home users Now users can enjoy various bandwidth consuming applications via SL2 141 SL2 141 I Wireless ADSL2 Router Features ADSL Compliance ANSI T1 413 Issue 2 ITU G 992 1 Annex A G dmt ITU G 992 2 Annex A G lite ITU G 994 1 G hs Support dying gasp Maximum Rate 8 Mbps for downstream and 1 Mbps f...

Page 6: ...ultiplexing over AAL5 RFC2364 Point to Point Protocol PPP over AAL5 RFC2225 Classical IP and ARP over ATM RFC2516 PPP over Ethernet support Relay Transparent Forwarding and Client functions Support PPPoA or PPPoE Bridged mode the IP address got from ISP can be passed to the user s PC and behave as the IP address of the user s PC OAM F4 F5 End to End Segment Loopback Cells Bridging Features Support...

Page 7: ...rvices which detect protect a number of attacks such as SYN FIN RST Flood Smurf WinNuke Echo Scan Xmas Tree Scan etc Configuration and Management User friendly embedded web configuration interface with password protection Remote management access control via HTTP TFTP FTP Telnet SSH SNMP Telnet session for local or remote management Firmware upgrades through HTTP TFTP or FTP The boot loader contai...

Page 8: ...t various IP addresses Dynamic IP If you apply for dial up connection you will be given an Internet account with username and password You will get a dynamic IP by dialing up to your ISP Static IP address If you apply for full time connectivity you may get either one static IP address or a range of IP addresses from your ISP The number of IP addresses varies according to different ADSL service pro...

Page 9: ...s not present or fails to function WLAN Green Blinking Traffic is going through Wireless LAN interface Solid Wireless LAN interface ready to work Unlit Power off or wait for USB connection going up USB Green Blinking User data is going through USB port Solid USB connection is OK Unlit Power off or no Ethernet carrier is present Ethernet 1 4 Green Blinking Ethernet carrier is present and user data ...

Page 10: ... Green Solid Power on Rear Panel The following figures illustrate the rear panel of your ADSL Router Connector Description 12VAC 12VAC Power connector Power switch Ethernet 1 4 Ethernet RJ 45 connector USB USB connector for the model with USB interface only DSL RJ 11 connector ...

Page 11: ...er Or you could assign an IP address to the host PC first for initial configuration You also can manage the ADSL Router through a web browser based manager ADSL ROUTER CONTROL PANEL The ADSL Router manager uses the HTTP protocol via a web browser to allow you to set up and manage the device To configure the device via web browser at least one properly configured PC must be connected to the network...

Page 12: ...ce to your ADSL wall outlet with RJ 11 cable o Please attach one end of the Ethernet cable with RJ 45 connector to the LAN port of your ADSL Router p Connect the other end of the cable to the Ethernet port of the client PC q Connect the supplied power adapter to the PWR port of your ADSL Router and plug the other end to a power outlet r Turn on the power switch 4 ...

Page 13: ...stallShield Wizard Complete appears click Finish r Plug the USB cable between your device and PC Note If the USB device is not detected check the USB cable between the PC and the device Also verify that the device is power on s The system will detect the USB driver automatically Now the system will copy the proper files for this device t When the file copying finished the dialog above will close N...

Page 14: ... InstallShield Wizard will appear Please wait for a moment p When the welcome screen appears click Next for next step q When the InstallShield Wizard Complete appears click Finish r Plug the USB cable between your device and PC 6 ...

Page 15: ...cally Now the system will copy the proper files for this device t When the file copying finished the dialog above will close The InstallShield Wizard Complete appears click Finish Now the USB driver is installed properly You can use the device For Windows XP n Run the USB installation program from the CD provided by your device package o An InstallShield Wizard will appear Please wait for a moment...

Page 16: ...n the InstallShield Wizard Complete appears click Finish r Plug the USB cable between your device and PC Note If the USB device is not detected check the USB cable between the PC and the device Also verify that the device is power on s The system will detect the USB driver automatically 8 ...

Page 17: ...users please press Continue whenever a prompted window asking for permission to continue during USB driver installation process see the figure below for example To install the USB driver before connect the router to the PC here provides two methods Method One Use the driver CD came with the product package n Run the USB installation program on the CD provided in your router package o An InstallShi...

Page 18: ...the welcome screen appears click Next for the next step q When the complete message of InstallShield Wizard appears click Finish r Link your router and the PC with a USB cable s The system will detect the USB driver automatically 10 ...

Page 19: ...te If the USB device is not detected check the USB cable between the PC and the device Also make sure that the device is power on t After the file copying finished a completing message will appear u You can use the router now 11 ...

Page 20: ...er folder on your PC and then enter setup s Press enter to start silent installation Then click the icon Key in cmd and press Enter q The system will install the driver automatically You can connect your router and the PC with a USB cable now r The system will detect the USB driver automatically Note If the USB device is not detected check the USB cable between the PC and the device Also make sure...

Page 21: ...vice to detect the router and then install the driver n Plug the USB cable into the USB port on the PC o A Found New Hardware window will appear Press Locate and install driver software recommended p Then insert the USB driver CD provided in your router package into the PC and press Next q The system will search disc for the USB driver needed and then complete the installation 13 ...

Page 22: ...iles on your PC you can follow the steps below p Press I don t have the disc Show me other options q Select Browse my computer for driver software advanced r Press Browse to set the path for the driver file and then press Next s Wait while the system installing the driver 14 ...

Page 23: ...lled successfully Press Close to start using the router To make sure the USB driver for your router is properly installed please do the following steps 1 Open the Start menu and press Control Panel 2 On the Control Panel folder click System and Maintenance 15 ...

Page 24: ...ADSL Router User Manual 3 Press System 4 Click Device Manager 5 Confirm that the Siemens ADSL Router USB Remote NDIS Device BCM63xx Based is 16 ...

Page 25: ...Unplug the USB cable between your device and your PC r When the Maintenance Complete screen appears the USB driver is removed successfully Click Finish The second way n Choose Settings Control Panel from the Start menu Choose Add Remove Programs o A dialog appears to ask you choose the program that you want to remove Please select Siemens ADSL Router USB Driver and click Change Remove p The Instal...

Page 26: ...lowing The first way n Choose Programs Siemens Broadband Uninstall Siemens ADSL Router USB Driver from the Start menu o The InstallShield Wizard dialog will appear p A dialog appears to ask you confirm if you want to remove the USB driver or not Please click Ok q Unplug the USB cable between your device and your PC 18 ...

Page 27: ...onfiguration r When the Unsafe Removal of Device screen appears the USB driver is removed successfully Click OK s When the Maintenance Complete screen appears the USB driver is removed successfully Click Finish 19 ...

Page 28: ...cond way n Choose Settings Control Panel from the Start menu Choose Add Remove Programs o A dialog appears to ask you choose the program that you want to remove Please select Siemens ADSL Router USB Driver and click Change Remove 20 ...

Page 29: ...ation p The InstallShield Wizard dialog will appear q A dialog appears to ask you confirm if you want to remove the USB driver or not Please click Ok Unplug the USB cable between your device and your PC Then click OK 21 ...

Page 30: ...ars the USB driver is removed successfully Click Finish For Windows XP For uninstall the USB driver there are two ways to do it Please do as the following The first way n Choose Programs Siemens Broadband Uninstall Siemens ADSL Router USB Driver from the Start menu 22 ...

Page 31: ...you want to remove the USB driver or not Please click Ok q Unplug the USB cable between your device and your PC r When the Unsafe Removal of Device screen appears the USB driver is removed successfully Click OK s When the Maintenance Complete screen appears the USB driver is removed successfully Click Finish 23 ...

Page 32: ...cond way n Choose Settings Control Panel from the Start menu Choose Add Remove Programs o A dialog appears to ask you choose the program that you want to remove Please select Siemens ADSL Router USB Driver and click Change Remove 24 ...

Page 33: ...d your PC Then click OK r When the Maintenance Complete screen appears the USB driver is removed successfully Click Finish For Windows Vista For Vista users please press Continue whenever a prompted window asking for permission to continue during USB driver uninstallation process see the figure below for example 25 ...

Page 34: ... To uninstall the USB driver there are two ways to do it Please follow the instructions Method One Remove from Device Manager n Choose Start menu and then select Control Panel o Click System and Maintenance p Press System 26 ...

Page 35: ...apter 3 Configuration q Click Device Manager r Right click Askey ADSL Router USB Remote NDIS Device on the Network adapters list and press Uninstall s Click OK when the Confirm Uninstall window appears 27 ...

Page 36: ...s Unplug and press OK t When the Confirm Device Uninstall screen show up check Delete the driver software for the device and click OK to continue u Wait while the system is uninstalling v When the uninstallation is finished the icon of this router under network adapter list will disappear Method Two uninstall from program list 28 ...

Page 37: ... cable between your router and your PC o Choose Start menu and open Control Panel folder Click Uninstall a program p If the driver name is not on the list click Refresh button or F5 to update the information To remove the driver select it and then press Uninstall Refresh button q Then the system will start to uninstall the USB driver software automatically r When Maintenance Complete window shows ...

Page 38: ... s The USB driver is successfully removed now Setting TCP IP In order to access the Internet through the router each host on your network must install setup TCP IP Please follow the steps below for select a network adapter 30 ...

Page 39: ...work icon 3 The Network window appears On the Configuration tab check out the list of installed network components Option 1 If you have no TCP IP protocol click Add Option 2 If you have TCP IP protocol go to Step 6 Your network interface card Check out if TCP IP for your NIC is installed or not 4 Highlight Protocol and click Add 31 ...

Page 40: ...ick OK 6 When returning to Network window highlight TCP IP protocol for your NIC and click Properties 7 On IPAddress tab Enable Specify an IP address option Enter the IPAddress 192 168 1 x x is between 2 and 254 and Subnet Mask 255 255 255 0 as in figure below On Gateway tab Add a gateway IP address 192 168 1 1 and click OK 32 ...

Page 41: ...Chapter 3 Configuration 8 When returning to Network window click OK 9 Wait for Windows copying files 10 When prompted with System Settings Change dialog box click Yes to restart your computer 33 ...

Page 42: ...you have TCP IP protocol go to Step 6 4 Highlight Protocol and click Add 5 On the left side of the windows highlight Microsoft and then select TCP IP on the right side Then click OK 6 While returning to Network window highlight TCP IP protocol for your NIC and click Properties 7 On the IP Address tab select Specify an IP address Enter the IP address 192 168 1 x x is between 2 and 254 Subnet Mask 2...

Page 43: ...Windows NT 1 Click Start point to Settings and then click Control Panel 2 Double click the Network icon 3 The Network window appears On the Protocols tab check out the list of installed network components Option 1 If you have no TCP IP Protocol click Add Option 2 If you have TCP IP Protocol installed go to Step 7 4 Highlight TCP IP Protocol and click OK 35 ...

Page 44: ... CD Then click Continue 7 Returning to the Network window you will find the TCP IP Protocol among the list Select TCP IP Protocol and click Properties 8 Enable Specify an IP address option Enter the IP Address 192 168 1 x x is between 2 and 254 and Subnet Mask 255 255 255 0 and Default Gateway 192 168 1 1 as in figure below 36 ...

Page 45: ...Chapter 3 Configuration 9 When returning to Network window click Close 10 When prompted with Network Settings Change dialog box click Yes to restart your computer 37 ...

Page 46: ...n click Network and Dial up Connections 2 Right click the Local Area Connection icon and then click Properties 3 On the General tab check out the list of installed network components Option 1 If you have no TCP IP Protocol click Install Option 2 If you have TCP IP Protocol go to Step 6 38 ...

Page 47: ...OK 6 When returning to Local Area Connection Properties window highlight Internet Protocol TCP IP and then click Properties 7 Under the General tab enable Use the following IP Address Enter the IP address 192 168 1 x x is between 2 and 254 Subnet Mask 255 255 255 0 and Default gateway 192 168 1 1 Then click OK 39 ...

Page 48: ...mponents Option 1 If you have no TCP IP Protocol click Install Option 2 If you have TCP IP Protocol go to Step 6 Highlight Protocol and then click Add Click Internet Protocol TCP IP and then click OK On the Local Area Connection Properties window highlight Internet Protocol TCP IP and then click Properties Under the General tab enable Use the following IP address Enter the IP address 192 168 1 x x...

Page 49: ...Chapter 3 Configuration For Windows Vista 8 Open the Start menu point to Control Panel and click it 9 Click Network and Internet 10 Select Network and Sharing Center 41 ...

Page 50: ...t click Local Area Connection and select Properties 13 On the Networking tab you will find Internet Protocol Version 6 and Version 4 Contact your ISP to confirm which one will be used We take TCP IPv4 for example here Select Internet Protocol Version 4 TCP IPv4 and press Properties 42 ...

Page 51: ... server for the client PCs on the LAN you should configure the client PCs to obtain a dynamic IP address Please follow the previous section to install TCP IP component Only that you do not need to specify an IP address when configuring TCP IP properties The following section describe the procedures for CPEs to get IP address For Windows 98 On the IP Address tab select Obtain an IP address automati...

Page 52: ...automatically Then click OK For Windows NT On the IP Address tab click on the drop down arrow of Adapter to select required adapter Enable Obtain an IP address from a DHCP server and then click OK When prompted with the message below click Yes to continue For Windows 2000 44 ...

Page 53: ...Chapter 3 Configuration Enable Obtain an IP address automatically and then click OK 45 ...

Page 54: ... Vista On the IP Address tab select Obtain an IP address automatically Then click OK Renew IP Address on Client PC There is a chance that your PC does not renew its IP address after the ADSL Router is on line and the PC cannot access the Internet Please follow the procedures below to renew PC s IP address For Windows 98ME 46 ...

Page 55: ... from the Start menu 2 Type winipcfg in the dialog box and the click OK 3 When the figure below appears click Release and then Renew to get an IP address For Windows NT 1 Select Run from the Start menu 2 Select Run from the Start menu 47 ...

Page 56: ...og box and the click OK 4 Type ipconfig at prompt Then you will see the IP information from DHCP server 5 If you want to get a new IP address type ipconfig release to release the previous IP address and then type ipconfig renew to get a new one 48 ...

Page 57: ...se the previous IP address and then type ipconfig renew to get a new one For Windows XP 1 Type ipconfig at prompt Then you will see the IP information from DHCP server 2 From the Start menu point to Programs Accessories and then click Command Prompt 3 Type ipconfig at prompt Then you will see the IP information from DHCP server 4 If you want to get a new IP address type ipconfig release to release...

Page 58: ...lick OK 2 The command prompt window will appear 3 Type ipconfig at the command window and press Enter to view the computer s IP information from DHCP server 4 If the computer is holding a current IP address type ipconfig release to let go of the address then type ipconfig renew to obtain a new one 50 ...

Page 59: ...e message The requested operation requires elevation please go to the Start menu and right click Command Prompt then set Run as administrator Press Continue when a dialog asking for permission to continue prompts After then repeat the above instruction to release and renew the IP address 51 ...

Page 60: ...er ATM IPoA Numbered IP over ATM IPoA NAT Unnumbered IP over ATM IPoA Unnumbered IP over ATM IPoA NAT Bridging For making sure that you can connect the ADSL to your computer well and get into Internet successfully please make sure the following first Make sure you have installed a network interface card into your computer Make sure the connection between the ADSL and your computer is OK Check to s...

Page 61: ... Start Quick Setup Uncheck Auto Scan Internet Connection PVC Type in the VCI and VPI value Then click the Next button eg VPI 0 VCI 38 3 On the Configure Internet Connection Connection Type page select the PPP over ATM PPPoA then click the Next button 4 In the WAN IP Settings page select Obtain an IP address automatically and check Enable NAT box Click Next 5 In the PPP Username and Password page e...

Page 62: ...nter this ADSL web based manager 2 Go to Advanced Internet Connections And click Add 3 Type in the VCI and VPI value Then click the Next button eg VPI 0 VCI 38 4 On the Configure Internet Connection Connection Type page select the PPP over ATM PPPoA then click the Next button 5 In the WAN IP Settings page select Obtain an IP address automatically uncheck Enable NAT box and check PPP IP extension t...

Page 63: ...ck Start Quick Setup Uncheck Auto Scan Internet Connection PVC Type in the VCI and VPI value Then click the Next button eg VPI 0 VCI 39 3 On the Configure Internet Connection Connection Type page select the PPP over Ethernet PPPoE then click the Next button 4 In the WAN IP Settings page select Obtain an IP address automatically and check Enable NAT box Click Next 5 In the PPP Username and Password...

Page 64: ... 1 1 as the address to enter this ADSL web based manager 2 Go to Advanced Internet Connections And click Add 3 Type in the VCI and VPI value Then click the Next button eg VPI 0 VCI 39 4 On the Configure Internet Connection Connection Type page select the PPP over Ethernet PPPoE then click the Next button 5 In the WAN IP Settings page select Obtain an IP address automatically uncheck Enable NAT box...

Page 65: ...the address to enter this ADSL web based manager 2 Go to Quick Start Quick Setup Uncheck Auto Scan Internet Connection PVC Type in the VCI and VPI value Then click the Next button VPI 0 VCI 32 3 On the Configure Internet Connection Connection Type page select the IP over ATM IPoA then click the Next button 4 In the WAN IP Settings page select Use the following IP address and type in the IP address...

Page 66: ...gs match the settings provided by ISP Click Finish 8 Set TCP IP for your computer Specify an IP Address subnet mask and set default gateway eg IPAddress 10 3 75 51 Subnet Mask 255 255 255 248 Gateway 10 3 75 49 9 Now the router is well configured You can access into Internet 58 ...

Page 67: ...s 255 255 255 248 The WAN address is 10 3 70 1 and the subnet mask for WAN is 255 255 255 252 Configuration 1 Start up your browser and type 192 168 1 1 as the address to enter this ADSL web based manager 2 Go to Quick Start Quick Setup Uncheck Auto Scan Internet Connection PVC Type in the VCI and VPI value Then click the Next button VPI 0 VCI 32 3 On the Configure Internet Connection Connection T...

Page 68: ...gure the second IPAddress and Subnet Mask for LAN Interface and type in the second IP address and subnet mask Then click Next Secondary IPAddress 10 3 75 49 Subnet mask 255 255 255 248 8 Check the network information Make sure the settings match the settings provided by ISP Click Finish 9 Now the router is well configured You can access into Internet 60 ...

Page 69: ...wser and type 192 168 1 1 as the address to enter this ADSL web based manager 2 Go to Quick Start Quick Setup Uncheck Auto Scan Internet Connection PVC Type in the VCI and VPI value Then click the Next button VPI 0 VCI 32 3 On the Configure Internet Connection Connection Type page select the IP over ATM IPoA then click the Next button 4 In the WAN IP Settings page select None for WAN IP address se...

Page 70: ... Set TCP IP for your computer Specify an IP Address subnet mask and set default gateway eg IPAddress 10 3 75 51 Subnet Mask 255 255 255 248 Gateway 10 3 75 49 9 Now the router is well configured You can access into Internet 62 ...

Page 71: ...tion but not assign any WAN IP Configuration 1 Start up your browser and type 192 168 1 1 as the address to enter this ADSL web based manager 2 Go to Quick Start Quick Setup Uncheck Auto Scan Internet Connection PVC Type in the VCI and VPI value Then click the Next button VPI 0 VCI 32 3 On the Configure Internet Connection Connection Type page select the IP over ATM IPoA then click the Next button...

Page 72: ...Subnet Mask for LAN Interface and type in the second IP address and subnet mask Then click Next Secondary IPAddress 10 3 75 49 Subnet mask 255 255 255 248 8 Check the network information Make sure the settings match the settings provided by ISP Click Finish 9 Now the router is well configured You can access into Internet 64 ...

Page 73: ... x x is between 2 and 254 and the gateway as 192 168 1 1 2 Start up your browser and type 192 168 1 1 as the address to enter the web based manager 3 Go to Quick Start Quick Setup Uncheck Auto Scan Internet Connection PVC Type in the VCI and VPI value Then click the Next button eg VPI 0 VCI 32 4 On the Configure Internet Connection Connection Type page select the Bridging then click the Next butto...

Page 74: ...red please proceed as follows 1 Start your web browser and type the private IP address of the ADSL Router in the URL field 192 168 1 1 2 After connecting to the device you will be prompted to enter username and password By default the username is admin and the password is admin See the example for running under Windows XP If you login successfully the main page will appear From now on the ADSL Rou...

Page 75: ... Main Window It is the current workspace of the web management containing configuration or status information To Have the New Settings Take Effect After select or adjust the settings to your desire your customizations will be saved to the flash memory before you restart the router And only after restarting the router your customizations take effect Language On the top to the right of this web page...

Page 76: ... setting is checked If there is no any PVC configured in your ADSL router you can check this item Otherwise please uncheck this box VPI Virtual Path Identifier Identifies the virtual path between endpoints in an ATM network The valid range is from 0 to 255 To enter the setting please refer to the setting that the ISP gave you VCI Virtual Channel Identifier Identifies the virtual channel endpoints ...

Page 77: ...wing screen will appear Please choose the connection type and encapsulation mode that you want to use and click Next for next page For example PPP over Ethernet PPPoE in this screen is selected Next we are going to tell you different webpage for different protocol that you choose in this page 69 ...

Page 78: ...atically radio button Or click Use the following IP address button and enter the IP address for WAN interface Click Enable NAT if you want As for the detailed NAT settings it will be described in later sections Click Enable QoS for your necessity It can improve the performance for selected classes of applications Before you check this item please assign the priorities for various applications from...

Page 79: ...got from your ISP for your LAN connection Configure the second IPAddress and Subnet Mask for LAN interface Check this box to make another set of IP Address and Subnet Mask to connect to your router if they are not included in the range that DHCP server accepts Secondary IPAddress Type in the second IP address that you got from your ISP for your LAN connection Subnet Mask Type in the subnet mask th...

Page 80: ...t is 1day DHCP Server Off Check this item if DHCP service isn t needed on the LAN You can check it at this time If you find something is incorrect click Back to change the settings If everything is OK click Finish to accept these settings Now the system will reboot to activate the new settings that you have done in this section Please wait for 2 minutes for restarting the router 72 ...

Page 81: ...ake the system get DNS server automatically Use the following DNS server address If you want to set DNS server by yourself you have to click on this button to invoke the following entries Primary DNS server Type in your preferred DNS server that you got from ISP Secondary DNS server Type in the alternate DNS server that you got from ISP Click Enable NAT if you want As for the detailed NAT settings...

Page 82: ...ction Subnet Mask Type in the subnet mask that you got from your ISP for your LAN connection DHCP Server On Check this item if DHCP service is needed on the LAN The router will assign IP address gateway address for each of your PCs Start IPAddress Type in the start point IP address End IPAddress Type in the end point IP address Leased Time Type in the duration for the time The default is 1day On t...

Page 83: ...Chapter 5 Connection Mode Now the system will reboot to activate the new settings that you have done in this section Please wait for 2 minutes for restarting the router 75 ...

Page 84: ...ick this button to make the system get DNS server automatically Use the following DNS server address If you want to set DNS server by yourself you have to click on this button to invoke the following entries Primary DNS server Type in your preferred DNS server that you got from ISP Secondary DNS server Type in the alternate DNS server that you got from ISP Click Enable NAT if you want As for the d...

Page 85: ...needed on the LAN The router will assign IP address gateway address for each of your PCs Start IPAddress Type in the start point IP address End IPAddress Type in the end point IP address Leased Time Type in the duration for the time The default is 1day DHCP Server Off Check this item if DHCP service isn t needed on the LAN Click Next to get into next web page You can check it at this time If you f...

Page 86: ...SL connection It includes if the wireless network is enabled or not lists the LAN IP address default gateway DNS servers IP address firmware version the period of activating the router and so on The system status will be changed according to the settings that you configured in the web pages 78 ...

Page 87: ...information about ADSL Line Status ADSL BER Test This test determines the quality of the ADSL connection It is done by transferring idle cells containing a known pattern and comparing the received data with this known pattern to check for errors After select the test duration time and click Start the following dialog appears to tell you the test is running You can stop the test by click Stop or cl...

Page 88: ... PVC name category protocol invoking NAT or not IP address link status and so on Traffic Statistics This table shows the records of data going through the LAN and WAN interface For each interface cumulative totals are displayed for Received and Transmitted DHCP Table This table shows all DHCP clients who get their IP addresses from your ADSL Router For each DHCP client it shows the Host Name MAC A...

Page 89: ...s the MAC address for all of wireless LAN clients currently associated to your DSL Router Routing Table This table shows the routing method that your router uses ARP Table This table shows the IP address record for IP to Physical translation in your router 81 ...

Page 90: ...for LAN interface Check this box to make another set of IP Address and Subnet Mask to connect to your router if they are not included in the range that DHCP server accepts Secondary IPAddress Type in the second IP address that you got from your ISP for your LAN connection Subnet Mask Type in the subnet mask that you got from your ISP for your LAN connection MTU It means the maximum size of the pac...

Page 91: ...n the Server IP in this field Server and Relay Off Check this item if DHCP service isn t needed on the LAN Apply Click this button to activate the settings listed above You can reserve one specific IP address for a certain PC for certain purpose Simply add a mapping entry of MAC address IP address for that PC by pressing the View Reserved IPAddress List button The following picture will appear Cli...

Page 92: ...ADSL Router User Manual The new one will be shown on the dialog right away That is the specified address will be reserved and not be assigned by DHCP for other computer 84 ...

Page 93: ...e of Quick Setup and ask you to fill in the data according to the request of the screen Refer to Quick Setup for more information if you don t know how to set the configuration To add a new WAN connection please click the Add button The following screen appears VPI Virtual Path Identifier Identifies the virtual path between endpoints in an ATM network The valid range is from 0 to 255 You cannot ty...

Page 94: ...hic is the one that you will get if you choose to add a new interface of PPPoA PPPoE mode You can check Enable NAT or Enable Qos for your necessity And you can set the MTU value in this page If you want to add a new interface of PPPoE mode and choose PPPoE from the previous web page you will get a web page as the graphic listed in right side Please refer to Quick Setup for more information if you ...

Page 95: ... a way for an Internet computer to report its multicast group membership to adjacent routers The hosts interact with the system through the exchange of IGMP messages When you want to configure IGMP proxy the system will interact with other router through the exchange of IGMP messages However when acting as the proxy the system performs the host portion of the IGMP task as follows When it is querie...

Page 96: ...ata rate and the data rate on each latency path is unchanged Check this box to enable the function If not uncheck this box to close the function Seamless Rate Adaptation It enables the ADSL2 system to change the data rate of the connection while in operation without any service interruption or bit errors Check this box to enable the function If not uncheck this box to close the function IP Routing...

Page 97: ...g appears to ask you to confirm the action Click Yes to remove the static route or click No to keep the setting Configuring Other Routers on Your LAN It is essential that all IP packets for devices that are not on the local LAN can be passed to the Router so that they can be forwarded to the external LAN WAN or Internet To achieve this the local LAN must be configured to use the Router as the defa...

Page 98: ...ADSL Router Destination 192 168 10 0 Subnet Mask 255 255 255 0 Standard Class C Gateway 192 168 1 254 Router B IP Routing Dynamic Routing Routing Information Protocol RIP is utilized as a means of exchanging routing information between routers It helps the routers to determine optimal routes This page allows you to enable disable this function RIP Version It incorporates the RIP information when r...

Page 99: ...Chapter 5 Connection Mode different interface Otherwise disable this function Click Apply to invoke the settings set here 91 ...

Page 100: ...number in this packet e g port 80 indicates HTTP service and port 21 indicates FTP service By specifying the port number you tell the router which service should be forwarded to the local IP address you specify After you setting the virtual server you should modify the filter rule whichever port and service you set on virtual server Because the firewall has protect the route by filter rule so that...

Page 101: ...amic DNS feature to allow users to connect to your virtual servers by using a URL instead of an IP address To set a virtual server please open the Virtual Servers item from the Advanced Setup NAT menu Add New Port Forwarding To add a new Port Forwarding please click Add from the Port Forwarding web page Pre defined Choose one of the services type from the first drop down list such as Audio Video G...

Page 102: ...eck the Delete box of that one and click the Delete button to discard it Or if you want to add another one again click Add to add a new one Connecting to the Virtual Servers Once configured anyone on the Internet can connect to your Virtual Servers They must use the Internet IP Address the IP Address allocated to you by your ISP For example Http 203 70 212 52 Ftp 203 70 212 52 It is more convenien...

Page 103: ...ost radio button and type the IP Address into the field of IP address of DMZ host then click Apply This feature allows one computer on your LAN to be exposed to all users on the Internet allowing unrestricted 2 way communication between the specified IP address and other Internet users or Servers This allows almost any application to be used on the specified IP address The specified IP address wil...

Page 104: ... DDNS select Disabled to disable this function Internet Connection Selects the interface that you want to use for connecting Internet User Name Type in the user name that you registered in www dyndns org Password Type in the password that you registered in www dyndns org Domain Name Type in the domain name that you registered in www dyndns org You can use letters and dash for naming yet other char...

Page 105: ...ackets Filtering by IP address An example for firewall setup This picture is the most common and easiest way to employ the firewall Basically you can install a packet filtering router at the Internet gateway and then configures the filter rule in the router to block or filter protocols and addresses The systems behind the router usually have a direct access to the Internet however some dangerous s...

Page 106: ...nsmission please pull down the drop down menu to choose a proper one All This setting means that all the IP addressed in the network are allowed or denied to pass through in Internet If you choose Single an IP address field will appear to the right side You have to type in the specific IP address as the start end point to let the router identify for granting or denying pass through If you choose S...

Page 107: ...traverse the Internet or intranet with higher quality transmission service Bridge QoS To classify the upstream traffic by assigning the transmission priority for data of different users please use Bridge QoS to prioritize the data transmission The Bridge QoS allows you to set the settings based on layer two IP packets Traffic Class Name Type in a name as the traffic class for identification 802 1p...

Page 108: ...he right side will appear Traffic Class Name Type in a name as the traffic class for identification Protocol Choose the proper interface for this function If you don t know how to select simply use the default one TCP UDP Source IPAddress Subnet Mask You have to type in the source IP address ex 192 168 1 50 and subnet mask ex 255 255 255 0 for the application ex FTP HTTP and so on that you want to...

Page 109: ...t setting IP type of Service The system provides some types of service for you to choose The meaning of each type is the same as the denotation The default one is No change After you click Apply the new QoS setting will be shown on the graphic as the right side To delete the one you set simply click the check button below Delete item and click Delete button Port Mapping This page allows you to con...

Page 110: ...able interfaces such as Ethernet USB wireless etc will be displayed in the left side box When you choose it and click Add it will be transferred into the right side box of Grouped Interfaces Yet if you want to remove the interface from the current group it will be returned back to the Default group left side box after you click Remove After finish the settings click Apply 102 ...

Page 111: ...ally broadcasts its SSID to allow the wireless clients within the range to recognize its presence This can create a security hole since any wireless clients which got the broadcast might associate to your system Please be noted that if you want to communicate all wireless clients should use the same SSID with the router or access point Channel The frequency in which the radio links are about to be...

Page 112: ...ie or service You can use the default setting If you want to speed up the rate choose the one from the drop down list In addition the selections for this item will be different according to the transmission mode that you choose on this page Turbo Mode When it is enabled the data transmission will be faster for this router Check Enabled to invoke this function for speeding up the transmission or ch...

Page 113: ...ot be shown on this page For 64 Bit WEP Wireless Security Select the WEP mode for the WEP key function You can choose 64 bit or 128 bit for your necessity If selected data is encrypted using the key before being transmitted For example if you set 64 bit in this field then the receiving station must be set to use 64 Bit Encryption and have the same Key value too Otherwise it will not be able to dec...

Page 114: ... you set on the Key boxes as the default one After finished settings click Apply for activation For 128 Bit WEP Wireless Security Select the WEP mode for the WEP key function You can choose 64 bit or 128 bit for your necessity If selected data is encrypted using the key before being transmitted For example if you set 128 bit in this field then the receiving station must be set to use 128 Bit Encry...

Page 115: ... authentication Format Choose the typing method of encryption key You have to click either Hexadecimal digits or ASCII characters and type the keys on the fields of Key 1 to Key 4 Key 1 to 4 Type the encryption key length and fill out WEP keys As for 128 bit WEP mode the number you can type is that 13 characters or 26 hexadecimal digits Default Transmission Key Select one of network key that you s...

Page 116: ...to enter the port number for the server Port 1812 is the reserved RADIUS authentication port described in RFC 2138 Earlier AP RADIUS clients use port 1945 The default value will be shown on this box You can keep and use it RADIUS Share Secret A share secret is like a password which is used between RADIUS Server and the specific AP RADIUS client to verify identity Both RADIUS Server and the AP RADI...

Page 117: ...28 192 or 256 bits TKIP AES combines the features and functions of TKIP and AES WPA Group Rekey Interval Type in the time for the WPA group rekey interval The unit is second RADIUS Server IPAddress RADIUS Server is a protocol for carrying authentication authorization and configuration information between a Network Access Server which desires to authenticate its links and a shared Authentication Se...

Page 118: ...you set here can join this network WPA Group Rekey Interval Type in the time for the WAP group rekey interval The unit is second Data Encryption WPA Select the data encryption for the WPA mode There are three types that you can choose TKIP AES TKIP AES TKIP takes the original master key only as a starting point and derives its encryption keys mathematically from this master key Then it regularly c...

Page 119: ...y sizes of 128 192 or 256 bits TKIP AES combines the features and functions of TKIP and AES WPA2 Pre authentication The wireless client that has associated with an AP A can do the authentication with another AP B in advance If the client roams to AP B it can associate with AP B quickly Please click Enabled to inactivate this function Network Re auth Interval When a wireless client has associated w...

Page 120: ...x You can keep and use it RADIUS Share Secret A share secret is like a password which is used between IAS and the specific RADIUS client to verify identity Both IAS and the RADIUS client must be use the same shared secret for successful communication to occur Type in the words for the share secret After finished settings click Apply for activation 112 ...

Page 121: ...s Access Control List dialog allows you to add a new MAC address and view current MAC address that you had added To add a new MAC address to your wireless MAC address filters click on the Add button from the Wireless Access Control List dialog to show next page MAC Address of Wireless You have to type in the MAC Address that you want it to be linked to your router And click Apply The result of add...

Page 122: ... other repeater in the wireless network The result will be shown under below Click Apply to invoke the wireless repeater options If you click Manual as the Search Other Repeaters you will need to type the MAC address for wireless repeaters in the boxes of MAC Address of Remote Wireless Repeaters The right picture shows an example of executing the function of wireless repeater When you finish setti...

Page 123: ...w that failed one will be failed too Use this diagnostic test to detect the connectivity mistakes whenever you happen to the linked problem For the item which passes through the diagnostics a PASS word will be shown on the right side of that item If not a Fail word will be there N A means that item is not necessary for the system to test The Help link lets you know what the result Pass Down Fail r...

Page 124: ...lect one connection item from the drop down list to enable the function Web Browser Choose this box if you want to have remote control through HTTP The default port number will be shown in the box Modify this number whenever you want Telnet Choose this box if you want to have remote control through telnet FTP Choose this box if you want to have remote control through FTP SNMP Choose this box if yo...

Page 125: ...start time by typing the year the month the day the hour and the date to help the router perform tasks Timezone Choose the time zone of your country where you are going to use the router Apply Save the data on the screen and apply the data after restarting the router System Log As shown in the web page you can view the system log and configure system log whenever you want Configure System Log Afte...

Page 126: ...e selection includes Local Remote and Both The default one is Local If you choose Remote or Both all the events will be sent to the specified UDP port of the specified log server Viewing System Log For viewing the system log please click the View System Log button The screen will be shown immediately for your reference 118 ...

Page 127: ...agent device that supports other applications such as FTP both TCP and UDP are required An agent may issue a trap message in response to an event that effects the MIB and the underlying managed resources Note There are no ongoing connections are maintained between a management station and its agents Instead each exchange is a separate transaction between a management station and an agent Each agen...

Page 128: ...ant to update the firmware for this router you can open the update software web page and choose the correct file by pressing Browse Then click the Update Software button The system will execute the update procedure automatically When it is finished the system will tell you the update is successfully Reset Router To make effect the settings that you set for this router please open the Reset Router ...

Page 129: ...alling UPnP components 1 Click on the Start menu point to Settings and click on Control Panel 2 Select Add or Remove Programs Add Remove Windows Components to open Windows Components Wizard dialog box 3 Select Network Services and click Details Click the Universal Plug and Play check box 4 Click Ok The system will install UPnP components automatically 5 After finishing the installation go to My Ne...

Page 130: ...ser Manual 7 Now the NAT traversal function will be provided The ADSL router will create a new virtual server automatically for mapping while the router detecting the computer running some Internet applications 122 ...

Page 131: ... of the ftp 21 Direction setting Choose filter the packets that incoming action In Bound are Allow on the interface Problems with WAN You cannot access the Internet Check the physical connection between the ADSL Router and the LAN If the LAN LED on the front panel is off or keeps blinking there may be problem on the cable connecting to the ADSL Router At the DOS prompt ping the IP address of the A...

Page 132: ...n your router the LEDs might not work normally Action Use the browser to connect to the router for executing image upgrade Error Message Image uploading failed The selected file contains an illegal image Possible cause The firmware file format is invalid Action Check the file format is correct otherwise download a firmware file with correct format Error Message Image uploading failed The system is...

Page 133: ...e NAT IP address and NAT has to be enabled so that the DHCP IP address can be translated into a public IP address By this the client PCs are able to access the Internet LAN Local Area Network WAN Wide Area Network A LAN is a computer network limited to the immediate area usually the same building or floor of a building A WAN on the other hand is an outside connection to another network or the Inte...

Page 134: ...ch as computer workstations ftp servers and web servers PVC Permanent Virtual Circuit A PVC is a logical point to point circuit between customer sites PVCs are low delay circuits because routing decisions do not need to be made along the way Permanent means that the circuit is preprogrammed by the carrier as a path through the network It does not need to be set up or turned down for each session R...

Page 135: ...istinguished A unique and separate VPI VCI identifier is assigned in advance to indicate which type of cell is following unassigned cells physical layer OAM cells metasignaling channel or a generic broadcast signaling channel Your ISP should supply you with the values 127 ...

Page 136: ...ADSL Router User Manual 128 ...

Page 137: ... GHz wireless LAN connection z One hidden reset button for restoring to factory default settings Regulatory Approvals and Compliance EMI FCC part 15 Class B CE Immunity FCC part 68 Class B Safety UL CB LVD Power Requirement and Operation Environment Requirement Power Adaptor Input 110 10 or 230 10 VAC Output 12 VAC 1A Power Consumption less than 10 Watt Ambient Temperature 0 to 40 C 32 to 96 F Rel...

Page 138: ...ADSL Router User Manual 130 ...

Page 139: ...k that doesn t require port authentictaion 2 Open up Microsoft Explorer in Windows XP and go to http yourserver certsrv 3 Authenticate to the server using your account that you created at the end of the server setup e g 123 and click OK A dialog box might appear for you to choose 4 Make sure that Request a certificate is selected and click Next 131 ...

Page 140: ...tificate is selected and click Next 6 Click Submit in this dialog 7 Now you ll see status messages on the screen then your certificate will be returned to you Click Install this certificate 8 You ll receive a confirmation message about accepting the certificate click Yes 132 ...

Page 141: ...nections located under Network and Internet Connections if in Category View 2 Right click on the Wireless Network Connection and select Properties 3 Select the Authentication Tab and ensure that Enable network access control using IEEE 802 1X is selected and Smart Card or other Certificate is selected from the EAP type 4 Click on the Wireless Networks tab 5 Select the wireless network on which you...

Page 142: ...L Router User Manual 6 Select Data encryption WEP enabled and ensure The key is provided for me automatically is also selected 7 Now you re ready to configure your router AP with 802 1x authentication 134 ...

Page 143: ...Appendix B Server Setup for 801 x Client 135 ...

Page 144: ...an health It is a precondition for reuse and recycling of used electrical and electronic equipment For more detailed information about disposal of your old appliance please contact your city office waste disposal service the shop where you purchased the product or your SIEMENS partner The statements quoted above are only fully valid for equipment which is installed in the countries of the European...

Reviews: