background image


&RQQHFWLQJWKH23%

Release 03/2004


Operating Instructions (Compact)  OP 77B 


4–8 

6AV6691-1EA01-0AB0 

4.5  Connecting the Power Supply 

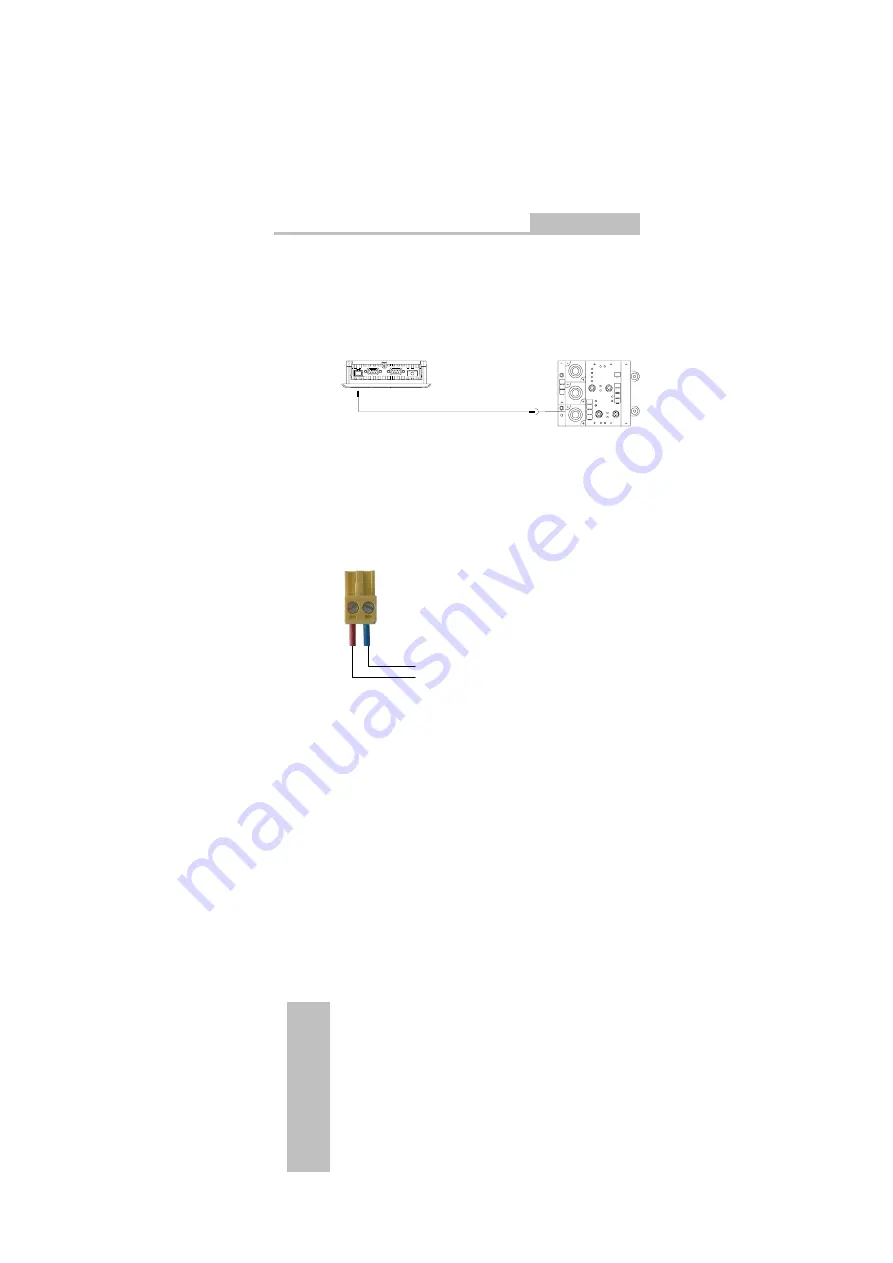
Connection configuration 


Figure 4–6 

Connecting the power supply 

The associated terminal block is contained in the 
accessories kit and designed for cables with a 
maximum cross-section of 1.5 mm

2

Connecting the terminal block  

2

1

DC +24 V

GND


Figure 4–7   Connecting the terminal block 

Connect the terminal lock to the power supply lines as 
illustrated in Figure 4–7. Ensure that the lines are 
connected properly and not to the wrong terminals. 

Reverse battery protection 

The HMI device is equipped with reverse battery 
protection. 

Summary of Contents for SIMATIC OP 77B

Page 1: ...dition 03 2004 SIMATIC HMI OP 77B Operating Instructions Compact Contents Overview Technical Data Installing the OP 77B Connecting the OP 77B Operating the OP 77B Alarms and Recipes Index Order No 6AV6691 1EA01 0AB0 ...

Page 2: ...recautions are not taken Warning indicates that death or severe personal injury can result if proper precautions are not taken Caution used with the safety alert symbol indicates a potentially hazardous situation which if not avoided may result in minor or moderate injury Caution used without the safety alert symbol indicates a potentially hazardous situation which if not avoided may result in pro...

Page 3: ...V and PELV When dimensioning the power supply take a voltage drop in the connection cable into account Operating Instructions Compact for professionals Important information on the OP 77B is summarized in these Operating Instructions Compact Operating Instructions Detailed information on the OP 77B is provided in the OP 77B operating instructions Migration Information on migration of existing OP7 ...

Page 4: ...l or design are reserved Disclaimer of Liability We have checked the contents of this manual for agreement with the hardware and software described Since deviations cannot be precluded entirely we cannot guarantee full agreement However the data in this manual are reviewed regularly and any necessary corrections included in subsequent editions Suggestions for improvement are welcomed Siemens AG Au...

Page 5: ...tion of Interfaces 1 5 2 Technical Data 3 Installing the OP 77B 3 1 EMC Guidelines 3 1 3 2 Installation Position and Fixation 3 2 3 3 Producing the Installation Cut Out 3 3 4 Connecting the OP 77B 4 1 Connecting the Potential Equalization 4 2 4 2 Connecting the PLC 4 3 4 3 Connecting the Configuration Computer 4 6 4 4 Connecting Peripheral Equipment 4 7 4 5 Connecting the Power Supply 4 8 ...

Page 6: ... 5 4 2 Alphanumeric values 5 11 5 4 3 Entering numeric and alphanumeric characters 5 12 5 4 4 Correcting input 5 14 5 4 5 Entering symbolic values 5 16 5 4 6 Entering date and time 5 17 5 5 Calling Help on a Project 5 17 5 6 Logging On and Off 5 18 5 7 User Administration in a Project 5 19 5 7 1 Log on user 5 21 5 7 2 Setting up a user 5 22 5 7 3 Changing passwords 5 24 5 7 4 Deleting a user name ...

Page 7: ... 5HOHDVH 2YHUYLHZ Operating Instructions Compact OP 77B 6AV6691 1EA01 0AB0 1 1 Overview 1 Overview 1 1 HMI Device Design 1 3 2 1 Display 2 LED display 3 Membrane keyboard Figure 1 1 Front view 1 ...

Page 8: ...holder 2 Memory card slot for an MMC 3 Slot for wrench 4 Guides for the labeling strips 5 Rubber seal Figure 1 2 Side view 1 2 4 5 3 1 Connection for the power supply 2 RS 422 RS 485 interface MPI PROFIBUS DP interface 3 Ground connection 4 RS 232 interface serial interface 5 USB interface Figure 1 3 Bottom view ...

Page 9: ...as an external storage medium The memory card is an option and can be ordered separately Notice The MMC of the SIMATIC S7 controller cannot be used Accessory kit Plug for the power supply terminal block 1 piece Spring terminals for installing the HMI device 4 pieces Supplement The Supplement is only applicable for the HMI device with the following identification on the rear 1 piece ...

Page 10: ...re not supplied as accessories If necessary these can be produced using the template supplied The template can be found on the installation computer after installing WinCC flexible and on the WinCC flexible installations CD under Documents slide77b doc 1 4 Scaled Drawings 134 6 2 38 5 170 150 186 Figure 1 4 Main dimensions of the OP 77B ...

Page 11: ...Figure 1 5 Pin assignment for power supply RS 422 RS 485 IF 1B 1 5 9 6 Sub D socket 9 pin secured by screws Pin Assignment with RS 422 Assignment with RS 485 1 N c N c 2 M M 3 TxD LTG B 4 RxD RTS AS 5 GND potential free GND potential free 6 DC 5 V potential free DC 5 V potential free 7 DC 24 V in DC 24 V in 8 TxD LTG A 9 RxD RTS AS Figure 1 6 RS 422 and RS 485 interface pin assignments ...

Page 12: ... 9 pin secured by screws Pin Assignment 1 DCD 2 RxD 3 TxD 4 DTR 5 GND 6 DSR 7 RTS 8 CTS 9 N c Figure 1 7 RS 232 interface pin assignment 1 2 3 4 5 6 7 8 9 Figure 1 8 Pin switching USB 1 4 USB standard connector Pin Assignment 1 DC 5 V max 100 mA 2 USB DN 3 USB DP 4 GND Figure 1 9 USB standard connector pin assignment ...

Page 13: ... 500 g Display Type STN Screen area active 102 38 x 40 94 mm Resolution 160 x 64 pixels Pixel size 0 62 x 0 62 mm Colors possible Monochrome yellow green Contrast control Yes Brightness typical 20 cd m 2 Back lighting Half Brightness Life typical 100 000 h Keyboard Type Membrane keyboard System keys with dedicated functions 23 Softkeys Configurable as softkeys 8 8 Labeling strips 2 for keys F1 to ...

Page 14: ... optional Power supply Rated voltage Range permissible 24 V DC 18 V to 30 V Transients maximum permissible 35 V 500 msec Time between two transients minimum 50 s Power consumption Typical Constant current maximum Power on current surge I2 t USB interface Approx 200 mA Approx 300 mA Approx 0 5 A2 s Approx 100 mA Fuse internal Electronic ...

Page 15: ...l as the EMC guidelines of the European Union Installing HMI devices conform to EMC requirements Preconditions for errorfree operation are a PLC design compliant with EMC requirements and the use of interferenceproof cables The guidelines for interference free construction of PLCs and the PROFIBUS network manual apply for the installation of the HMI device Note The term switching cabinet subsequen...

Page 16: ...0 C Figure 3 1 Permissible ambient temperatures without external ventilation If the unit is installed horizontally and the permissible ambient temperature is exceeded external ventilation is necessary In general ambient temperatures exceeding 50 C are impermissible Caution If the HMI device is used at a temperature exceeding the maximum permissible temperature without any external ventilation the ...

Page 17: ...below Figure 3 2 Installing the spring terminals 3 3 Producing the Installation Cut Out Warning Danger high voltage After opening the switching cabinet parts become exposed which conduct voltage levels that could prove fatal on contact Switch off the power supply to the switching cabinet before opening it When selecting the installation cut out ensure that the installation surface around the insta...

Page 18: ...stallation cut out 2 mm to 6 mm Deviation of the installation cut out to the horizontal plane in respect of the overall dimensions of the HMI device 0 5 mm Permissible surface roughness in the area of the installation seal 120 µm Rz 120 An installation cut out complying to the figure below is required 135 1 171 1 Figure 3 3 Installation cut out Ensure that the switching cabinet has enough space to...

Page 19: ...e in the following sequence Potential equalization line PLC Configuration computer if necessary Peripheral equipment if necessary Power supply Notice Connection sequence Please observe the sequence of HMI device connections Failure to do so may result in damage to the HMI device When disconnecting the connections ensure it is done in the reverse sequence Connecting the cables When connecting the c...

Page 20: ...al equalization line Figure 4 1 Potential equalization line connection Notice Potential equalization line Line shields are not suitable for potential equalization Only use the potential equalization lines recommended refer to Figure 4 1 Potential equalization lines for example must have a minimum cross section of 16 mm2 When setting up MPI and PROFIBUS DP networks ensure cables with a sufficient c...

Page 21: ...pproved cables for connections to the SIMATIC S7 1 SIMATIC S5 Converter TTY AS 511 SIMATIC S7 M7 SIMATIC 500 505 PLC of other manufacturers RS 485 RS 422 RS 422 RS 485 1 SIMATIC 500 505 PLC of other manufacturers Figure 4 2 Connecting the PLC Interfaces Serial Interface description refer to Chapter 1 5 Standard cables are available for the connection refer to SIMATIC HMI Catalog ST 80 ...

Page 22: ...RTS signal are interchanged Normally the RTS signal is not required by the PLC 2 1 3 3 1 Rear panel cover 2 DIL switch 3 Illustration of the switch setting Figure 4 3 Position of the DIL switch Note Pay attention to the DIL switch settings on the rear of the HMI device depicted in the diagrams also refer to Table 4 1 The following table describes the DIL switch settings according to the communicat...

Page 23: ...P 77B Table 4 1 DIL switch setting positions Communication Switch settings PLC MPI PPI Standard cable 4 3 2 1 ON No RTS on connector PLC RS 422 4 3 2 1 ON PLC PROFIBUS DP MPI 4 3 2 1 ON No RTS on connector 4 3 2 1 ON RTS on Pin 9 as programming unit 4 3 2 1 ON RTS on Pin 4 ON Switch 4 3 2 1 ON State on delivery ...

Page 24: ...I card PG 7xx MPI card PROFIBUS DP MPI PROFIBUS DP MPI PC PG 7xx USB USB PC COM 1 COM 2 PG 7xx COM 2 RS 232 RS 232 Figure 4 4 Connecting the configuration computer Interfaces serial or USB Interface description refer to Chapter 1 5 Applies for the USB interface HMI device and programming unit are master Therefore a host to host cable is required for the USB interface ...

Page 25: ...aces USB Interface description refer to Chapter 1 5 Notice Nominal load of the interface The load capacity of the USB connection is limited to 100 mA Avoid applying higher loads Otherwise functional faults can occur on the peripheral equipment connected The following peripheral equipment can be connected Printer Note Documentation on peripheral equipment Also observe the documentation supplied wit...

Page 26: ...contained in the accessories kit and designed for cables with a maximum cross section of 1 5 mm2 Connecting the terminal block 2 1 DC 24 V GND Figure 4 7 Connecting the terminal block Connect the terminal lock to the power supply lines as illustrated in Figure 4 7 Ensure that the lines are connected properly and not to the wrong terminals Reverse battery protection The HMI device is equipped with ...

Page 27: ...oltage standards The supply voltage must be within the specified voltage range Voltages outside this range can cause HMI device malfunctions The requirements of the voltage supply are set out in Chapter 1 5 Switching on the HMI device Proceed as follows Connecting the terminal block to the HMI device Switch on the power supply to the HMI device The following window appears Bootloader Date xx xx xx...

Page 28: ...pens Figure 4 9 Transfer dialog Note When the HMI device is restarted it is possible that a project already exists on the HMI device in which case Transfer mode is not called in but the project is started Exit from the project The Loader then reappears Press ESC After canceling the Loader appears Loader Transfer Start Infos Settings B 7 0 0 xx Figure 4 10 Loader Switching off the power supply to t...

Page 29: ...le for use Key Effect of pressing or Move to the next menu item or Move to the previous menu item ENTER The menu item or associated submenu is called in ESC Cancel the entry and return to the menu item one level above Note Entries in the dialog boxes are possible using the cursor keys numeric values too using the numeric keypad Other keys without functions are available in the Loader ...

Page 30: ... RQQHFWLQJ WKH 23 Release 03 2004 Operating Instructions Compact OP 77B 4 12 6AV6691 1EA01 0AB0 ...

Page 31: ...A01 0AB0 5 1 Operating the OP 77B 5 Operating the OP 77B 5 1 Front Side Operating Elements and Indicators 1 5 3 2 4 1 Softkeys without LED 2 Softkeys with LED 3 System keys digit keypad 4 LED display 5 System keys control keys Figure 5 1 Front side operating elements and indicators 5 ...

Page 32: ...ontrol keys Notice Keyboard damage Heavy handed operation of the keys with a hard pointed or sharp object leads to a considerable reduction in their service life and even to their complete failure Only use your fingers to operate the HMI device keys 5 2 Further Operating Elements When an HMI device is installed further operating elements can be accessed by opening the switching cabinet Danger Dang...

Page 33: ...re 4 3 Using memory cards Notice Data loss If a prompt for formatting appears when using a memory card for the first time on the HMI device make a backup copy of the data on the memory card on a PC beforehand Proceed as follows to prevent loss of data Cancel the formatting process by pressing ESC Data which must not be lost should be saved on a PC Format the memory card on the HMI device Transfer ...

Page 34: ...o not plug the memory card in or unplug it during data access when making a data backup or transferring a recipe Otherwise the memory card can be inserted and removed during operation 2 1 1 Eject knob 2 MMC Figure 5 2 Ejecting the memory card On pressing the Eject knob the memory card is released from the memory card slot Notice Do not press the knob abruptly This could damage the ejection mechani...

Page 35: ...vice has been installed Softkeys which are not screen dependent can be provided with labeling strips also refer to Figure 5 6 Printing the labeling strips The template can be found on the installation computer after installing WinCC flexible and on the WinCC flexible installation CD under Documents slide77b doc The file can be edited using the MS Office programs MS Word or Wordpad 160 15 3 15 25 6...

Page 36: ...ps Ensure that the corners are cut according to Figure 5 4 This simplifies sliding it into the guide Danger Danger high voltage After opening the switching cabinet parts become exposed which conduct voltage levels that could prove fatal on contact Switch off the power supply to the switching cabinet before opening it Remove the existing labeling strips Slide the labeling strips in the guide 1 2 1 ...

Page 37: ...displayed Within a screen a softkey can only have one function assigned either global or local In the case of local and global functions the local function has priority Softkeys with local function assignment A softkey with a local function assignment relates to a specific screen and thus is only effective in the active screen The function of a softkey can vary from screen to screen The two row so...

Page 38: ...is reversed INS DEL In character String input fields the character at the current cursor position is deleted All the following characters move one position to the left HELP Calls in a window containing operator notes on the selected object Condition Operator notes are only available on the selected object when the HELP LED lights up Pressing ENTER enables toggling between operator notes for a scre...

Page 39: ...pressing ENTER The input is confirmed and applied Initiates input via and Navigation in lists Table 5 2 Keys for navigation in lists Key Effect of pressing or Selects the previous or next list item SHIFT 9 SHIFT 3 Scrolls one page forward or back to other list entries SHIFT HOME SHIFT 0 END Marks the first or last entry in a list ...

Page 40: ...the input field according to the configuration Numeric Alphanumeric Symbolic Date Time Enter value Incorrect input can be canceled by pressing ESC The original value is then automatically restored Confirm input with ENTER 5 4 1 Numeric values Entering numeric values Numeric values are entered character by character using the system keyboard If a field already contains a value it is fully deleted f...

Page 41: ... not accepted and the original value reappears Decimal places If a numeric input field is configured with a specific number of decimal places additional decimal places are ignored after confirmation or too few decimal places are filed with 0 5 4 2 Alphanumeric values Alphanumeric values digits and letters are entered character by character using the system keyboard If a field already contains a va...

Page 42: ... of pressing 0 END to 9 Enter the digits 0 to 9 HOME Enter a comma or stop SHIFT The sign of a numeric value is changed Press to toggle between the two signs SHIFT 1 A to SHIFT 8 F Letters A to F can be entered The characters in an extended character set are called in successively All 255 character are displayed in succession ENTER The input is valid ESC The input is deleted The original value bec...

Page 43: ...he selection field If the cursor keys are used for input press them until the required character appears The following keyboard input is necessary 2 B SHIFT INS DEL ENTER SHIFT ENTER 7 E 7 E A O 1 1 2 2 2 O A O P O P O P A O P 7 O P A 7 O P 7 7 O P A 7 7 O P B 7 7 B 7 7 P O 1 Input via the cursor keys 2 Input via the numeric keypad Figure 5 7 Example of alphanumeric input using cursor keys and num...

Page 44: ... to be changed Press or until the required character appears Press ENTER Deleting a character Proceed as follows Press ENTER Position the cursor at the character to be deleted Press INS DEL The marked character is deleted The remaining characters to the right of the cursor shift one position to the left Valid for writing aligned to the right The marked character is deleted The remaining characters...

Page 45: ...characters to the right of the cursor shift one position to the right Valid for writing aligned to the right The remaining characters from the cursor shift one position to the left Correcting input using the numeric keypad Replacing an incorrect character Press ENTER Position the cursor at the character to be changed Enter the correct character via the numeric keypad One character too many or too ...

Page 46: ...tion field Key Effect of pressing ENTER or SHIFT SHIFT The selection field is activated containing the symbolic input configured for it Select text Key Effect of pressing Text is scrolled in a single line list until the text searched for is found Accept or cancel the input Key Effect of pressing ENTER The text selected becomes valid The symbolic I O field is deactivated ESC The original text becom...

Page 47: ...the format is dependent on the language set Use the keys as described in Chapter 5 4 3 to enter the date and time 5 5 Calling Help on a Project Operator notes can be created for the following objects during configurations with WinCC flexible ES Alarms Screens I O field Recipes and recipe elements Operator notes can be configured in several languages The availability of an operator note is indicate...

Page 48: ... a group have the same operating rights Each user is assigned a password Login dialog When a user calls a function which is protected and has not been assigned the necessary user rights the Logon dialog appears User OK Password Cancel Figure 5 8 Example of a Logon dialog Enter the user name and password refer to Chapter 5 4 3 for the keys Note Characters entered for the password are always represe...

Page 49: ...ng element assigned operating rights a log on is necessary This is obsoleted however on exceeding the logoff time refer to Figure 5 13 5 7 User Administration in a Project There are three groups which can manage the users and their assigned entries the administrator During configuration the administrator is assigned unlimited user rights the operator user the user with unrestricted user rights The...

Page 50: ... set up The empty bottom line is available for the setup If a user cannot log on as Administrator but only as a user only that entry is displayed e g Operator In this case no unrestricted user rights have been assigned Only the following entries can then be changed for that user Password and Logoff time However it is possible for a user to modify the entry of another user A condition for this is t...

Page 51: ...values for user password and user displays Characters Length of user name maximum 40 Length of password minimum 3 Length of password maximum 24 Entry in the user display maximum 50 5 7 1 Log on user Proceed as follows Select the empty line in the dialog refer to Figure 5 9 Press ENTER Note The following Logon dialog only appears when the user has still not been logged on as a user The dialog also ...

Page 52: ...ord Create a user 5 7 2 Setting up a user The following dialogs appear after entering the user and password User OK Cancel Figure 5 10 Example of a User dialog Proceed as follows Enter a user Confirm with OK The following dialog appears Password OK Cancel Figure 5 11 Example of a Password dialog Note The password is only legible once in plain text when it is assigned in the Password dialog On ente...

Page 53: ...ailable groups select the one containing the user rights to be assigned to the new user Make the selection using SHIFT or or using ENTER and then or Logoff time OK Cancel 5 Figure 5 13 Example of a Logoff Time dialog The logoff time is defined in minutes 5 minutes are entered as the default value Select the value depending on the respective operating situation Confirm with OK The user display appe...

Page 54: ...rs Password OK Cancel Password Figure 5 15 Example of a Password dialog Enter the password Confirm with OK Confirm the two subsequent dialogs The new password becomes valid 5 7 4 Deleting a user name When a user is deleted the password is deleted from the User display A condition for deleting users is the assignment of administrator rights There are two methods of deleting a user Select the user n...

Page 55: ...veral tags which define the data structure of as data record Data record A data record contains the values of a recipe Recipe entry A recipe element consists of an entry name and a value The names assigned to the tags are referred to an element names Single recipe views The Recipe view is a configurable object in the recipes data records and recipe elements displayed in lists These are described b...

Page 56: ...nge 4 Apple Figure 6 1 Example of a recipe list Table 6 1 Overview of keys available Key Effect of pressing SHIFT INS DEL Creates a new data record ENTER Opens the data record list of the selected recipe HELP Calls in a window containing operator notes on the selected object refer to Table 5 1 Opens the menu Further keys used for navigation are explained in Section Navigation in lists This also ap...

Page 57: ...rink 3 Nectar Figure 6 2 Example of a data record list Table 6 2 Overview of keys used in data record lists Key Effect of pressing SHIFT INS DEL Creates a new data record ENTER Opens the entry list of the selected data record ESC The recipe list is displayed again Note When the first data record has been selected and is pressed the associated recipe name is displayed ...

Page 58: ...nfigured Table 6 3 Overview of keys available for use Key Effect of pressing ESC The data record list is displayed again HELP Calls in a window containing operator notes on the selected object refer to Table 5 1 Note When the first element has been selected and is pressed the associated data record and recipe name is displayed Proceed as follows to edit a value Select element name The entries poss...

Page 59: ...data records and element lists Menu button Effect of pressing Call in the menu Alternatively to using the menu can be called in with The menu items which can be configured can be determined from Table 6 4 Configurable menu items in the Recipe view The following table indicates which menu items are available in the three lists Some menu items in the following table can also be called in via the sys...

Page 60: ...te data record in PLC Yes Read data record from PLC Yes Data record save as Yes Yes Data record rename Yes Yes Display operator notes HELP Yes Yes Yes Open list ENTER Yes Yes Open previous list ESC Yes Yes The menu can appear as follows for example 2 Save 4 to PLC 5 from PLC 6 Save as Figure 6 4 Example of a menu with menu items configured for entry lists Each of these menu items can also be calle...

Page 61: ...gned menu item ENTER Triggers the menu item selected with the cursor ESC Displays the previously selected list Example Using the Save Data Record menu item refer to Figure 6 4 Proceed as follows With cursor key input Select Save Data Record with the cursor key Confirm the selection with ENTER The data record is saved and the entry list reappears With numeric input Enter 2 The data record is saved ...

Page 62: ...events A system event is assigned to the System event category The related alarms consist of static text They can also contain tags It is possible to configure an alarm text to flash A maximum of 80 characters per alarm are possible Fault alarm class The occurrence of an alarm of the alarm class Fault is indicated by the flashing alarm indicator LED Figure 6 5 Alarm indicator LED The alarm indicat...

Page 63: ...f lines per alarm Number of visible lines Table 6 6 Overview of keys used in Alarm views Key Effect of pressing ACK Acknowledges the alarms which have arrived HELP Calls in the operator notes on the selected alarm Further keys for navigation purposes are explained in Table 5 1 The keys displayed in the table are valid for all alarm classes Edit alarm Pressing ENTER triggers the function assigned t...

Page 64: ...5HFLSHV DQG ODUPV 5HOHDVH Operating Instructions Compact OP 77B 6 10 6AV6691 1EA01 0AB0 ...

Page 65: ...iphery 4 7 PLC 4 3 Potential equalization line 4 2 Power supply 4 8 Terminal block 4 8 Connecting peripheral equipment 4 7 Connecting the configuration computer 4 6 Connecting the PLC 4 3 Connecting the potential equalization 4 2 Connecting the terminal block 4 8 Connection configuration Configuration computer 4 6 Periphery 4 7 PLC 4 3 Potential equalization line 4 2 Power supply 4 8 Connection se...

Page 66: ...rs 5 1 Input Correcting 5 15 Input in a project 5 11 Installation OP 77B 3 1 Installation cut out 3 3 Installation positions 3 2 Interfaces 1 5 K Keyboard 2 1 L Labeling 5 6 Labeling strips 1 4 5 6 Limit value test 5 12 Limit values For users passwords user displays 5 22 Log off 5 19 Log on 5 19 User 5 22 Login dialog 5 19 M Memory 2 2 Memory card 1 3 Eject 5 5 Using 5 4 Menu 6 5 Menu items Config...

Page 67: ... R Recipe list 6 2 Recipe views Menu 6 5 Recipes 6 1 Reverse battery protection 4 8 RS 232 1 6 RS 422 1 5 RS 485 1 5 S Scaled drawings 1 4 Side view 1 2 Softkeys 2 1 5 3 5 8 global 5 8 labeling 5 6 local 5 8 Switch settings 4 5 Switching on 4 9 4 10 System keys 2 1 5 3 T Technical data 2 1 Terminology Recipe views 6 1 Time 5 18 Type of fixation 3 3 U USB 1 6 User Log on 5 22 User administration 5 ...

Page 68: ... QGH Release 03 2004 Operating Instructions Compact OP 77B 7 4 6AV6691 1EA01 0AB0 ...

Reviews: