en
Installation instructions
18
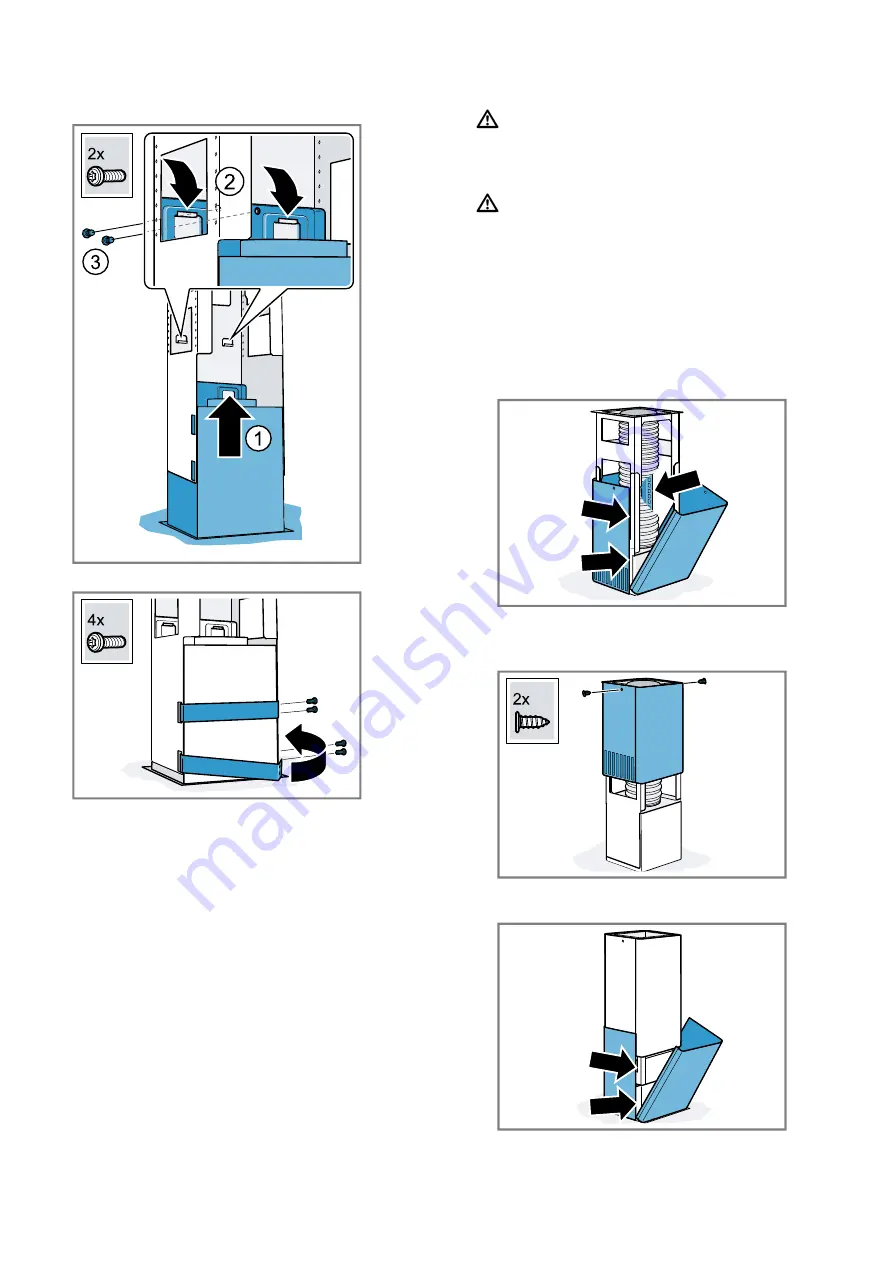
2.
Attach the appliance to the support frame using 2
securing screws.
3.
Hook in the retaining clips and screw them in tightly.
Piping
Note:
If you are using an aluminium pipe, smooth the
connection area beforehand.
We recommend the piping with an exhaust air pipe dia-
meter of 150 mm.
Establishing the exhaust air connection (exhaust air
pipe, 150 mm diameter)
▶
Fit the exhaust air pipe directly to the air-pipe con-
nector and seal the joint.
Establishing the exhaust air connection (exhaust air
pipe, 120 mm diameter)
1.
Secure the reducing connector to the air-pipe con-
nector.
2.
Secure the exhaust air pipe to the reducing con-
nector.
3.
Seal the joints.
Installing the flue duct
WARNING ‒ Risk of injury!
Components inside the appliance may have sharp
edges.
▶
Wear protective gloves.
WARNING ‒ Risk of electric shock!
Sharp-edged components inside the appliance may
damage the connecting cable.
▶
Do not kink or trap the connecting cable.
1.
To separate the flue ducts, remove the adhesive
tape or the flue duct from the protective packaging.
2.
Remove any protective foil from both flue ducts.
3. Note:
To prevent scratches, lay soft towels over the
edges of the outer flue duct to protect the surface.
Place both parts of the upper flue duct on the appli-
ance so that they fit together.
Note:
The slots on the flue duct point downwards.
4.
Push the upper flue duct upwards and secure it us-
ing 2 screws.
5.
Place both parts of the lower flue duct on the appli-
ance so that they fit together.
Summary of Contents for LF98BIR55
Page 19: ......


