


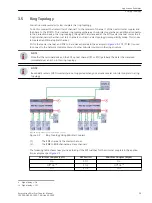


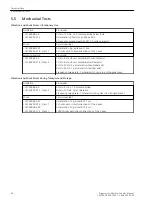


Commissioning
²
Fasten the device to a symmetric DIN rail as per EN 50022.
²
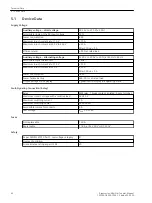
Check whether the operational data match the values on the name plate.
²
Do not make any changes to the device.
²
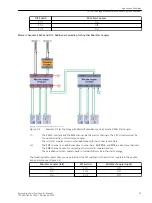
Carefully screw the fiber-optic connectors (hand-tight).
²
Insert and screw the RS232 connector in position.
²
Attach the connectors of the auxiliary voltage to the terminal V
aux
(DC: L+/L- or AC: A/N)N/- and L/+.
²
Switch on the auxiliary power supply.
After connecting the auxiliary power supply, the green LED Power On lights up and the device is ready for
operation.
4.3
Assembly and Commissioning
4.3 Commissioning
Accessories, Mini Star Coupler, Manual
37
C53000-G9050-C595-1, Edition 05.2020
Summary of Contents for 7XV5450-0BA00/BB
Page 20: ...20 Zubehör Mini Sternkoppler Handbuch C53000 G9050 C595 1 Ausgabe 05 2020 ...
Page 32: ...32 Zubehör Mini Sternkoppler Handbuch C53000 G9050 C595 1 Ausgabe 05 2020 ...
Page 50: ...50 Zubehör Mini Sternkoppler Handbuch C53000 G9050 C595 1 Ausgabe 05 2020 ...
Page 56: ...6 Accessories Mini Star Coupler Manual C53000 G9050 C595 1 Edition 05 2020 ...
Page 70: ...20 Accessories Mini Star Coupler Manual C53000 G9050 C595 1 Edition 05 2020 ...
Page 82: ...32 Accessories Mini Star Coupler Manual C53000 G9050 C595 1 Edition 05 2020 ...
Page 100: ...50 Accessories Mini Star Coupler Manual C53000 G9050 C595 1 Edition 05 2020 ...


