Operating Instructions
Chapter
10
CLV 42x bar code scanner
Appendix
8 009 981/O078/16-08-2004
©
SICK AG · Division Auto Ident · Germany · All rights reserved
10-23
In the Parameter mode, all commands begin with the number "3".
3.
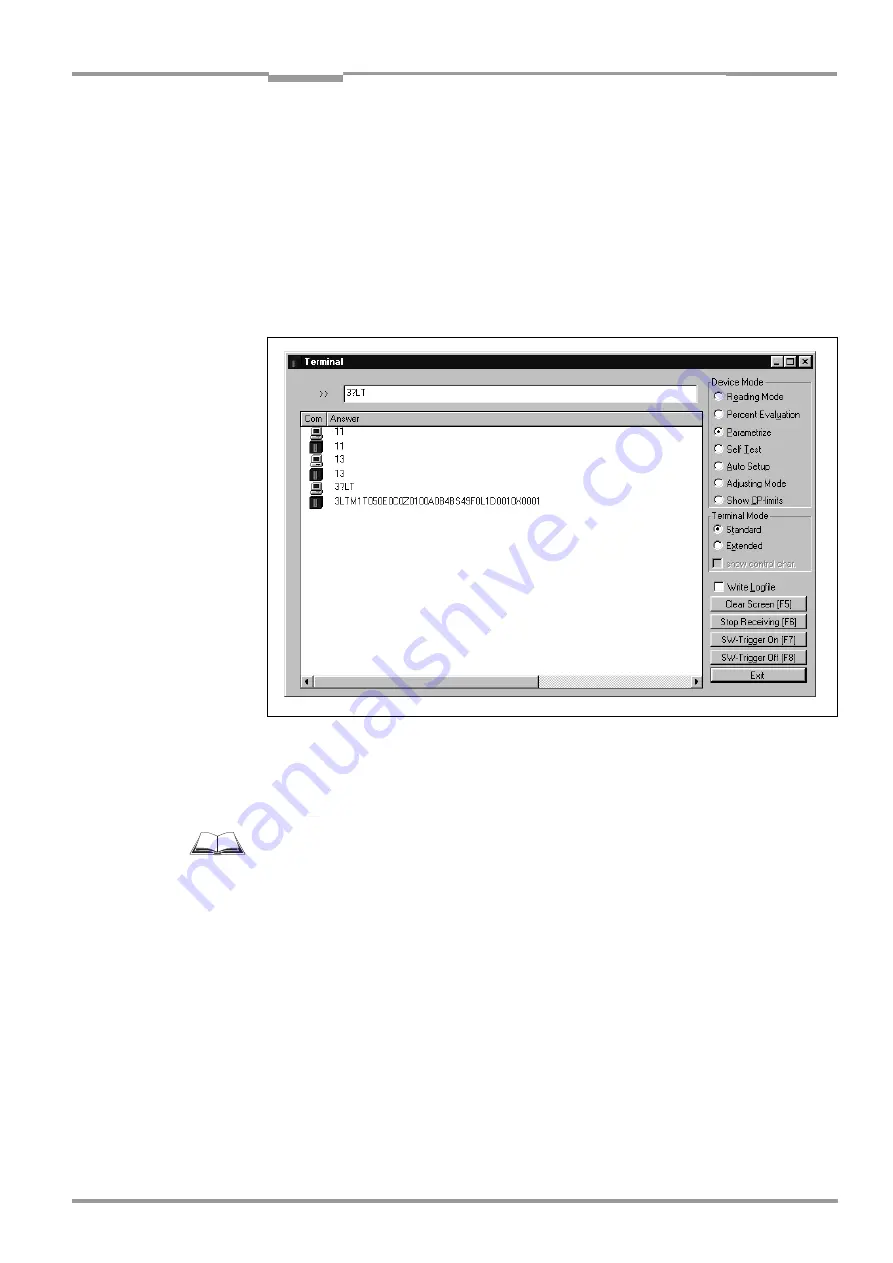
Enter the desired command in the command field
➀
and press the [Return] key.
The command is then sent to the CLV.
With a few exceptions, the CLV replies to a command with correct syntax with an echo.
Example:
Entering "3?LT" causes the CLV to output the parameter values of the reading pulse in
encoded form in the output window
➁
.
4.
Activate the R
EADING
M
ODE
radio button to return to the Reading mode.
The "Device Ready" LED lights up.
Note
Changes that are made directly to parameter values in the CLV using command strings are
only registered and displayed in CLV Setup after the current parameter set has been
uploaded from the CLV.
A list of command strings is available on request.
Outputting command strings for all the parameter settings
You can output a list of all the parameter settings configured with CLV Setup in ASCII format.
To do so, proceed as follows:
1.
In the menu bar, choose E
XPORT
P
ARAMETERS
under CLV 42x.
Starting from the default settings, CLV Setup collects all the command strings required
to parameterize the default configuration and customized settings.
The S
ELECT
FILE
NAME
FOR
PARAMETER
EXPORT
dialog box is displayed.
2.
Enter a file name and click the S
AVE
button.
CLV Setup saves the data as a text file in the directory shown.
You can open this text file using any Windows text editor.
If the commands are sent from the host/PLC to the CLV for configuration, note that "3 EEW"
has to be sent as the last command to ensure that they are permanently transferred to the
CLV (EEProm).
Fig. 10-8:
CLV Setup: entering commands in the terminal emulator
➀
➁


