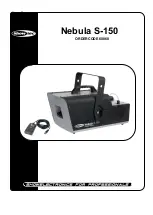
Nebula S-150
ORDERCODE 60860
Page 1: ...Nebula S 150 ORDERCODE 60860...
Page 2: ...n Showtec for more excellent lighting products We design and manufacture professional light equipment for the entertainment industry New products are being launched regularly We work hard to keep you...
Page 3: ...ription Features and Overview Backside Installation Installing the snow machine Set Up and Operation Control Modes One Nebula Multiple Nebula s Master Slave control Multiple Nebula s DMX control Fixtu...
Page 4: ...rson involved with the installation operation and maintenance of this device have to be qualified follow the instructions of this manual Before your initial start up please make sure that there is no...
Page 5: ...ng Always keep the snow machine upright Always unplug your SHOWTEC snow machine before filling its tank For adult use only Snow machine must be installed out of the reach of children Never leave the u...
Page 6: ...ent temperature of 45 C If this device is operated in any other way than the one described in this manual the product may suffer damages and the warranty becomes void Any other operation may lead to d...
Page 7: ...od to use Note If you are given an RMA number please include the following information on a piece of paper inside the box 1 Your name 2 Your address 3 Your phone number 4 A brief description of the sy...
Page 8: ...ne from Showtec 800 W Snowmachine Snow output 120ml min Fuse 5A 250V Output distance 6 5 m Tank Capacity 2 5L 1 DMX channel DMX Onboard DMX controllable Stand alone mode Included Remote Control Cable...
Page 9: ...ful not to exceed the maximum fluid level DO NOT OVERFILL When filled place cap back on liquid tank Firmly attach the remote control cable to the proper input on the rear of the machine The unit can a...
Page 10: ...the following figure Multiple Nebula s Master Slave control 1 Fasten the effect light onto firm trussing Leave at least 0 5 meter on all sides for air circulation 2 Use a 3 p XLR cable to connect the...
Page 11: ...s process to link the second third and fourth units 5 Set DMX dip switches as follows See Dip Switch setting page 11 Nebula Address Value Dip Switches ON Unit 1 1 1 Unit 2 2 2 Unit 3 3 1 and 2 Unit 4...
Page 12: ...la s on a DMX data link 30 fixtures Data Cabling To link fixtures together you must obtain data cables You can purchase DAP Audio certified DMX cables directly from a dealer distributor or construct y...
Page 13: ...4 3 Explanation Since each unit has 1 channel each address advances 1 value See Address Value above Once address values are determined set the appropriate DMX dip switches on each unit Example 1 If y...
Page 14: ...hannels Channel 1 Output 0 2 Off 3 255 Continuous snow output 100 You can use the SMALL ON Off switch on the back to alter the force of the snowmachine On Full force Off Half Force DMX control with Ad...
Page 15: ...rewdriver into a slot in the fuse cover Gently pry up the fuse cover The fuse will come out 3 Remove the used fuse If brown or unclear it is burned out 4 Insert the replacement fuse into the holder wh...
Page 16: ...now output 120ml min Output distance 6 5 m Tank Capacity 2 5L 1 DMX channel DMX Onboard DMX controllable Stand alone mode Included Remote Control Cable length 4 5m Dimensions 500x315x350mm LxWxH Weigh...
Page 17: ......