These instructions are for your safety. Please read through them thoroughly before use .
PLEASE KEEP THIS LEAFLET FOR FUTURE REFERENCE
All information, contained in this booklet © Shire Garden Buildings .
Version 5 14/05/
2015 Julian Shepherd
Complies with EN71
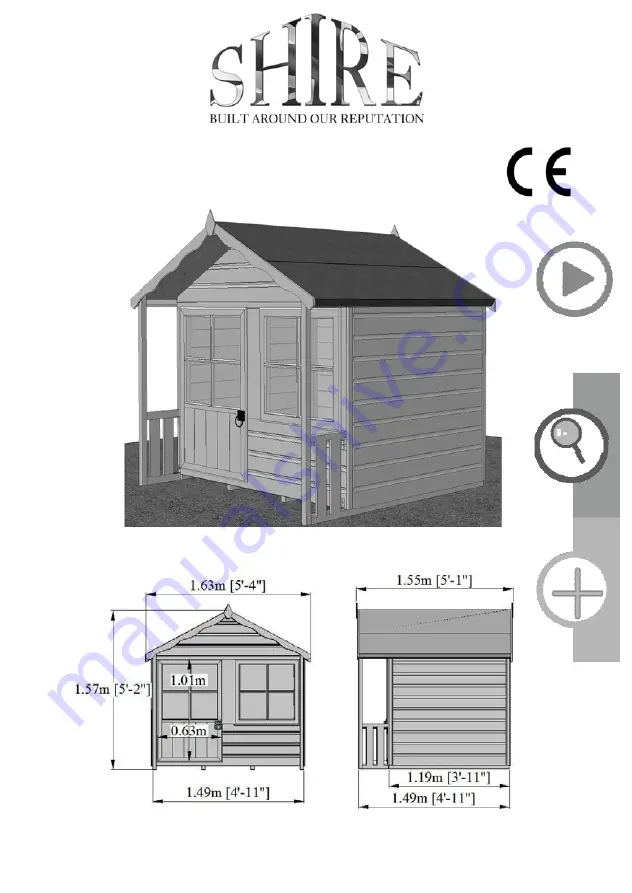
© Kitty Playhouse


