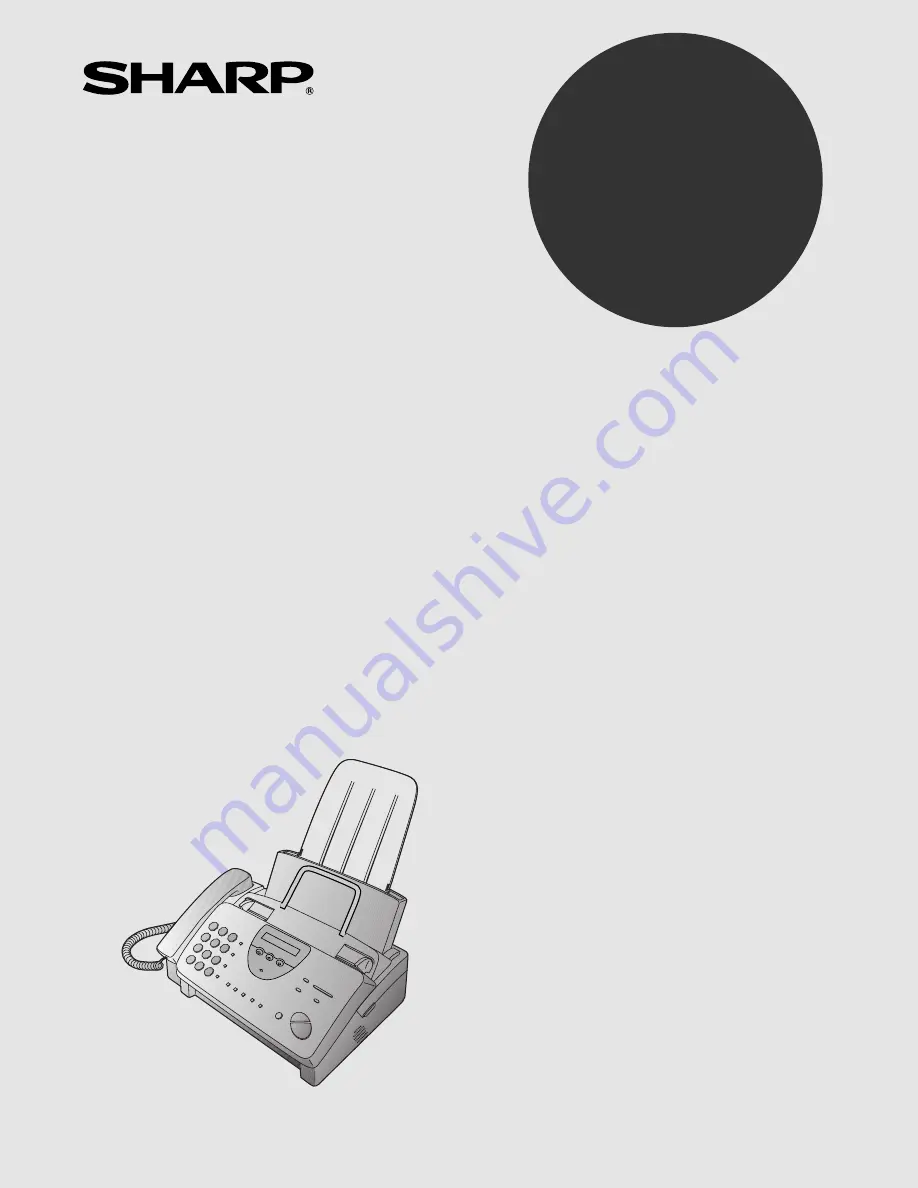
background image

OPERATION MANUAL

FACSIMILE

MODEL

UX-460

  1.  Installation 
  2.  Using the Answering Machine  
  3.  Sending Documents     
  4.  Receiving Documents   
  5.  Making Copies    
  6.  Making Telephone Calls       
  7.  Special Functions
  8.  Option Settings 
  9.  Printing Reports and Lists
10. Maintenance    
11. Troubleshooting

UX-460

FACSIMILE

Summary of Contents for UX 460 - B/W Thermal Transfer

Page 1: ...UX 460 1 Installation 2 Using the Answering Machine 3 Sending Documents 4 Receiving Documents 5 Making Copies 6 Making Telephone Calls 7 Special Functions 8 Option Settings 9 Printing Reports and Lists 10 Maintenance 11 Troubleshooting ...

Page 2: ...ill not occur in a particular installation If this equipment does cause harmful interference to radio or television reception which can be determined by turning the equipment off and on the user is encouraged to try to correct the interference by one or more of the following measures Reorient or relocate the receiving antenna Increase the separation between the equipment and the receiver Connect t...

Page 3: ...ry size 512 KB approx 30 average pages with no voice messages recorded or 24 minutes of voice mes sages including OGMs with no documents in memory Modem speed 9600 bps with automatic fallback to 7200 4800 or 2400 bps Transmission time Approx 15 seconds Sharp special mode Reception modes TEL FAX TAD Resolution Horizontal 203 pels inch 8 pels mm Vertical Standard 98 lines inch 3 85 lines mm Fine Hal...

Page 4: ... 5 5 to 23 6 140 to 600 mm Effective scanning width 8 3 210 mm max Contrast control Automatic Dark selectable Copy function Standard Telephone function Standard cannot be used if power fails Power requirements 120 V AC 60 Hz Operating temperature 41 to 95 F 5 to 35 C Humidity Maximum 85 Power consumption Stand by 4 2 W Maximum 100 W Dimensions Width 13 5 343 mm Depth 10 1 256 mm Height 7 2 182 mm ...

Page 5: ...machine produces odors smoke or unusual noises The power cord is frayed or damaged The machine has been dropped or the housing damaged Do not allow anything to rest on the power cord and do not install the machine where people may walk on the power cord Never insert objects of any kind into slots or openings on the machine This could create a risk of fire or electric shock If an object falls into ...

Page 6: ...tlet must be installed near the equipment and must be easily accessible Important This facsimile machine is not designed for use on a line which has call waiting call forwarding or certain other special services offered by your telephone company If you attempt to use the fax machine in conjunction with any of these services you may experience errors during transmission and reception of facsimile m...

Page 7: ...g Machine 34 Recording an Outgoing Message 34 Operating the Answering Machine 37 Optional Answering Machine Settings 41 Transfer Function 45 Override Ringing 48 Remote Operations 50 3 Sending Documents 59 Transmittable Documents 59 Loading the Document 61 Resolution and Contrast 63 Sending a Fax by Normal Dialing 65 Sending a Fax by Automatic Dialing 67 4 Receiving Documents 76 Using FAX Mode 76 U...

Page 8: ...e Numbering 100 Blocking Reception of Unwanted Faxes 102 Sending Documents From Memory 104 Polling Requesting a Fax Transmission 106 Timer Operations 109 8 Option Settings 111 9 Printing Reports and Lists 118 10 Maintenance 125 11 Troubleshooting 129 Problems and Solutions 129 Messages and Signals 134 Clearing Paper Jams 137 Ordering Parts 140 FCC Regulatory Information 141 Index 144 6 ...

Page 9: ... sure you have all of the following items If any are missing contact your dealer or retailer Handset Handset cord Telephone line cord Imaging film initial starter roll Rapid key labels Operation manual Imaging film cartridge Paper tray extension Original document support Gears 4 7 ...

Page 10: ...2 13 15 17 18 19 10 DIGITAL ANSWERING SYSTEM 5 6 14 16 SPEED DIAL key Press this key to dial a 2 digit Speed Dial number REDIAL key Press this key to automatically redial the last number dialed REPEAT key Press this key to repeat playback of a message Display This displays messages and prompts during operation and programming PLAY SKIP key Press this key to play recorded messages During playback p...

Page 11: ...rd you to open the operation panel Number keys Use these keys to dial numbers and enter numbers and letters during number name storing procedures HOLD SEARCH key Press this key to search for an automatic dialing number or during a phone conversation press this key to put the other party on hold SPEAKER key Press this key to hear the line and fax tones through the speaker when sending a document No...

Page 12: ...Y key Press this key to send or receive a document or to scan a document into memory before sending it COPY HELP key When a document is in the feeder press this key to make a copy At any other time press this key to print out the Help List a quick reference guide to the operation of your fax 16 17 18 19 A Look at the Operation Panel 10 ...

Page 13: ...the machine Keep the area around the machine clear About condensation If the machine is moved from a cold to a warm place it is possible that condensation may form on the scanning glass preventing proper scanning of documents for transmission To remove the condensation turn on the power and wait approximately two hours before using the machine 1 Installation Connections 11 ...

Page 14: ...ds of the handset cord are identical so they will go into either jack Make sure the handset cord goes into the jack marked with a handset symbol on the side of the machine Use the handset to make ordinary phone calls or to transmit and receive documents manually Connections 12 ...

Page 15: ...e warranty The machine does not have a power on off switch so the power is turned on and off by simply plugging in or unplugging the power cord Note If your area experiences a high incidence of lightning or power surges we recommend that you install surge protectors for the power and telephone lines Surge protectors can be purchased at most telephone specialty stores 1 Installation Connections 13 ...

Page 16: ... jack Comments Your fax is set for touch tone dialing If you are on a pulse dial rotary line you must set the fax for pulse dialing by changing Option Setting 8 This procedure is described in Chapter 8 Option Settings If you intend to use a computer fax modem on the same phone line you must reset Option Setting 10 Fax Signal Receive to NO in order to prevent transmission and reception errors This ...

Page 17: ...ally into the notches in the paper tray Rotate the paper tray extension up until it snaps into place Attach the original document support Note The original document support has a top side and a bottom side If you cannot insert the tabs on the support into the holes turn the support over 1 Installation Connections 15 ...

Page 18: ... optional If desired you can connect an extension phone to the TEL SET jack on the fax 1 Remove the seal covering the TEL SET jack 2 Connect the extension phone line to the TEL SET jack TEL SET TEL LINE Connections 16 ...

Page 19: ...ax can print about 30 letter size pages When replacing the film use a roll of Sharp UX 3CR imaging film One roll can print about 100 letter size pages Note If there is paper in the paper tray pull the paper release plate forward and remove the paper before loading the imaging film 1 Open the operation panel by grasping the finger hold and pulling up 2 Pull the green release on the right side of th...

Page 20: ...move the imaging film cartridge from the print compartment grasp the handle at the front of the cartridge and turn it over 4 Remove the used film from the cartridge 5 Remove the four green gears from the used film DO NOT DISCARD THE FOUR GREEN GEARS Loading the Imaging Film 18 ...

Page 21: ... two protrusions on the large gear fit firmly into the slots in the end of the spool Insert the remaining three gears into the spools making sure the protrusion on each gear fits firmly into one of the slots in the end of each spool If needed pull the spools apart slightly to allow the gears to fit the band will stretch Protrusion Slot Large gear 1 Installation Loading the Imaging Film 19 ...

Page 22: ...en insert the small gear on the other end of the spool into its holder 9 Cut the band that holds the two spools together Unroll the film slightly and insert the small gears into their holders 10 Turn the cartridge over grasp the handle and insert the cartridge into the print compartment Loading the Imaging Film 20 ...

Page 23: ...owing keys to initialize the film Note Paper must be loaded before the film can be initialized To load paper see the following section Loading the Printing Paper Display shows INITIALIZE FILM When to replace the imaging film Replace the imaging film when the display shows FILM END Use the following imaging film which is available from your dealer or retailer FUNCTION 6 START MEMORY Sharp UX 3CR Im...

Page 24: ... sheets Legal size 25 sheets 1 Fan the paper and then tap the edge against a flat surface to even the stack 2 Pull the paper release plate toward you 3 Insert the stack of paper into the tray print side down If paper remains in the tray take it out and combine it into a single stack with the new paper before adding the new paper Be sure to load the paper so that printing takes place on the print s...

Page 25: ...and cause paper jams 5 The fax has been set at the factory to scale the size of received faxes to letter size paper If you have loaded legal paper you must change the paper size setting to legal Press these keys The display will show PAPER SIZE SET Press 1 to select LETTER or 2 to select LEGAL FUNCTION 6 1 2 LETTER LEGAL or The display will show COPY CUT OFF Press the STOP key to return to the dat...

Page 26: ... that you obtain better print quality by changing the setting to LIGHT Press these keys The display will show FUNCTION 6 PRINT CONTRAST Press 1 to select NORMAL or 2 to select LIGHT NORMAL LIGHT 1 STOP 2 or The display will show PAPER SIZE SET Press the STOP key to return to the date and time display Loading Printing Paper 24 ...

Page 27: ...r and the date and time appear on each fax message you send Enter your name and fax number here and set the date and time as explained in the following section to have your fax include this information automatically at the top of your fax messages 2 1 3 9 4 5 6 7 8 0 3 key FUNCTION key STOP key START MEMORY key key Note The imaging film and printing paper must be loaded before your name and fax nu...

Page 28: ...s press the key If you make a mistake press the HOLD SEARCH key to move the cursor back to the mistake and then enter the correct number The new number will replace the old number 5 Press the START MEMORY key to enter the fax number in memory Example START MEMORY 5 5 5 2 1 4 3 The display will show ENTER YOUR NAME Cursor A dark square mark in the display that indicates where a number or letter wil...

Page 29: ...to move the cursor to the left Press this key to change case Press this key to move the cursor to the right A B C D E F G H I J K L M N O P Q R S T U V W X Y Z SPACE Press either key repeatedly to select one of the following symbols _p 7 Press the START MEMORY key to save your name in memory The display will show START MEMORY SPEED DIAL REDIAL HOLD SEARCH SPEAKER ABC DEF JKL MNO GHI TUV WXYZ PQRS ...

Page 30: ... 6 7 8 0 3 key FUNCTION key STOP key START MEMORY key key Note The imaging film and printing paper must be loaded before the date and time can be set 1 Press these keys The display will show FUNCTION 3 ENTRY MODE 2 Press the key four times The display will show DATE TIME SET Note The fax is Year 2000 compliant Setting the Date and Time 28 ...

Page 31: ...move the cursor back to the mistake and then enter the correct number Example January 5 Enter a two digit number for the day 01 to 31 Example the 5th 6 Enter the year four digits Example 1999 7 Enter a two digit number for the hour 01 to 12 and a two digit number for the minute 00 to 59 Example 9 25 0 1 0 5 9 0 2 5 9 8 Press the key to select A M or the key to select P M or A M P M 9 9 1 1 Install...

Page 32: ...rd automatically at the beginning and end of Daylight Saving Time To turn on this function press the panel keys as follows 1 Press these keys The display will show ENTRY MODE 2 Press the key three times The display will show DAY LIGHT SAVING 3 Press 1 to turn on the Daylight Saving Time function or 2 to turn it off The display will show 1 2 YES NO or STORE JUNK 4 Press the STOP key to return to th...

Page 33: ... want the built in answering machine to answer all calls Voice messages will be recorded and fax messages will be received automatically TAD is an acronym for Telephone Answering Device Setting the reception mode Press the RECEPTION MODE key until the arrow in the display points to the desired mode RECEPTION MODE FAX TEL TAD FAX TEL TAD FAX TEL TAD FEB 1 10 30 FEB 1 10 30 FEB 1 10 30 2 1 3 9 4 5 6...

Page 34: ...ringer using the UP and DOWN keys 2 1 3 9 4 5 6 7 8 0 DOWN key UP key Speaker 1 Press the SPEAKER key SPEAKER DOWN UP 2 Press the UP or DOWN key or 3 When the display shows the desired volume level press the SPEAKER key to turn off the speaker SPEAKER Volume Adjustment 32 ...

Page 35: ... UP or DOWN key Make sure the SPEAKER key has not been pressed and the handset is not lifted The ringer will ring once at the selected level then the date and time will reappear in the display Display RINGER HIGH RINGER MIDDLE RINGER LOW RINGER OFF OK 2 If you selected RINGER OFF OK press the START MEMORY key START MEMORY DOWN UP or DOWN UP or 1 Installation Volume Adjustment 33 ...

Page 36: ...rding an Outgoing Message The outgoing message OGM is the greeting that the machine plays after answering a call to inform callers that they can leave a message or send a fax Example Hello You ve reached the ABC company No one is available to take your call right now Please leave a message after the beep or press your facsimile Start key to send a fax Thank you for calling 1 Press these keys The d...

Page 37: ... press the START MEMORY key and speak into the handset The outgoing message can be up to 60 seconds long The outgoing message for the Transfer function can be up to 15 seconds long While recording the display will show the time remaining to record 6 When finished press the STOP key and then replace the handset STOP START MEMORY 7 Press the STOP key to return to the date and time display STOP Recor...

Page 38: ...to erase it To return to the date and time display press the STOP key twice Note that the general outgoing message cannot be erased If you need to change it simply repeat the recording procedure Note If an extension phone is connected to the UX 460 an outgoing message cannot be recorded played or deleted while the extension phone is being used while LINE IS IN USE appears in the display Recording ...

Page 39: ...eived at least one incoming message or after four rings if no messages have been received For more information see Toll Saver in Remote Operations in this chapter Note If the memory is full from messages previously recorded MEMORY IS FULL will appear in the display To set the reception mode to TAD you must first erase some or all of the stored messages Note In TAD mode the machine will automatical...

Page 40: ... plays the date and time of recording will appear briefly in the display If no messages were received NO MESSAGES will appear To listen to a message a second time press the REPEAT key before playback of that message ends To move back to the previous message press the REPEAT key within 3 seconds of the beginning of the current message To skip forward to the next message press the PLAY SKIP key PLAY...

Page 41: ...versations and messages for other users of the UX 460 These will be played back together with any incoming messages when the PLAY SKIP key is pressed Recording messages To record a message press the REC MEMO key for at least 1 second and then pick up the handset press the START MEMORY key and speak into the handset When you have finished speaking replace the handset or press the STOP key Recording...

Page 42: ...SETTINGS 2 Press these keys The display will show ICM CONFIRMATION 3 Press the START MEMORY key The number of messages recorded will appear in the display 4 Press or one or more times to show the date and time of each of the messages The message number will appear first and then the date and time several seconds later FUNCTION 0 5 Press the STOP key Note The recorded dates and times are cleared ea...

Page 43: ...ler a maximum of 4 minutes to leave a message If desired you can change this setting to 15 30 or 60 seconds 1 Press these keys STOP The display will show T A D SETTINGS 2 Press these keys The display will show ICM RECORD TIME 3 Press a numeric key to select the desired ICM recording time 1 15 seconds 2 30 seconds 3 60 seconds 4 4 minutes 4 Press the STOP key FUNCTION 0 3 1 2 4 Optional Answering M...

Page 44: ...o your messages and then erase them see Remote Operations in this chapter Automatic fax reception YES The reception mode will switch to FAX mode allowing the UX 460 to continue to receive faxes automatically With this setting you can still use the remote commands to listen to your messages and erase the message memory see Remote Operations in this chapter Automatic fax reception is set to NO at th...

Page 45: ...hone services as Call Waiting or Call Forwarding signals used by these services may be mistaken for a CPC signal causing the machine to hang up during a call In this case follow the steps below to turn off CPC detection Note CPC detection may not operate properly in some telephone exchanges For this reason periods of silence and or telephone company signals may be recorded even if CPC detection is...

Page 46: ...ll play but callers will not be able to leave a message The machine will still receive faxes sent by automatic dialing 1 Press these keys FUNCTION 0 The display will show OGM ONLY MODE STOP 2 Press 1 to turn on OGM only mode or 2 to turn it off 3 Press the STOP key or 1 2 Optional Answering Machine Settings 44 ...

Page 47: ...ote operations described in the previous section Note When you hang up after a transfer call the UX 460 will not immediately resume normal operation If you want the UX 460 to accept calls immediately after a transfer call enter twice before hanging up if you want to hang up during message playback first enter 0 and to stop playback then enter twice Programming the transfer number To use the Transf...

Page 48: ...ording the transfer message The transfer message plays when you answer the telephone and informs you that the call is a transfer call It can be up to 15 seconds long To record a transfer message follow the steps described in Recording an Outgoing Message in this chapter The following is an example Hello This is a transfer call for YOUR NAME Enter your remote code number now 5 5 2 1 5 4 3 Transfer ...

Page 49: ...these keys The display will show T A D SETTINGS 2 Press these keys The display will show TRANSFER FUNC 3 Press 1 to turn the Transfer function on or 2 to turn it off 0 FUNCTION 1 2 or 4 Press the STOP key STOP 2 Answering Machine Transfer Function 47 ...

Page 50: ... the override code To override the answering machine your callers must enter a 3 digit override code from their telephone This code has been set to 009 at the factory If you want to change it press the panel keys as shown below Important Make sure the override code is different from the remote code used for remote operations 1 Press these keys The display will show T A D SETTINGS 2 Press these key...

Page 51: ...the override code and by pressing the appropriate keys on their telephone If an incorrect code is entered the caller will hear four beeps He or she must re enter the correct code within 10 seconds or the line will be disconnected 3 The UX 460 will make a special ringing sound Pick up the handset to answer the call Note that an extension telephone connected to the same line will not ring If you do ...

Page 52: ...r is used to prevent unauthorized people from listening to your messages or changing the settings of your machine The remote code number has been set to 001 at the factory If you want to change it press the panel keys as shown below 1 Press these keys 0 FUNCTION The display will show T A D SETTINGS 2 Press these keys The display will show REMOTE CODE 3 Enter a 3 digit number by pressing the number...

Page 53: ...ply hang up before it answers saving yourself the cost of that call If you do not want to use the Toll Saver function you can turn it off by following the steps below In this case the UX 460 will answer after the number of rings set with Option Setting 2 see Chapter 8 the ring setting for FAX reception mode 1 Press these keys 0 FUNCTION The display will show T A D SETTINGS 2 Press these keys The d...

Page 54: ...e outgoing message will stop 2 Enter your remote code number and then by pressing the keys on the telephone You will hear a series of beeps equal to the number of messages recorded or one long beep if four or more messages have been received The machine will then play back the messages beeping once at the end of each message When all messages have been played back you will hear a long beep If no m...

Page 55: ... playback press 0 and on the telephone After this you can enter any of the commands described in the following section Other remote operations Play new messages To listen to only your new messages first stop playback by pressing 0 and and then press 6 and Erase a message To erase the message you are currently listening to press 3 and before it ends 3 0 0 6 2 5 5 When you have finished listening to...

Page 56: ... Comments When a remote command is accepted by the machine you will hear one beep If an incorrect command is entered you will hear four beeps In the latter case re enter the correct command When entering a command do not pause longer than 10 seconds between each digit If you do a 4 beep error signal will be issued and the digits entered up to that point will be disregarded In this case re enter th...

Page 57: ... do not want to wait until playback ends to enter a command first stop playback by pressing 0 and and then enter the command Changing the fax reception mode Select a new reception mode by pressing the keys as follows TAD mode 8 1 and FAX mode 8 2 and TEL mode 8 3 and Caution In TEL mode you will not be able to further change the reception mode Recording a new outgoing message 1 Press 4 and on the ...

Page 58: ...ep and the new message will be played back Turning the Transfer function on or off To turn Transfer on Press 9 1 and on the telephone To turn Transfer off Press 9 2 and on the telephone Changing the transfer telephone number 1 Press 9 0 and on the telephone 1 9 0 9 2 After you hear a short beep enter the new telephone number When finished press To insert a pause between any two digits of the numbe...

Page 59: ... will hear a beep and the new message will be played back automatically Recording a Memo You can record a memo for yourself or other users of the UX 460 The memo will be played back when incoming messages are listened to 1 Press and on the telephone 0 2 When you hear a short beep speak into the telephone to record the memo 3 When you are finished press 0 and If the UX 460 detects a certain period ...

Page 60: ...OGM only mode press 1 1 and Your outgoing message will play but callers will not be able to record a message Faxes sent by automatic dialling will be received To turn off OGM only mode press 1 2 and 1 1 2 1 Remote Operations 58 ...

Page 61: ...pend on whether you load one page at a time or several pages at once Loading one page at a time Minimum size Maximum size Minimum weight Maximum weight Loading several pages at once Minimum size Maximum size Minimum weight Maximum weight 140 mm 148 mm 216 mm 600 mm 52 g m 157 g m 52 g m 80 g m 140 mm 148 mm 297 mm 216 mm 3 Sending Documents 59 ...

Page 62: ...nk Ink glue and correcting fluid on documents must be dry before they pass through the document feeder All clips staples and pins must be removed from documents before loading in the feeder If these are not removed they may damage the machine Documents which are patched taped torn smaller than the minimum size carbon backed or easily smudged should be photocopied and the copy loaded in the feeder ...

Page 63: ... time insert each page into the feeder as the previous page is being scanned Insert gently to prevent double feeding 1 Adjust the document guides to the width of your document 2 Place the document face down and push it gently into the document feeder The top edge of the document should enter the machine first The feeder will draw the leading edge of the document into the machine The display will s...

Page 64: ... panel Important Do not try to remove a document without opening the operation panel This may damage the feeder mechanism 1 Open the operation panel by grasping the finger hold and pulling up 2 Remove the document 3 Close the operation panel making sure it clicks into place Click Loading the Document 62 ...

Page 65: ...e not effective for receiving a document Resolution settings STANDARD Use STANDARD for ordinary documents This setting gives you the fastest and most economical transmission FINE Use FINE for documents containing small letters or fine drawings SUPER FINE Use SUPER FINE for documents containing very small letters or very fine drawings HALF TONE Use HALF TONE for photographs and illustrations The or...

Page 66: ...st setting AUTO will appear next to each resolution setting The second time you move through the list the contrast setting DARK will appear RESOLUTION Display STANDARD AUTO FINE AUTO SUPER FINE AUTO HALF TONE AUTO STANDARD DARK FINE DARK SUPER FINE DARK HALF TONE DARK Note In order to transmit in SUPER FINE resolution the receiving fax machine must also have that resolution If it doesn t your mach...

Page 67: ...t to talk Normal Dialing allows you to listen to the line and make sure the other fax machine is responding 1 Load the document s The display will show READY TO SEND 2 5 8 GHI JKL MNO TUV WXYZ PQRS ABC DEF 1 4 7 3 6 9 SPEAKER or Set the resolution and or contrast if desired 2 Pick up the handset or press the SPEAKER key Listen for the dial tone 3 Dial the number of the receiving machine by pressin...

Page 68: ...ception tone press the START MEMORY key Replace the handset if you used it When transmission is completed the fax will beep once Using the REDIAL key You can press the REDIAL key to redial the last number dialed To send a document proceed from Step 4 of Normal Dialing Note that the speaker will be automatically activated when you press the REDIAL key START MEMORY Beep Facsimile reception tone This...

Page 69: ...number you select a two digit Speed Dial number for it 45 Speed Dial numbers are available 1 1 01 START MEMORY SPEED DIAL Speed Dial numbers 01 through 05 are for Rapid Key one touch Dialing Speed Dial numbers 06 through 45 are for dialing with the SPEED DIAL key 2 1 3 9 4 5 6 7 8 0 SPEED DIAL key Rapid keys Attach the strip of Rapid Key labels above the Rapid Keys When you store a number in a Rap...

Page 70: ...eed Dialing Example 4 Enter the fax or voice number by pressing the number keys max of 32 digits including pauses Note A space cannot be entered Press the SPEED DIAL key to clear a mistake If a pause is required between any of the digits to access a special service or an outside line press the REDIAL key two seconds per pause The pause will appear as a hyphen Several pauses can be entered in a row...

Page 71: ...xit If the number will be used for Rapid Key Dialing you can write the name on the appropriate Rapid Key label Step 3 or START MEMORY STOP Storing area codes and access codes You can also store an area code or access code in a Rapid Key or Speed Dial number To use this number to dial see Chain Dialing in Chapter 5 Making Telephone Calls Note An area code or access code stored in a Rapid Key or Spe...

Page 72: ... which you want to make changes in Step 3 and then change the number and or name when they appear in the display Steps 4 and 6 respectively START MEMORY 2 STOP 0 1 A lithium battery keeps automatic dialing numbers in memory The machine uses a lithium battery to keep automatic dialing numbers and other programmed data in memory when the power is turned off Battery power is consumed primarily when t...

Page 73: ...or contrast if desired RESOLUTION 2 Press the Rapid Key corresponding to the desired Speed Dial number The name of the receiving party will appear in the display If no name was stored the fax number will appear If the name or number is incorrect press the STOP key The document will be automatically transmitted once the connection is made 01 02 03 Example To dial Speed Dial number 01 press Rapid Ke...

Page 74: ...desired RESOLUTION 2 Press the SPEED DIAL key and then enter the two digits of the Speed Dial number by pressing the number keys To enter numbers 1 through 9 first enter 0 and then the number SPEED DIAL 2 0 Example 3 Check the display If the name or number shown is correct press the START MEMORY key If not press the STOP key and then repeat Step 2 START MEMORY Sending a Fax by Automatic Dialing 72...

Page 75: ...chine by pressing the number keys If a pause is required between any of the digits to access a special service or an outside line press the REDIAL key two seconds per pause The pause will appear as a hyphen Several pauses can be entered in a row 2 5 8 GHI JKL MNO TUV WXYZ PQRS ABC DEF 1 4 7 3 6 9 3 Check the display If the number of the receiving machine shown is correct press the START MEMORY key...

Page 76: ...ired RESOLUTION 2 Press the HOLD SEARCH key and then the 1 key HOLD SEARCH 1 3 Enter the first letter of the stored name by pressing the appropriate number key the key below the marked letter one or more times until the letter appears in the display If the name begins with a special character or number press 1 If you don t remember the first letter go to Step 4 you will scroll through the list fro...

Page 77: ... automatically transmitted once the connection is made Automatic redialing If you use automatic dialing including Direct Keypad Dialing and the line is busy the machine will automatically redial the number The machine has been set at the factory to make 2 redialing attempts at intervals of 5 minutes To stop automatic redialing press the STOP key If desired you can change the number of times the ma...

Page 78: ...ive incoming faxes 4 rings Fax reception You can change the number of rings on which the machine answers calls by changing Option Setting 2 See Chapter 8 Option Settings If you pick up the handset before the machine answers you can talk to the other party and or receive a document as described in Using TEL mode Note If you are using distinctive ring the machine will answer incoming calls after two...

Page 79: ...e s handset or an extension phone connected to the same line Answering with the fax s handset 1 Pick up the handset when the machine rings 2 If you hear a fax tone wait until the display shows RECEIVING and then replace the handset Beep RECEIVING Note If you have set Option Setting 10 Fax signal receive to NO press the START MEMORY key to begin reception 4 Receiving Documents Receiving Documents 7...

Page 80: ...en it rings 2 If you hear a soft fax tone wait until your fax responds the extension phone will go dead if it is connected to your fax or you will hear pronounced high pitched tones if the phone is connected to a separate wall jack then hang up Beep Phone goes dead or pronounced high pitched tones 3 If the fax doesn t respond or if the other party first talks to you and then wants to send a fax pr...

Page 81: ... can be changed if desired See Option Setting 5 Tel Fax Remote Number in Chapter 8 Option Settings 2 in 1 Print To save paper you can have the size of your incoming faxes reduced by 55 This will allow you to receive for example a 2 page document on one page note that this may not be possible if the document pages are longer than your printing paper To turn on this function follow the steps below 1...

Page 82: ...ine Note Automatic reduction may not be possible if the received document is too large contains too many fine graphics or images or is sent at high resolution In this case the remainder of the document will be printed on a second page 1 Press these keys FUNCTION 6 The display will show RECEPTION RATIO 2 Press 1 to turn automatic reduction on or 2 to turn it off AUTO 100 or 1 2 If you selected AUTO...

Page 83: ...mory FAX RX IN MEMORY will appear in the display alternating with OUT OF PAPER FILM END or PAPER JAM When you add paper replace the imaging film or clear the jam the stored documents will automatically print out If you received documents in memory because the fax ran out of paper be sure to add paper which is the same size as the paper previously used If not the document print out size may not mat...

Page 84: ...esired The default setting for copying is SUPER FINE 2 Press the COPY HELP key The display will show RESOLUTION COPY HELP COPY MODE 1 MULTI COPY 2 SORT COPY START COPY If you are only making one copy of the original or of each original and don t want to make a reduction or enlargement setting press the START MEMORY key twice Copying will begin If you are only making one copy of the original or of ...

Page 85: ...RY key If you are making multiple copies per original enter the number of copies per original if the number is less than 10 enter a 0 before the number 0 9 The display will show COPY RATIO Example Nine copies per original 5 Set the amount of reduction or enlargement by entering a number from 1 to 5 as shown below or press the START MEMORY key to automatically select 100 Copying will begin 1 AUTO a...

Page 86: ...nt that is longer than the printing paper use the copy cut off setting to select whether the remaining part of the document will be cut off or printed on a second page The intial setting is YES cut off the remainder To change the setting follow the steps below 1 Press these keys The display will show FUNCTION 6 COPY CUT OFF 2 Press 1 to set copy cut off to YES the remaining part of the document wi...

Page 87: ...Dial the number using one of the following methods Normal Dialing Enter the full telephone number with the numeric keys Rapid Key Dialing Press the appropriate Rapid Key Speed Dialing Press the SPEED DIAL key and enter the 2 digit Speed Dial number with the numeric keys 2 5 8 GHI JKL MNO TUV WXYZ PQRS ABC DEF 1 4 7 3 6 9 3 Speak with the other party when they answer If you pressed the SPEAKER key ...

Page 88: ...rea code or an access code for a special service in a Rapid Key you can press the Rapid Key for that area code or access code then dial the remainder of the number by pressing a Rapid Key pressing number keys or pressing the SPEED DIAL key and entering a two digit Speed Dial number Using the HOLD SEARCH key You can use the HOLD SEARCH key to search for a Rapid Key or Speed Dial number First search...

Page 89: ...e they cannot hear you You can put the handset back in the cradle without breaking the connection When you are ready to speak with them again pick up the handset If you did not put the handset back in the cradle press the HOLD SEARCH key again to resume conversation 6 Making Phone Calls Making Telephone Calls 87 ...

Page 90: ...o use this function you must subscribe to a caller identification service from your telephone company Your fax may not be compatible with some caller identification services 1 Press these keys FUNCTION 4 The display will show OPTION SETTING 2 Press the key three times The display will show CALLER ID 2 1 3 Press 1 to turn on Caller ID or 2 to turn it off If you selected 2 NO go to Step 7 If you sel...

Page 91: ...etting 2 Number of Rings to Answer to 2 or more rings see Chapter 8 How Caller ID operates When you receive a call the name and phone number of the caller will alternately appear in the display beginning just before the second ring The information will continue to be displayed until you pick up the handset or until the fax answers automatically if it is in FAX mode Note Some caller ID services may...

Page 92: ...r information was not provided by the telephone company at the caller s request Viewing the Caller ID list If you subscribe to a Caller ID service and have turned on the Caller ID function your fax machine will keep information on the most recent 20 calls and faxes you have received You can view this information which consists of the name and number of each caller in the Caller ID List After you h...

Page 93: ...the STOP key when you have finished viewing the list START MEMORY STOP or To delete calls from the Caller ID list If you want to delete a single call from the caller list press the 0 key while the call appears in the display If you want to delete all calls from the list hold the 0 key down for at least 3 seconds while you are viewing any number in the list Priority Call If desired you can set your...

Page 94: ... fax receptions the Anti Junk Fax function normally only blocks faxes In this case when a voice call or a fax transmission comes in from a number you have specified as a Junk Number your fax will break the connection as soon as it receives the calling phone number from the caller ID service before the second ring To use this function set Option Setting 11 to YES as described in Chapter 8 Option Se...

Page 95: ... whereby they assign an additional second number to your regular single line The second number rings differently from your normal number If you subscribe to a distinctive ring service you can set the fax machine to automatically answer when your second number is called This allows you to use the second number as an exclusive fax number To have your fax automatically answer when your second number ...

Page 96: ...ll show 1 3 2 4 5 FAX SIGNAL RX 4 Press the STOP key STOP 5 Set the reception mode to FAX When using distinctive ring you must set the reception mode of your fax to FAX When your designated fax number is dialed your fax will automatically answer and begin reception after two rings Note that other devices on the same line will also ring until your fax answers If one of your other numbers is dialed ...

Page 97: ...numbers to dial the numbers of the receiving machines 1 Load the document s The display will show READY TO SEND 2 Press the START MEMORY key and then 2 3 Dial the receiving machines maximum of 20 using one or both of the following methods Enter one or more Speed Dial numbers by pressing the number keys Press one or more Rapid Keys START MEMORY 4 Press the START MEMORY key 2 START MEMORY 2 2 01 02 ...

Page 98: ...on Report is automatically printed out after Broadcasting is completed Check the Note column of the report to see if any of the locations are marked Busy or have a communication error code If so send the document to those locations again START MEMORY Broadcasting 96 ...

Page 99: ...ammed Your name and number must be programmed as explained in Chapter 1 You can select a message Follow the steps below to turn on the cover sheet function Once the cover sheet function is turned on cover sheets will be included with all tranmissions until you turn it off 1 Press these keys The display will show FUNCTION 4 OPTION SETTING 2 Press these keys The display will show COVER SHEET 7 Speci...

Page 100: ...l When the cover sheet function is turned on you can also select a message which will appear as a header at the top of the cover sheet Note that the message selection is only effective for one transmission 1 Load the document s The document must be loaded before a message can be selected The cover sheet function must be turned on 2 Press these keys The display will show FUNCTION 5 COVER SHEET HEAD...

Page 101: ...1 URGENT 2 IMPORTANT 3 CONFIDENTIAL 4 PLS DISTRIBUTE 1 Example 4 Dial the receiving machine and transmit the document Note To cancel a cover sheet header setting press the STOP key or remove the document from the feeder 7 Special Functions Cover Sheet 99 ...

Page 102: ...eceiver to check for missing pages 1 Load the document s The document must be loaded before batch page numbering can be set 2 Press these keys The display will show FUNCTION PAGE COUNTER SET 3 Enter the total number of pages 01 to 99 by pressing the number keys If you are sending a cover sheet do not include it in the total number of pages the number will be adjusted automatically 8 0 Example Eigh...

Page 103: ...ey If the number of pages actually transmitted does not coincide with the batch number entered the alarm will sound and PAGE COUNT ERROR will appear in the display PAGE E will also appear in the NOTE column of the Transaction Report if it has been set to print out 7 Special Functions Batch Page Numbering 101 ...

Page 104: ... will not operate for a number which has also been stored as a Priority Call number To clear a number from the Anti Junk Number List you need to know the 1 digit number which identifies it If you have forgotten this number print out the Anti Junk Number List as explained in Chapter 9 1 Press the keys shown at right STORE JUNK will appear in the display 2 Press 1 to store a number in the Anti Junk ...

Page 105: ... block max of 20 digits Example 5 Press the START MEMORY key 6 Return to Step 3 to enter or clear another number or press STOP to exit Step 3 or 5 5 5 3 2 1 4 STOP START MEMORY 7 Special Functions Blocking Reception of Unwanted Faxes 103 ...

Page 106: ...document and frees the feeder for other operations After transmission the document will be cleared from memory Only one memory transmission can be set at a time The amount of memory currently occupied appears as a percentage in the display while the document is being scanned 1 Load the document s The display will show READY TO SEND Set the resolution and or contrast if desired 2 Press the START ME...

Page 107: ...matically if necessary START MEMORY 01 02 03 Example If the memory becomes full If the memory becomes full while the document is being scanned MEMORY IS FULL will appear in the display Press the START MEMORY key if you want to transmit the pages which have been stored up to that point in memory The remaining pages will be ejected from the feeder After transmission the memory will be cleared and yo...

Page 108: ...on Settings Requesting transmission Note Rapid Dial Keys cannot be used for polling To dial a Rapid Dial location press the SPEED DIAL key and then enter the 2 digit number corresponding to the Rapid Key 1 Dial the fax machine you want to poll using one of the following methods Pick up the handset or press the SPEAKER key and dial the full number Wait for the fax answerback tone Press the SPEED DI...

Page 109: ...mber of the polling fax machine has been entered in your machine s list of permitted fax numbers called passcode numbers The number of the polling fax must also be programmed in itself for identification To use Polling Security follow the steps below to turn the function on and then enter permitted numbers as shown on the following page 1 Press the keys shown at right ENTRY MODE will appear in the...

Page 110: ...er or 2 to clear a number or 4 Storing Enter a 2 digit number from 01 to 10 This number identifies the fax number you will store in the next step Clearing Enter the number which identifies the fax number you want to clear and go to Step 6 Example 5 Enter the fax number max of 20 digits Example 6 Press the START MEMORY key 7 Return to Step 4 to enter or clear another number or press STOP to exit St...

Page 111: ... be there when the operation is performed Note Only a Speed Dial number can be used to dial the receiving machine Setting a timer operation 1 Press the keys shown at right TIMER MODE will appear in the display 1 FUNCTION 2 Press to set a transmission operation SEND MODE or to set a polling operation POLLING MODE or 3 Press 1 to select SET 4 Enter the time at which you want the operation to take pl...

Page 112: ...ssion operation load the document in the feeder sometime before the specified time of transmission To cancel an operation If you need to cancel an operation after it has been set follow the steps below 1 Press the keys shown at right TIMER MODE will appear in the display 2 Press to cancel a transmission operation or to cancel a polling operation or 3 Press 2 to select CLEAR 4 Press the START MEMOR...

Page 113: ...t press FUNCTION and 4 then press or to scroll through the options or Setting 1 FINE RESOLUTION PRIORITY This option sets the default resolution the resolution used if a setting is not made with the RESOLUTION key for transmitting documents Press 1 YES to set the default resolution to FINE or 2 NO to set it to STANDARD Initial setting 2 FUNCTION 4 FUNCTION 4 Display will show FINE PRIORITY STOP 2 ...

Page 114: ... of time your fax will wait between automatic redials when the line is busy Enter 01 for 1 minute 02 for 2 minutes etc up to a maximum of 15 minutes Initial setting 05 FUNCTION 4 Press until display shows RECALL INTERVAL Enter a number from 01 to 15 RECALL TIMES STOP Setting 4 RECALL TIMES This sets the maximum number of times your fax will automatically redial if the line is busy Enter any number...

Page 115: ...shows TEL FAX REMOTE Enter a number from 0 to 9 REMOTE RECEPTION STOP Setting 6 REMOTE RECEPTION SELECT If you don t intend to use the above TEL FAX REMOTE NUMBER you can turn detection of the number off This will ensure that the fax never mistakenly attempts to begin reception if it detects a signal similar to the TEL FAX REMOTE NUMBER while you are talking on an extension phone Press 1 to turn d...

Page 116: ...EVER PRINT A report will never be printed 5 ERROR ONLY A report will be printed only after an error occurs Initial setting 5 FUNCTION 4 Press until display shows TRANSACTION LIST STOP Enter a number from 1 to 5 DIAL MODE Setting 8 DIAL MODE This sets the mode of dialing Press 1 if you are on a touch tone line or 2 if you are on a pulse dial line If you don t know which type of line you have try ma...

Page 117: ...ll on your fax or an extension phone If you use a computer fax modem to send documents on the same line you must turn this function off in order to prevent your fax from mistakenly attempting to receive documents from the computer fax modem Press 1 to turn the function on or 2 to turn it off Initial setting 1 FUNCTION 4 Press until display shows FAX SIGNAL RX STOP 2 1 YES NO or JUNK CHECK Setting ...

Page 118: ...ler ID service and want to use the Caller ID function press 1 twice enter your 3 digit area code by pressing the number keys and then press the START MEMORY key To turn Caller ID off press 2 Caller ID is explained in more detail in Caller ID in Chapter 7 Initial setting 2 FUNCTION 4 until display shows CALLER ID 2 1 YES NO or If 1 selected AREA CODE MODE 2 1 SET CLEAR or If 1 selected ENTER AREA C...

Page 119: ...isplay shows COVER SHEET STOP 2 1 YES NO or AUTO PRINT OUT Setting 15 ACTIVITY REPORT AUTO PRINT OUT Press 1 to have your fax automatically print out an Activity Report once every 30 operations The list can still be printed out on demand when desired Press 2 to turn automatic print out off Initial setting 2 FUNCTION 4 Display will show AUTO PRINT OUT STOP 2 1 YES NO or FINE PRIORITY 8 Option Setti...

Page 120: ... 2 The display will show LISTING MODE START MEMORY 2 Press the key or the key until the desired list appears in the display or 3 Press the START MEMORY key Activity Report This report shows information on your most recently performed send and receive operations a combined maximum of 30 operations can appear The report is divided into two parts the TRANSMISSIONS ACTIVITY REPORT which shows informat...

Page 121: ...ll be overwritten each time a new operation is performed Explanation of headings SENDER RECEIVER The fax number of the other machine involved in the transaction If this machine does not have an ID function the communication mode will appear for example G3 PAGES Number of pages transmitted or received NOTE OK Transmission reception was normal JAM A problem with the paper or original document occurr...

Page 122: ...d transmission using a function which your fax does not have If you were attempting to fax make sure a document is in the feeder If you were receiving contact the faxing party toseehow they are trying to send to you Timer List This list shows the timer operations that are currently set Telephone Number List This list shows the fax and voice numbers that have been stored for automatic dialing Print...

Page 123: ...r name and fax telephone number as entered in the machine and a sample of the header printed at the top of every page you transmit HEADER PRINT Option Setting List This list shows the current status of the option settings 9 Printing Lists Printing Reports and Lists 121 ...

Page 124: ... numbers that are blocked by the Anti Junk function Caller ID List This list shows information about your most recent calls maximum of 20 calls This list is only available if you are using the Caller ID function Printing Reports and Lists 122 ...

Page 125: ...med for the answering machine Message List This list shows information about the messages currently recorded in the answering machine including the date and time of recording the length and the type ICM memo or 2 way 9 Printing Lists Printing Reports and Lists 123 ...

Page 126: ...tory to print out the report only when an error occurs If desired you can change the setting to have it printed out under a variety of other conditions This is done by changing Option Setting 7 Transaction Report Print Select as described in Chapter 8 The same headings appear in the Transaction Report as in the Activity Report See Activity Report in this chapter for an explanation of the headings ...

Page 127: ...um printing performance 1 Unplug the power cord 2 Pull the paper release plate forward and remove the paper 3 Open the operation panel grasp the finger hold and pull up and then pull the release on the right side of the machine forward to open the print compartment cover 10 Mainenance 125 ...

Page 128: ...ead and roller with denatured alcohol Print head Roller Caution Do not use benzene or thinner Avoid touching the print head with hard objects The print head may be hot if your fax machine has just received a large number of documents If this is the case allow the print head to cool prior to cleaning Maintenance 126 ...

Page 129: ... compartment 7 Close the print compartment cover press down on both sides to make sure it clicks into place and then close the operation panel 8 Reinsert the paper in the paper tray and push the paper release plate back down 10 Mainenance Maintenance 127 ...

Page 130: ...g fluid are removed as dirts and stains will cause vertical lines on transmitted images and copies Adhesive cellophane tape is useful for removal of debris from the rollers Document rollers Scanning glass Caution When wiping take care not to damage any of the protruding parts on the underside of the operation panel The housing Wipe the external parts and surface of the machine with a dry cloth Cau...

Page 131: ... number from 0 to 1 2 3 4 5 6 or 7 in the NOTE column Try the transaction again If the error persists check the following Check the hookup The cord from the TEL LINE jack to the wall jack should be no longer than six feet Make sure there are no modem devices sharing the same telephone line Check with the other party to make sure their fax machine is functioning properly Have your telephone line ch...

Page 132: ...place Make sure that the receiving machine has fax paper Make sure that the telephone line cord is plugged into the TEL LINE jack and not the TEL SET jack If the receiving machine is in manual mode with no attendant reception will not be possible If the receiving machine is not a Sharp model make sure it is G3 compatible Check the display for error messages Pick up the handset and check for a dial...

Page 133: ...machine Print a report or make a copy to confirm the printing ability of your machine General print quality is poor It is important to select a paper that is appropriate for the thermal transfer printer in your fax We recommend using laser quality paper that has a very smooth finish Copier paper will work but it sometimes tends to yield a lighter print quality The received document is faint Ask th...

Page 134: ...takes place continuously for a long time the print head may overheat Turn off the power and let it cool down A received document or copy prints out in strips Make sure the operation panel and the printer compartment cover under the operation panel are completely closed press down on both sides of each To close the printer compartment cover grasp the top of the operation panel and pull to open it a...

Page 135: ... back in several seconds later Automatic document feeding does not work for transmission or copying Check the size and weight of the document see Transmittable Documents in Chapter 2 Voice calls taken on an extension phone are interrupted by the fax The fax may interrupt during a voice call if the reception mode is set to TAD To prevent interruption on a touch tone extension phone press any three ...

Page 136: ...close it DOCUMENT JAM The original document is jammed See the following section Clearing Paper Jams FAX RX IN MEMORY A fax has been received in memory because the imaging film needs replacement you have run out of printing paper or the paper is jammed The fax will print out automatically when the problem is fixed FILM END The imaging film may need replacement Check the film and replace if necessar...

Page 137: ...inting out a document from memory NO DATA This appears if you attempt to search for an automatic dialing number when none have been stored NO STORED You have tried to dial or clear a Rapid Key or Speed Dial number that hasn t been programmed a full number hasn t been assigned to it OUT OF PAPER You are out of printing paper or the paper release plate is open Load paper as described in Loading Prin...

Page 138: ...ic dialing number or press STOP to return to the data and time display See Using the HOLD SEARCH key in Sending a Fax by Automatic Dialing in Chapter 2 TOTAL PAGE S 01 Number of pages transmitted received or copied Audible signals Continuous tone 3 seconds Indicates the end of transmission reception or copying Intermittent tone 3 beeps 5 seconds 1 second on 1 second off Indicates incomplete transm...

Page 139: ...EMORY key If the document doesn t feed out open the operation panel and remove it Important Do not try to remove a document without opening the operation panel This may damage the feeder mechanism 1 Open the operation panel by grasping the finger hold and pulling up 2 Remove the document 3 Close the operation panel making sure it clicks into place Click 11 Trouble shooting Clearing Paper Jams 137 ...

Page 140: ...peration panel grasp the finger hold and pull up and then pull the release on the right side of the machine forward to open the print compartment cover 3 Gently pull the jammed paper out of the machine making sure no torn pieces of paper remain in the print compartment or rollers Clearing Paper Jams 138 ...

Page 141: ...nt cover press down on both sides to make sure it clicks into place and then close the operation panel 5 Reinsert the paper in the paper tray and push the paper release plate back down 11 Trouble shooting Clearing Paper Jams 139 ...

Page 142: ...ar NGERH2456XHZZ Part distribution centers Panson Electronics I 80 and New Maple Ave Pine Brook NJ 07058 Tel 1 800 255 5229 Fax 1 800 332 3922 Tritronics Inc 1306 Continental Drive Abingdon MD 21009 Tel 1 800 638 3328 Fax 1 800 888 FAXD Tritronics Inc 1015 NW 52nd Street Ft Lauderdale FL 33309 Tel 1 800 365 8030 Fax 1 800 999 FAXD Fox International Ltd 23600 Aurora Road Bedford Heights OH 44146 Te...

Page 143: ...ephone company may disconnect your service temporarily If possible they will notify you in advance If ad vance notice is not practical you will be notified as soon as possible You will also be ad vised of your right to file a complaint with the FCC Your telephone company may make changes in its facilities equipment operations or procedures that could affect the operation of your equipment If this ...

Page 144: ... 8016 60 2 1 3 Polyester resin 27923 68 8 1 3 Others 1 5 Section 4 Hazardous Identification Emergency Overview This product is ink film for thermal transfer facsimile Ink film is a thin film coated with ink It is no special hazard under normal use condition Section 5 Health Hazard Data Route s of Entry Inhalation Skin Ingestion not applicable not applicable Possible but very unusual Health Hazards...

Page 145: ... and Use Personal Protection Information Respiratory Eye Protection and Protective Glove not required Engineering Control Ventilation not required Work Hygienic Practice none Steps to be taken in case of Spill or Leak If rumple the product and wax layer peel off sweep up or clean with vacuum cleaner If it dirty skin wash with water and soap If it clothes wash by suitable method Waste Disposal Meth...

Page 146: ...ng Direct Keypad 73 Normal 65 85 Rapid Key 71 85 Search 74 86 Speed 72 85 Direct Keypad Dialing 73 Display 8 Display messages 134 Distinctive Ring 93 Document feeder 61 Document guides 61 Document restrictions 60 Document rollers 128 Document sizes 59 Document maximum scanning size 60 E Extension telephone Connecting 16 Using 78 F FAX reception mode 31 76 Fax reception on TAD failure 42 Fax Signal...

Page 147: ... 24 Print head cleaning 125 Print Setup List 124 Priority Call 91 R Rapid Dial keys 9 Rapid Key Dialing 71 85 Rec Memo key 9 Recall Times 112 Recall Wait Interval 112 Reception mode FAX mode 31 76 Setting 31 TAD mode 31 37 TEL mode 31 77 Reception mode key 9 31 Reception Ratio setting 80 Redial key 8 66 86 Redialing 75 86 Remote code number 50 Remote operations 50 Remote Reception Select 113 Remov...

Page 148: ...13 Telephone line cord 14 Telephone Number List 120 Telephone using as 85 Time setting 28 Timer List 120 Timer operations 109 Transaction Report 124 Transaction Report Print Select 114 Transfer function 45 Two in one printing 79 V Volume keys 9 32 Index 146 ...

Page 149: ...nd carry it with you when you go out Remote Operation Guide 1 Call your fax from a touch tone telephone and press when the outgoing message begins 2 Enter your remote code 3 Press 4 After listening to your messages you can either hang up to save them or enter one of the com mands on the reverse side ...

Page 150: ...d Stop Play new messages only first stop playback ERASING MESSAGES Erase single message Erase all messages RECORDING A MEMO Start End RECORDING A NEW OGM Start FAX RECEPTION MODES TAD mode FAX mode TEL mode TRANSFER FUNCTION Turn on Turn off New transfer number Record transfer OGM To quickly disconnect OGM ONLY MODE Turn on Turn off ...

Page 151: ... the period s from the date of purchase set forth below Neither the sales personnel of the seller nor any other person is authorized to make any warranties other than those described above or to extend the duration of any warranties beyond the time period described above on behalf of Sharp The warranties described herein shall be the sole and exclusive warranties granted by Sharp and shall be the ...

Page 152: ...SHARP ELECTRONICS CORPORATION Sharp Plaza Mahwah New Jersey 07430 2135 SHARP CORPORATION PRINTED IN THAILAND TINSE4007XHZZ ...

Reviews: