4-18
RETRIEVING A STORED DESTINATION
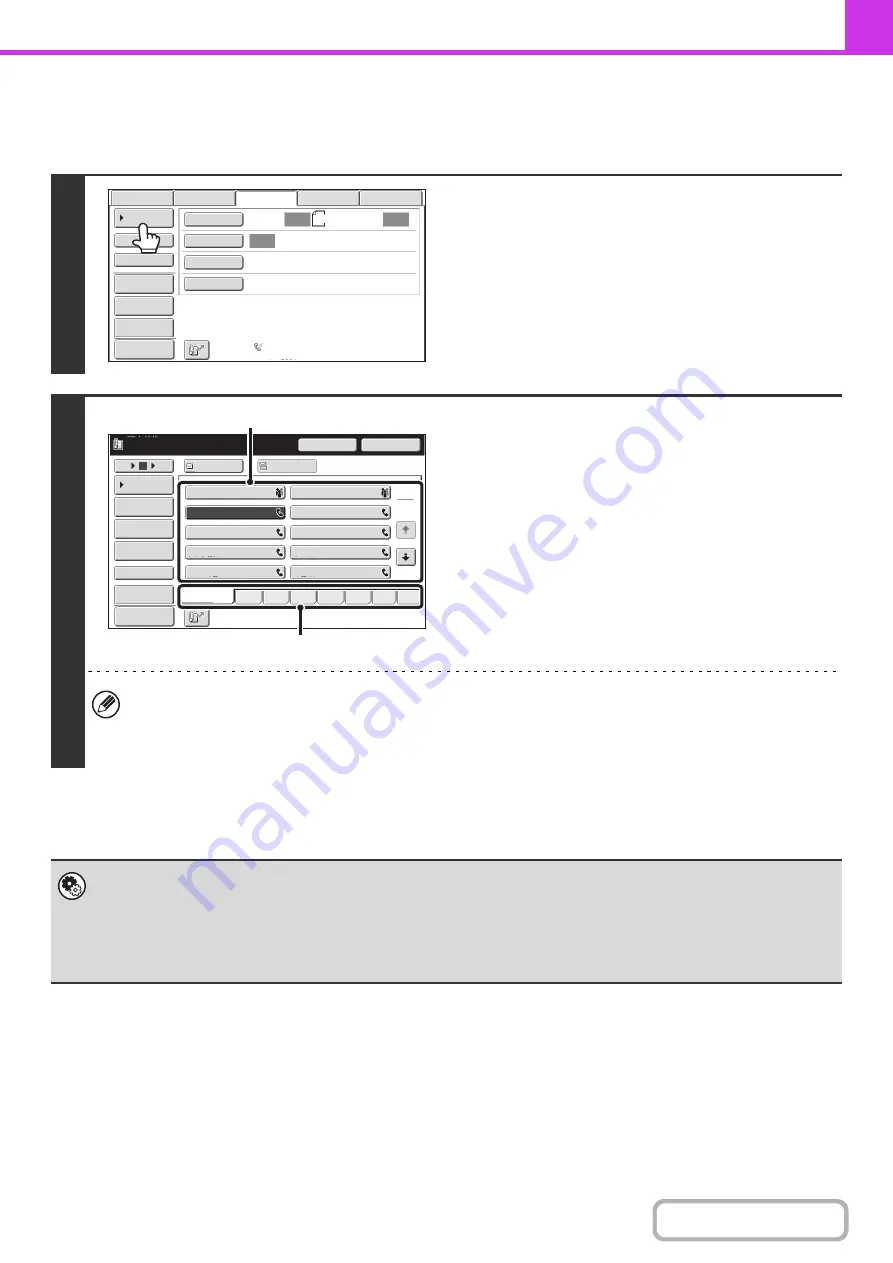
A destination fax number is retrieved by simply touching the one-touch key of that destination.
1
Touch the [Address Book] key.
2
Select the destination.
(1) Touch the index tab where the destination
is stored.
(2) Touch the one-touch key of the desired
destination.
If you select an incorrect destination, touch the key again
to cancel the selection.
• Frequently used destinations can be displayed in the [Freq.] index. Specify that a destination be displayed in the
[Freq.] index when you store the destination.
•
To continue specifyin
g
other destinations...
Touch the [Next Address] key and repeat (1) and (2) of this step.
•
System Settin
g
s (Administrator): Must Input Next Address Key at Broadcast Settin
g
This setting determines whether or not the [Next Address] key can be omitted before specifying the next destination.
Factory default setting: The [Next Address] key can be omitted.
•
System Settin
g
s (Administrator): Disable Switchin
g
of Display Order
This is used to disable switching of the order of display of the one-touch keys in the address book screen. The currently
selected display order will be the order that is used after this setting is enabled.
Auto
Auto
Auto
File
Quick
File
Address
Review
Direct
TX
Sub
Address
Address
Book
USB
Mem.
Scan
Fax
Internet
Fax
PC
Scan
Special
Modes
Resolution
Exposure
Original
Scan
:
Scan
Send
:
Standard
Auto
Reception
Fax
Memory
:
100
%
8
½
x11
Preview
1
2
10
5
15
To
Pause
Next
Address
CCC
CCC
012345678
9
Cc
III
III
GGG
GGG
EEE
EEE
CCC
CCC
AAA
AAA
JJJ
JJJ
HHH HHH
FFF
FFF
DDD
DDD
BBB
BBB
Global
Address
Search
Address
Entry
Sort
Address
Sub
Address
Address
Review
Condition
Settings
ABCD
Fre
q
.
EFG
H
IJKL
MNOP
QRSTU
V
WXYZ
etc.
Preview
(2)
(1)
Summary of Contents for MX-M266N
Page 8: ...Assemble output into a pamphlet Create a stapled pamphlet Staple output Create a blank margin ...
Page 11: ...Conserve Print on both sides of the paper Print multiple pages on one side of the paper ...
Page 35: ...Organize my files Delete a file Delete all files Periodically delete files Change the folder ...
Page 259: ...3 19 PRINTER Contents 4 Click the Print button Printing begins ...


