


87
GENERAL PROCEDURE FOR USING STAMP
To select stamp settings, follow the steps below.
1
Place the original.
Place the original face up in the document feeder tray, or face down on the document glass.
2
Select the special modes.
(1) Touch the [Special Modes] key.
(2) Touch the
keys to switch through the screens.
(3) Touch the [Stamp] key.
☞
Special modes menu (2nd screen)
(page 45)
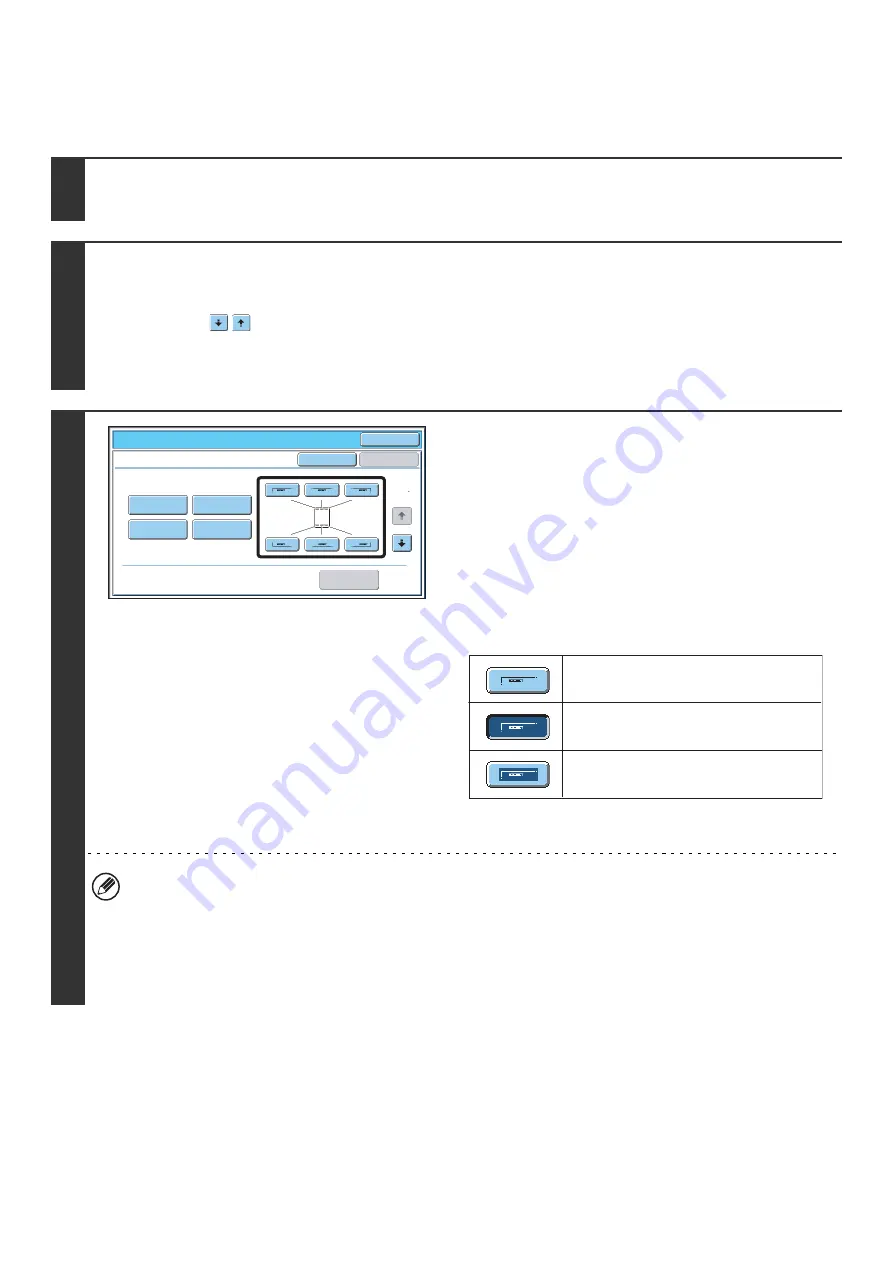
3
Select the print position.
Select from 6 positions: top left, top center, top right, bottom
left, bottom center, bottom right.
You can also skip this step and go directly to the next step. In
this case, the stamp items will be printed in the following
positions:
Date:
Top right
Stamp:
Top left
Page number:
Bottom center
Text:
Top left
Print positions
The keys that show the print positions will appear as follows
depending on the state of the settings.
The above key is the top left key. The appearance of each key
varies depending on the position of the key.
• "Date" and "Page Numbering" cannot be selected in multiple positions. If the [Date] key or [Page Numbering] key is
touched when "Date" or "Page Numbering" has already been selected for a position, a message will appear asking
you if you wish to move that item to the selected position. To move the item, touch the [Yes] key. Otherwise, press
the [No] key.
• If you attempt to set "Date", "Text", or "Page Numbering" in a position where one of these items is already set, a
message will appear. To change the previously selected item to the new item, touch the [Yes] key. To keep the
previous item, touch the [No] key.
O
K
Special
Modes
Sta
m
p
O
K
Layout
Cancel
Date
Page
Nu
mb
ering
Text
Sta
m
p
1
2
Not selected, stamp setting has not
been selected.
Selected during selection of the stamp
setting.
Not available, stamp setting has already
been selected.
Summary of Contents for MX 5500N - Color Laser - Copier
Page 1: ...User s Guide MX 5500N MX 6200N MX 7000N MODEL ...
Page 2: ...System Settings Guide MX 5500N MX 6200N MX 7000N MODEL ...
Page 108: ...MX7000 US SYS Z2 System Settings Guide MX 5500N MX 6200N MX 7000N MODEL ...
Page 109: ...Document Filing Guide MX 5500N MX 6200N MX 7000N MODEL ...
Page 157: ...MX7000 US FIL Z2 Document Filing Guide MX 5500N MX 6200N MX 7000N MODEL ...
Page 158: ...Scanner Guide MX 5500N MX 6200N MX 7000N MODEL ...
Page 279: ...MX7000 US SCN Z2 Scanner Guide MX 5500N MX 6200N MX 7000N MODEL ...
Page 280: ...Printer Guide MX 5500N MX 6200N MX 7000N MODEL ...
Page 351: ...MX7000 US PRT Z2 Printer Guide MX 5500N MX 6200N MX 7000N MODEL ...
Page 352: ...Copier Guide MX 5500N MX 6200N MX 7000N MODEL ...
Page 499: ...MX7000 US CPY Z2 Copier Guide MX 5500N MX 6200N MX 7000N MODEL ...
Page 576: ...MX7000 US USR Z2 User s Guide MX 5500N MX 6200N MX 7000N MODEL ...