


OPERATION GUIDE - FORWARDING RECEIVED DATA MANUALLY
file:///G|/Documents/Products/MX2610_3110_3610N/Operation%20Manual/MX3610OP_0122A1/mx3610_ex_ope/contents/04-060b.htm[24/03/2011 3:00:28 PM]
MX-2610N / MX-3110N / MX-3610N
FORWARDING RECEIVED DATA MANUALLY
FAX
<
5
steps in all >
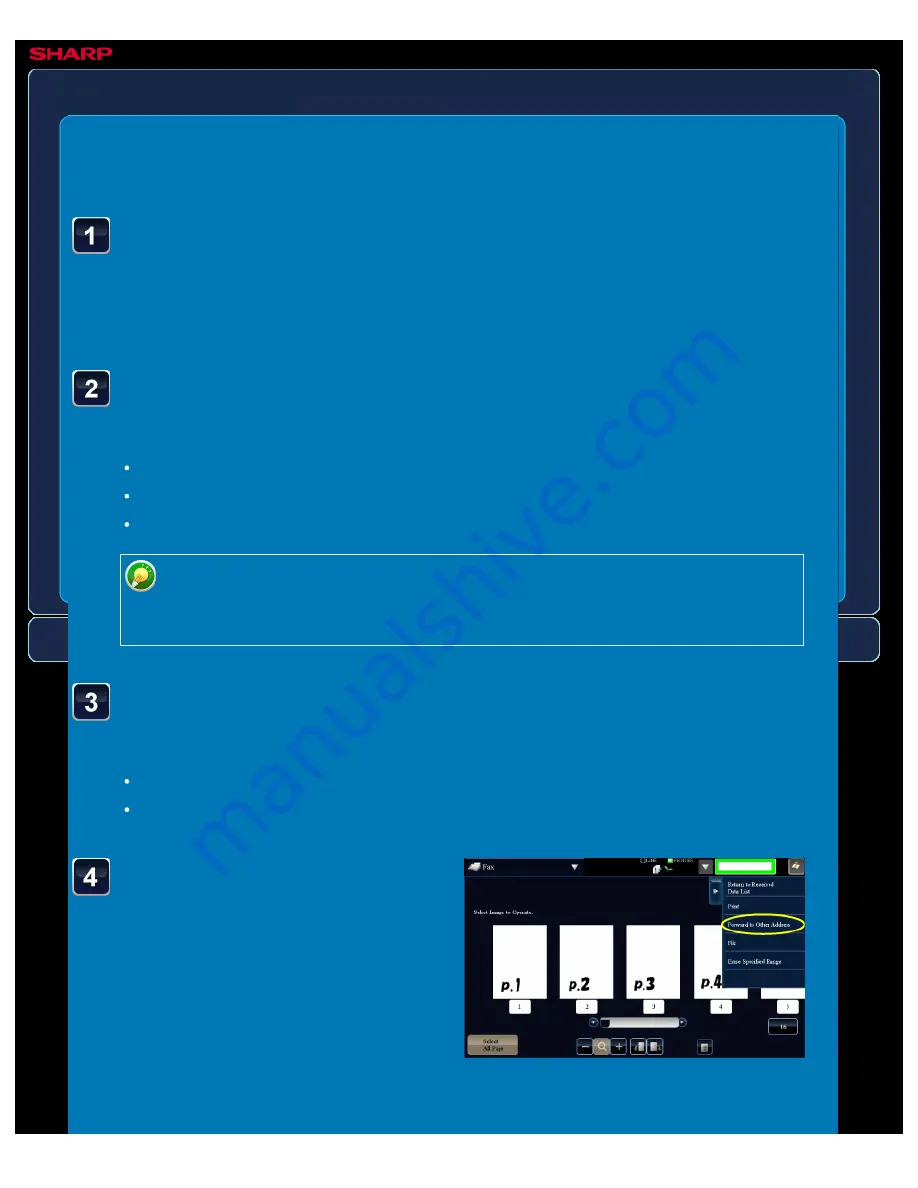
Select the image to
forward, and tap the
[Forward to Other Address]
key on the action panel.
When data is received, the [Received Data] icon appears.
Tap the icon.
You can also display the received data list by tapping the job status display and then
tapping the [Review Received Data] key on the action panel in the job status screen.
Tap the key of the received data you wish to forward, and
tap the [Forward to Other Address] key.
Multiple received data items can be selected.
Specify the destination in the displayed address book screen, and forward the data.
If you wish to select the image to forward, go to step 3.
To store the sender fax number as a number for "Allow/Reject Number Setting",
tap the [Store to Unwanted Fax] key and, in the confirmation message screen,
tap the [Store] key.
Tap the [Image Check] key on the action panel, and tap the
[Forward to Other Address] key.
To show thumbnails of the received images, tap the [Thumbnail] key.
Only one received data can be selected.