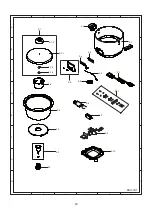
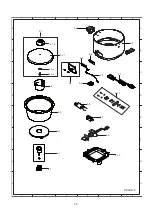
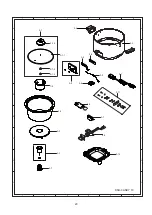
background image

8

1.  Remove the bottom lid in accordance with “REMOVE OF BOTTOM LID”.
2.  Remove the closed terminal holding for the neon lamp lead wires.
3.  Cut the cord band and disconnect terminal from the micro SW.
4.  Remove 2 screws holding the lead wire yellow and lead wire blue from
   2 heater terminals and disconnect terminal from the micro switch.
5.  Remove the screw holding the panel from the outer pot.
6.  Pull the insulator cover from the panel.
7.  Remove the neon lamp ass’y from the panel.
8.  Now the neon lamp ass’y is free.

REMOVE OF NEON LAMP ASSEMBLY

1.  Remove the bottom lid in accordance with “REMOVE OF BOTTOM LID”.
2.  Remove 2 screws holding lead wires from the heater plate ass’y.

3.  Remove 3 screws holding the heater plate ass’y from the reflector.

4.  Now the heater plate ass’y is free.

REMOVE OF HEATER PLATE ASSEMBLY

Heater plate

Screw

Screw

Screw

Reflector

Outer pot

Screw

Fig. 9

Fig. 10

Outer pot

Insulator

Neon lamp ass’y

Panel

Screw

Screw 

Lead wire yellow

Lead wire red

Lead wire yellow

Lead wire blue

Terminal

Micro switch

Closed terminal     

Cord  band     

Heater

terminal

Summary of Contents for KSH-CANDY 11

Page 1: ...CIRCUIT DIAGRAM COMPONENT REPLACEMENT PROCEDURE METHOD OF OPERATION ADJUSTMENT OF SWITCH LEVER AND CONTACTS INSPECTION AFTER REPAIRING TESTING OPERATING CONDITION PROBLEMS AND SOLUTIONS SERVICE PARTS LIST Page 2 3 3 4 5 8 9 10 11 12 12 13 14 23 In the interests of user safety Required by safety regulation in some countries the set should be restore to its original condition and only parts identica...

Page 2: ...SPECIFIC INFORMATION Model Rated voltage V 220 50 Power consumption W Rice cooking Warming Rice cooking capacity Min Product dimension mm Weight kg Rated frequency Hz Max KSH Q11 485 485 42 42 277 277 224 224 216 215 1 5 1 7 600 600 42 6 42 6 325 325 268 268 239 233 1 9 2 3 KSH Q18 KSH CANDY 11 KSH CANDY 18 W D H 0 18 or 1 cup 0 18 or 1 cup 0 36 or 2 cups 0 36 or 2 cups 1 1 or 6 cups 1 1 or 6 cups...

Page 3: ...mostat thus the finish of cooked rice may be made worse 7 Do not immerse the set in water or sprinkling water on the heater plate 8 In case the power cord is broken it must be replaced with specialized power cord or the standard power cord made by manufacturer or appointed service providers 9 Disconnect the plug from the wall outlet every time after use 10 Do not use the cooker on a wet floor unde...

Page 4: ...4 WIRING DIAGRAM CIRCUIT DIAGRAM 220V Micro switch COM NC W H H P Temp fuse Cooking Warming ...

Page 5: ...remove the neon lamp ass y from the panel 4 Now the panel is free 1 Remove the inner pot from the outer pot 2 Remove 2 screws holding handles from the outer pot Model KSH Q11 KSH CANDY 11 3 Remove 4 screws holding handles from the outer pot Model KSH Q18 KSH CANDY 18 4 Now handles are free REMOVE OF PANEL REMOVE OF HANDLE REMOVE OF BOTTOM LID Screw Panel Neon lamp ass y Insulator cover Outer pot H...

Page 6: ...rd the switch lever ass y into the outer pot and remove from the outer pot 6 Now the switch lever ass y is free REMOVE OF SWITCH LEVER ASSEMBLY 1 Remove the bottom lid in accordance with REMOVE OF BOTTOM LID 2 Disconnect 2 terminals from the micro SW 3 Remove the screw holding the micro SW from the SW angle 4 Now the micro SW is free REMOVE OF MICRO SWITCH Fig 5 Micro switch Cord band Reflector Sw...

Page 7: ...inal Lead wire yellow Lead wire blue Terminal Micro SW 1 Remove the bottom lid in accordance with REMOVE OF BOTTOM LID 2 Fix the thermostat rod pull the stop ring by using the pliers and straightening 2 claws of thermostat 3 Remove the thermostat from the thermo plate Fig 5 4 Now the thermostat ass y is free REMOVE OF THERMOSTAT ASSEMBLY 1 Remove the bottom lid in accordance with REMOVE OF BOTTOM ...

Page 8: ...el 7 Remove the neon lamp ass y from the panel 8 Now the neon lamp ass y is free REMOVE OF NEON LAMP ASSEMBLY 1 Remove the bottom lid in accordance with REMOVE OF BOTTOM LID 2 Remove 2 screws holding lead wires from the heater plate ass y 3 Remove 3 screws holding the heater plate ass y from the reflector 4 Now the heater plate ass y is free REMOVE OF HEATER PLATE ASSEMBLY Heater plate Screw Screw...

Page 9: ...following parts should be carefully checked and or repaired in the proper manners 1 Inner pot Outer side It must be cleaned without any contaminants and particles at the bottom for it can be firmly contacted the heater plate evenly Inner side It must be cleaned without dry cooked rice at the bottom otherwise it can be the prevention of heat transmission throughout the inner pot And it may cause te...

Page 10: ... the outer pot with inner pot inside disclose its bottom lid Push cook switch adjust switch lever and switch angle Bottom lid Outer pot Cook switch Inner pot Push the cook switch Cook switch Gap Micro switch Micro switch Switch lever Gap Thermostat rod Reflector Reflector Thermostat ass y Switch lever Inner pot Heater plate A Fig 11 Fig 12 View B B ...

Page 11: ...tely This rice cooker is so designed that the cook switch will not be put in COOK position whenever the inner pot is taken off or not set into the cooker before use Micro switch Switch lever Cook switch Reflector Heater plate Thermostat spring back Thermostat ass y Cook switch spring back Switch lever No gap Thermo plate touch reflector Reflector Thermostat ass y Fig 13 View C C ...

Page 12: ...layer is slightly light drown the cooking operation is acceptable In contrary if cooked rice is brownish of uncompletely cooked thermostat may be fault INSPECTION AFTER REPAIRING 1 Cook switch should be at the center of panel 2 Ensure that there is no any contaminants deposits stains exist on heater plate thermostat and outside bottom of inner pot 3 Firmly put inner pot inside the cooker move inne...

Page 13: ... switch lever 2 Faulty thermostat 3 Deformed inner pot or heater plate 1 Disconnected power cord 2 Faulty wiring 3 Malfunction of switch 4 Disconnected resistor 1 Faulty wiring 2 Faulty heater plate 1 Burned out wire 2 Faulty warm heater 1 Faulty warm heater 2 Disconnected wiring 1 Adjust or replace Boil about 800 cc of water Check the state of bubbles at the bottom of inner pot If bubbles rise up...

Page 14: ...1U1042 KNOB SCREW 1 2 2 11A302 INNER POT 1 2 3 11A303BJ OUTER POT BJ 1 11A303ER OUTER POT ER 1 11A303OT OUTER POT OT 1 11A303PH OUTER POT PH 1 11A303VS OUTER POT VS 1 2 4 11A202BL HANDLE Blue 2 11A202GR HANDLE Green 2 11A202OR HANDLE Orange 2 11A202P HANDLE Pink 2 11A202VL HANDLE Violet 2 2 5 11A203BLASY PANEL ASS Y Blue 1 11A203GRASY PANEL ASS Y Green 1 11A203ORASY PANEL ASS Y Orange 1 11A203PASY...

Page 15: ...CE FEC ELECTRIC PARTS 3 1 1B4934ASY POWER CORD ASS Y 1 3 2 1A2014 HEATER PLATE ASS Y 1 3 3 1A2021ASY THERMOSTAT ASS Y 1 3 4 11A402ASY NEON LAMP ASS Y 1 3 5 1A2394 TEMP FUSE ASS Y 1 3 6 11A401 WARM HEATER ASS Y 1 3 7 2A410 MICRO SWITCH 1 15 ...

Page 16: ... 1 4 130U0414A KNOB SCREW 1 2 2 11A302 INNER POT 1 2 3 11A303GA OUTER POT GA Green Apple 1 11A303SK OUTER POT SK Sunkizt Orange 1 2 4 11A202B HANDLE Black 2 2 5 11A203GAASY PANEL ASS Y GA Green Apple 1 11A203SKASY PANEL ASS Y SK Sunkizt Orange 1 2 6 11A205 INSULATOR COVER 1 2 7 1B2031 THERMOSTAT SPRING 1 2 8 1A2051 THERMO PLATE 1 2 9 11A391SET SWITCH SET 1 2 10 11A305BASY BOTTOM LID ASS Y Black 1 ...

Page 17: ...1 LID KNOB BUSH 1 2 1 4 1A1043 KNOB SCREW 1 2 2 11B302 INNER POT 1 2 3 11B303BJ OUTER POT BJ 1 11B303ER OUTER POT ER 1 11B303OT OUTER POT OT 1 11B303PH OUTER POT PH 1 11B303VS OUTER POT VS 1 2 4 11B202BL HANDLE Blue 2 11B202GR HANDLE Green 2 11B202OR HANDLE Orange 2 11B202P HANDLE Pink 2 11B202VL HANDLE Violet 2 2 5 11B203BLASY PANEL ASS Y Blue 1 11B203GRASY PANEL ASS Y Green 1 11B203ORASY PANEL A...

Page 18: ...CE FEC ELECTRIC PARTS 3 1 1B4934ASY POWER CORD ASS Y 1 3 2 1B2012 HEATER PLATE ASS Y 1 3 3 1A2021ASY THERMOSTAT ASS Y 1 3 4 11B402ASY NEON LAMP ASS Y 1 3 5 1C2392 TEMP FUSE ASS Y 1 3 6 1B4201 WARM HEATER ASS Y 1 3 7 2A410 MICRO SWITCH 1 18 ...

Page 19: ... 1 4 130U0616A KNOB SCREW 1 2 2 11B302 INNER POT 1 2 3 11B303GA OUTER POT GA Green Apple 1 11B303SK OUTER POT SK Sunkizt Orange 1 2 4 11B202B HANDLE Black 2 2 5 11B203GAASY PANEL ASS Y GA Green Apple 1 11B203SKASY PANEL ASS Y SK Sunkizt Orange 1 2 6 11A205 INSULATOR COVER 1 2 7 1B2031 THERMOSTAT SPRING 1 2 8 1A2051 THERMO PLATE 1 2 9 11B391SET SWITCH SET 1 2 10 11B305BASY BOTTOM LID ASS Y Black 1 ...

Page 20: ...E C 6 2 F B 2 H 5 H 3 1 4 E A G F 5 A 3 D D 6 B C G 4 1 1 4 2 2 3 2 3 3 2 10 3 7 3 6 2 11 2 8 2 7 3 5 2 3 3 4 2 6 2 9 2 4 2 1 2 2 1 1 2 1 2 1 3 2 1 4 2 5 KSH Q11 3 1 20 ...

Page 21: ...E C 6 2 F B 2 H 5 H 3 1 4 E A G F 5 A 3 D D 6 B C G 4 1 1 4 2 2 3 2 3 3 2 10 3 7 3 6 2 11 2 8 2 7 3 5 2 3 3 4 2 6 2 9 2 4 2 1 2 2 1 1 2 1 2 1 3 2 1 4 2 5 KSH CANDY 11 3 1 21 ...

Page 22: ...E C 6 2 F B 2 H 5 H 3 1 4 E A G F 5 A 3 D D 6 B C G 4 1 1 4 2 2 3 2 3 3 2 10 3 7 3 6 2 11 2 8 2 7 3 5 2 3 3 4 2 6 2 9 2 1 2 2 1 1 2 4 2 1 2 1 3 2 1 4 2 5 KSH Q18 3 1 22 ...

Page 23: ...E C 6 2 F B 2 H 5 H 3 1 4 E A G F 5 A 3 D D 6 B C G 4 1 1 4 2 2 3 2 3 3 2 10 3 7 3 6 2 11 2 8 2 7 3 5 2 3 3 4 2 6 2 1 2 2 1 1 2 4 2 1 2 1 3 2 1 4 2 5 KSH CANDY 18 3 1 2 9 23 ...

Reviews: