


4-69
This section explains special modes that can be used for fax transmission.
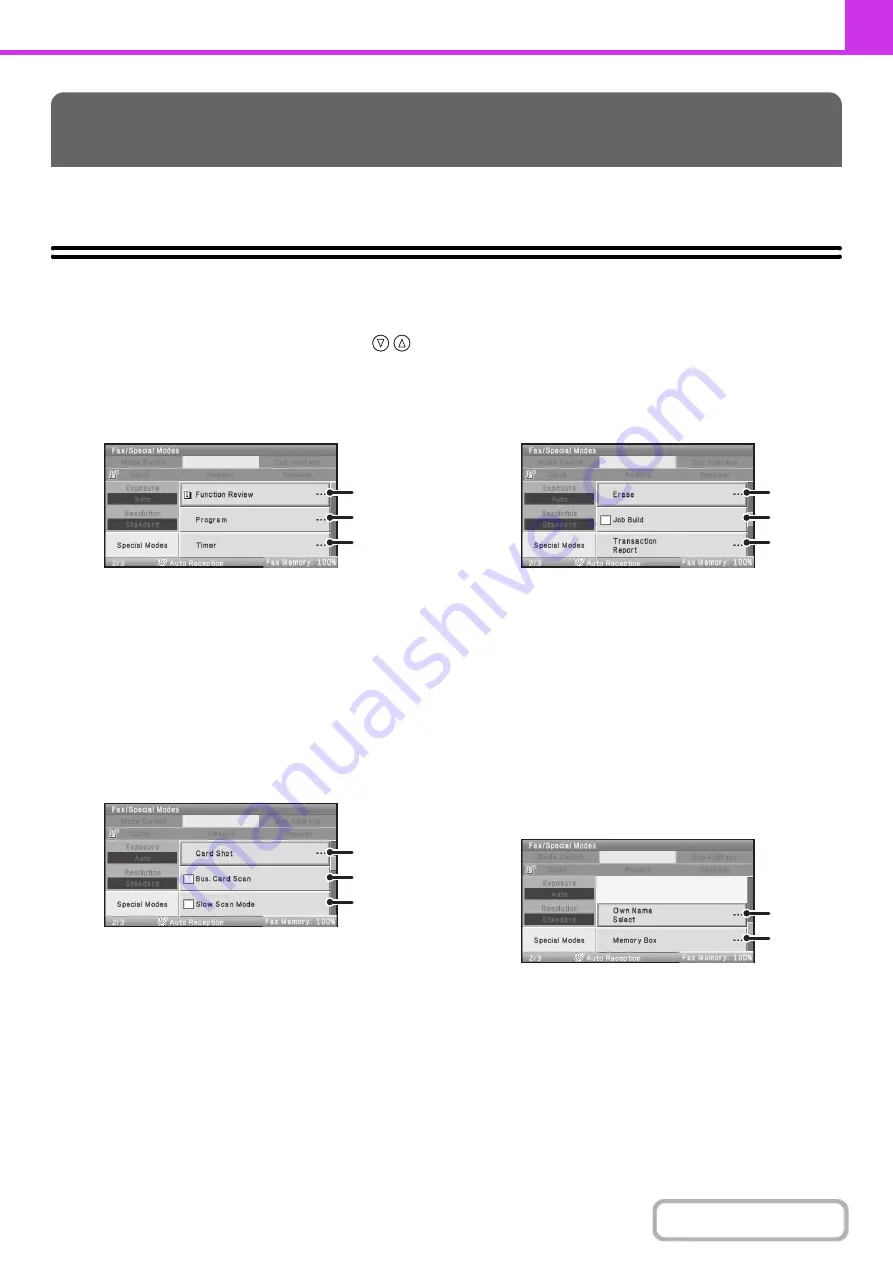
SPECIAL MODES
When the [Special Modes] key is selected in the base screen, the special modes menu screen appears. The special
modes menu consists of five screens. Press
the
key to switch between the five screens. When the [Basic Menu]
key is selected in the special modes screen, the selected settings are entered and the base screen reappears.
1st screen
(1)
[Function Review] key*
1
Select this key to check the special mode settings.
(2)
[Program] key
☞
STORING FAX OPERATIONS (Program)
(page
4-71)
(3)
[Timer] key
☞
SENDING A FAX AT A SPECIFIED TIME (Timer)
(page 4-74)
2nd screen
(1)
[Card Shot] key
☞
SENDING BOTH SIDES OF A CARD AS A SINGLE
PAGE (Card Shot)
(page 4-76)
(2)
[Bus. Card Scan] checkbox*
2
☞
SENDING BUSINESS CARDS (Business Card
Scan)
(3)
[Slow Scan Mode] checkbox
☞
FAXING THIN ORIGINALS (Slow Scan Mode)
(page
4-80)
3rd screen
(1)
[Erase] key
☞
ERASING PERIPHERAL SHADOWS ON THE
IMAGE (Erase)
(2)
[Job Build] checkbox
☞
SENDING A LARGE NUMBER OF PAGES (Job
Build)
(3)
[Transaction Report] key
☞
CHANGING THE PRINT SETTINGS FOR THE
TRANSACTION REPORT (Transaction Report)
(page 4-87)
4th screen
(1)
[Own Name Select] key
☞
TEMPORARILY CHANGING THE SENDER
INFORMATION (Own Name Select)
(2)
[Memory Box] key
☞
SENDING A FAX WHEN ANOTHER MACHINE
POLLS YOUR MACHINE (Polling Memory)
(page
4-94)
SPECIAL MODES
(1)
(2)
(3)
(1)
(2)
(3)
(1)
(2)
(3)
(1)
(2)
Summary of Contents for DX-C310 Operation
Page 5: ...Make a copy on this type of paper Envelopes and other special media Transparency film ...
Page 10: ...Conserve Print on both sides of the paper Print multiple pages on one side of the paper ...
Page 33: ...Search for a file abc Search for a file using a keyword ...
Page 34: ...Organize my files Delete a file Periodically delete files ...
Page 226: ...3 18 PRINTER Contents 4 Click the Print button Printing begins ...