background image

1/2/07

CD-SW300H-330H_FRONT.fm

TINSZA165AWZZ

SYSTEM MINIWIE

Ż

Y

MINISYSÉM
MINI KOMPONENT SYSTÉM
MINI KOMPONENS RENDSZER 

М

IHI 

КОМПОНЕНТНА


СИСТЕМА

MINI COMPONENT SYSTEM

MODEL
MODEL
MODEL

MODELLSZÁM

МОДЕЛЬ

MODEL

System miniwie

ż

y CD-SW330H sk

ł

ada si

ę

 z nast

ę

puj

ą

cych elementów: CD-

SW330H (jednostka g

ł

ówna), CP-SW330H (g

ł

o

ś

nik przedni) i CP-SW330H (sub-

woofer).

Minosystém CD-SW330 se skládá z CD-SW330H (hlavní jednotka), CP-

SW330H (p

ř

ední reproduktor) a  CP-SW330H (subwoofer).

Mini komponent systém CD-SW330H sa skladá z CD-SW330H (hlavná jed-

notka), CP-SW330H (

č

elný reproduktorov) a CP-SW330H (subwoofer).

A CD-SW330 Mini komponens rendszer egy CDSW330H egységb

ő

l (f

ő

egység), egy CP-SW330H egységb

ő

l (els

ő

 hangszóró) és egy CP-SW330H

egységb

ő

l (subwoofer) áll. 

Міні


компонентна


система

 CD-SW330 

складається


з

 CD-SW330H (

головний

блок

), CP-SW330H (

передній


гучномовець

та

  CP-SW330H (

сабвуфер

). 

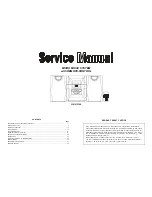
CD-SW330H Mini Component System consists of CD-SW330H (main unit),

CP-SW330H (front speaker) and CP-SW330H (subwoofer).

CD-SW330H


INSTRUKCJA OBS

Ł

UGI

NÁVOD K POUŽITÍ
NÁVOD NA POUŽÍVANIE

HASZNÁLATI ÚTMUTATÓ

ІНСТРУКЦІЯ


З


ЕКСПЛУАТАЦІЇ

OPERATION MANUAL

Summary of Contents for CD-SW330H

Page 1: ...ent systém CD SW330H sa skladá z CD SW330H hlavná jed notka CP SW330H čelný reproduktorov a CP SW330H subwoofer A CD SW330 Mini komponens rendszer egy CDSW330H egységből fő egység egy CP SW330H egységből első hangszóró és egy CP SW330H egységből subwoofer áll Міні компонентна система CD SW330 складається з CD SW330H головний блок CP SW330H передній гучномовець та CP SW330H сабвуфер CD SW330H Mini ...

Page 2: ...ąć wtyczkę z gniazdka elektrycz nego z Nagrań audiowizualnych chronionych prawami autorski mi nie można kopiować bez zgody właściciela tych praw Prosimy o postępowanie zgodne z obowiązującym pra wem z Urządzenie należy chronić przed zalaniem i wilgocią z Produkt jest urządzeniem laserowym klasy 1 z Korzystanie z przycisków lub regulatorów w sposób inny niż opisany w niniejszej instrukcji oraz wyko...

Page 3: ...nić że odpady zostaną poddane przetworzeniu odzyskowi i recyklingowi a tym samym zapobiec potencjalnym negatywnym skutkom dla środowiska naturalnego i zdrowia ludzkiego które w przeciwnym razie mogłyby mieć miejsce na skutek niewłaściwej obróbki odpadów 2 Kraje pozaunijne Jeśli chcą Państwo pozbyć się produktu należy skontaktować się z władzami lokalnymi i uzyskać informacje na temat prawidłowej m...

Page 4: ...e li přístroj delší dobu používat odpojte napájecí kabel z elektrické zásu vky z Audiovizuální nahrávky chraněné autorským právem nesmí být kopírované bez souhlasu majitele Postupujte v souladu s právem z Zabraňte kontaktu přístroje s vodou a vlhkem z Je to laserový výrobek třídy 1 z Použití ovladačů nastavení nebo procedur jiných než zde uvedených může způsobit vystavení se nebezpečnému laserovém...

Page 5: ... odpad vhodným způsobem zlikvidován obnoven a recyklován a zabráníte tak možnému poškození život ního prostředí a zdraví obzvatel ke kterému by mohlo dojít v případě nesprávné likvidace 2 V ostatních zemích mimo Evropskou unii Chcete li tento výrobek zlikvidovat obrat te se na místní orgány které vás seznámí s vhodnou metodou likvi dace B Informace o likvidaci pro podnikatelské subjekty 1 V zemích...

Page 6: ...zásuvky z Audiovizuálne záznamy ktoré sú chránené autorskými právami nesmiete kopírovat bez súhlasu ich majiteľa Prosíme postupujte v súlade s platnými právnymi pred pismi z Zariadenie nevystavujte pôsobeniu vlkosti a dbajte aby sa do jednotky nedostala voda z Výrobok je laserová jednotka 1 triedy z Použivanie tlačidiel alebo ovládačov iným spôsobom než je popísané v tejto príručke a využivanie za...

Page 7: ...ení toho aby odpad prešiel potrebnou úpravou ob novou a recykláciou a takto sa predchádzalo možným negatívnym vplyvom na životné prostredie a zdravie os ôb ku ktorým by inak mohlo dochádzat v dôsledku nevhodného zaobchádzania s odpadom 2 V ostatných štátoch mimo EÚ Ak si želáte znehodnotit tento výrobok obrát te sa na vaše miestne orgány a informujte sa o správnej metóde likvidácie B Informácie o ...

Page 8: ... országban érvényes jogszabályok az irányadók z A tűzveszély és az áramütés megelőzése érdekében ügyeljen arra hogy a készülék ne érintkezzen foly adékokkal Ne helyezzen semmilyen folyadékkal töltött tár gyat pl vázát a készülékre z A készülék 1 OSZTÁLYBA SOROLT LÉZERTERMÉK z A kezelőszervek kézikönyvtől eltérő módon való használata valamint a kézikönyvben ismertetett beállításoktól műveletektől v...

Page 9: ... a szükséges kezelésen visszanyerési és újrahasznosítási eljáráson ezáltal közreműködik a lehetséges káros környezeti és humán egészségi hatások megelőzésében amelyek ellenkező esetben a helytelen hulladékkezelés következtében előállhatnának 2 Az EU n kívüli egyéb országokban Ha a terméket ki szeretné selejtezni kérjük forduljon az önkormányzathoz és érdeklődjön a helyes hulladékelhelyezési módsze...

Page 10: ...стувалися пристроєм слід витягнути штепсель з електричної розетки z Аудіовізуальні записи які захищені відповідними параграфами авторського права забороняється копіювати без дозволу власника авторських прав Поступайте згідно із діючим законодавством z Оберігайте пристрій від від дії води та вологи z Даний продукт є лазерним пристроєм класу 1 z Використання кнопок або регуляторів незгідно із їх при...

Page 11: ...а буде запобігти потенційним негативним наслідкам для натураль ного середовища та людського здоров я які в свою чергу можуть мати місце у випадку неправильної утилізації відходів 2 Країни які не входять в ЄС Якщо Ви хочете усунути даний продукт слід сконтактуватися із відповідними місцевими владами які повинні надати Вам інформацію про правильну утилізацію даного продукту B Інформація про утилізац...

Page 12: ...the copyright Please refer to relevant law in your country z To prevent fire or shock hazard do not expose this appliance to dripping or splashing No objects filled with liquids such as vases shall be placed on the appara tus z This product is classified as a CLASS 1 LASER PRODUCT z Use of controls adjustments or performance of proce dures other than those specified herein may result in haz ardous...

Page 13: ... en sure that the waste undergoes the necessary treatment recovery and recycling and thus prevent potential nega tive effects on the environment and human health which could otherwise arise due to inappropriate waste han dling 2 In other Countries outside the EU If you wish to discard this product please contact your local authorities and ask for the correct method of dis posal B Information on Di...

Page 14: ...ils please visit http mp3licensing com MPEG Layer 3 audio coding technology licensed from Fraunhofer IIS and Thomson Accessories Please confirm that the following accessories are included Note Only the above accessories are included Contents Page General Information Precautions 2 Controls and indicators 3 6 Preparation for Use System connections 7 9 Remote control 10 Basic Operation General contro...

Page 15: ...it with a voltage other than that which is specified Volume control The sound level at a given volume setting depends on speaker effi ciency location and various other factors It is advisable to avoid ex posure to high volume levels Do not turn the volume on to full at switch on and listen to music at moderate levels Excessive sound pressure from earphones and headphones can cause hearing loss z D...

Page 16: ... 9 Headphone Socket 40 10 Game Video Input Sockets 39 11 Disc Tray Open Close Button 13 12 Disc Number Select Buttons 13 13 Volume Control 11 14 Disc or Tape Stop Button 15 26 15 Disc Play or Repeat Tape Play Button 13 16 25 16 Disc Track Up or Fast Forward Tape 2 Fast Forward Tuner Preset Up Time Up Button 12 15 24 26 17 Disc Track Down or Fast Reverse Tape 2 Rewind Tuner Preset Down Time Down Bu...

Page 17: ...cator 20 15 Daily Timer Indicator 36 16 FM Stereo Mode Indicator 23 17 FM Stereo Receiving Indicator 23 18 Tape Play Indicator 25 19 Memory Indicator 18 22 24 20 Extra Bass Indicator 11 21 Disc Repeat Play Indicator 17 22 Disc Pause Indicator 15 23 Disc Play Indicator 14 Rear panel Reference page 1 Cooling Fan 9 2 AC Power lead 9 3 FM 75 Ohms Aerial Socket 8 4 AM Aerial Earth Terminal 8 5 AM Loop ...

Page 18: ...ontrols and indicators continued Front Speaker 1 Tweeter 2 Super Tweeter 3 Woofer 4 Bass Reflex Duct 5 Speaker Wire 6 Speaker Light Up Wire Subwoofer 1 Subwoofer 2 Bass Reflex Duct 3 Subwoofer Light Up Wire 4 Speaker Wire 1 1 2 3 1 1 2 4 4 3 5 6 ...

Page 19: ...Tape Stop Button 26 17 Memory Button 12 18 24 35 18 Disc Pause Button 15 19 Disc Play or Repeat Button 13 20 Tape Play Button 25 21 Tape 2 Record Pause Button 27 22 Tuning Up Cursor Up Button 23 23 Disc Track Up or Fast Forward Tape Fast Forward Tuner Preset Up Time Up Cursor Right Button 12 15 24 26 24 Disc Track Down or Fast Reverse Tape Rewind Tuner Preset Down Time Down Cursor Left Button 12 1...

Page 20: ...ofer Right speaker Speaker connection see page 8 Aerial connection see page 8 Make sure to unplug the AC power lead before any connections FM aerial AM loop aerial Subwoofer Light up wire AC power connection see page 9 Wall socket AC 230 V 50 Hz Speaker light up wire Speaker light up wire ...

Page 21: ... FM aerial Connect the FM aerial wire to the FM 75 OHMS socket and position the FM aerial wire in the direction where the strongest signal can be received Supplied AM loop aerial Connect the AM loop aerial to the AM and EARTH GND terminals Position the AM loop aerial for optimum reception Place the AM loop aerial on a shelf etc or attach it to a stand or a wall with screws not supplied Assembling ...

Page 22: ...FM aerial is used disconnect the supplied FM aerial wire Cooling fan The main unit is built with a cooling fan at the rear of the unit for improved cooling Please do not cover the opening of the fan with any obstacles as this will block proper ventilation Table Floor Left speaker Main unit Right speaker Subwoofer Wall socket AC 230 V 50 Hz AC INPUT AC INPUT The first time the unit is plugged in th...

Page 23: ...UM SUM 3 R6 HP 7 or similar z Periodically clean the transmitter on the remote control and the sensor on the unit with a soft cloth z Exposing the sensor on the unit to strong light may interfere with operation Change the lighting or the direction of the unit z Keep the remote control away from moisture heat shock and vibrations Test of the remote control Check the remote control after checking al...

Page 24: ... will be displayed To change to a different mode press the EQUALIZER MODE button repeatedly until the desired sound mode appears Note If the EQUALIZER MODE button is pressed in the surround mode it will be cancelled automatically After use Press the ON STAND BY button to enter the power stand by mode Main unit operation When the VOLUME control is turned clockwise the volume will increase When it i...

Page 25: ...ur dis play will be skipped To change the 24 hour or 12 hour display 1 Press the ON STAND BY button to turn the power on 2 Press the CLOCK TIMER button 3 Within 10 seconds press the or button to select CLOCK and press the MEMORY button 4 Press the or button to select 24 hour or 12 hour display and then press the MEMORY button The 24 hour display will appear 0 00 23 59 The 12 hour display will appe...

Page 26: ...z Bitrate which is supported by MP3 is 32 320 kbps WMA WMA files are Advanced System Format files that include audio files which are compressed with Windows Media Audio codec WMA is developed by Microsoft as an audio format file for Windows Media Player z MP3 or WMA indicator will light up after the unit reads information on an MP3 or WMA disc z Bitrate which is supported by WMA is 64 160 kbps Aut...

Page 27: ... will not function If this occurs press the ON STAND BY button to enter the power stand by mode and then turn the power on again z If TV or radio interference occurs during CD operation move the unit away from the TV or radio z If a disc is damaged dirty or loaded upside down the disc will skip or not play 1 Press the ON STAND BY button to turn the power on 2 Press the CD button 3 Press the 1 butt...

Page 28: ...y Press in the stop mode Stop Press in the playback mode Pause Press in the playback mode Press the button to resume play back from the paused point Track up Track down Press in the playback or stop mode If you press the button in the stop mode press the button to start the desired track Fast for ward Fast reverse Press and hold down in the playback mode Release the button to resume playback z Tra...

Page 29: ...e disc is stopped press the button to start the desired track on the current disc Notes z A track number higher than the number of tracks on the disc can not be selected z During random play direct search is not possible 1 Press one of the 1 5 buttons to select the desired disc 2 Within 5 seconds press the button on the main unit Selected disc number Use the direct search buttons on the remote con...

Page 30: ...andom operation On the other hand the button does not allow you to move to the previous track The be ginning of the track being played will be located z In random play the unit will select and play tracks automatically You cannot select the order of the tracks Caution After performing repeat or random play be sure to press the CD button Otherwise the disc s will play continuously To repeat one dis...

Page 31: ...he stand by mode or change the function from CD to another the programmed selections will not be cleared z During the programme operation random play is not possible 1 Whilst in the stop mode press the MEMORY button on the remote control to enter the programming save mode 2 Press one of the 1 5 buttons to select the desired disc 3 Press the direct search buttons on the remote control to select the...

Page 32: ... on your PC connect words with hyphens This product recognises the first word as title 1 second one as title 2 and third one as title 3 Up to three words can be recognised Notes z MP3 files must have the extension mp3 z WMA files must have the extension wma z Up to 100 folders or 300 files can be read on the unit If either limit is exceeded no more folders files are displayed z This unit recognise...

Page 33: ... NAVI READ appears and the display shows the total number of folders and files on the selected disc 4 Press the NAVIGATION button 5 Press the or cursor button on the remote control to select FOL T 1 T 2 or T 3 To search files by folder name select FOL will flash The following steps describe file search by folder 6 Press the ENTER button The total number of folders or titles appears for 2 seconds a...

Page 34: ... or button to go to the next page of character display 6 Press the CHARACTER button and the active character will be entered in the 2nd row of the display To delete an entered character move the cursor to the character with the or button and press the CLEAR DIMMER button on the remote control 7 Repeat steps 5 and 6 to enter characters In the folder or title name search you do not have to enter the...

Page 35: ... button z If you press the RANDOM button in the stop mode the MP3 WMA navigation mode will be cancelled If tracks are programmed using track numbers see Programmed play on page 18 In the MP3 WMA navigation mode only programme by folder or title name are played When you exit the mode the programme by folder or title name are cleared When you exit the MP3 WMA navigation mode programme by track numbe...

Page 36: ...pear z Full auto tuning can be achieved for RDS stations ASPM see page 30 To receive an FM stereo transmission Press the TUNER BAND button to select stereo mode and ST indicator will be display z will appear when an FM broadcast is in stereo z If the FM reception is weak press the TUNER BAND button to extinguish the ST indicator The reception changes to monaural and the sound becomes clearer 1 Pre...

Page 37: ...r starting with preset channel 1 4 Within 30 seconds press the MEMORY button to store that station in memory If the MEMORY and preset number indicators disappear before the station is memorised repeat the operation from step 2 5 Repeat steps 1 4 to set other stations or to change a preset station When a new station is stored in memory the station previously memorised for that preset channel number...

Page 38: ...f tape operation the main unit enters the stand by mode after 15 minutes of inactivity Before playback z For playback use normal or low noise tapes for the best sound Metal or CrO tapes are not recommended z Do not use C 120 tapes or poor quality tapes as they may cause malfunctions z Before loading a tape into the cassette compartment tighten the slack with a pen or a pencil 1 Press the ON STAND ...

Page 39: ... mode TAPE 2 only Before recording z When recording important selections make a preliminary test to ensure that the desired material is properly recorded z SHARP is not liable for damage or loss of your recording arising from malfunction of this unit z The volume and sound controls can be adjusted with no effect on the recorded signal Variable Sound Monitor z For recording use only normal tapes Do...

Page 40: ...side to be recorded on facing you Wind past the leader of the tape on which recording cannot be performed 4 Press the button Recording will be paused 5 Press one of the 1 5 buttons to select the desired disc 6 Within 5 seconds press the button to start recording z Recording is started from the selected disc When the playback of the last track is finished or the end of the tape is reached the disc ...

Page 41: ...see page 23 2 Load a cassette into the TAPE 2 cassette compartment with the side to be recorded on facing you Wind past the leader of the tape on which recording cannot be performed 3 Press the button Recording will be paused 4 Press the TAPE button to start recording 1 Press the ON STAND BY button to turn the power on 2 Load a prerecorded cassette into the TAPE 1 cassette compartment Insert a bla...

Page 42: ...isplay when the received broadcast carries traffic information and TA Traffic Announcement will appear whilst a traffic information is on air PTYI Dynamic PTY Indicator will appear whilst the Dynamic PTY station is received You can control the RDS by using the buttons on the remote control only Information provided by RDS Each time the RDS DISPLAY button is pressed the display will switch as follo...

Page 43: ...f new stations you can store will be less 1 Press the TUNER BAND button to select the FM band 2 Press and hold down the RDS ASPM button for at least 3 seconds 1 After ASPM has flashed for about 4 seconds scanning will start 87 50 108 00 MHz 2 When an RDS station is found RDS will appear for a short time and the station will be stored in memory 3 After scanning the number of stations stored in memo...

Page 44: ...nts occur it does not mean that the unit is faulty z PS NO PS and a station name appear alternately and the unit does not operate properly z If a particular station is not broadcasting properly or a station is conducting tests the RDS reception function may not work properly z When you receive an RDS station whose signal is too weak information like the station name may not be displayed z NO PS NO...

Page 45: ...RDS PTY button SELECT and PTY TI will appear alternately for about 6 seconds 3 Within 6 seconds press the PRESET or button to se lect the programme type Each time the button is pressed the programme type will appear If the button is held down for more than 0 5 seconds the programme type will appear continuously 4 Whilst the selected programme type is flashing within 6 seconds press the RDS PTY but...

Page 46: ...elect the FM band 2 Press the PRESET or button to select a desired station 3 The station name will be displayed for 6 seconds Then the display will change NEWS Short accounts of facts events and publicly expressed views reportage and actuality AFFAIRS Topical programme expanding or enlarging upon the news generally in different presentation style or concept including debate or analysis INFO Progra...

Page 47: ...deas and opportunities Not for use for announce ments about problems delays or roadworks affect ing immediate travel where TP TA should be used LEISURE Programmes concerned with recreational activities in which the listener might participate Examples include Gardening Fishing Antique collecting Cooking Food Wine etc JAZZ Polyphonic syncopated music characterised by improvisation COUNTRY Songs whic...

Page 48: ... once timer recording works for one time only at a preset time For example if you are away but want to record a programme on a radio station Daily timer Daily timer play or daily timer recording works at the same preset time every day For example set the timer as a wake up call every morning 1 Set the daily timer pages 35 37 2 Set the once timer pages 35 37 Start Daily timer Once timer 1 minute or...

Page 49: ...on 8 Set the time to finish as in steps 6 and 7 above White Red 9 Switch input with the or button and then press the MEMORY button To select the timer playback source CD TUNER TAPE 1 or TAPE 2 To select the timer recording source TUNER z When you select the tuner select a station by pressing the or button and then press the MEMORY button z If a station has not been programmed NO PRESET will be dis...

Page 50: ...nected to the GAME INPUT sockets select GAME in step 9 This unit will turn on or enter the power stand by mode automatically however the connected unit will not turn on or off 1 Press the CLOCK TIMER button 2 Within 10 seconds press the or button to select ONCE or DAILY and press the MEMORY button 3 Within 10 seconds press the or button to select ONCE CALL or DAILY CALL and press the MEMORY button...

Page 51: ...conds press the or button to select SLEEP and press the MEMORY button 4 Press the or button to select the time Maximum 3 hours Minimum 1 minute z 3 hours 5 minutes 5 minute intervals z 5 minutes 1 minute 1 minute intervals 5 Press the MEMORY button SLEEP will appear 6 The unit will enter the power stand by mode automatically after the preset time has elapsed The volume will be turned down 1 minute...

Page 52: ... GAME VIDEO To record on a tape from game VCR etc AC INPUT GAME or VCR DVD etc Red Yellow Yellow To the line output sockets RCA lead not supplied Video cable not supplied Red White To video input socket Video cable not supplied Yellow TV Yellow White 1 Connect a video game system VCR DVD etc to the front GAME INPUT VIDEO AUDIO L and R sockets 2 Connect a TV to the rear VIDEO OUT sockets Switch the...

Page 53: ...Possible cause z The clock is not set to the correct time z Did a power failure occur Reset the clock Refer to page 12 z When a button is pressed the unit does not respond z Set the unit to the power stand by mode and then turn it back on z If the unit still malfunctions reset it Refer to page 42 z No sound is heard z Is the volume level set to 0 z Are the headphones connected z Are the speaker wi...

Page 54: ...ty z Is it a normal tape You cannot record on a metal or CrO tape z Cannot erase completely z Sound skipping z Is there any slack z Cannot hear treble z Is the tape stretched z Sound fluctuation z Are the capstans pinch rollers or heads dirty z Cannot remove the tape z If a power failure occurs during playback the heads remain engaged with the tape Do not open the compartment with great force Symp...

Page 55: ... will erase all data stored in memory including clock timer settings tuner preset and CD programme Before transporting the unit Remove all CDs from the unit Make sure there is no CD in the disc tray Then set the unit to the power stand by mode Carrying the unit with discs left inside can damage the unit Care of compact discs Compact discs are fairly resistant to damage however mistracking can occu...

Page 56: ...de of the unit It may cause malfunctions Specifications As part of our policy of continuous improvement SHARP reserves the right to make design and specification changes for product improvement without prior notice The performance specification figures indicated are nominal values of production units There may be some deviations from these values in individual units General This power consumption ...

Page 57: ...iliary audio signal 500 mV 47 k ohms Game Video 1Vp p Frequency response 50 14 000 Hz normal tape Signal noise ratio 55 dB TAPE 1 playback 50 dB TAPE 2 recording playback Wow and flutter 0 3 DIN 45 511 Type 3 way type speaker system Super tweeter 5 cm 2 tweeter 16 cm 6 5 16 woofer Maximum input power 230 W Rated input power 115 W Impedance 6 ohms Dimensions Width 200 mm 7 7 8 Height 330 mm 13 Dept...

Page 58: ...NOTATKI POZNÁMKY POZNÁMKY JEGYZETEK НОТАТКИ MEMO ...

Page 59: ...NOTATKI POZNÁMKY POZNÁMKY JEGYZETEK НОТАТКИ MEMO ...

Page 60: ...TINSZA248AWZZ 07B R KI 1 SHARP ELECTRONICS Europe GmbH Sonninstraße 3 D 20097 Hamburg SHARP CORPORATION ...

Page 61: ...CD SW330H MINI COMPONENT SYSTEM U P DOWN ...

Reviews: