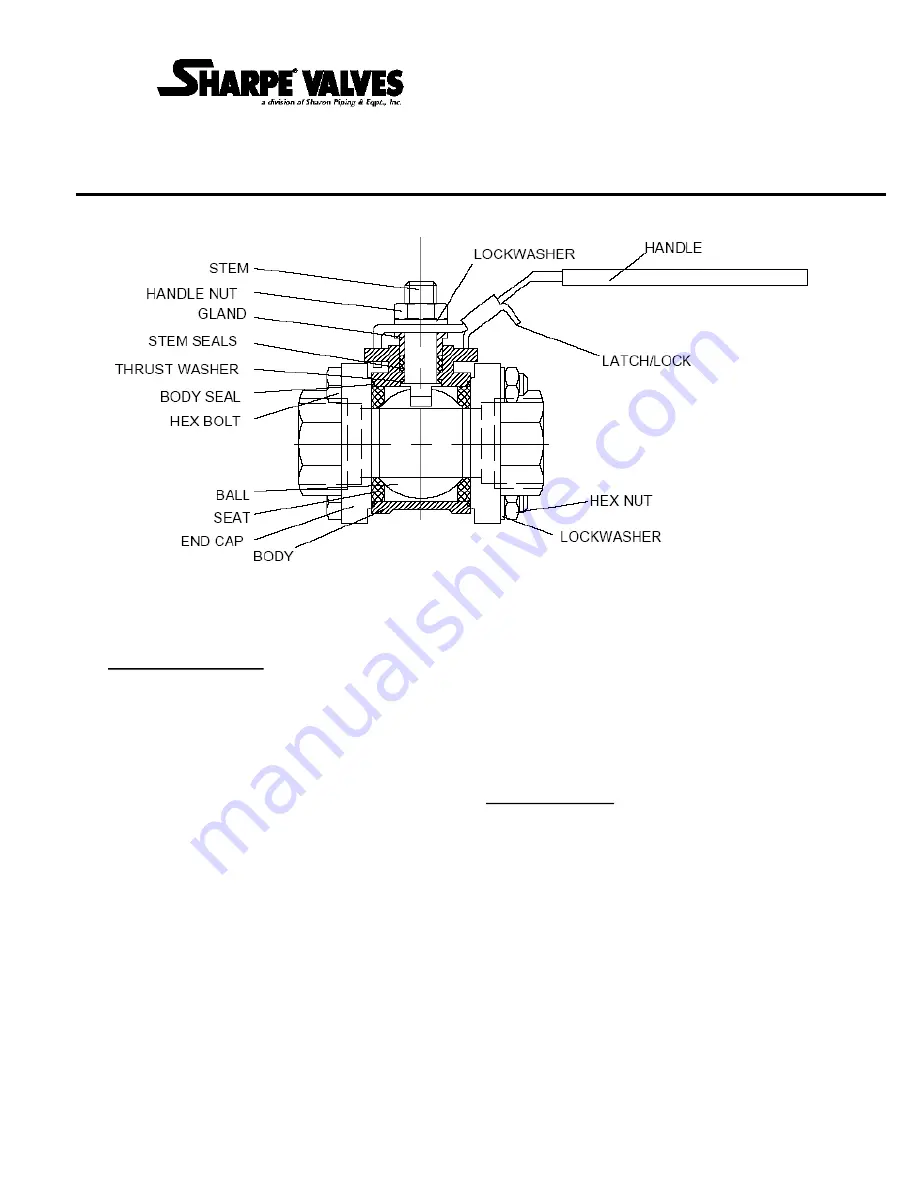
3-PIECE FULL PORT BALL VALVE
–
MODELS 53034 & 53036
INSTALLATION, OPERATION, AND MAINTENANCE INSTRUCTIONS
IM-53-1 (6/04)
INSTALLATION
:
These valves may be installed in the pipeline in
any orientation or position, using good piping
practice. For threaded end valves, use a
suitable joint compound or TFE tape on pipe
threads for ease of fit-up.
Welding End Valves:
Socket weld and butt weld end valves must be
partially disassembled to prevent heat damage
during welding of the soft plastic seats and seals
in the valve. Prior to disassembly, the valve
may be temproarily fitted in line, and the ends
tack-welded to the piping for alignment
purposes.
With the valve in the open position, remove the
body hex nuts and lockwashers, and the body
hex bolts. Carefully lift out the center section,
making sure that the seats and body seals are
held in position. Place the center section in a
clean area where it will not be damaged, and
complete the welding of the end caps to the
piping.
When the welds are cool to the touch, reinstall
the center section of the valve between the body
end caps. Take care that the seats and seals
are in place, and have not been damaged. Re-
install the body bolting, and tighten following the
“Assembly” instructions on the following page.
OPERATION:
These are quarter-
turn (90° rotation) ball valves,
and are normall fitted with a latching lever
handle for manual operation. The handles also
contain travel stop tabs at the open and closed
positions. To open the valve, lift the latch/lock
slider up, and turn the handle clockwise. To
close the valve, lift the latch/lock and turn the
handle counterclockwise.
For valves fitted with power actuators, operating
instructions are contained in the manuals
supplied with the actuator and accessories.


