


SerVision
Embedded Video Gateway System Guide
Appendix A: Viewing Video on a CCTV Monitor (TV-Out)
230
4. Under
Timeout
, select the up and down arrows (
and
) to specify the hours and minutes of the screen-
saver timeout. The screen saver is activated when the mouse has not been moved for this amount of time.
5. When you are finished configuring the switch delay and screen saver settings, exit the menu by selecting one
of the following buttons:
Done:
Return to live video display. The settings remain in effect until they are manually changed again or
until the Video Gateway restarts. When the unit restarts, the previous settings are implemented again.
Save:
Save the settings on the Video Gateway. The next time the unit restarts, the unit’s configuration is
updated with the new settings. The settings remain in effect until they are manually changed again, either
on the monitor or in the configuration utility.
Back:
Return to the
Config
menu. The settings remain in effect until they are manually changed again or
until the Video Gateway restarts. When the unit restarts, the previous settings are implemented again.
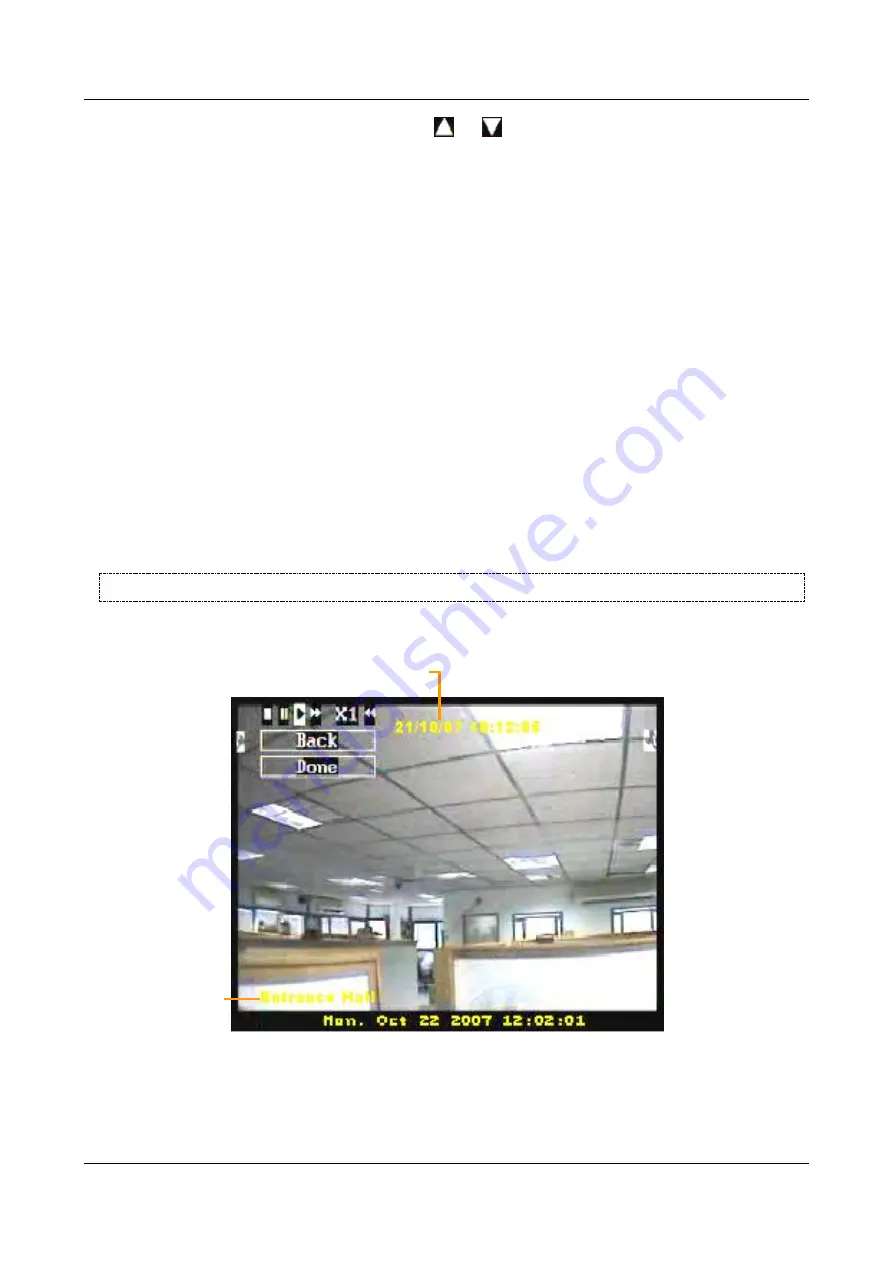
Adjusting On-Screen Information Display
The On-Screen Display (OSD) options control how information is displayed in the video panes. Each pane can have
one or two banners superimposed on the video:
Lower banner:
When displayed, this banner indicates the name of the camera whose video is displayed in the
pane. The name can be displayed as it appears in the configuration utility – for example, “Back Door” – or it
can simply be the camera number – for example, “Camera 1.”
Upper banner:
For camera panes in which recorded video is being played, this banner can provide a
timestamp, indicating the date and time at which the recording was made.
NOTE:
Banners require
a lot of system resources. If your system appears overloaded, try removing them.
The color of the lettering of the banners can be configured to maximize its visibility.
Figure 272: Camera pane with Timestamp and Camera Name banners displayed (full-screen camera pane)
Initial OSD settings are defined in the configuration utility (see
You can modify these settings on the monitor, and, if you wish, save the new settings to the unit’s configuration.
Camera name
Timestamp