Senrigan GP-35 Brushless Gimbal
Instruction Manual
Page 1 of 19
Page 1: ...Senrigan GP 35 Brushless Gimbal Instruction Manual Page 1 of 19...
Page 2: ...For Assembly 5 4 Assembly Steps Mechanism Parts 6 5 Assembly Steps IMU Mounting 12 6 Assembly Steps Power Connection and Manually Tilting 14 7 Assembly Steps Setup Manual Tilting on NAZA 16 8 Power On...
Page 3: ...Last but not the least GP 35 Gimbal comes with an AV Output cable which allows GoPro 3 camera to transmit the video signal down to the ground by using an FPV system not included So that you will see w...
Page 4: ...Soft IMU Cable 1pcs New BL Gimbal Motor 2208 2pcs CNC Metal Parts A Side Camera Cover B Upper Camera cover C Motor Mount D Front arm E Rear arm Lower Damper Plate 1pcs Rubber Tension Damper Balls 6pc...
Page 5: ...rew 8pcs Black Philip Screw 2pcs M3 Set Screw 3pcs 3 Equipment Required For Assembly 1pcs Gopro3 Camera 1 complete set of DJI Phantom Important Before install GP 35 Gimbal on your Phantom make sure it...
Page 6: ...sing M2 5x6mm Hex Cap Screws which is included with the motor This is the Tilt Axis Apply little amount of Thread Locker when securing screw to metal parts Step 3 Install the Upper Camera cover onto t...
Page 7: ...y little amount of Thread Locker when securing screw to metal parts Step 6 Complete assembly Step 7 Install the Front Arm onto the Front Side of BL Gimbal Motor using M2 5x6mm Hex Cap Screws which is...
Page 8: ...to the installation direction of the Lower Damper Plate Apply little amount of Thread Locker when securing screw to metal parts Step 10 Complete assembly Step 11 Insert the cable of the Tilt Motor in...
Page 9: ...ep 14 Complete assembly Step 15 Install the Top Mounting Frame onto the bottom side of Phantom using 2pcs Silver Philip Screws Apply little amount of Thread Locker when securing screw to metal parts S...
Page 10: ...pletely Step 18 Install the Gopro 3 camera onto the Upper Camera cover using the Side Camera Cover and secure it with 2pcs Silver Hex Cap Screw M2 5x6mm Apply little amount of Thread Locker when secur...
Page 11: ...lt and Roll Motors into the Connector Cases included Pay attention to the position of each color of wires Step 22 Connect the Titl and Roll Motors onto the Gimbal Controller Board Follow the connect d...
Page 12: ...Controller Board Step 3 Stick the IMU Unit onto the Upper Camera cover using double sided foam tape Check the double faced adhesive tape regularly to ensure that the IMU is securely positioned Ensure...
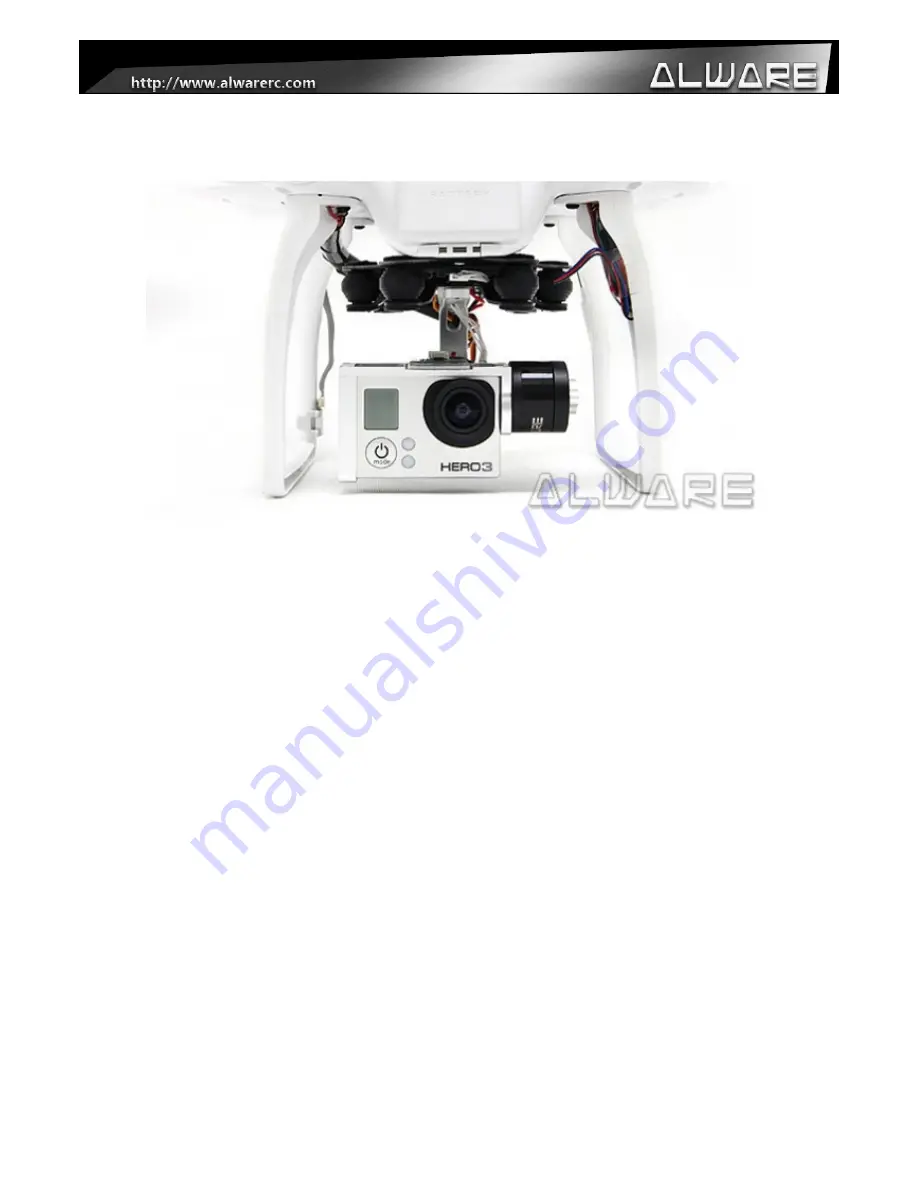
Page 13: ...Step 5 Front view of GP 35 assembly Step 5 Side view of GP 35 assembly Page 13 of 19...
Page 14: ...ake sure the Power cable in the Phantom is passing through the casing Step 2 Solder the Male JST Connector to the Power cable of the Phantom Important Solder Red to red wire and black to brown wire St...
Page 15: ...ease be noted that the 3 wire End connector is useless when using the original Transmitter of Phantom You can just fix this connector on the landing gear of Phantom for better appearance Step 8 Connec...
Page 16: ...ain values as reference if needed You may need to adjust these values according to your own situation The value of Pitch and Roll gain must be lower than 110 so that the gimbal will work with minimum...
Page 17: ...ransmitter to control the Tilt Axis of GP 35 Gimbal You can use or DIY a flat rod to control this channel or you can order the DJI Phantom Upgrade Kit in the near future Step 6 Or you can add the DJI...
Page 18: ...s no additional tuning needed Follow the following sequencies to power on your Senrigan GP 35 Brushless Gimbal correctly Step 1 Turn on your Phantom s Trnsmitter Step 2 Power on the Phantom with 3S 11...
Page 19: ...imum vibration before mounting the Gimbal Sometimes you may need to balance the props for your Aircraft too Q4 Do I need to upgrade to latest version of firmware or adjust any parameters A It is not n...