Sennheiser HDVA 600, Instruction Manual
The Sennheiser HDVA 600 is a premium headphone amplifier that delivers unparalleled sound quality. For detailed instructions on how to maximize your listening experience, download the free Instruction Manual from manualshive.com. Unleash the full potential of your headphones with this essential manual.
Share
Download


Reviews:
No comments
Related manuals for HDVA 600

S170
Brand: NAD Pages: 2

S170
Brand: NAD Pages: 33

Pro Series
Brand: 5Core Pages: 2

Smart Amp 5.1
Brand: Canton Pages: 132
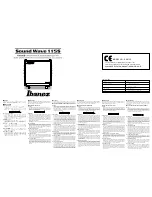
Sound Wave 115S
Brand: Ibanez Pages: 2

OM2000A+
Brand: OM POWER Pages: 13

VC30
Brand: Laney Pages: 16

WILDFIRE 15
Brand: Alesis Pages: 16

Amp 300
Brand: AudioSource Pages: 8

312-0001
Brand: Neets Pages: 20

CTA-30
Brand: Cable-Tronix Pages: 5

BPx1100.1
Brand: JBL Pages: 8

163AV
Brand: NAD Pages: 33

S7TW
Brand: RDP Group Pages: 12

Troubadour T80IISM
Brand: Ibanez Pages: 28

FETRODE 2283FT
Brand: UFi Pages: 4

Pro VLA II
Brand: Art Pages: 16

SWA200
Brand: Destination Audio Pages: 12


