Preparing the Digital 9000 system for use
38 |
Digital 9000
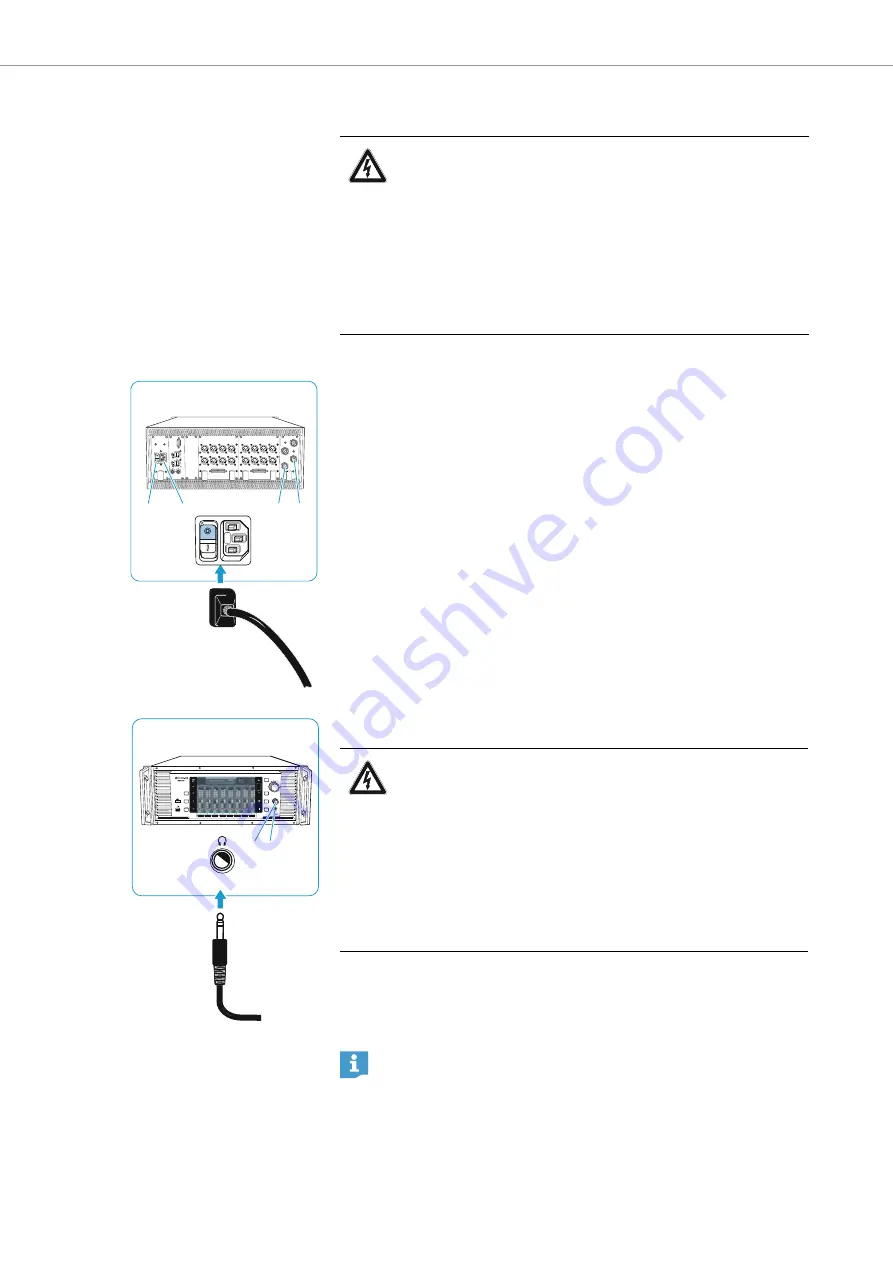
Connecting the receiver to the mains
To connect the receiver to the mains:
Set the ON/OFF switch
to position “
0
”.
왘
Connect the supplied mains cable to the 3-pin mains socket
왘
Plug the mains connector into the wall socket.
왘
Set the ON/OFF switch
1
”.
To disconnect the receiver from the mains:
왘
Set the ON/OFF switch
0
”.
All daisy chained signals are interrupted, i.e.:
– the antenna signals at the daisy chain outputs
,
– the booster supply voltage,
– the signal of the external word clock generator.
왘
Pull out the mains connector from the wall socket to completely discon-
nect the receiver from the mains.
Connecting headphones
왘
First turn the headphone volume control
counterclockwise to the
minimum.
왘
Connect headphones with a ¼” (6.3 mm) stereo jack plug to the head-
phone socket
.
CAUTION
Damage to the device due to electric current!
If you connect the receiver to an unsuitable power supply, this
can cause damage to the device.
왘
Use the supplied mains cable to connect the receiver to the
mains (100 to 240 V AC, 50 or 60 Hz).
왘
Ensure a reliable mains ground connection of the receiver –
especially when you are using multi-outlet power strips or
extension cables.
EM9046
2
1
H
G
EM9046
I
H
WARNING
Danger of hearing damage due to high sound pressure levels!
The headphones connected to the headphone socket are capable
of producing very high sound pressure levels, which can cause
permanent hearing damage.
왘
Always turn the headphone volume control
counterclock-
wise to the minimum
– before connecting headphones and putting them on;
– before you change to a different channel.
For information on headphone monitoring of channels, refer to page
83.
Summary of Contents for Digital 9000
Page 1: ...System instruction manual WSM Digital 9000 Digital 9000 ...
Page 2: ......
Page 6: ......
Page 12: ......
Page 32: ......
Page 50: ......
Page 86: ......
Page 94: ......
Page 102: ......
Page 103: ...Using the L 60 Using the L 60 Digital 9000 ...
Page 106: ......
Page 110: ......
Page 111: ...Digital 9000 109 If a problem occurs If a problem occurs If a problem occurs Digital 9000 ...
Page 129: ......


