background image

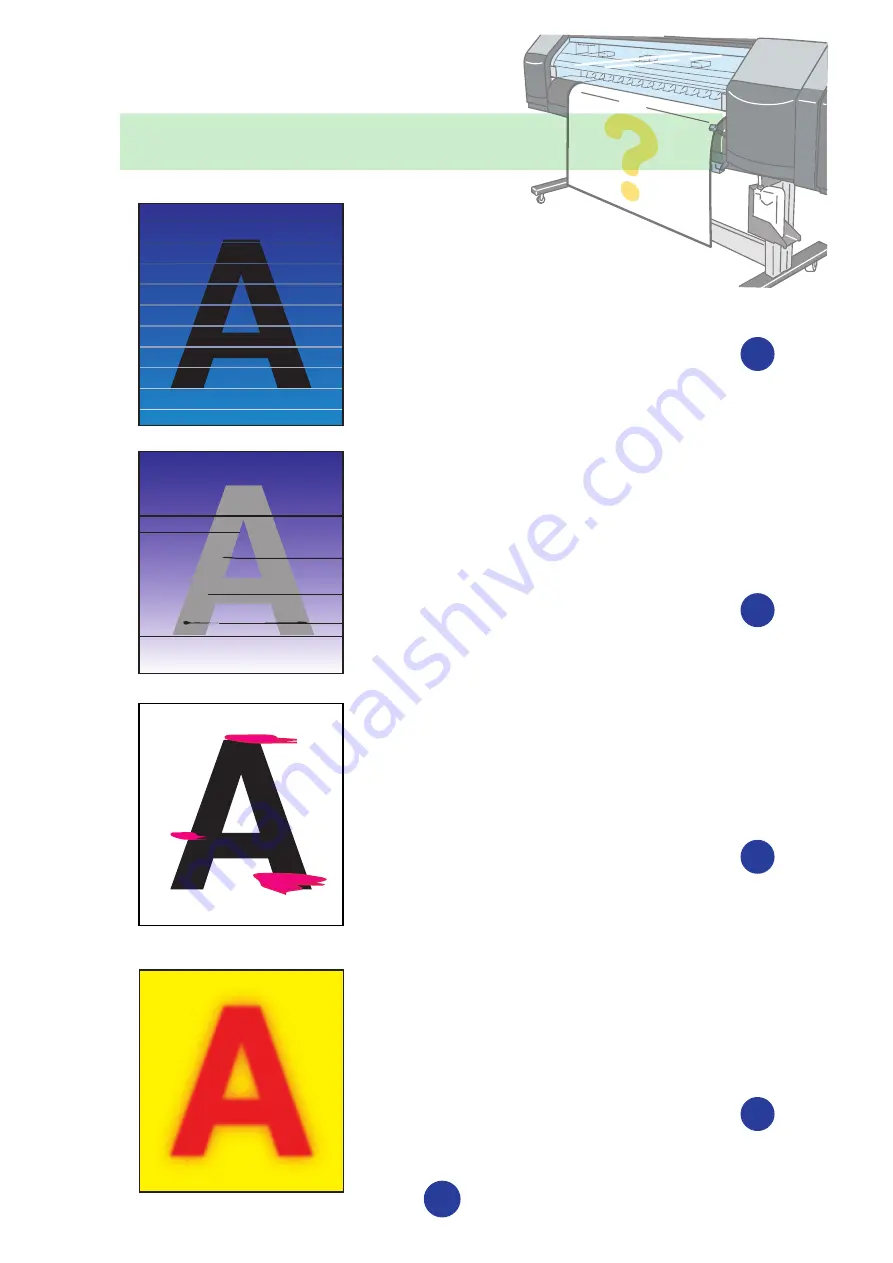
White lines

 on the print

Contents

Choose a poor image quality symptom that is similar to that of your print 

from below. Refer to the designated page.

Dark lines


on the print

Go to page

Stain

 on the print

Bleeding 

on the print

3

9

4

9

Go to page

Go to page

Go to page

Summary of Contents for ColorPainter V-64S

Page 1: ...TroubleshootingGuide TroubleshootingGuide When you encounter white lines bleeding stain and dark lines on the print U00118640201...

Page 2: ...Number U00118640200 First Edition February 2010 U00118640201 Second Edition March 2010 Copyright Seiko I Infotech Inc 2010 All rights reserved The content of this document may be changed without a pri...

Page 3: ...pattern Handle the issue according to the Solutions P in this Guide show the reference pages in the User s Guide 1 Step 2 Troubleshooting Some symptoms may have several causes Depending on the situat...

Page 4: ...Choose a poor image quality symptom that is similar to that of your print from below Refer to the designated page Dark lines on the print Go to page Stainon the print Bleeding on the print 3 9 14 19...

Page 5: ...pattern 1 Go to page White lineson the print Main symptoms Basic image White lines pattern 2 Go to page White lines pattern 3 Go to page 4 5 6 White lines pattern 4 Go to page 7 White lines pattern 5...

Page 6: ...switch the pressure Print the image and adjust the media advance value P 4 32 Change during online printing HINT Apply this solution when white lines appear at the same position on each of the six col...

Page 7: ...8 Performing the nozzle print Select RESEAT PRINTHEAD on the operation panel and move the carriage After cleaning the print head nozzle surface perform NOZZLE PRINT and confirm that the symptom is imp...

Page 8: ...pectively Be careful not to lose the temperature balance Print in the print mode QUALITY P 3 25 PRINT MODE Set the print mode by the RIP software In the RIP software setting choose the mode to increas...

Page 9: ...g the take up reel unit adjust the position of flange at the take up side or re set the media Confirm that the media is loaded straight against the flange If the media is under the entire pressure rol...

Page 10: ...White linespattern 5 Cause The media is coated unevenly Solution Solution Change to other media White lines on the print White lines pattern 5...

Page 11: ...Dark lines pattern 1 Go to page Dark lines pattern 2 Go to page Dark lines pattern 3 Go to page 10 11 12 Dark lines pattern 4 Go to page Refer to the solutions for White lines pattern 4 7 Dark lines p...

Page 12: ...l and then clean the surface of Carriage base P 4 16 Cleaning the Carriage base 2 Then clean the Head guard P 4 17 Clean the Head guard Raise the height of Print head P 2 44 Change the Print head heig...

Page 13: ...DIR P 3 26 PRINT DIRECTION Set the print direction by the RIP software In the RIP software setting choose the mode for unidirectional print Unidirectional Outward etc and then print Print in the print...

Page 14: ...ng the heater control menu Raise the temperature of the front heater print heater and rear heater by 5 C from 45 C 40 C and 45 C respectively Be careful not to lose the temperature balance Print in th...

Page 15: ...the image gradient HIGHLIGHT2 P 3 31 IMAGE GRADIENT Change the print direction P 3 26 PRINT DIRECTION Change the print direction from BIDIR to UNIDIR or from UNIDIR to BIDIR and then print Set the pr...

Page 16: ...14 14 Stainpattern 1 Go to page Stainon the print Main symptoms Basic image Stainpattern 2 Go to page Stainpattern 3 Go to page 15 16 17 Stainpattern 4 Go to page 18...

Page 17: ...nfirm that the symptom is improved P 4 3 Regular Inspection Maintenance Daily maintenance Perform the Print head cleaning NORMAL ALL Perform NOZZLE PRINT and confirm that the symptom is improved P 4 1...

Page 18: ...ntenance Perform the Print head cleaning NORMAL ALL Perform NOZZLE PRINT and confirm that the symptom is improved P 4 19 Print head cleaning P 4 8 Performing the nozzle print Select RESEAT PRINTHEAD o...

Page 19: ...control menu Be careful not to wrinkle the media Raise the height of the Print head P 2 44 Change the Print head height Check the environment temperature Use the printer within the room temperature o...

Page 20: ...media edge guard does not locate near the vacuum HINT The above stain pattern is explained with yellow ink Depending on the situation the stain may caused by cyan or magenta ink Stain on the print Sta...

Page 21: ...19 19 Bleedingpattern 1 Go to page Bleedingon the print Main symptoms Basic image Bleeding pattern 2 Go to page 20 21...

Page 22: ...int mode QUALITY P 3 26 PRINT DIRECTION P 3 25 PRINT MODE Set the print direction or mode by the RIP software In the RIP software setting choose the mode for unidirectional print Unidirectional Outwar...

Page 23: ...that the Print head height is not kept at HIGH or NORMAL Adjust the Print head position P 4 39 PH TO PH adjustment procedure Adjust the Print head s right and left position P 4 41 ADJUST PH R L adjust...

Page 24: ...t head position correctly bleeding in a single color or different colors bleeding of sharp lines such as register marks in a single color or different colors uneveness of mixed colors Transfer of the...

Page 25: ...memo...

Page 26: ...memo...

Reviews: