Q U I C K S TA R T
G U I D E
ADVANTAGE DKLP
E c o n o m y
1 of 4
Model
19-100E
2
Make sure you have everything shown here.
3
Unlock and remove front panel
of keypad unit; then using
carriage bolts and hex nuts,
attach unit to pedestal as shown.
4
For ease of wiring, insert front
panel into enclosure as shown.
START HERE
Keypad Unit
Key
Carriage Bolt
( 4x )
Hex Nut
( 4x )
Reset Button
For performing reset procedures
Power and Relay Terminals
For wiring to gate operator or
door opener and power
POWER MUST BE 7–14 VDC!
CAUTION!
Double check your wires! You must wire from
positive on keypad unit to positive on your
power source and negative on keypad unit to
negative on your power source.
Reverse polarity can damage keypad unit!
What’s what?
Important components labeled
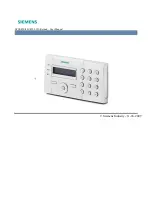
Keypad Unit Front Panel
Shown as it would appear with front panel inserted
into enclosure as in
Step 4
.
WARNING!
AUTOMATIC GATES CAN CAUSE
SERIOUS INJURY OR DEATH!
ALWAYS CHECK
that the
GATE PATH IS
CLEAR BEFORE OPERATING!
REVERSING
or other
SAFETY DEVICES
SHOULD ALWAYS BE USED
!
1
Carefully unpack box.


