background image


SEAS Catalina 30 Operating Guidelines 

8/10/2021 


Page 17 of 28 


Connecting shore or solar power: 


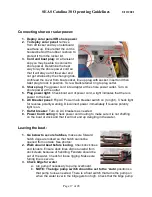
1.  Deploy solar panel OR shore power


2.  To deploy solar panel:

 remove 

from aft locker and lay on starboard 
seat face up. Ensure that the cord is 
hooked behind the rubber cushion to 
protect it from the locker lid. 

3.  Cord and boat plug:

 At a transient 

slip you may be able to connect to 
shore power. Determine the best 
way to lay the shore power cord so 
that it will stay out of the water and 
not get strained by the changing tide.  
Unthread the cover from boat socket, line up plug with socket, insert and then 
twist plug to lock in position.  Screw black retainer ring to plug outlet.  

4.  Shore plug: 

Plug power cord into adapter at the shore power outlet. Turn on 

shore power at the outlet 

5.  Plug power light: 

Check boat end of power cord, a light indicates that there is 

power to the boat. 

6.  AC Breaker panel:

 Flip AC Power main breaker switch on (to right).  Check light 

for reverse polarity warning. Disconnect power immediately if reverse polarity 
light is on. 

7.  Outlet breaker:

 Turn on AC breakers as needed.   

8.  Power Cord routing:

 Check power cord routing to make sure it is not chaffing 

on the boat or dock and that it will not end up dangling in the water. 


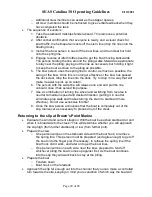
Leaving the boat: 


1.  Go below to secure hatches, 

make sure forward 

hatch dogs are locked so that hatch cannot be 
opened from outside. See photos:


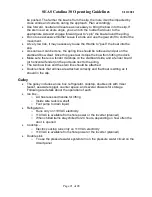
2.  Walk around boat before leaving

. Check dock lines 

and fenders. Ensure dock lines did not unwind from 
dock cleats because of handling. Fenders should be 
out of the water. Check for loose rigging. Make sure 
furling line is secure


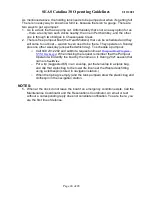
3.  Check bilge for water


a.  run pump if necessary to pump overboard. 
b. 

NOTE: The bilge pump switch should be set to the ‘Auto’

 position so 

that pump runs as needed. There is a float switch that turns the pump on 
when the water level in the bilge gets too high. Check that the bilge pump 

Summary of Contents for Catalina 30

Page 1: ...OPERATING MANUAL The BREEZE AUGUST 10 2021 SEAS MONMOUTH CHAPTER...

Page 2: ...neral procedure 11 Getting Ready to Sail 12 Sail Selection 13 Sail Trim 14 Reducing Sail Area 14 Preparing to re start engine on return 14 Furling sails 15 After docking 16 Connecting shore or solar p...

Page 3: ...e clearance I 41 stem to mast head J 11 6 stem to mast base P 35 main sail luff E 11 6 main sail foot Sail Area 100 Jib 235 75 sq ft Sail Area Main 201 25 sq ft Sail Area Std Total 437 sq ft Sail Area...

Page 4: ...ities those responsibilities apply on SEAS the BREEZE the same as on any other SEAS vessel If you need more information than is presented here you should refer to the appropriate authoritative source...

Page 5: ...f oil by pouring into oil fill on top of engine This engine has capacity for 3 2 quarts of oil so add small amounts wait several minutes and recheck Do not over fill If level is very low check engine...

Page 6: ...Rotate the lever clockwise to the vertical position the seacock is now open and seawater can flow to the engine cooling system If you cleaned the Raw Water Strainer basket check the strainer after op...

Page 7: ...veral types of switches on the electric circuit panel 1 Toggle the 120VAC switch is a toggle type circuit breaker 2 Push button circuit breakers used for 120VAC circuits and 12VDC circuits 3 Rocker sw...

Page 8: ...ead on easily and not require a lot of effort 6 Coil Power cord Coil power cord and store it in the cockpit stern lazarette starboard side 7 Battery check Test battery voltage as follows 1 Set battery...

Page 9: ...emote has microphone speaker and channel changer functions 12 Helm Station Remove cover from helm station stow in port lazarette check reading on depth instrument It is critical that the depth instrum...

Page 10: ...ositions of the gearshift lever so you will know what gear you are in by looking at the lever and by feel of the position of the lever Always set throttle to idle before shifting gears Move shift leve...

Page 11: ...y when the engine starts If the engine does not start you probably did not turn on the glow plug long enough WHEN CRANKING THE ENGINE CRANK FOR A MAXIMUM OF 10 SECONDS AND PAUSE FOR A MINIMUM OF 20 SE...

Page 12: ...here are no exhaust gasses leaking from any of the hose or hose connections 11 Alternator output At the 12 Volt DC panel use battery test switch to check alternator output Readings should be just abov...

Page 13: ...continuing to spit water out of the exhaust Check periodically while under engine power Getting Ready to Sail 1 When ready to sail put mainsail up first and then unfurl the jib 2 Turn off engine by pu...

Page 14: ...9 Main Reef 1 Wind 19 21 kts Jib 75 Main Reef 2 Wind 22 25 kts Jib 50 12 Main Reef 2 Wind 26 30 kts Jib 25 8 6 Main none Wind 30 kts and up Jib 0 Main none Here is a comparison of the key performance...

Page 15: ...ck the reef clutches and lines be sure they are set or released to suite your conditions Reducing Sail Area 1 To furl the jib the furling line must be secured to the cleat behind the winch When the ji...

Page 16: ...entry into Cheesequake creek or Keyport Harbor and Matawan Creek 6 Assign bow person to stand by with anchor in emergency a Entering Cheesequake Creek Tune into Channel 13 and listen for Bridge attend...

Page 17: ...k if backed in cross the stern lines E G The line tied to the starboard side of the dock is cleated to the Port stern cleat Ensure that the stern lines can t become tangled in the stern ladder 2 Stop...

Page 18: ...t there is power to the boat 6 AC Breaker panel Flip AC Power main breaker switch on to right Check light for reverse polarity warning Disconnect power immediately if reverse polarity light is on 7 Ou...

Page 19: ...eful to ensure the port cover stays on board 7 Ensure that you have firm hold of the fuel can 8 Tip fuel can to insert nozzle into fuel fill port before releasing the valve 9 Release the valve to disp...

Page 20: ...he binder Leaving the slip at Brown s Point Marina Detailed procedure With the engine running double check that there is water coming out of the exhaust at the stern Determine which way the wind and o...

Page 21: ...board once it has served its purpose 7 Use a combination of turning the wheel and switching from reverse to neutral to maintain speed and desired direction putting it in neutral eliminates prop walk a...

Page 22: ...midships on the starboard side and a fender board or horizontal fender on the port side next to the piling The two bow lines and the stern line should be attached Double check that all lines are attac...

Page 23: ...rning light in the lavatory to indicate when the holding tank is full When the light is lit the tank is full and the toilet cannot be used until the tank is emptied DO NOT WAIT FOR THE LIGHT TO BE LIT...

Page 24: ...the left unlocks it You may need to add more water from the washbasin hose 6 Be judicious with the amount of fresh water you use You want to get the toilet completely flushed which means not only gett...

Page 25: ...ed which day To schedule a pumpout o Call 848 231 2202 and submit a request online at Pumpout Boat Program NYNJ Baykeeper When making the request remember that the Pumpout Operator will identify the b...

Page 26: ...attery Charger Breaker Bilge Pump Electric Primary Bilge Mid Bilge Pump Electric Primary Fuse Bilge Mid Bilge Pump Electric Primary Switch DC Breaker Panel Bilge Pump Electric Secondary Bilge Mid Bilg...

Page 27: ...Side Engine Throttle Lever Cockpit Binnacle Starboard Side First Aid Kit Cabin Starboard Cabinet Forward Lower drawer Flags Signal Flares Cockpit Port lazarette Flashlight Navigation station GPS Brea...

Page 28: ...Toilet Raw Water Seacock Cabin Port Settee Fwd Toilet Raw Water Shutoff Right side of Head near floor Tool Kit Emergency Navigation Station Tools Galley cabinet aft lower drawer Transmission Shift Lev...

Page 29: ...SEAS Catalina 30 Operating Guidelines 8 10 2021 Page 28 of 28...

Reviews: